“To Travel Hopefully” News Flash!: I am honored to be named a finalist in Travel Photographer of the Year competition

Dear Readers,

I am thrilled to have been named a finalist for the prestigious Travel Photographer of the Year award. TPOTY is considered by many in the industry to be the premier international travel photography competition.  Tens of thousands of entrants from 123 countries have been culled in two rounds of judging down to a shortlist of several dozen photographers.  I am the only American finalist in the Wildlife and Nature category.  Feeling very honored and humbled by this happy validation of my recent career change.  Please send your positive thoughts as we enter the third and final round of judging.  I’ll keep you posted.  If you’d like to learn more about TPOTY, here’s a link to their site: Travel Photographer of the Year.

Thank you for your incredible support thus far.  Please invite your friends and family members who are also passionate about travel and/or photography to join us.  Here’s to the many further travel photography adventures we will share together!

Cheers,

Kyle Adler

It’s All in the Telling: Sharing images as a photo essay can help tell a story


When we share our images from a trip or from an event close to home, we become more than photographers; we become storytellers.  An individual image can tell a powerful story all by itself, and most of the best ones do.  But presenting a series of related images in the form of a photo essay is a great way to share a story with your viewers.  Each image serves a purpose in the structure of a photo essay, just as each sentence or paragraph does in a written essay.  In this post, I will revisit last weekend’s Sacramento Super Spartan Race (see Post on Spartan Race), taking the same 12 images from the earlier post but rearranging them in the form of a rudimentary photo essay.  We’ll discuss the purpose of each major type of image in creating the essay.  [Note: I am borrowing some of the organizational concepts presented in CUNY’s Photojournalism course materials at this site: http://photo.journalism.cuny.edu/week-5/.]

Establishing Shot: Usually the first image in a photo essay, the establishing shot should draw in the viewer by presenting the big picture.

The establishing shot sets the context of the essay.  Here I use an image of large contingents of athletes running over the hills.  I shot from a distance, using a telephoto lens to compress the perspective and emphasize the massive scale of the race.  Buy this photo

Alternatively, we could use the starting line image as our establishing shot.  Some essays lend themselves well to a chronological telling, in which case it’s good to start at the beginning.  In the case of this specific event, I prefer the establishing shot to be a big-picture overview of many athletes in the middle of their course.

The starting line is a good place to set the stage for your photo essay if you will be using a chronological method of telling the story.  Buy this photo

Portraits: Often the biggest portion of the photo essay, portraits tell the story through images of some of the people who are involved.  The portraits can be tight head-shots, full-body shots, or environmental portraits that show the setting as well as the person.  I like to use a combination of all of these compositional methods.  And it’s also fine to use a mix of posed shots and candids.  Variety can improve some photo essays, although in other cases you may opt for a consistent look-and-feel for many of your images so the mash-up of styles doesn’t distract the viewer from the story.

This environmental portrait shows the athlete in the context of the monkey bars obstacle, with other athletes and the background included in the frame.  Buy this photo

Portraits of athletes don’t have to be in the cliche pose of standing, legs apart, on the ground flexing their biceps.  Athletes are happy to pose in the midst of whatever they’re doing when they see a photographer nearby.  Buy this photo

Not all portraits have to show the subject’s face.  This environmental portrait works because it shows us what the athletes are doing from their point of view.  Buy this photo

This posed portrait is framed rather tightly, showing the power and the elation of the athletes after finishing the race.  The background, while bright and busy, is not overly distracting.  Buy this photo

For powerful portraits, I like to seek out people who have something special to say.  This racer stopped for a moment so I could make a portrait.  His flag makes a nice counterpoint to the rolling hills and featureless sky in the background.  Buy this photo

Interaction: Most photo essays can benefit from at least one shot showing the interaction between different people in the story.

Although Spartan Race athletes are fierce competitors, they also make an effort to support one another and cheer their fellow racers on.  I enjoy capturing these interactions because these moments often tell a strong story visually.  Buy this photo

This shot of kids playing in the shower area at the end of the race shows another type of interaction.  Buy this photo

Close-Up: It’s helpful to include some images that show the little details.  In the case of this particular event, I don’t have many close-up shots, so I’ll include this one fairly tight portrait as a placeholder.  It would be great to include a true close-up shot showing just the athlete’s gloved hands as she grasps the rope, perhaps with part of her face in the background, for example.  This could be done by tightly cropping this image.

This tight portrait shows great action and emotion.  While it’s not a true close-up image, which ordinarily would show only a few details rather than the full person, it can serve a similar function in the essay by focusing the viewer’s attention on a small specific part of the race.  Buy this photo

Closer: This will be the last image in the photo essay, so it needs to be a strong one.  It could be a climactic moment or, if the story is being told chronologically, an image made at the end of the race.  I’ll include two possible closing shots here.  The first captures an athlete jumping over the fire at the finish line; it’s both dramatic and symbolizes the end of the event.  The second shows a classic Spartan Race moment, where the athletes have to carry heavy buckets of sand along a muddy, hilly course; this image could make a good closer because it evokes a quintessentially Spartan Race sense of emotion.

The finish line itself is a dramatic vantage point.  In this particular race, athletes must jump over a line of fire to finish the course.  Buy this photo

An iconic Spartan Race image.  I captured the strenuous activity of carrying buckets filled with sand by shooting from a distance with a telephoto lens.  Buy this photo

Have you presented your images in the form of a photo essay?  How did you structure it?  What advice can you share for fellow photographers who would like to use this format?

Getting Oriented [Encore Publication]: Shooting vertically as well as horizontally expands your artistic vision

Who says a portrait image has to be shot in portrait orientation, or that a landscape photo must be shot using landscape orientation?  Rules are meant to be broken, and they call it “artistic license” for a reason.  I would estimate that a third of my people images are shot in landscape (horizontal) orientation, and that a third of my landscape images are shot in portrait (vertical) orientation.  It’s always a good idea to shoot at least a few frames in both orientations so you can decide later which ones work best for your artistic vision.  Let’s take a look at a few examples.

Laura is one of my all-time favorite models (she also creates all her own costumes and does her own hair and makeup), and she looks great framed in any orientation, but I think her remarkable inventiveness is shown to good advantage in this composition using landscape orientation.  Buy this photo

It’s a cliché that people pictures should be composed vertically, so that we can fill the whole frame with the model’s head or full body.  A lot of the time this portrait orientation works well.  But there are some good reasons to shoot people images using landscape orientation as well as portrait orientation.

First, sometimes the model’s pose or the environmental elements around the model favor a horizontal image.  When traveling, I like to shoot environmental portraits that show us more than just the person by including elements of his or her home, livelihood, or lifestyle.

Second, we need to think about how the image will be used.  If I’m shooting publicity photos for musicians, for example, I know they need horizontal images at least as often as vertical images, so as to meet the requirements for the venues and promoters with whom they work.  Magazines and billboards often require landscape orientation, as well.  Even more prosaic uses of our photos, such as Facebook or LinkedIn cover photos, must be oriented horizontally.

Third, some portraits just cry out artistically to be framed in landscape orientation.  The image of the model Laura, above, for example, just works better to my eye in horizontal format, because the negative space behind her leads the viewer’s eye to admire her remarkably creative style, and leaving the lower part of her body and her dress out of the image allows us to focus on her expressive face.

By the same token, there are some good reasons to shoot landscape images in portrait orientation.

First, there could be some limitations to the left or right of the frame that, when shot horizontally, could distract from the power of the image we want to create.  Think about a coastal landscape with a glorious sunset sky and delightful foreground elements such as rocks with water flowing around them, but to the left of our vantage point there’s an unattractive pile of litter.  Frame the image in portrait orientation and avoid the problem.

Second, there are publication media where portrait orientation is required.  Knowing where the image is likely to be published will dictate the orientation in which we shoot.  A card or trifold brochure, for example, will likely require a vertical shot.

Third, again, consider your creative vision.  This night landscape of the Milky Way over Yosemite National Park’s Half Dome also worked beautifully in the more traditional landscape orientation, but here I shot the same scene using portrait orientation to frame the granite mountains with a circle of trees and to create a leading line using the Milky Way’s galactic core to bring the viewer’s eye around the valley’s landforms and the night sky.

This night shot of the Milky Way over Yosemite Valley works especially well in portrait orientation because the pine trees create a frame around the leading line of the galactic core.  Buy this photo

Whenever possible, remember to mix it up and shoot with the non-standard orientation for at least a few frames.  You may find your best shots–and the most marketable ones for placement in certain forums–are the ones you make using the unconventional orientation.

Do you have a favorite image that you shot using the opposite orientation from the expected one?  Please share your experiences here.

Want to learn some more photographic techniques?  Here’s a list of all my posts dealing with the technical aspects of travel photography: http://www.to-travel-hopefully.com/category/techniques/


Luck Favors the Prepared [Encore Publication]: Tools for planning your shot

It was Louis Pasteur who said, “Fortune favors the prepared mind.”  We usually hear the quote paraphrased as, “Luck favors the prepared.”  For travel photographers, there is often a great deal of luck involved in capturing a truly great image, but there are some very useful tools that we can use to help us plan to be in the right place at the right time with the right gear.  Let’s look at just a few of my favorites.

I’ll start with a quick review of the most obvious resources.  I would never plan an hour-long photo shoot, let alone a month-long trip to a far-flung travel destination, without doing some research.  What are the must-see locations, and what dates and times of day are perfect for each one?  What are the events or activities that most authentically represent the locations I am visiting?  Is there a livestock market, a street festival, or a religious celebration taking place while I’m in the region?  How can I build an itinerary that best incorporates all of these locations?  Great resources for this type of research include guidebooks (online and hardcopy), online review sites such as Trip Advisor and Yelp, mapping and navigation apps (Google Maps is still my all-around favorite, but several others have their own advantages), and local weather sites.  I like to build my itinerary by customizing an online map to show all of the locations I’d like to visit, then creating a routing that links the locations in the proper order.  If travel by air, rail, bus, or boat is involved, I research those schedules and fares to determine the best way to get from one place to the next.  Airline consolidation sites such as Orbitz can be quite helpful for finding the best flights at the best prices.  If the itinerary has been pre-planned by a travel company, then I will still do most of this background research to better understand the locations we’ll be visiting.

Once I know where I’ll be going and what events I plan to shoot, I develop a shot list.  Some photographers craft very detailed and specific shot lists, but I like to keep it quite flexible and informal, often simply jotting down my ideas in the calendar event on my phone that is associated with each planned shoot.  After all, if I adhere too closely to a shot list, I will just end up with the same images that hundreds or thousands of other visitors have captured after doing the same research.  Serendipity and the artist’s eye have their place in travel photography, too.  The research phase can also inform me as to what clothing, gear, and other essentials I should bring to each location.

Now I’d like to introduce three smartphone apps that I consider indispensable for travel photography.  First, there’s Photo Pills, an app that incorporates several essential tools into one package.  I use Photo Pills for planning shots where I need to know how to get all the elements, including location, date, and time of day, to come together.  For example, during the Perseid Meteor Shower, I wanted to find a dark sky location with a nice foreground and a view toward the galactic core of our Milky Way.  This way, I could capture images including the meteor shower, the Milky Way, and the pretty landscape in the foreground.  I had a location in mind, a beautiful spot where there isn’t too much light pollution and with a gorgeous view over a reservoir and the Santa Cruz Mountains.  The Planner tool in Photo Pills allowed me to visualize the foreground as viewed by my phone’s camera, superimposed against the Milky Way as it would appear on different days and times of day.  I planned the shot for a certain time on each of several consecutive days, confirmed that the Milky Way would be rising in the desired direction and that the nearly full moon would have already set, and then waited for clear weather.  The first night of the meteor shower was cloudy, but the second night was the charm, and I was able to capture this striking image.
Using the Photo Pills app on my smartphone, I was able to plan in advance for a location, date, and time that would maximize the chances of capturing the Perseid Meteor Shower and Milky Way over the lovely Crystal Springs Reservoir.  Buy this photo

Here’s a screenshot of the Planner tool in Photo Pills that I used to prepare for this shoot.

img_3452

The Photo Pills app has a number of tools to help plan and execute your shots.

Another useful app for planning the best locations, dates, and times for your shoots is TPE (The Photographer’s Ephemeris).  I find this tool to be especially helpful for visualizing the path of the sun and moon across the field of view for any location I select.  This app is very powerful, and I have only scratched the surface of what it can do to predict and prepare for photo opportunities.

img_3453

The Photographer’s Ephemeris (TPE) is a powerful tool for planning any outdoor photo shoots.

A final app I will mention here is called Easy Release.  Sometimes (read this post for details about model releases), we need a model release when a person or several people are clearly identifiable in a photo.  I know some photographers who carry hardcopy model releases with them wherever they travel, but I find this to be cumbersome and impractical when on the road shooting.  Instead, I use Easy Release on my phone, so I’m always ready to quickly prepare a release for a new friend to sign when they appear in my images.  Even though the app has the ability to translate the text of the release into several languages, there are situations in which it isn’t reasonable to try to explain to a local person what’s in the release and why it’s required.  Furthermore, I consider it to be exploitative if the person can’t reasonably be expected to understand what’s in the document or why they should be signing it.  But there are times when having immediate access to a model release that can be prepared, signed, and stored right on my phone is a big advantage.

img_3454

Easy Release is a convenient tool for creating, signing, sharing, and storing model releases when a person is clearly identifiable in photos.

With proper planning using readily available resources and various apps including the ones I’ve presented here, we can be better prepared to maximize our chances of capturing memorable images.  Happy shooting, and remember that luck favors the prepared!

Do you have a favorite tool you use to plan for your photo adventures?  How have you used this tool to get your shot?  Please share your experiences here.

Focus on Sacramento Spartan Race: Covering a Spartan Race can be an endurance event

Some events are just plain fun to shoot from beginning to end.  One of my favorite types of sporting events to cover is the Spartan Race.  Basically a combination of long-distance running with a supersized obstacle course, a Spartan Race is an extreme athletic event that attracts thousands of athletes from elite to weekend warrior.  I enjoy shooting these races because they offer so many exciting elements: color, drama, showmanship, grit, stamina, and humor.  Adding to the photographic fun quotient are the glorious natural surroundings, the photogenic and extraordinarily fit athletes, and the wide range of athletic rigors required of them.

In this post I’ll present some of my images from this past weekend’s Super Spartan Race held near Sacramento, California.  I will also share some tips on how to capture the best of a big and sprawling event like this one.

The Spartan Race organization recognizes and welcomes professional and enthusiast photographers more readily than do many US sporting authorities.  For any large sporting event, I apply several weeks in advance for a media (or press) pass so that I can bring in all my gear, shoot in all areas including those off-limits to spectators, gain free or reduced-price entrance and parking, and access VIP areas.  I’ve found the Spartan Race organizers to be quite helpful and understanding of what working photographers do.

img_3701
Yours truly with media badge.  This pass is important for the professional, as it allows access to otherwise off-limits areas and lets athletes and officials know you’re a working photographer.

One point to keep in mind when covering an endurance event spread out over long distances is that as a photographer, you will experience some portion of the rigors the athletes face.  The Super Spartan Race traverses a course about 8 miles long over steep and often muddy hills, interspersed with a couple of dozen obstacles of different types.  While I don’t typically try to cover all of the obstacles, it’s important to get a reasonable sample of the different challenges, so I do usually hike quite a few miles during the course of the day.  Photographers with a media pass have access to the whole course, but there are no special roads or ramps to get us there.  We have to trek up and down the same hills, through the same mud, and over the same terrain as the athletes do.  So come prepared for a bit of a workout!

The starting line is a good place to set the stage for your photo essay.  There is usually a DJ and music to get the athletes pumped up for the race.  Everyone is fresh, clean, and excited at this early stage.  Buy this photo

In addition to portraits and close-ups of individual athletes, it’s important to capture some establishing shots to set the context of the race.  I like to get some images of large contingents of athletes running over the hills.  I shoot from a distance, but often use a telephoto lens to compress the perspective and emphasize the massive scale of these races.  Buy this photo

When shooting individual athletes on the obstacles, use a fast shutter speed to freeze the action and a relatively small aperture to blur the background.  Buy this photo

Portraits of athletes don’t have to be in the cliche pose of standing, legs apart, on the ground flexing their biceps.  Athletes are happy to pose in the midst of whatever they’re doing when they see a photographer nearby.  Buy this photo

After finishing the course, athletes gather in the festival area.  This is a great place to make portraits.  The athletes are exhausted and muddy but in a celebratory mood.  Buy this photo

Spartan athletes in the festival area display strength as well as excitement for having completed the race.  Buy this photo

The finish line itself is a dramatic vantage point.  In this particular race, athletes must jump over a line of fire to finish the course.  I shot from a low perspective to emphasize the height of the jump, and used a fast shutter speed and small aperture to freeze the moment and isolate the athlete from the background.  Buy this photo

This image works so well because the shooting angle looking upward from below emphasizes the athlete’s power, and because the timing captured her expression at just the perfect moment.  I shot many frames to increase the likelihood of capturing the right moment, and, once again, I chose a fast shutter speed to freeze the motion along with a small aperture to blur the background.  Buy this photo

The shower area at the end of the race was taken over by hordes of kids who used the hoses for water play.  Humorous moments like this one lend a playful element to the day’s portfolio of images.  Buy this photo

An iconic Spartan Race image.  I captured the strenuous activity of carrying buckets filled with sand by shooting from a distance with a telephoto lens.  This technique compresses the perspective to include more athletes in the frame while still showing the strain on their faces.  Buy this photo

I like to seek out the athletes who have something special to say.  This racer stopped for a moment so I could make a portrait.  His flag makes a nice counterpoint to the rolling hills and featureless sky in the background.  Buy this photo

Although Spartan Race athletes are fierce competitors, they also make an effort to support one another and cheer their fellow racers on.  I enjoy capturing these interactions because these moments often tell a strong story visually.  Buy this photo

What are your favorite sporting events to shoot?  Do you have tips you can share for making great images of athletes?

Camera of the Future?: A new company promises DSLR quality from a cellphone-sized device

The Holy Grail for us travel photographers would be to have a tiny and affordable cellphone-sized camera that can capture images with the quality and versatility found today only in large, heavy, and expensive digital cameras (DSLRs and medium- to large-format cameras).  A new company called Light promises to offer just such a device starting sometime in 2018.  Reading their pitch in IEEE’s newsletter for this innovative camera design, I was excited by the revolutionary concept but not convinced that their first offering would truly meet travel photographers’ needs.  Take a look at the prototype photo and the IEEE article, and then we’ll discuss the bottom line.

lightcameraconcept

IEEE Article on Light camera concept

My take on Light’s pitch is that they have an exciting new design concept which someday could translate into a truly remarkable product.  The idea of combining multiple cheap camera systems, each with a cellphone camera’s small plastic fixed-aperture lens and tiny inexpensive sensor, and then combining their data using controlling mirrors and software into a single high-resolution image with control over such elements as focal length, depth-of-field, and bokeh effects, is creative and compelling.  By combining the separate power from all of these small cheap lenses and sensors, none of which by itself can gather much light, capture high resolution, nor provide manual control over focal length or aperture, the device and its software can achieve a final image that will be brighter, more detailed, and more controllable than the sum of its parts.

But given how little the sum of its parts costs to produce, this next-gen technology carries a hefty early-adopter premium when priced at $1699.  For that money, one could buy an enthusiast DSLR system (body and a couple of zoom lenses) with similar resolution and a greater range of focal lengths than the Light camera will have.  But there are many other serious advantages to a DSLR or a good advanced mirrorless ILC  system than just resolution and focal length.  Even if the Light device’s software can generate a final processed image that overcomes each lens and sensor’s weaknesses to rival a DSLR’s image in terms of brightness and image quality (and I have real reservations about its ability to do so), it still won’t likely be able to match a DSLR’s power-up time (the time from when you turn it on until it is ready to shoot), capture frame rate (the speed at which it can capture multiple shots), or bright optical viewfinder.

In summary, I like the concept and believe it could hold the key to building a future breed of travel cameras that are smaller, lighter, and cheaper than today’s “serious” cameras while retaining much of their quality.  But the initial device’s high price and design trade-offs won’t leapfrog the advantages of a good DSLR or mirrorless camera just yet.  The first offering would be fun to play with, in the spirit of “the best camera is the one you have with you,” but it won’t get me to leave my DSLR system at home.  This will be a fun technology and a fun company to watch, though.  I’ll provide updates in future posts as I learn of new information.

What do you think of Light’s new camera concept?  Do you see this design as the basis for a new generation devices that would replace your DSLR or mirrorless camera system?  Please share your thoughts here.


The Raw Truth [Encore Publication]: Why you should always shoot in RAW mode

For many years after I took the plunge into digital photography, I had my camera set to store image files in the JPEG format only.  I now realize that during those years I was throwing away a lot of very valuable information with every photo I made.  There are two main reasons for this information loss.  First, the JPEG format does not store the detailed data for each pixel in the camera’s sensor but instead does some processing according to your settings and then saves only stripped-down information from each area of your image.  Second, the JPEG standard is what’s referred to as a “lossy” format; every time it is opened and resaved, the image loses more detailed data.  Once your image data is thrown away, you cannot retrieve it.

By contrast, the RAW file format keeps all the data your camera’s sensor “sees” for every pixel in the image.  Yes, RAW files are bigger and take a bit longer to store on your camera’s memory card than JPEG files, and yes, they take up more space on the memory card and on your PC’s hard drive later.  For those early years of digital photography, I avoided shooting in RAW mode because I was concerned about having reduced shooting speed and storage space for these monster-sized files.  I also was concerned that it would be too much work to shoot in RAW mode because RAW images require post-processing in order to look their best.  I now realize that I had been making a big mistake.  Shooting in RAW all the time, even when high speed is needed for action shots, ensures that you’ll always have the most image data to work with later.  You will be able to crop your images more tightly, print them to larger sizes, and especially important, refine the exposure and color with far more control if they were shot in RAW format rather than in JPEG or other compressed formats.

I now shoot nearly exclusively using my camera’s setting to save files as both RAW and JPEG.  Having the JPEG version of each image can be helpful if I want to share the photo right out of the camera.  It will look pretty decent without any post-processing because the JPEG file is stored with all of the camera’s settings for white balance, sharpening, and so on.  But when I come home from a trip, I always do my post-processing on the best images using RAW files exclusively.  Because the RAW format stores so much more information about the color and brightness of every single pixel of the image, I have much more freedom in how I choose to develop the image using my editing software (typically Adobe Lightroom, but occasionally I also use Adobe Photoshop).

Below, I show two files of the same image of my wife and me by a “fairy chimney” rock formation in Cappadocia, Turkey, both processed in exactly same the same way in Lightroom, but the first one was originally saved by the camera as a JPEG while the second was originally saved in RAW mode.  While the differences may be subtle at the size and resolution shown in this post, you can still make out more details in the RAW file, especially in areas shrouded in shadow.  The color of the sky is deeper.  Colors and shapes are rendered with more accuracy.  And of course, if we needed to crop or enlarge these images to a much bigger size, the quality of the JPEG file would deteriorate much sooner than would the RAW file.

 The JPEG version of this image.

 The RAW version of the same image.

I recommend shooting in RAW+JPEG all the time, unless you know you will need the slightly faster shooting speed or extra storage space of JPEG alone.  Doing so will give you the best of both worlds: a quick and easy JPEG to share right out of the camera, and the much more detailed data in the RAW file from which to bring out the nuances in color, texture, and exposure later during post-processing.  If you use JPEG alone, you’ll be throwing away image information you may wish you had later.

Do you shoot in RAW mode?  If so, what do you like about it?  If not, why not?  Please share your thoughts here.

Want to read more posts about photographic techniques?  Find them all here: Posts on Techniques.


Holiday Special: Please support To Travel Hopefully by purchasing some images at special holiday prices

Holiday Special Gallery

Dear Readers,

Since I launched To Travel Hopefully a few months ago, it has been my privilege to share my travel experiences, philosophy, and images from around the world.  Our goal is to travel with sensitivity and curiosity, learn to use our cameras as tools for closer cultural understanding, and share and advocate our travel experiences with greater power.  To continue this project into 2017 and beyond, your support is needed!  If you’ve enjoyed the images, stories, and technical advice presented in To Travel Hopefully, then please tell your friends about us.  You can also help today by considering purchasing some images from my portfolio.

As we enter the holiday season, I am offering a special promotion on my full portfolio of fine art photography.  Many of you have asked me over the last few months—as I began the career transition from the corporate world to the professional pursuit of my longtime passion for photography—how you can purchase my images.  From now until the end of the year, I am offering discounted pricing of up to 75% off my usual rates.  That means, to give a few examples, that you can purchase a 4×6” print for just $1.99, a coffee mug for $15.99, a set of four coasters for $31.99, a box of ten 5×7” folded holiday cards customized with your personal greetings for $34.99, a mahogany desk organizer for $39.99, custom-made cases for iPhones or Android phones starting at $39.99, or an 8×10” stretched canvas wall art piece for $75.99.  Many other items and sizes are also available, and this promotion applies to any image in my portfolio.  I will also donate 10% of profits to Heifer International, an excellent charitable organization that is fighting to end world hunger and poverty.                           

The printing is done by one of the top professional photo labs in the country.  I use this lab for my own account and for all work on behalf of my clients, so I can vouch for their quality.  They also offer a high-quality framing service for your convenience (these options are available at checkout), although I do not personally share in the revenue or profit for that.

While this promotion applies to all images on my website, you may want to start by checking out this gallery showcasing a few of my favorite images that I’ve hand-selected for holiday shopping: Holiday Special Gallery.

Please take a look at the gallery and let me know if you have any questions about the story behind any specific images.  I’m always delighted to discuss my photos and to suggest additional images you might like.  I hope you find some images that you feel would make great gifts for friends or a nice addition to your own home.  There’s something here for everyone and for all price ranges.  Thank you so much for supporting To Travel Hopefully!

With Warmest Regards,

Kyle

Cultural Awareness Begins at Home: Some musings on this week’s US election

Like most Americans, I was surprised at the outcome of the US presidential election this week.  This is not a political forum, and I won’t discuss my own personal politics (although for what it’s worth, most travel photographers do lean toward the progressive side), but I would like to share in today’s post a few thoughts on the surprise results.

The big question being asked across the entire political spectrum is how could nearly all of the polls and analysis point toward one outcome (a big win by Clinton) when the actual election went the opposite way (a big win by Trump)?  There is likely quite a lot of complexity behind the answer, but the simple truth is that very few people truly understood the full extent of the anger and frustration so many Americans have been feeling in recent years.  For many, their vote was not cast in support of Mr. Trump so much as it was a cry of protest against what they view as a broken government by the elite that left them out of the economic recovery of the last few years.

And this has gotten me to thinking.  As travel photographers, we roam far from our home, and often far from our home country, seeking to better understand the ways people are similar and different.  In other words, we strive to learn about, document through our images, and share with others a cultural understanding of each place we visit.  I’ve written frequently in this forum about the importance of traveling with sensitivity and an open mind so that we can get to know people from all walks of life in our destinations.  I often discuss here how photography is a wonderful tool to bridge the gap between our culture and that of the people we meet around the world.

But in the wake of this week’s surprise election results, I am realizing that I don’t understand the full range of cultural diversity in my own country.  I may have spent time with a tobacco farmer in rural Cuba, but how much time have I spent getting to know the challenges faced by a small farm owner in rural America?  I’ve had conversations with religious minority groups across China who felt oppressed by Beijing’s rule, but I haven’t spoken much with Americans who feel our federal government isn’t in touch with their religious beliefs.  And I’ve visited a wide range of villages and nomadic settlements in Tanzania to learn how the residents differ in terms of their unequal sharing in that country’s economic growth, but I haven’t been exposed to enough communities across America who feel left out of our country’s economic recovery.  In summary, I open my eyes and mind while traveling abroad better than I do in my own country.

As travelers, and especially as travel photographers, we are in a great position to meet, listen to, and learn from diverse communities all around the world.  Let’s make an effort to do the same in our home countries.  From such learning comes insight, and from insight, perhaps, can come workable solutions to pressing problems without having to resort to hate and extremism.

What’s been on your mind in the wake of the US election?  Do you have thoughts about how we can better understand the differences among our fellow countrymen?  Please share your ideas here.


Purple Mountain’s Majesty: Including mountains in your images

Whether we’re traveling halfway around the world or just a few miles from home, we travel photographers get excited about including mountains in our images.  Mountainous landscapes can provide so many of the most basic elements we look for in a great photograph: beautiful light, compelling composition, exquisite textures, and an authentic sense of place.  In this post we will cover some of the fundamental techniques for capturing great images of mountains.

As with most kinds of photography, it all begins with beautiful light.  Whenever possible, try to shoot mountain landscapes near sunrise or sunset, or when something interesting is happening with the weather conditions.  The quality of light tends to be best during these times.  You’re more likely to capture lovely colors on the peaks and in the sky, and the image is more apt to give a sense of depth and drama than during the middle hours of the day.

Shooting from the deck at our lodge in Torres del Paine National Park in Chile, I had to miss most of an excellent dinner to capture Lago Grey with its mountains and glaciers during the “golden hour” just before sunset.  The lovely interplay of colors and textures, from the sky to the peaks and to the icebergs and water, made the resulting image worth the effort.  Buy this photo

When shooting mountain landscapes, it is usually a good idea to bracket your exposure.  With the camera fixed on a sturdy tripod, compose your scene and then shoot a series of images, each with a slightly different exposure.  Many cameras have settings to automate the process of bracketing.  The two main benefits of exposure bracketing are raising the odds you’ll have a perfectly exposed image and allowing you to create a high dynamic range (HDR) image from several different exposures.  See this post for a refresher on how to use exposure bracketing: Post on Exposure Bracketing.

This HDR image of Yosemite National Park’s peaks reflected in the Merced River was created from a series of different exposures made using bracketing.  The camera was mounted on a tripod and I made a series of seven shots, each one exposed 2/3 of a stop brighter than the previous one.  Buy this photo

I’m often asked how to make mountain images that really “pop”.  Why are some photographs of mountain landscapes so dynamic and compelling, with intriguing contrast between the peaks and the sky?  Of course, there are many elements that go into the making of an excellent image, but there is a “secret sauce” that can dramatically improve many mountain images: the polarizing filter.  Properly using a circular polarizing filter on your lens can emphasize the contrasting parts of the rock, snow, and/or ice on the mountains and can also add drama to the clouds and sky.  Every image shown in this post was made with a polarizer.  Be sure to adjust the filter by turning its outer ring until you see the effect you want to achieve.  Usually this involves rotating the filter’s ring until you see the maximum polarizing effect possible and then dialing it back a little (or a lot) until you achieve a balance between added drama and a natural look.  Experience helps here.  Check out this post on the use of filters, including polarizers: Post on Filters.

This image of a rare lenticular cloud forming on the summit of Osorno Volcano in Argentinian Patagonia was made using a polarizing filter to bring out the cloud formation and darken the sky.  Buy this photo

Mountain colors can be glorious, but also consider converting some mountain images to black-and-white during post-processing.  Rendering in black-and-white can emphasize the textures on the crags and peaks of a mountain and can also lend drama to the foreground and sky.  Shots captured with a polarizing filter will usually result in more intriguing monochrome images.  When converting to black-and-white during post-processing, be sure to play around with the contrast and individual color channel sliders until you achieve the result you want.  For more info on black-and-white photography, check out this post: Post on Black and White Photography.

This shot of a rock dome in Yosemite’s Tuolumne Meadows area is striking when rendered in black-and-white.  Buy this photo

Sometimes when we’re traveling we don’t have the option of returning to a gorgeous mountain location when the lighting is perfect.  Don’t let the flat lighting of a bright mid-day sun stop you from shooting the local peaks.  Great images can be made at any time of day.  Just make sure to follow the main techniques outlined in this post: compose well, use a polarizing filter, and bracket your exposure.

Patagonian peaks captured on our way out of Torres del Paine National Park.  Because we didn’t have the option of returning at the golden hour, I made this image in the harsh mid-day sun.  With careful attention to composition and the use of a polarizing filter and exposure bracketing, I was able to make a favorite image in spite of the less than perfect lighting conditions.  Buy this photo

What are your go-to methods when shooting mountain scenery?  What are your favorite mountain locations?  Please share your thoughts in the comment box here.


To Travel Hopefully is Taking the Day Off: Please browse the archived posts you may not yet have read

Dear Reader,

To Travel Hopefully is taking the day off, but don’t worry, we’ll be back with fresh new content tomorrow.  In the meantime, please take a look at the helpful travel photography tips and inspiring images in our archived posts.  Just select a category (Destinations, Gear, Techniques, Travel, etc.) from the right nav bar, or choose a month under Archives, and browse to your heart’s content.  Thank you for visiting To Travel Hopefully!

Warm regards,

Kyle Adler

Please Vote Today: A friendly reminder to my readers in the US

Dear Readers,

This is a travel photography forum, and I don’t usually like to go off-topic.  But for today only, I am going to digress and direct a gentle, friendly reminder to my fellow Americans: Please vote today!

The stakes have never been higher.  Every vote counts.  That’s true even for those of us who live in states where the outcome of the presidential race is virtually certain.  It’s important to stand up and be counted.  And there are many down-ballot races and ballot measures that are extremely important and whose outcome is not at all determined yet.

As travelers and photographers, we are united by a yearning to explore and understand the world, and by a passion for sharing and advocating for what we learn during our travels.  I’ve traveled in many nations where the right to vote in free and fair elections is just a distant dream.  For those of us fortunate enough to have the right to choose our leaders, it is not an option to sit by and leave the selection to others.

Voting is the most serious obligation most of us are called to perform regularly in a democratic society.  Please get out there are vote today, if you have not already done so.  Thank you!
No matter how you have to get there, go to the polls and vote today!


A Good Camera Store is Hard to Find: Can anything be done to prevent the extinction of pro camera stores?

img_3689

This past week, the doors closed permanently at one of the San Francisco Bay Area’s few remaining pro camera shops, Keeble & Shuchat of Palo Alto.  After 51 years of providing sales of a tremendous range of fairly priced photographic gear, friendly service, lifesaving repairs, and informative classes, this local institution was forced to shut down.  The story is a familiar one, and extends beyond the San Francisco Bay Area and beyond the photography sector.  Local brick-and-mortar stores nationwide and in all sectors of the retail economy are being forced out of business due to severe price competition with online and big-box retailers and rising commercial real estate prices.  Over the last few years, my neighborhood has lost the last of its independent coffee shops, bookstores, and movie theaters, and it now seems that camera stores oriented toward enthusiast and professional photographers are also going the way of the dodo bird.

I’m sad about the closure of Keeble & Schuchat because there really is no substitute store within an hour’s drive of my house, and because I knew several of the staff there and don’t know what they’ll do next.  But at the same time, I share some of the blame over their closing.  I was a regular in their store, where I browsed their range of new gear and asked all manner of questions of the friendly and helpful staff.  I made it a point to buy a few doodads at K&S, and I attended paid classes there from time to time.  I depended on them for the repair and maintenance of most of my gear.

But whenever it came time to drop some big bucks on a new pro camera or lens, guess what?  I always purchased from a big online retailer like Amazon or B&H.  I’m sure many other serious photographers behave similarly.  It’s hard to justify paying a 10-20% price premium as well as the local 9.25% sales tax in my county when we’re already stretching to afford the gear in the first place.  It’s very tempting to save so much money with just a few clicks in our web browser.  But something significant is lost when we drive away the local experts who sell books, cameras, or cappuccinos in our neighborhoods.  We lose the local merchant’s accumulated knowledge and the passion for the category we love.  For us photographers, that means there soon won’t be many places we can go locally to chat about the merits or drawbacks of some new piece of gear, to repair or maintain our existing gear, or to learn from people who share our passion for image-making.

When my main portrait lens had some dirt stuck between the inner elements that was causing a speck to appear on all my images, and I observed this on the day before a major portrait shoot for two clients, I took the lens to K&S and their tech diagnosed and repaired it while I waited.  He charged me the whopping sum of $10 for his efforts.  Why?  Because he also was a working photographer and he knew the importance of getting this problem solved quickly and without impacting the clients.  We may save a few dollars by buying our gear online, but what is lost by the mass shift from local stores to e-commerce sites?  I’d better be thinking about what I’m going to do the next time I need an urgent repair done, because there is no longer anywhere reliable to go within an hour’s drive of my home.

How about you?  Please share your thoughts on the value or lack thereof of having experienced, passionate tradespeople in our neighborhoods?  Is it worth spending extra cash to ensure we preserve access to these local stores?  Or do you have a different viewpoint?

img_3690

Filtered Down to the Essentials [Encore Publication]: Why you should always have these filters in your bag

Filters are the Rodney Dangerfield of photographic gear: They don’t get enough respect.  Most photographers will begin to salivate when talking about the latest camera bodies or lenses and even plates or heads for our tripods, but we tend to think of filters as pedestrian items, if we think about them at all.  I nearly always make room in my bag for several filters, and I believe that using them properly is more important than what camera or even which lens I choose.  Let’s look into why these affordable little accessories are so important.

Three kinds of filters are essential gear for most photographers.  I’ll cover each type here.  Note that you must use a filter that is the correct size to attach to your lens.

It’s a good idea to keep a UV filter (also known as a haze filter) attached to your lenses at all times, as this helps protect the front element of the lens from fingerprints, moisture, and even scratches.  In addition to offering some physical protection for your lens, a good UV filter can also improve image quality when there is atmospheric haze or moisture in the air.  Use a good quality filter, though, as some can adversely affect your image quality.  I would recommend removing the UV filter when shooting with certain other combinations of filters, as the edges of the image can be cut off (vignetting) with too thick a stack of filters on the end of the lens.  In most cases, use of a UV filter does not affect the exposure more than about half a stop, so they can be used in most lighting conditions. I’ve had good luck with Hoya UV filters.  Always be sure to look at the specifications for your lens before buying any screw-on filter, because the diameter of the filter thread must match the size of the lens.

The second must-have type of filter is the circular polarizer.  A polarizing filter can reduce glaring reflections and can darken skies and enhance natural colors.  This little gadget is almost a secret weapon for making images that really pop.  Again, I like the Hoya products, which are thin, well made, and perform as they should.

It takes a bit of practice to learn to use a polarizing filter properly.  While looking through your camera’s viewfinder or LCD screen, turn the outer part of the filter slowly to see the effect.  The greater the angle between the light source (typically the sun) and the shooting direction, the bigger the effect of turning the outer ring of the filter.  You will observe as you rotate the outer ring of the filter that the sky, clouds, and any bodies of water will transform quite dramatically.  When you see the effect you like best, overshoot a little bit and then rotate the outer ring back to where you want it.  In most cases, I recommend not using the maximum amount of polarizing effect when there are reflections from water or glass, because you usually want some of these reflections to be visible in your final image, but this is art, not science, so you get to choose the effect you want.  Note that using a polarizing filter will cost you about 2-3 stops of exposure.  You will have to use a slower shutter speed and/or faster ISO or wider aperture, so use a steady tripod if the lighting conditions are dim.

Here’s an example of a shooting situation in which a polarizing filter can really make an image pop.  For this shot of the imposing peaks in Southern Patagonia’s Torres del Paine National Park, I rotated the polarizer to about 2/3 of its maximum effect to darken the sky, make the clouds more dramatic, and bring out the bright sheer faces of the granite peaks.

A circular polarizing filter makes a big difference when shooting mountains, skies, and/or bodies of water.  Buy this photo

The final essential filter is the neutral density (ND) filter.  These reduce the amount of light that reaches the camera’s sensor, so you can use slower shutter speeds to blur motion, or so you can use a wider aperture to get a shallow depth-of-field, even in bright sunlight.  ND filters come in different strengths as designated by the number in the filter’s specifications.  For example, an ND2 filter blocks 1/2 the light for a one-stop reduction in exposure, while an ND8 filter blocks 7/8 of the light for a three-stop reduction in exposure.  It’s a good idea to carry a range of ND filters for each lens you plan to use in the field.  A newer type of ND filter even allows for variable adjustment of the strength of the ND effect with just one filter, but these tend to be expensive.

A classic example of a situation in which you’d want to use an ND filter is when shooting moving water in bright lighting conditions.  You may want to use a longer shutter speed to blur the water, but even at your camera’s lowest ISO setting and your lens’ smallest aperture there could still be too much light for a slow shutter speed.  Mounting an ND8 filter to your lens will allow you to use a shutter speed eight times longer than without the filter, so for example you could move from shooting at 1/30 of a second to 1/4 of a second.

Here’s a photo of my younger daughter by a waterfall in Yosemite National Park.  The image was made in the early afternoon under very bright sunlight, bright enough that even using my camera’s slowest native ISO sensitivity and my lens’s most narrow aperture, I would still have had to use a shutter speed of 1/60 of a second, which would have frozen the water in the falls.  Using an ND8 filter, however, I was able to slow down the shutter speed to 1/8 of a second, long enough to impart a nice blur to the falling water.

 Use of a neutral density filter allowed me to blur the falling water even under very bright lighting conditions.  Buy this photo

I recommend carrying a kit containing several ND filters of different strengths for each lens you plan to use for landscape images.  Once again, make sure the diameter of the filter matches the diameter of the lens you intend to fit it to.

Note that there’s another type of ND filter called the “graduated ND filter,” and filter varies the light-blocking effect from one end of the filter to the other end.  I used to use this type of filter quite often, but in this digital era I find it usually works just as well to simulate the effect of a graduated ND filter using post-processing software later.

Armed with these three types of filters, you will be prepared to create the images you have in your mind, even under challenging shooting conditions.  Happily, filters are small, light, and not terribly expensive, making them one of the better values we photographers can find.

Which filters do you always carry, and when have you found them most useful?  Any tips or tricks on how to use filters for the best results?  Please leave a comment in the box after this post to share your thoughts.

Want to see more posts about photography gear?  Find them all here: Posts on Gear.

Black-and-White to the Rescue: Converting a noisy or strangely colored image to monochrome can save the day

In yesterday’s post (Post on Circus Automatic), I shared several practical tips for shooting fast-moving indoor performances, using a recent circus performance as an example.  While I was happy with many of my images from that evening’s shoot, I discussed how the single-colored LED lights now used at many indoor performances can impart an unnatural color cast to photos that can be hard to correct in post-processing.  In today’s post, I show how converting these images to black-and-white can overcome some of the limitations of shooting under these adverse lighting conditions, with the added bonus that the noise imparted to the images (from having to shoot at a very high ISO setting) can also be less noticeable in black-and-white conversions.

First, a little background explanation on why these LED lights are so troublesome for the photographer to work with.  When we refer to the resolution, or number of pixels, in our camera’s sensor, that number is actually the total count of three different kinds of pixels, each kind sensitive to only one of the three primary colors (red, blue, and green).  Without going into the nitty-gritty technical details, suffice it to say that in most camera sensors, about 50% of the pixels record only green data, about 25% only red data, and about 25% only blue data.  My camera (the Nikon D810) is said to have a resolution of 36.3 megapixels (MP), but if my subject is lit by a single-colored red LED, in reality only about 9 MP of resolution is recorded.  The other two color channels will essentially contain no data.  This is bad for several reasons, most notably because the image will be cast unnaturally toward the red color channel and because its effective resolution will be low.

There’s very little we can do in post-processing to recover from the loss of resolution during capture, but we can adjust the color temperature to try to correct a little bit of the strange color cast.  Converting the image to black-and-white, though, can restore the image to a more natural appearance by masking the color cast.  This can be aided by using Lightroom’s contrast and color control sliders to adjust the balance of the black-and-white version until it appears closest to a normal tone.

Consider the following two versions of the same shot.  The first version is in color, and even after adjusting the color temperature and contrast, there is still a distracting red color cast.  There is also some noise apparent in the image as a result of the high ISO setting required to freeze the acrobats’ motion.

The color version of this image appears unnatural even after adjusting color temperature, due to the lighting which consisted of a red-colored LED array.

Now, take a look at the black-and-white version of the same image.  Creating this version required careful attention to the balance of each color and contrast setting to make the final image.  The good news: the monochrome image appears much more natural to the eye than does the color version.  The skin tones seem less artificial, and the curtain in the background does not distract as much.  Furthermore, there is less noise apparent in the black-and-white version.
The same shot appears more natural and less noisy when converted to a black-and-white photo.  Buy this photo

This next shot appears much more acceptable in its color version.  During a live performance, the lighting often changes drastically from one moment to the next, and in this image the LED lights didn’t impart as harsh a red cast as in the previous image.  Furthermore, the aerialist was dressed entirely in red and was working with red ropes, so what red color cast was present does not appear as unnatural.

This image is highly effective when presented in full color.  Buy this photo

While I like this image for its dramatic power and strikingly vibrant red colors, let’s take a look at a black-and-white conversion for comparison.  The monochrome version lacks the visceral impact of the strident red color, but it benefits from a more natural tone, a quasi-documentary look and feel, and a nice clean black background.  In this case, the black-and-white conversion doesn’t so much rescue the image as change the kind of feeling it elicits.  I like both versions.
The black-and-white version is cleaner and evokes a very different set of emotions than does the color version.  Buy this photo

When you are forced to shoot under very difficult lighting conditions, try converting to black-and-white during post-processing.  It just might rescue some of your images and can evoke a very different feel in other images.

For a refresher on the black-and-white conversion process and when you may want to use it, read this post: Post on B&W Conversion.

During post-processing, have you been able to rescue or improve images shot under challenging lighting conditions?  Did you convert to black-and-white, or use different techniques?  Please share your experiences here.


Not My Circus, Not My Monkeys: How to shoot a live performance with fast action and challenging lighting


Last night I had the opportunity to shoot a live performance by Circus Automatic, a talented young San Francisco-based circus troupe.  Indoor performances, where the action is fast and the lighting dim and unpredictable, can be extremely challenging to shoot.  In this post I share some images from the circus show as well as a few tips on how to make the best of these difficult conditions.

The first tip is to use a fast lens and a high ISO setting.  Since you will need a shutter speed of 1/200 second or faster in order to freeze most of the action, and given that the light is often very dim, you will likely have to use an ISO of at least 1600 and perhaps quite a bit higher, even when using a fast f/1.8 or f/2.8 lens wide open.  All of these images were made shooting wide-open with my favorite portrait lens, the Nikon 85mm f/1.8.  ISO ranged from 800-3200, and shutter speeds ranged from 1/160 to 1/800 second.

To capture this striking image of the aerialist, I shot wide-open with a fast prime lens and used a high ISO setting in order to obtain a fast enough shutter speed to freeze her action.  Buy this photo

The second tip is to seek the drama present in all aspects of the show.  Sometimes the most interesting subject is not the star performer.  In this image I captured the expressions of the rest of the cast as they watched the star of the final act.

Part of the fun of a circus is getting to know the cast members, who tend to be very interesting and photogenic characters even aside from their remarkable performing abilities.  Look for the “side shows” as well as the “big top” acts.  Buy this photo

During our “intermission,” let’s review some basic rules for shooting an indoor performance: 1) Get permission from the producer before you bring your camera to the show; 2) never use flash (it annoys your neighbors and can cause injury or even death by blinding an unsuspecting aerialist); 3) use your camera’s quietest shutter mode and disable its LCD display so as not to distract those around you; and 4) don’t attempt to use a tripod or monopod unless you’ve obtained special permission.

My next tip is to look for those moments when the action subsides naturally.  In most kinds of fast-action performances, including dance, sports, and yes, circus acts, there are brief moments of stasis when the motion is swinging from one direction to another.  Even a juggler balancing on a teeter-totter placed precariously atop a pile of four metal cylinders will reach moments of relative rest.  Here I fired the shutter at the exact instant when two of the batons are in his hands while the third has just reached its apogee.  This image encapsulates all of the excitement of the act but has almost no perceptible motion blur.

Find those brief moments when the fast action settles into a natural lull.  Buy this photo

Another tip is to shoot in RAW mode.  That’s a good practice for nearly all types of photography, but for indoor performances the color of the lighting is often very tricky and rapidly changing, so using RAW files allows much greater control over the color temperature during post-processing.  The venue for last night’s show used awful single-colored LED lights that cast a very strange temperature over many of my images.  Some I could correct in post-processing, but others remain unnatural looking and cold.  Regrettably, these LED lights are becoming very popular so this is a common challenge when shooting live indoor events.  Other useful post-processing techniques for these types of shows include noise reduction (required due to the high ISO settings) and image sharpening.

The final tip is to keep shooting, because you rarely can tell in advance when something remarkable may happen!

Parting shot: The acrobat dismounts dramatically to end the show.  Buy this photo

Now it’s your turn.  Please share your experiences and advice for shooting live performances.

To Travel Hopefully is Taking the Day Off: Please tell your friends about us!

Dear Reader,

To Travel Hopefully is taking the day off, but don’t worry, we’ll be back with fresh new content tomorrow.  In the meantime, please take a moment to tell your friends and family about us.  Anyone who enjoys travel and wants to improve their photography will find great daily content here, including inspiring images from around the world and tips and tricks for making the best possible photos.  You can email any post or share it via social media with the click of one of the buttons at the end of each post.  And if you enjoy To Travel Hopefully, please click in the right nav bar to subscribe via email or RSS feed, so you won’t miss a single post.  Thank you for visiting To Travel Hopefully!

Warm regards,

Kyle Adler


Rock Solid [Encore Publication]: Why you should always have a tripod with you

Tripods have had their ups and down, so to speak.  When photography was in its infancy, the wet plates used to make the images were very slow, so extremely long exposures were required and the cameras were big and bulky, so use of a big, heavy wooden tripod was essential.  It’s all the more remarkable when looking at the incomparable work of Ansel Adams to realize that in order to make these images he had to hike miles up steep mountain trails with a heavy view camera, several big and fragile plates, and an enormous tree trunk of a tripod.  As cameras became smaller and film faster, tripods went out of style except for certain low-light situations for professionals.  Now, more and more enthusiast photographers are recognizing the value of a sturdy tripod for capturing the best possible quality images of landscapes, buildings, and of course night scenes.  In some iconic travel spots, it’s hard to find space to shoot amidst the ocean of tripods.

Sure, they’re heavy and bulky, particularly when we’re hiking or walking for long stretches.  But a good solid tripod is essential for so many types of shots that I now carry one with me at nearly all times.

An example of a technique requiring a tripod even in bright light is high dynamic range (HDR) photography.  To make an HDR image, you shoot a series of photos of the exact same scene in rapid succession, varying the exposure by a little bit between each frame, and then use special software during post-processing to bring out all brightness levels in the image, from the dark shadows to the brilliant highlights.  But if the camera moves at all between the shots, it becomes harder to stitch the shots together into a beautiful HDR image.  I’ve been known to handhold some HDR shots, but I strongly recommend shooting them using a tripod.  Of course, you’ll also want a tripod for low-light and nighttime photography, and they’re very useful for landscape images where the high resolution of your camera’s sensor is called upon to render extremely fine detail throughout the scene.  And let’s not forget that to include yourself in a scene, use of a tripod makes life a lot easier.

Although I was shooting in bright sunlight, I needed a tripod to make this HDR image of Yosemite Valley peaks reflected in the Merced River.  If the camera moves at all between frames, it is harder to combine them into the final photo.  Buy this photo

For most travel situations, you’ll want a lightweight tripod that folds up to a portable size but still offers enough stability for most uses.  There are times, though, when I need to bring along my heavy and bulky professional tripod.  Whatever tripod you choose, be sure to fit it with a good quality head–ball heads provide a lot of flexibility and ease of use for travelers–and remember to take along the plate that attaches the tripod to your camera, if required.

My go-to lightweight travel tripod is the Manfrotto Be Free.  It folds up to an incredibly small size yet affords a surprising amount of stability.  The included ball head works well but is difficult to adjust for sensitivity.  This tripod is designed to fit into a specially designed pouch in my favorite travel photography backpack, also made by Manfrotto.

The SLIK 615-315 is a great tripod for use close to home or on trips where you will have constant vehicle support.  It’s very solid, supports a tremendous amount of weight, and can be adjusted for nearly any shooting situation.  I recommend you fit it with a good ball head for maximum flexibility.

A monopod can be a real problem solver when you need more stability than handholding or resting your camera on a vehicle or table will afford, but you can’t carry or use a full tripod.  I use the Manfrotto 681B model.

To be sure, if you know 100 photographers, you’ll hear 110 different opinions about tripods and the heads and plates that go with them.  The products listed above are my recommendations only, but I’ve had good experiences using them.  For those with a lot more money to spend, tripods and heads made by Really Right Stuff are much beloved by professional and well-heeled enthusiast photographers.

What combination of tripod, head, and plate do you use, and why?  Please share your recommendations here.  Tripods are one piece of gear with which we’re constantly experimenting, so bring it on!

Want to read more posts about photography gear?  Find them all here: Posts on Gear

Sweet Release: What is a model release and when do you need one?

We photographers are passionate about many aspects of our trade.  We love the artistic expression, that feeling of capturing a special moment that otherwise would be lost to time, even the gear we use to make images.  But one aspect of the trade that few of us–professionals and amateurs alike–enjoy thinking about is the legal side of making and selling images.  And one legal element about which we need to be knowledgeable is the model release.  Unless you never plan to make any images in which any person is recognizable, you should learn what a model release is and when you may need to use one.

First, a disclaimer: I am not an attorney and the advice I provide in this post is not intended to replace consultation with a competent lawyer.  What I provide here is just some practical advice I’ve acquired over the years, in which course I’ve made plenty of mistakes.  And you should also be aware that laws governing when you can photograph a person and how that image can be used vary from country to country and even among states or provinces within some countries.  With these points made, let’s explore the basic concept of a model release and when you may need one.

In the simplest terms, a model release is a legal agreement between a photographer and any person who will be recognizable in images made by the photographer.  It spells out the conditions under which the image can be published and often specifies the compensation to which the model is entitled.  In the US, a valid model release must be signed and dated by the photographer, the model, and a witness.  If the model is a minor child, a parent or legal guardian also must sign.  This agreement protects the photographer against being sued for defaming or cheating the model, but equally it protects the model from being taken advantage of.


When I work with a professional model, like Laura here, I always obtain a signed release before the photo shoot.  This practice ensures she will be properly compensated and protected against inappropriate uses of her likeness, while I and any publisher will be protected against defamation claims by the model.  Having the release means I have more flexibility as to how the image can be used later.  Buy this photo

So, when do you need a model release?  Here are some situations (not an exhaustive list) in which you should have one:

  • A person can be recognized in your image.  Note that personally identifiable information doesn’t derive only from a direct likeness of the person’s face.  He or she could also be recognized from a special feature such as a tattoo or from the context such as a clearly identifiable location.
  • … AND … one or more of the following statements is true:
    • You may wish to sell the image for commercial purposes such as advertising or use in a business’s publicity or promotion.
    • You may wish to enter the image in a competition or contest.  Check the specific competition’s rules; some require a model release whenever a person is clearly identifiable in the photo, while others do not.
    • You may wish to provide the image (even if you’re not compensated) for other people to use in a context you can’t control.  A model release protects you and those who obtain a license to use your image from being sued by the model for using their likeness in a way that they don’t approve.

In contrast, there are plenty of situations in which you don’t need to have a signed model release.  Some of these include:

  • One or many people appear in the image but none is recognizable.  The subjects may be far away from the vantage point or they may all be obscured or facing away from the camera.  As long as they cannot be identified individually, there is no need for a model release.
  • You plan to use the image only for your own portfolio.
  • You plan to use the image only for editorial purposes.  If your photo is published in a newspaper, magazine, or website where the primary purpose is editorial rather than commercial, a release is not required.  Imagine if every reporter had to get a signed release before publishing the likeness of every person appearing in any news outlet.  This would have a chilling effect on journalism, which is a pillar of a free and democratic society.  So in most cases, if your photo will be used for editorial purposes (that is, it will appear in a newspaper or magazine’s news section rather than in an advertising section), then you and the outlet’s publishers don’t need a release.
  • The images can be considered fine art photography.  Photos can be published and sold without express permission from the person appearing in them if the primary purpose is fine art.  In the US, case law upholds artistic expression as a form of First Amendment free speech in most cases.

Kashgar, China
Images with news value, such as this one made of a Uighur girl in Kashgar’s Old Town days before her home was to be demolished by the Chinese government, may be published and sold for editorial purposes with no requirement for a signed model release.  Buy this photo

When you do believe that a model release would be helpful given your intended future use of an image, it is quite a simple task to obtain one.  Some photographers carry printed forms with them so they can ask a subject to sign their release as needed.  I use an app on my smartphone called “Easy Release,” which you can purchase for $9.99 on the iTunes Store: Easy Release app for iPhone.  This app simplifies the process of creating a model release, getting it signed by your model and yourself, sending it to others, and storing and managing it for future use.

Because “To Travel Hopefully” primarily treats the subject of travel photography, I want to share my own philosophy when it comes to asking for a model release while traveling.  Even if you understand the laws of the country in which you are shooting, there are potential ethical issues in asking your subject to sign a legal document that he or she probably can’t understand.  You may be able to get the text of the document translated into your subject’s local language, but even then the context of the agreement may not make sense to somebody from a very different culture than our own.  I try to exercise good judgment when it comes to compensating the people I photograph when traveling overseas and to how I use the images later.  You may want to read or reread my pillar post on photography as a bridge to local culture: Post on Travel Portraiture.

Many photographers, models, and publishers misunderstand the conditions under which a model release is or is not required, so there’s a lot of misinformation out there.  Please consider my points here as just a starting point for learning more about this topic.

What are your best practices regarding when and how to use a model release?  Please share your thoughts here.


Under the Milky Way Tonight [Encore Publication]: How to make great images including our home galaxy

Not too long ago, making images of the Milky Way was not practical for most photo enthusiasts.  Only astronomers and a handful of professional astrophotographers had the expensive equipment required to capture sufficient light from the cluster of quite dim stars that we refer to as the Galactic Core in the night sky.  Shooting with a very long exposure didn’t do the trick for the Milky Way, because leaving the camera’s shutter open for more than about 15-30 seconds would blur each star’s image due to rotation of the Earth.  These blurs, called star trails, could make for striking images with the stars appearing to streak in circles across the sky, but the subtle beauty of the Milky Way would be lost with these long exposures.

But in the last five years or so, camera sensors have become much more sensitive to light, and now it is possible–indeed quite easy–for photo enthusiasts to photograph our home galaxy without expensive specialized equipment.

Here’s how:

You will need a camera with a sensor that can gather a lot of light and with a shutter that can be kept open for a long time.  These requirements limit the range of suitable cameras to full-frame DSLRs and advanced interchangeable lens mirrorless cameras.  You will also need a fairly fast wide-angle lens: I recommend a zoom or prime (fixed focal length) lens with a focal length of 14-16mm on a full-frame camera, and a maximum aperture of f/4 or faster.  For astrophotography I most often use the Nikon 16-35mm f/4 lens.  It’s got great image quality and is well built, and of course it is wide enough and fast enough for the purposes of capturing the Milky Way.

You will also need a heavy, solid tripod.  I’ve been successful using a lighter weight tripod for Milky Way shots while traveling, but a good professional tripod is better.  I use the SLIK 615-315 with a ball head.

Finally, you’ll want to have a remote shutter release, either a hardwired cable release or a wireless remote release.  This is to trigger the camera without touching it, so as to avoid blurring the image from the vibration of your touch.

Once you have the right equipment, it’s fairly straightforward to photograph the Milky Way.  Choose a dark sky area, far away from the light pollution of any cities or other sources of stray nighttime light.  Shoot toward the Galactic Core where the stars of the Milky Way appear brightest and most colorful.  To plan for where the GC will be on any given date and time and at any given location, I use a smartphone app called PhotoPills: PhotoPills in App Store.  Try to include foreground and/or middle-ground subjects to add interest to your composition.  The image below, made at Yosemite National Park, is appealing because the Milky Way is seen rising above the iconic peak known as Half Dome.

The Milky Way is seen arched through the sky above Half Dome and other landforms in Yosemite Valley.  Careful composition adds drama to your Milky Way images by including Earth-based subjects as well as the sky.  Buy this photo on my website

With your fast wide-angle lens on your full-frame camera, all mounted on your stable tripod, you are ready to shoot.  Remove any filters on the lens, set your camera on full manual mode, select a fast ISO (I usually start at about 3200 and sometimes have to go even higher) and a wide aperture (f/4 or wider), and choose a shutter speed of 20-25 seconds (shorter if your lens is longer than about 18mm).  You can use the 500 Rule, which states that shutter speed should be approximately 500 divided by the focal length of the lens; for example, for a 16mm lens you can use a shutter speed of not longer than about 31 seconds.  Turn off your autofocus on your lens or camera, as it will not work in so dark a setting; instead, manually set your focus to a point near infinity where the stars appear sharp in your viewfinder (or better yet, on your live-view screen).  I like to tape my lens to this setting before it gets dark, so I know the focus won’t change while I’m out in the field in the dark.  It’s also a good idea to turn off your camera’s long-exposure noise reduction feature, if it has one, as this wastes time in the field and it’s equally effective to reduce the noise in Lightroom during post-processing.  Of course, you want to be sure you are shooting RAW files.

Go ahead and shoot a lot of frames, experimenting with different ISO settings and compositions.  It is often a good idea to get a very long exposure, sometimes several minutes long, so that your foreground subjects will be properly exposed.  The frames with the foreground well exposed can later be combined in Photoshop with the ones in which the night sky is properly exposed.

This image was made from several frames: one long exposure for the lake, trees, and mountain in the foreground and middle-ground, and several different 25-second exposures that each captured a different meteor during the peak of the Perseid Meteor Shower.  The resulting image shows all of these objects quite prominently, along with the Milky Way.

You may want to combine several different images to see all the features of the night sky and the terrestrial objects clearly. Buy this photo on my website


With practice, you’ll find that capturing the Milky Way is within your reach, so long as you have suitable equipment and the patience required to compile enough images that a few will turn out to be successful.  I believe it’s well worth the effort because a good Milky Way shot is so subtle, colorful, and strikingly beautiful.  Good shooting!

Have you created a Milky Way image that you love?  What were the key components to your success?  What were the challenges you faced?  Please share your thoughts and experiences here.

Want to read more posts about photographic techniques?  Find them all here: Posts on Techniques.

ProCam 4 Review: The best iOS camera app I’ve ever used

I’ve posted repeatedly about the importance of understanding how to take manual control of your camera in order to make images that are properly exposed and focused.  Whether you are using a professional DSLR, an advanced full-frame mirrorless ILC, a compact point-and-shoot, or the camera built into your smart phone, there is no way you will get consistently acceptable results if you leave the camera’s settings to its auto mode.  See this post for an overview: Post on Beyond the Auto Mode.

For the past two days I have been testing an iPhone app called “ProCam 4”, which is by far the best iOS camera app I’ve ever used.  Like the “Manual” camera app that I’ve been using for years, ProCam 4 allows the manual selection of ISO, shutter speed, exposure compensation, and focus distance (note that the iPhone camera’s lens has a fixed aperture, so F-stop cannot be manually set).  Also like the Manual app, ProCam 4 allows images to be captured using RAW mode, which has a great many advantages over capture in JPEG format (see this post for more information: Post on RAW Capture).  And both of these camera apps display a histogram to assist in setting exposure properly.  

But ProCam 4 offers far more functionality than does the Manual app or any other iOS camera app I’ve tried.  Here is a partial list of some of my favorite additional features:

  • Shutter Priority: You can choose an exposure mode in which you select the shutter speed first and the app will set the appropriate ISO.
  • Exposure Bracketing: You can shoot a series of four shots at different exposures to increase the likelihood that one of them will be at the best exposure for the lighting conditions.  The series of shots can also be combined using HDR tools found in Lightroom, Photoshop, and other editing software into a single image with a higher range of tones from very dark to very bright.
  • White Balance: You can adjust white balance in the app, which is often preferable to having to adjust it in your RAW files during post-processing.
  • Virtual Horizon: The display can show you when the horizon is level.
  • Slow Shutter Options: You can select long fixed shutter speeds as well as bulb mode to keep the shutter open for as long as you’d like.
  • RAW+JPEG: You can choose to store the image in both RAW and JPEG formats.
  • Editing Options: This app provides many advanced in-camera editing tools and filters.

With all this incremental functionality, your little phone’s camera begins to behave a lot like a more advanced standalone camera.  While the iPhone’s camera, with its small sensor and its tiny fixed-aperture non-interchangeable lens, still cannot compare to a professional or enthusiast DSLR or ILC camera, the results using ProCam 4 are vastly improved compared to using the phone’s native camera app.  At $4.99 to purchase via the iTunes Store, this app is a great buy and a serious enhancement to the iPhone’s built-in camera.

You can find the ProCam 4 app here: ProCam 4 app.

What app do you use to control your phone’s camera?  What do you like and dislike about it?  Please share your thoughts here.

Want to read more posts about photography gear?  Find them all here: Posts on Gear.


If You Can’t Be with The Camera You Love [Encore Publication]: How to make the best of it when you don’t have ideal kit with you

There’s an old adage that goes, “The best camera is the one you have with you.”  That is never more true than for travel photography.  As travelers, we have to compromise regarding what gear we pack for a whole trip, and then we have to compromise again with respect to what equipment we can pack on a particular day’s outing during the trip.  If a flight is involved, we’re often obligated to leave much of our gear at home so as to avoid having to check our precious photography equipment.  If a good deal of hiking, biking, or travel via public transportation is required, we may have to leave bulky or heavy items in the hotel room for the day.

Fortunately, it’s never been easier to ensure we always have at least some backup solution to keep shooting even when a key camera, lens, filter, or tripod has to be left behind.  The smartphone that nearly everyone carries with them at all times likely has a pretty darn good camera attached to it.  My Apple iPhone 6s, for example, comes with a 12 MP camera, incorporating a decent if small sensor and a tolerable quality and moderately fast (f/2.2) lens.  Even the smaller “selfie” camera has a 5 MP sensor.

No one will confuse the images made using this camera phone with those made using my professional DSLR camera and collection of lenses, but in a pinch I can get acceptable quality shots with just the phone’s camera.  The trick is understanding how to use your smartphone’s camera, or your small point-and-shoot camera, in the right way to capture the images, and then to post-process the images in such a way as to overcome the compromises built into the camera.

Just yesterday I found myself on a family day trip to the annual Scottish Highland Gathering and Games without my professional camera gear.  I made the best of things and shot all day with just my camera’s phone.  I’m fairly pleased with the resulting images, even though of course they would have been better had I had access to my regular camera and a few choice lenses and accessories.  Here are a few of my images along with some tips on how to get the best out of a not-so-great camera.

First of all, learn how to control your phone’s camera manually so that you can choose what part of the image you want to be in focus and what part of the image you want to drive the exposure.  Nearly all modern phone’s cameras allow you to touch the screen to select where on the image you want to set the focus and exposure.  In this photo of a Scottish traditional music performance, I set the focus point on the fiddler to ensure sharp focus on the musicians.  Then I adjusted the exposure by moving the vertical slider upward, in order to add some brightness to the image and avoid underexposing the backlit performers.

Touch your smartphone camera’s screen to select the focus point, and then move the exposure slider up or down to adjust the exposure separately from the focus point.  Buy this photo on my website

Better yet, take full manual control over your phone’s camera by installing an app.  There are good free and inexpensive apps for both iOS and Android.  The one I use for iOS is called “Manual” and is available on the Apple App Store: Manual app.  With such an app installed on your camera, you can specify manually exactly what settings you want to use for the focus point, aperture, shutter speed, ISO, flash, etc.  This level of control was essential for a shot like the one below.  The tossin’ of the caber, a “heavy athletics” event in which the contestants throw a 75-pound tree trunk as far as possible, requires a fast shutter speed in order to freeze the rapid action.

Using the “Manual” app I was able to focus on the athlete and choose a fast shutter speed to freeze the rapidly moving caber.   Buy this photo on my website

To capture this action shot of an indoor sheepdog trial, I had to set a fast shutter speed and increase the camera sensor’s sensitivity (ISO) to accommodate the quick action and the low-light setting.  Again, the Manual app allowed for this flexibility.  I also cropped the image during post-processing because the phone’s camera does not have a long enough focal length lens to zoom in closely on the subject.

Both manual selection of the ISO and shutter speed and cropping during post-processing are required to get a decent shot of action like this sheepdog trial.  Buy this photo on my website

To capture this image of a girl teaching young children how to dance around the maypole, I had to use all the elements we’ve been discussing here.  I used manual settings to choose a focus and exposure that were correct for this subject, forced the camera’s flash to fire to try to even out the harsh shadows across the girl’s face, and employed cropping and lighting adjustments during post-processing to achieve a pleasing composition.

Bringing it all together: To make this image of the maypole celebration, I manually selected the focus, exposure, and flash, and then cropped and adjusted exposure during post-processing.  Buy this photo on my website

Next time you can’t or just don’t have the best equipment with you, use the tips we’ve covered here to make the best of a challenging situation.

When did you have to make do with less than ideal gear for a shoot?  How did you make the best of it?  Do you have tips or tricks you can add?  Please contribute your thoughts using the comment box at the end of this post.

Want to read more post about photographic gear?  Find them all here: Posts on Gear

To Travel Hopefully is Taking the Day Off: Please browse the archived posts you may not yet have read

Dear Reader,

To Travel Hopefully is taking the day off, but don’t worry, we’ll be back with fresh new content tomorrow.  In the meantime, please take a look at the helpful travel photography tips and inspiring images in our archived posts.  Just select a category (Destinations, Gear, Techniques, Travel, etc.) from the right nav bar, or choose a month under Archives, and browse to your heart’s content.  Thank you for visiting To Travel Hopefully!

Warm regards,

Kyle Adler

Hiking in Southwestern Ireland: How to capture glorious landscapes along the trails

The central portion of our recent trip through Ireland and Scotland was a week of hiking in the southwest of Ireland.  While we hiked independently, the logistics were arranged for us by a travel company called Country Walkers (http://www.countrywalkers.com/).  With its richly verdant and rugged terrain, glorious views to the sea and mountains, historic and cultural points of interest, and warm and welcoming people, this region is supremely rewarding for the travel photographer.

I highly recommend a visit to the very remote Gougane Barra peninsula.  There’s only one hotel, which offers outstanding food and views over a tiny island with a picturesque church and the ruins of a sixth century monastery.  A photographer’s paradise!

St. Finbarr’s Church stands on a tiny island on the Gougane Barra Peninsula.  To make this image, I shot in the early morning when the quality of light was compelling, got down low to include the rushes in the lake, and used a polarizing filter to bring out the textures in the water and sky.  Buy this photo

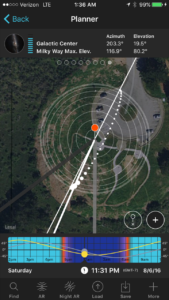
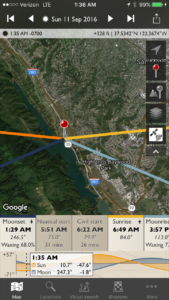
Don’t put away your gear when the sun sets!  On a rare clear night in rural Ireland, the photography is stunning.  Here’s an image of the Milky Way sprawling above the ruins of St. Finbarr’s Abbey, a sixth century monastery.

To capture the Milky Way, use a sturdy tripod and a relatively fast lens with a high ISO setting.  In most cases, a shutter speed of 20-25 seconds is best, but here I used a somewhat shorter exposure to avoid having the cross appear washed out in the site’s artificial light.  Buy this photo

We then hiked a segment of the long-distance Sheep’s Head Way.  You’ll rarely encounter completely clear skies while walking in Ireland, but the changeable conditions can create opportunities for glorious landscapes.  This lovely image was made just as the rain let up and the sun poked out, generating a vivid rainbow that spanned over the green fields and ancient walls.

Here I used my go-to landscape lens, the Nikon 16-35mm f/4 lens, fitted with a good circular polarizing filter.  I adjusted the angle of the polarizer carefully to enhance the sky without weakening the refraction of the rainbow.  I got down low to the ground to include the leading line from the old wall.  Other compositional elements include the sheep and the dramatic clouds.  Buy this photo

Ladder stiles are encountered frequently when hiking in this region, but are less familiar back home, so dramatic images can be made incorporating travel companions crossing fences using these ladders.  Here I used a wide-angle lens with polarizing filter to emphasize the expansive terrain and dramatic sky.  Buy this photo

At the end of the Sheep’s Head Way sits the lovely Bantry House, owned by the same family since 1750.  Climb the hill behind the house to capture the house and its gardens with the harbor behind.  Buy this photo

On our way to the start of our next day’s hike in Killarney National Park, we stopped at a viewpoint called Priest’s Leap for this lovely view.  I’ve said it before and I’ll say it again: remember to include yourself and your travel companions in some of your images.  Set up the camera and either mount it on a tripod or show another person how to release the shutter.  For more on how to make images including yourself, read this post: Post on Including Yourself

This image at Priest’s Leap was made using a normal lens with polarizing filter, stopped down to maximize depth-of-field.  Buy this photo

Ireland is filled with forests that are shrouded in mystery and magic.  Look for the little things as you walk: a flower or shamrock, a moss-covered tree, a tiny stream.  All that rain has the happy side-effect of making Ireland the greenest place I’ve ever seen.

Slow down and seek out the little natural details around you, like this moss-covered tree in Killarney National Park.  Buy this photo

The lovely Torc Waterfall within Killarney National Park is one of the most scenic in the region.  To capture the motion of the water, I used a neutral density filter to allow a long shutter speed and steadied the camera on a solid tripod.  Buy this photo

The legendary Gap of Dunloe outside of Killarney stretches for eight miles through mountains and valleys, along streams and by ancient farmhouses.  It can be traversed by horse-drawn carriages called “jaunting cars,” but the intrepid photographer will want to hike it instead.

The Gap of Dunloe offers compelling photographic subjects like this stream flowing in a valley surrounded by mountains.  A good wide-angle lens with a polarizing filter brings out the color and texture in such a landscape, even on a “soft day” like this one.  Buy this photo

Hiking isn’t the only great way to see the local landscapes.  After hiking the Gap of Dunloe, take a boat ride along the rivers and lakes to the ancient Ross Castle.

This mountain rising from the lake was captured during the boat ride back from the Gap hike, using a normal lens with polarizing filter.  Buy this photo

We spent every evening in Ireland visiting a pub or two.  These pubs differ in character, but all reflect the generous and friendly local culture, and many offer live music.

At a pub in Killarney, I was chatting with this fiddler during a break between sets and made this portrait using natural light with a fast portrait lens, a wide aperture, and a high ISO.  Buy this photo

My essential portrait lens:

We were fortunate to stay two nights in Killarney at the wonderful Lake Hotel.  The hotel grounds include the ruins of an ancient castle situated on a lake with mountains behind.  During breakfast on our second morning, I noticed the cloud cover had lifted but there was still mist hanging on the side of the hills around the lake.  I ran up to our room, grabbed my thirty pounds of camera gear, and rushed outside to capture the ruins with the mist enshrouding the lake and mountains.

There was no time to set up a tripod as the warming sun was burning away the magical mist on the lake, so I shot this image handheld.  Buy this photo

Our final day’s hike was the beautiful Wild Atlantic Way from Ventry to Dunquin.  The lovely views of the Atlantic are punctuated with green fields dotted with odd “beehive huts,” some dating back to the Neolithic Period.
To make this landscape incorporating ancient stone beehive huts and walls, I shot down across the fields to the sea, being sure to keep the horizon level.  Buy this photo

The picturesque Blasket Islands were home to a community of Irish-speaking farmer-fishermen until they were forced to evacuate in 1953.  This is one of Ireland’s most gorgeous stretches of coastline, captured here using a wide-angle lens with polarizer.  Rotate the filter until the sky is dark and dramatic.  Buy this photo

I hope this post inspires you to hike and photograph in this gorgeous region.  Expect some wet weather nearly every day, and prepare accordingly to protect yourself and your camera gear.  You’ll be richly rewarded with expansive views of some of the world’s greenest and loveliest vistas!

Have you visited southwestern Ireland?  What were your most memorable experiences?  Please share your thoughts here.

Want to see posts on other travel photography destinations?  Find them all here: Posts on Destinations.

The Camera Eats First [Encore Publication]: How to make delicious images of local food specialties

A big part of the joy of travel is learning about the local food and drink.  For the travel photographer, local culinary specialties represent a cornucopia of image possibilities.  In this post, we’ll look at some food images and discuss a few tips and tricks to make delectable photos of the victuals we meet while traveling.  Warning: Do not read this post while hungry.

When photographing plated food, it’s best to get in close.  Shoot straight down or at a slightly oblique angle, and always check your background to ensure it is as uncluttered as possible.  Be aware of your focal point and depth of field (how much of the image is in focus) so that the most important part(s) of your image are sharp.

For this photo of a cheese plate in Burgundy, France, I got in close to the subject and chose a small aperture to ensure all the different cheeses were sharply in focus.  Buy this photo

Don’t forget that  specialty drinks are also a big part of local culture.  For example, in Argentina the deep love of mate (pronounced MAH-tay), a local infusion, becomes almost a religious practice.  This image of the mate service engages all the senses with its bright colors, contrasting textures, and suggestion of the smell and taste of the drink. To capture a sense of the Argentinian obsession with mate, I shot this image of the serving of the drink with all its components.  I wanted to include some of the environment around the mate tray as well.  The scene was lit with natural light, which further saturated the bright colors.

Argentina’s national obsession, mate.  Buy this photo

Always be on the lookout for local dishes that are unusual or exotic to our own sensibilities.  This image of the local Peruvian specialty cuy, or guinea pig, has sold well on American and European stock photography sites because the main ingredient is so unfamiliar to our palettes.  I love the saturated colors and the humor inherent in the guinea pigs holding peppers in their mouths.  The ocher wall makes a lovely background to offset the colors of the dish.  To capture this image of Peruvian cuy served during a home-hosted lunch, I got in close as the hostess held up her dish, ensuring that the ocher wall behind was all that was visible in the background.  I chose a wide aperture to slightly blur one of the guinea pigs and the wall.  I used natural lighting with just a kiss of off-camera flash to accentuate the highlights.

 Cuy (guinea pig) is a Peruvian delicacy.  Buy this photo

Sometimes it is the ingredients rather than the final dish that are most interesting.  While on a shore excursion on the Greek island of Rhodes, my family saw these beautiful octopuses hanging to dry in the sun.  After photographing them, we ordered a plate of grilled octopus.  We very nearly missed the sailing of our ship, as the taverna’s cook took her time to grill the dish, but it was absolutely worth it!

Obviously, natural light was the way to go with this image.  I wanted to get in close, but not too tight, so that the lovely Rhodes scenery would be partly visible behind the drying octopus.  I used a medium-wide aperture to slightly soften the background.  Buy this photo

What’s even better than food images?  Portraits of local people making or serving the food!  Here’s a shot of a server holding up a tray of Istanbul’s best baklava.  The background is a bit cluttered, but I like this image for its blending of the beautiful dessert tray with the pride of the man serving it.

Often a street vendor, cook, or restaurant server will be reluctant to have their portrait made but will be happy to pose with their wares.  For this portrait of an Istanbul baklava server, I chose a wide-angle lens and got in very close to the food tray to emphasize the baklava while including the server in the composition.  Just natural light and balanced fill flash were used as lighting.  Buy this photo

Street markets are a wonderful source of travel images.  They tend to be bright, colorful, exotic, and characteristic of the location.  Be aware that some vendors will expect you to buy something if you want to photograph their wares.

I like the contrasting colors in this shot of Istanbul’s ancient Spice Market.  Buy this photo

Nearly every culture around the world has its own version of barbecue, and in my broad and diverse travel experience, it’s all good.  Here’s a photo of whole branzino (Mediterranean sea bass) fish being grilled topside by the captain of our small wooden sailing ship on the Turquoise Coast of Turkey.  It was nearly completely dark, so I lit this image using light from the burning coals and a touch of flash.  A relatively high ISO was required to balance the low natural light with the need for a small enough aperture to keep the whole subject in focus.

Whole fish on the grill aboard a gulet yacht in Turkey.  Buy this photo

Sometimes a local cuisine is all about diversity, such as the Dutch-Indonesian specialty rijsttafel (rice table).  Some presentations of rijsttafel in Amsterdam involve over a hundred different tiny plates, each containing a different food preparation.  To capture this tapestry of tastes, I stood on the bench and shot obliquely onto the table top, including as much of the spread as I could.

Indonesian rijsttafel served in Amsterdam.  Note that in restaurants at night we have little or no control over the artificial lighting, which can sometimes lead to an unnatural color cast on the food.  Shoot in RAW format so you can adjust the color balance during post-processing when you get home.  Buy this photo

I grew up in New England, and after traveling to more than 100 countries around the world I can say with authority that few meals can beat a good old-fashioned New England clambake with lobster.  To capture this iconic image, I shot up close and directly toward the lobster, using a normal lens with a medium aperture.  This allowed most of the meal to be sharply focused, but with some falloff in sharpness toward the edges in order to emphasize the Maine event.  The contrasting colors between lobster, clams, and corn make for a pleasing composition.

A lobster clambake in Maine showcases the contrasting colors and textures of this delicious meal.  Buy this photo

As a parting shot, I’ll leave you with this image of French haute cuisine.  The gloriously prepared and plated fish course at Paul Bocuse’s three-Michelin-starred restaurant made a fun subject because it is whimsical and artistic at the same time.  The available lighting was soft and subdued for artificial light, so no flash was needed.  I shot some closer compositions of just the plate, but preferred this one with some of the table setting included.

Bon appétit!  Buy this photo

What are your favorite food photos?  Do you have tips on how to make food images really pop?  Please share your comments.