Focus on Asha Stanford Holi [Encore Publication] : Capturing the colors, joy, and exuberance of an iconic Indian celebration held close to home

I love all aspects of travel photography, but the moments I truly live for are when I have the opportunity to experience and to capture images of the world’s most exuberant celebrations.  The iconic Indian festival of Holi, celebrated annually throughout India in huge cities and small villages alike, is one of my absolute favorites.  This year I had the chance to shoot a large and vibrant Holi celebration without the need to fly for 30 hours to get to India.  As an official photographer for Asha Stanford’s Holi festival, I got to document all the color, joy, and revelry of a large, world-class Holi event, all within 20 minutes drive from my home.  In today’s post, I share some favorite images from the event along with some brief remarks about how each was made.  Note that all of these images and many more are available to view and purchase on my website–get there by clicking on any of the images here.

With colored powder and often sheets of water flying everywhere, Holi is by design a messy and mischievous celebration.  Protect yourself when “playing Holi” by wearing clothes you can part with after the event and by covering your camera body and lens with a rain sleeve.  Here’s the one I use, which is excellent–inexpensive, easy to use and very protective of the gear:

Note that even when using a high-quality rain cover like this one, the front end of the lens is still exposed, so be sure to protect your lens’ front element with a UV or Haze filter.  And to be extra safe, I brought only one camera body and only a single lens, which was an inexpensive but versatile “walk-around” travel zoom lens.

Crowded festivals, by their nature, have cluttered backgrounds.  When making portraits in such environments, I do try to reduce the clutter by choosing the background carefully, but capturing the moment is more important and in any case, it is futile trying to wait for completely uncluttered backgrounds.  In post-processing, some of the clutter can be minimized through careful cropping and the application of just a bit of post-crop vignetting.  Use too much vignetting, though, and the image begins to take on an artificial appearance.

To capture fast action, you obviously want to choose a fast shutter speed.  That’s no problem when shooting in bright sunshine such as we had during this Holi celebration.  Still, I choose a moderately high ISO (400) to ensure I could retain fast shutter speeds even when in the shade or when using a small aperture to maximize depth-of-field.

Get in close!  Portraits often are most effective when they emphasize a specific detail rather than show the entire environment.  To further emphasize that specific detail, try to select a wide aperture (low f-stop number) in order to obtain shallow depth-of-field.  I had only a relatively slow “walk-around” zoom lens with me, so for close-up portraits I shot wide open at f/4.5–not great for isolating the subject, but better than shooting at an even smaller aperture.  In typically less adverse environments, I would be shooting with a much faster portrait lens, most likely my favorite 85mm f/1.8 prime lens:


When your subject is backlit (the main light coming from behind), as is often the case when shooting outdoors in bright sunlight, be sure to choose exposure based on the main subject.  Here I used my camera’s spot metering mode to set the exposure based on the clothing of one of the people in the group, but it’s also fine to get your exposure by zooming in or walking up close to the group and then to set that exposure manually on your camera.  You can also use your camera’s exposure compensation control to dial up the automatic exposure by about 1.5 or 2 stops, but I recommend not trying to use automatic exposure modes in general.  If you use the exposure your camera’s auto mode chooses for you and your subject is strongly backlit, your image will be underexposed by typically 1.5-2 stops or even more.

I’m always on the lookout for great moments to capture.  When I saw this dad playing with his young daughter, I composed the frame around the two of them and started shooting continuously so as to get a shot at just the right instant.  During post-processing, I cropped the image to show only the portion that portrays the thrill and joy of the playful pair.

Careful composition is always important in photography, but it’s easy to forget this point during the heat of the moment when shooting in bustling and chaotic environments.  To compose this image, I framed it to get the splash of color from the two friends’ “high-five” moment right in front of the big sign boldly pronouncing, “COLOR”.  That’s a Holi moment.

One of the keys to successfully documenting huge festivals is finding the small, intimate moments.  Big, sweeping crowd shots showing chaotic motion are important to document, but it’s capturing those small interpersonal interactions that really make your portfolio shine.  I used as wide an aperture as I had available in order to cast the busy background in soft focus.

Performances are often a part of festivals, and these are wonderful fun to capture.  I’ve posted many times on the techniques required to make great images of performing arts, so I won’t repeat myself here.  Just be sure to compose appropriately, set the exposure correctly (challenging to do in direct sunlight), and shoot lots of images to be sure of capturing a few excellent ones.

The climactic moment of the Holi celebration comes near the end, when all the revelers simultaneous throw handfuls of colored powder high into the air.  Be ready for these big moments by preparing all your gear and composing all elements of the shot beforehand.  

To capture the sweeping scale of really big celebrations, sometimes it helps to make a panoramic image.  Some cameras can do this automatically in-the-camera, but I find those images don’t turn out very well, so I make panoramas manually by shooting a series of overlapping images that span the scene.  In theory this is quite simple.  Just take a series of photos starting from the far left side of the scene, then panning the camera a little bit to the right so the next photo just overlaps with the previous one, and so on until you reach the far right side of the scene.  You then use software such as Lightroom or Photoshop to stitch the separate, overlapping photos together into a single sweeping image.  In practice, this can be quite difficult.  I find the software often takes an extremely long time to process a panoramic image and sometimes even crashes while attempting to do so.  If you have a more powerful computer than I have, you may have an easier time with this process.  

Parting shot: When I see a great subject for a portrait, I will interact with him or her, get to know them a bit, then begin shooting with their permission.  Over time and in the heat of a celebration, they will forget I’m even there, but the resulting images will be better for the time spent interacting with the person first.

I hope you’ve enjoyed this photo essay and brief notes about how to shoot festivals and celebrations.  Whether we’re close to home or halfway around the world, such festive gatherings truly define the culture of the celebrants and make amazing photographic subjects.  If you’d like to read more posts about what to shoot while traveling or near home, find them all here: Posts about what to shoot.

What are your favorite celebrations to shoot, and how do you capture images there?  Please share your thoughts here!


“Boundless Theft in Limited Professions” ~Shakespeare [Encore Publication]: What to do if your images are being stolen

Disclaimer: I am not an attorney and cannot dispense legal advice.  In this post I am simply sharing as-is my own experiences of learning about unauthorized use of my images and taking steps to correct this situation.  You should consult with a qualified lawyer if you are facing theft of your intellectual property.

I recently traveled to London to receive an award and attend the opening of the Travel Photographer of the Year winners exhibition.  When I returned from the trip, I performed a Google image search on my winning photograph to see if it had garnered more international press coverage in the wake of the show’s opening.  The good news: there were dozens of new articles featuring my winning image, and hundreds of articles in total, spanning dozens of countries around the world.  The bad news: I learned that my image was being used without my permission on dozens of sites.  A winner of Travel Photographer of the Year and shortlisted for National Geographic’s Travel Photography Awards, this particular image is an important asset in my professional photography portfolio.  And while I don’t mind it being shared without authorization if it includes an attribution to me as the photographer, or at least includes my watermark, there were several quite egregious cases of my work literally being stolen.  In some of these cases, other people were trying to pass off my image as their own, one fellow even going to the point of claiming he had shot the photo “with a black-and-white camera.”  In a couple of other cases, my valuable intellectual property was being made available for download as a wallpaper image to the general public, without my permission.  Every one of these illegal downloads takes away the opportunity for me to sell the image on my own site or to earn a royalty through the image being sold by my authorized agents.

It has never been easier to steal intellectual property–in the form of photos, videos, or the written word–than in today’s interconnected digital world.  While it can be good for an artist’s reputation and business to have her or his work “go viral” on the web, the benefits only accrue when the work is attributed to the artist who created it.  If other people are passing the work off as their own or distributing it widely to others without authorization, then we have a problem.

After consulting with an intellectual property attorney (who also happens to be my brother), I realized that I need to act promptly to protect my rights.  I have started the process of identifying the worst cases of theft of my image and taking steps to stop the unauthorized use.  If you also have had your photographs used without your permission, here are some steps you may consider taking:

  1. Search the web for all uses of your image and identify the sites where it is being used without authorization: The remarkable technology to search the vast Internet for specific groupings of pixels that resemble your image is actually very easy to use.  Just right-click on your image and select “Search Google for image” from the drop-down menu.  You’ll see a listing of all likely matches to your image throughout the web.  From this listing, select the uses that are not authorized.  My image, for example, matched several hundred occurrences on the web, but most of these were valid press outlets reporting on the image’s success with Travel Photographer of the Year and National Geographic Travel Photography Awards.  I studied the list of sites to find the ones that were using my image without permission, and I further pared down this list to focus only on sites that were using my image without attribution to me and without my watermark.
  2. Identify the owners of the offending domains: Using a who-is directory search, you can often find contact information for the registered owner of the domain that is using your work illegally.  You can first try https://www.whois.net/, although other directory lookup services may provide better information.  Enter the domain (for example, reddit.com) from the URL of the site where your image is being misused, and who-is will provide some information on the domain owner.  You’re looking for the contact info about the owner so that you can complain about the abuse.  Look for a field like this one: “Registrar Abuse Contact Email: abusecomplaints@markmonitor.com”.
  3. Write and send DMCA Takedown Requests to the owners of the offending sites: The Digital Millennium Copyright Act, or DMCA, is a US copyright law that also provides some protection of intellectual property rights in certain other countries.  It provides for copyright owners (including photographers) to demand an unauthorized use of their property be taken down.  There is a standardized form called a DMCA Takedown Request that can be used to notify the owner of a site that they are using work you own without your permission, and to insist they remove promptly remove the infringement from their site.  There are numerous locations on the web where you can find sample Takedown Request forms.  Tailor one of these sample forms with your own info, the info about your property, and the location of the infringement of your copyright.  You will need to sign (electronically or physically) the form, including a statement that you swear under penalty of perjury that you own the copyright of the work in question.
  4. Follow up to ensure compliance with your DMCA Takedown Request: While the owner of the infringing site or domain is obligated to promptly remove the infringing post, frequently they may not do so in a timely manner, or they may ignore your request completely.  Two days after filing seven takedown requests, I have received only two responses, and both of them were from ISPs who claimed they were not responsible for the content their subscribers posted (I have since identified the actual owners of the infringing sites and directly sent them new takedown requests).  I plan to continue to follow up over the coming weeks to ensure compliance.
  5. Consider further legal action if required: So far, I have not asked for legal damages from the infringing site owners, but if they disregard my takedown requests and continue to either pass off my work as their own or propagate my photo in bulk to the general public, then I may choose to sue them for damages.  I will publish a followup to this post to share how this situation progresses, but I do want readers to be aware that there are further actions that can be taken beyond a DMCA Takedown Request.
  6. Consider registering your most valuable images: A photograph, like other forms of intellectual property, may be registered with the US Copyright Office at https://www.copyright.gov/.  Doing so it not required to initiate a DMCA Takedown Request, but having your copyright registered for your most valuable images may offer you more protection and give you standing for further legal action.

I hope that by sharing my own experiences with having my images stolen, readers may gain some context on the problem.  In this digital and interconnected era, most working photographers will likely see at least a few of their images used without permission.  We all need to be aware of the situation and how to deal with it.  Please consult with a qualified lawyer about the specifics of your own situation.  Nothing in this post should be interpreted as legal advice.

Have you had your images used without authorization?  Please share your experiences here.

What to read other posts about sharing your images?  Find them all here: Posts on Sharing Images.


Focus on Iceland [Encore Publication]: A world-class landscape photography destination

Iconic Icelandic scene: The lovely Gullfoss Waterfall can be viewed from three different levels to obtain different perspectives on these dramatic falls.  To capture this image, I climbed to the top level, secured the camera and wide-angle lens on a sturdy tripod, and attached a neutral-density filter to allow a long exposure even in the harsh midday lighting.  I shot a series of seven exposures, each one stop apart, and then combined them into a single image using image-processing software.  This technique, called High Dynamic Range (or HDR), allows a single image to show a wide range of tonal values from extremely dark to extremely bright. 

My two daughters, my wife, and I recently returned from an inspiring two-week adventure traveling through Iceland.  Our itinerary took us from the main city of Reykjavik to the scenic Snaefellsness Peninsula’s volcanic landscape, then up to Iceland’s far north just below the Arctic Circle, down to the southern coast dotted with geothermal fields and spectacular waterfalls, and ending with a visit to Iceland’s premier attraction, the Blue Lagoon.  Throughout this adventure we had the opportunity to meet and learn about Iceland’s Nordic culture and Viking roots from Icelanders of all backgrounds and trades.  Iceland is a photographer’s dream, filled with glorious landscapes, otherworldly natural features, and friendly people.

Our Icelandic adventure began in the largest city, Reykjavik.  While small relative to other major world capitals, Reykjavik is modern, well-functioning, and ambitious in its development.  Its harbor-side location lends the city a strong measure of natural beauty.

Reykjavik’s new Harpa Concert Hall is Iceland’s premier home for the arts.  The brightly colored glass façade of the building was inspired by Iceland’s volcanic landscape.  While it’s tempting in architectural photography to use a wide-angle lens in order to include the entire building, I find it’s often more interesting to use a moderate telephoto lens in order to emphasize just a part of the whole.  This abstract image takes the viewer’s eye along the multicolored façade with its varied patterns of texture and reflections.

A big part of the joy of travel photography is using our camera as a tool to get to know the people we meet.  While we shared a city bus ride with a group of schoolkids out on a field trip to visit the National Museum, this little boy and I were playing a game of virtual peekaboo, resulting in this unorthodox portrait.

Stunning view over Reykjavik and its harbor from the top of the tower at Hallgrimskirkja Church.  A polarizing filter can help darken skies and enhance the sense of drama in clouds and water. 

Departing Reykjavik for the Snaefellsnes Peninsula, we traversed a fabled landscape first discovered by the early Viking settlers.

A short hike took us to the summit of Mount Helgafell, a sacred hill about 250 feet high.  When composing landscape photos, keep in mind two useful tools, the Rule of Thirds, and the principle of Leading Lines.  Both are used in this image.  The Rule of Thirds suggests placing key elements of the image along the lines that cut 1/3 and 2/3 of the way through the frame in both the horizontal and vertical dimensions.  And Leading Lines draw the viewer’s eye across the frame to rest on the most important spots.

The coastal town of Stykkisholmur sits on the coast along the scenic Snaefellsnes Peninsula.  There we came across this curious house with windows at street level and a doorway at the second story level.  Often the most memorable photos are made of the strange places we happen upon during our wanderings.

During a visit to a horse farm, we saw a demonstration of all five gaits (one more than other breeds) that Icelandic horses are capable of.  So smooth is the Icelandic horse’s cantor that you could, if you like, enjoy a mug of beer while riding.

Even a dreadful rain storm couldn’t spoil images of Godafoss Waterfall.  Meaning “waterfall of the pagan gods,” the falls received their name when the leader of Iceland’s parliament decided that the country should adopt Christianity as the official religion in AD 1000.  Informally, Icelanders were still allowed to practice pagan rites in private, but the head of parliament made a symbolic gesture of throwing most of his pagan statues into the falls.  Waterfalls are wonderful subjects for landscape photography, but they should be treated with care and patience.  A sturdy tripod is essential for holding the camera steady during the long exposures required to lend a dramatic blur to the turbulent water.  Here I fitted the camera with a wide-angle lens and a neutral-density filter, which blocks out most of the light and allows a slow shutter speed even in broad daylight.  The camera was mounted on a tripod and I used a cable release to trigger the shutter in order to avoid shaking the camera.  During post-processing I decided to convert this image to black-and-white in order to remove the distraction of the color and really emphasize the dramatic effect of the roiling water.

Sometimes we get the best photos by turning our lens on small and easily overlooked features.  The volcanic soil at Lake Myvatn makes a fertile habitat for colorful lichens.  There were hundreds of other visitors present during our visit to Lake Myvatn, but nobody else noticed the vibrant natural display just below our feet.  The amazing palette of colors in this image is entirely natural. 

This abstract image shows the facade of the Lutheran church at the Laufas turf houses.  I was struck by the textures and patterns of the architecture, so I used a telephoto lens to crop the composition so as to show only a part of the building, then converted to black-and-white during post-processing to simplify the presentation.

The Laufas turf houses were built over a period of several hundred years for wealthy families, and included all the comforts of contemporary living.  When photographing architecture with a wide-angle lens, it’s important to keep the camera level so as to avoid excessive distortion of the vertical lines. 

Leaving behind the lovely Snaefellsnes Peninsula, we headed north to reach Akureyri, Iceland’s second-largest city located just a few miles below the Arctic Circle.

In Akureyri, just a few miles below the Arctic Circle, we enjoyed the warmth of a wonderful home-hosted dinner.  Our hosts were both professional musicians, and they performed an impromptu concert for us after dinner.

Suited up for the cold and wind, our group boarded a vessel for a whale watching excursion in Dalvik.  I made this portrait of our on-board naturalist, a true native Icelander, using a moderate telephoto lens.

There are so many wonderful subjects to capture during our travels that it’s important to remember to shoot a few of ourselves.  Because our daughters, in their early 20s, don’t get to travel with us very often, we cherish the few photos we have featuring all of us together as a family.  To grab this fun shot of our human family interacting with a family of trolls, I configured all of the camera’s settings before handing the camera to a fellow traveler in our group who triggered the shutter.

A short flight from Iceland’s far north back down to Reykjavik positions us to explore the famed Golden Circle, a road connecting Thingvellir National Park, Geysir geothermal region, and Gullfoss Waterfall.

At Thingvellir National Park, we hiked along the rift zone where two tectonic plates (the Eurasian and the North American) are drifting apart.  It’s hard to capture the majesty of dramatic and varied geological features, so I like to combine several layers of landforms in the image.  From top to bottom, this composition captures the sky, the rocky rift zone, and the ropey lava in the foreground.

Visiting the Geysir geothermal area, from which all geysers derive their name.  Along with Yellowstone’s Old Faithful and Calistoga’s geyser, Iceland’s Strokkur is one of just a few regularly erupting geysers in the world.  A hard truth in travel photography is that we can’t control the weather and often we can’t control the time of day when we visit certain locations, so we have to make do with what we’re given.  To make the best photo possible given the poor contrast between the geyser’s eruption and the cloudy sky, I stepped back several hundred yards to include the observers, the dramatic clouds, and the mountainous background in the composition.

An excursion via super truck (a large four-wheel drive vehicle with the tires partly deflated) afforded us the opportunity to explore the otherwise inaccessible glacial terrain, including hiking into this otherworldly ice cave.

My daughters, who only recently attained legal drinking age, enjoy a shot of local Icelandic vodka chilled with glacial ice during our hike into an ice cave.  In the dim lighting inside the cave, use of a flash is required to light a portrait, but to avoid firing the flash too close to the axis of the lens, I attached a flash unit to my camera via a remote flash cord.  This simple and inexpensive accessory makes a huge difference when using flash lighting.

Our ATV tour took us off-road across the volcanic landscape of the Reykjanes Peninsula.

On our last full day in Iceland before flying back home, we visited the legendary Blue Lagoon spa near Reykjavik.  Crowded, expensive, and touristy, it is nonetheless supremely relaxing and lots of fun.  This spa is also a very social place where it’s easy to meet—and photograph—visitors from all over the world.

The one site that nobody sets foot in Iceland without visiting is the Blue Lagoon.  During our time there, I made portraits of several visitors from different parts of the world.  It’s important to spend some time chatting with and getting to know your subject before making their portrait.  This practice is partly due to courtesy (it’s rude to shoot photos of people without their permission), but it also yields better images because your subject will relax and show you their true self after they get to know you.

All of the images appearing in this post and many more are available for viewing and purchase on my website here: Iceland photo gallery.

Have you traveled in Iceland?  Please share the most memorable aspects of your photographic journey in the comments box.

Want to read more posts about world-class travel photography destinations?  Find them all here: Posts about destinations.


Please Join Me for a Hands-on Portraiture Workshop: Learn to make beautiful portraits using natural light

Dear Readers,

If you’d like to learn how to make beautiful portraits using just natural light and a few simple techniques, then please join me for a 2-hour hands-on workshop/class that I’ll be teaching on Saturday, October 6. Held in a scenic location in Mountain View, CA, this class will cover the basics of techniques and tools, and then we’ll practice by shooting in the field with a wonderful model. Learn more or register for a session here: Kyle’s workshop on portraiture using natural light.

In today’s post I am sharing a few favorite images that we shot during a recent session of this workshop.  Working with our wonderful model Roxy, I walked students through the entire process of creating stunning headshots, full-body and action portraits, and environmental portraits, all using only natural light and with a minimum of gear, fuss, and bother.  Students learned how to configure their cameras, what lenses to choose for different portrait situations, where to shoot, how to pose and direct the model, how to use light modifiers (reflectors and diffusers), and much more.

Learning to capture flattering and eye-catching headshots is a basic requirement for portrait photography.

We will also learn to make full-body and action shots that bring out our subject’s true personality.

Always be on the lookout for special and playful moments.

I emphasize the artistic as well as the technical aspects of portrait photography.

Roxy really went the extra mile by climbing a tree wearing heels and a red dress!  In my hands-on portrait workshops, we will collaborate with fun and creative models.  Students will gain skills and a comfort level in directing models, even if they have never worked with a model previously.

You can see more details and book your place in the class here: Kyle’s workshop on portraiture using natural light.


Sneak Preview [Encore Publication]: Behind the scenes on my ongoing Human/Machine Dance Project

How does the human body move when interacting with artificial intelligence technologies? This is the question that my collaborator Carly Lave embarks on a year-long Fulbright grant to research. A talented dancer, choreographer, and scholar, Carly will present her research findings in visual form via a self-choreographed dance solo performance. I approached her to collaborate on a photography series informed by her research goals and artistry as a dancer. We explored several visual themes, each related to the timely question of how we humans will be transformed by increasing immersion into advanced technologies, including virtual reality, robotics, and interconnectivity. To complete this ongoing project, we will continue to collaborate across two continents during Carly’s research fellowship. Stay tuned!

In the meantime, I’d like to share a few early images from this work-in-process along with some words about how they were made.  It can be tricky to imagine a visual concept and realize it via photography, and all the more challenging when the concept is abstract like the ones Carly and I selected.  I’ll present four of our initial concepts, each illustrated with an image and a description of the techniques required to execute it.

  1. Virtual Reality Motion Study: Virtual meets reality as Carly’s body floats through the physical world while her motion is informed by her interactions with the virtual world playing inside her headset.This concept sounds simple but is quite difficult to execute photographically.  We wanted to capture Carly’s physical motion in the real world as she reacts to the experience of the VR world.  Images like these require a long time exposure (here about 15 seconds), which in turn necessitates shooting in a darkened photography studio.  I used a black backdrop and continuous LED lighting to illuminate Carly as she moved across the studio, with a single studio strobe light at the front right part of the set to capture her final pose at the end of the exposure.  The strobe was set to trigger as the camera’s shutter closed at the end of each shot (“rear curtain sync”).  Using this technique, Carly’s motion can be traced during the whole exposure but the vivid exposure is what we see last.  Considerable post-processing is then required to clean up the scene.
  2. Interconnectivity: Carly shared, “I found myself visualizing my body wrapped in cables coiled around my limbs and torso. I was thinking about the body in relation to embedded systems here, and how now all of our world is connected through cables either in the air or sea.”To shoot this visual concept, we used a dance studio with a mirrored wall.  Using different angles to obtain a variety of perspectives, I shot both Carly and her reflection as she improvised motion along the wall.  The technique conveys the impression of the interconnectedness between a human and a similar being across a network.  Post-processing was required to remove clutter and render the background as white.
  3. Human (de-)Evolution Series: A whimsical re-imagining of the classic ape-to-human evolution series, this montage asks us to consider whether technology contributes to or detracts from human evolution.This striking montage is actually quite straightforward to execute.  In a photography studio against a black backdrop, I shot images of Carly in each stage of the evolution series and then combined them using layers in Photoshop.
  4. Robotic Motion: Machines often perform the same tasks traditionally undertaken by humans, but the robot’s motion is constrained by its programming. How might the human dancer’s motion become similarly constrained if her movement is choreographed by programming instructions?For this concept, my job was fairly easy and Carly had to do the heavy lifting.  She choreographed movement indicative of robotic motion while I captured a series of images using a studio strobe light and a black fabric backdrop.

I hope this behind-the-scenes peek at my ongoing passion project will help inspire your own creative process.  It’s important to be personally and deeply invested in a project before you begin.  Select your partner(s) carefully and plan thoroughly.  Then the process becomes joyful and exhilarating as you begin to bring your concept to life!

Have you carried out a photography project?  Please share your key learnings–positive and otherwise–here!

Want to read more posts about what to photography while traveling or near home?  Find them all here: Posts about What to Shoot.


Chromatica App [Encore Publication]: Simple, intuitive, and affordable, this new iPhone camera control app is a winner

LR chromatica screenshot-

I’ve posted repeatedly about the importance of understanding how to take manual control of your camera in order to make images that are properly exposed and focused.  Whether you are using a professional DSLR, an advanced full-frame mirrorless ILC, a compact point-and-shoot, or the camera built into your smart phone, there is no way you will get consistently acceptable results if you leave the camera’s settings to its auto mode.  See this post for an overview: Post on Beyond the Auto Mode.

There are dozens of camera control apps available for the iPhone, and it can be confusing to figure out which one is right for you.  In the past, I’ve reviewed the following apps: Manual (see post on Manual app), ProCam 4 (see post on ProCam 4 app), and Camera Pixels (see post on Camera Pixels app).  In today’s post I offer a first look at a new app, Chromatica, from the same company that developed Camera Pixels.

Chromatica, priced at an appealing $2.99 on the Apple App Store, is aimed for a middle market of photographers who want more manual control than the camera’s native (built-in) app can provide but without the complexity of more enthusiast-level apps, such as Camera Pixels or ProCam 5 (the successor to ProCam 4).  It competes with other mid-level camera control apps such as Manual, though it is priced at $1 less.  My initial testing of the new Chromatica app found it to be a very worthy tool for most users to take control of their iPhone photography without the expense or complexity of the more advanced apps.  Chromatica has a very simple and intuitive interface, offers the ability to shoot in RAW mode for much higher quality images, and provides the basic required functionality to take manual control over your camera.  It doesn’t offer the full suite of bells and whistles found in the more sophisticated apps, but it’s still a powerful tool that makes the iPhone camera act much more like a DSLR or mirrorless camera while providing a clean and simple user interface.

Chromatica’s features include the ability to shoot in either auto or one of several manual modes such as Shutter Priority and ISO Priority.  It’s quite easy to realize which mode you’re in and to return to auto mode when you’re done taking manual control over the camera; the same cannot be said of some other camera control apps I’ve used.  Another essential feature is the ability to separate the exposure and focus points, so that exposure can be set based on one part of the image while focus is set on another part.  There doesn’t seem to be any user manual or in-app help function to explain this feature, so here’s how it works: simply touch the screen with two fingers and you’ll see a circle and a square appear.  Move the circle to the point in the image where you want to set exposure, and move the square to the point where you want to set focus.  Other useful features include an exposure histogram to show you the range of brightness levels in your shot, and exposure clipping to flag the areas of the image that are too bright or too dim.  Chromatica includes full optical stabilization in RAW mode as well as focus peaking to aid in manual focus operations.

What you won’t find in Chromatica, but for most photo-making purposes won’t miss, are advanced image-editing tools (instead, find these in your favorite standalone image editing software such as Lightroom or Photoshop), exposure bracketing, and long-exposure camera control modes.  Other more sophisticated apps do offer these and more features, but at the expense of higher cost and greater complexity.

In short, Chromatica does exactly what it’s designed to do: make it simple and quick to manually control your phone’s camera and make the most of it’s capabilities.  For most casual and enthusiast photographers, this is good enough when using a phone’s camera.  I typically shoot with professional DSLR gear costing many thousands of dollars when I need pro-level results, but I love the convenience and ease of grabbing some quick shots with my phone, and in the future I am likely to use Chromatica to control the phone’s camera when it’s a straightforward capture.  I’ll continue to use Camera Pixels and ProCam 5 when I require more advanced features to control the phone.

Here’s the link to the Chromatica app on the Apple App Store: Chromatica app.

For reference, here are some popular iPhone camera control apps along with their price and brief notes:

  • Native iOS Camera app (Free): Comes built-in with the iPhone.  Does not allow RAW capture, manual control of the camera, or any advanced features, but does allow the separation of focus and exposure points.
  • Camera Pixels Lite (Free): An entry-level version of Camera Pixels that offers basic camera control features but does not allow RAW capture.
  • Manual ($3.99): Another entry-level app that is really starting to show its age.  Offers basic camera control features including RAW capture, but lacks more advanced features and is difficult to use.
  • Chromatica ($2.99): A great value and very easy to use, this app offers camera control features, RAW capture, and a few more advanced features.
  • Camera Pixels ($3.99): A powerful manual control app with a very wide range of features, it remains quite intuitive to use.
  • ProCam 5 ($5.99): A very powerful app with a wide range of camera control features plus more sophisticated functionality typically associated with DSLRs and mirrorless cameras.  Also includes a full suite of image editing tools.  It can be difficult to use.  Note: I’ve only tested the older ProCam 4.
  • Pro Camera ($5.99): A popular higher-end app with a full range of features.  Note: I’ve not yet tested this app.


What app do you use to control your phone’s camera?  What do you like and dislike about it?  Please share your thoughts here.

Want to read more posts about photography gear?  Find them all here: Posts on Gear.


Purple Mountain’s Majesty [Encore Publication]: Including mountains in your images

Whether we’re traveling halfway around the world or just a few miles from home, we travel photographers get excited about including mountains in our images.  Mountainous landscapes can provide so many of the most basic elements we look for in a great photograph: beautiful light, compelling composition, exquisite textures, and an authentic sense of place.  In this post we will cover some of the fundamental techniques for capturing great images of mountains.

As with most kinds of photography, it all begins with beautiful light.  Whenever possible, try to shoot mountain landscapes near sunrise or sunset, or when something interesting is happening with the weather conditions.  The quality of light tends to be best during these times.  You’re more likely to capture lovely colors on the peaks and in the sky, and the image is more apt to give a sense of depth and drama than during the middle hours of the day.

Shooting from the deck at our lodge in Torres del Paine National Park in Chile, I had to miss most of an excellent dinner to capture Lago Grey with its mountains and glaciers during the “golden hour” just before sunset.  The lovely interplay of colors and textures, from the sky to the peaks and to the icebergs and water, made the resulting image worth the effort.  Buy this photo

When shooting mountain landscapes, it is usually a good idea to bracket your exposure.  With the camera fixed on a sturdy tripod, compose your scene and then shoot a series of images, each with a slightly different exposure.  Many cameras have settings to automate the process of bracketing.  The two main benefits of exposure bracketing are raising the odds you’ll have a perfectly exposed image and allowing you to create a high dynamic range (HDR) image from several different exposures.  See this post for a refresher on how to use exposure bracketing: Post on Exposure Bracketing.

This HDR image of Yosemite National Park’s peaks reflected in the Merced River was created from a series of different exposures made using bracketing.  The camera was mounted on a tripod and I made a series of seven shots, each one exposed 2/3 of a stop brighter than the previous one.  Buy this photo

I’m often asked how to make mountain images that really “pop”.  Why are some photographs of mountain landscapes so dynamic and compelling, with intriguing contrast between the peaks and the sky?  Of course, there are many elements that go into the making of an excellent image, but there is a “secret sauce” that can dramatically improve many mountain images: the polarizing filter.  Properly using a circular polarizing filter on your lens can emphasize the contrasting parts of the rock, snow, and/or ice on the mountains and can also add drama to the clouds and sky.  Every image shown in this post was made with a polarizer.  Be sure to adjust the filter by turning its outer ring until you see the effect you want to achieve.  Usually this involves rotating the filter’s ring until you see the maximum polarizing effect possible and then dialing it back a little (or a lot) until you achieve a balance between added drama and a natural look.  Experience helps here.  Check out this post on the use of filters, including polarizers: Post on Filters.

This image of a rare lenticular cloud forming on the summit of Osorno Volcano in Argentinian Patagonia was made using a polarizing filter to bring out the cloud formation and darken the sky.  Buy this photo

Mountain colors can be glorious, but also consider converting some mountain images to black-and-white during post-processing.  Rendering in black-and-white can emphasize the textures on the crags and peaks of a mountain and can also lend drama to the foreground and sky.  Shots captured with a polarizing filter will usually result in more intriguing monochrome images.  When converting to black-and-white during post-processing, be sure to play around with the contrast and individual color channel sliders until you achieve the result you want.  For more info on black-and-white photography, check out this post: Post on Black and White Photography.

This shot of a rock dome in Yosemite’s Tuolumne Meadows area is striking when rendered in black-and-white.  Buy this photo

Sometimes when we’re traveling we don’t have the option of returning to a gorgeous mountain location when the lighting is perfect.  Don’t let the flat lighting of a bright mid-day sun stop you from shooting the local peaks.  Great images can be made at any time of day.  Just make sure to follow the main techniques outlined in this post: compose well, use a polarizing filter, and bracket your exposure.

Patagonian peaks captured on our way out of Torres del Paine National Park.  Because we didn’t have the option of returning at the golden hour, I made this image in the harsh mid-day sun.  With careful attention to composition and the use of a polarizing filter and exposure bracketing, I was able to make a favorite image in spite of the less than perfect lighting conditions.  Buy this photo

What are your go-to methods when shooting mountain scenery?  What are your favorite mountain locations?  Please share your thoughts in the comment box here.

Want to see more posts about photographic techniques?  Find them all here: Posts on Techniques.


Capturing a Sense of Place: A case study on how to integrate the natural surroundings into a creative photo shoot

Whether halfway around the world or in my own backyard, I strive to capture a strong sense of place in my work.  Most often we associate “sense of place” with images of indigenous people living close to the land, but this sensibility can be extended to incorporate the local natural surroundings into any creative images.  As I collaborate with local people close to my home in the San Francisco Bay Area, I’m always seeking ways to integrate the intense beauty of our landscapes into my work.  Today’s post is a case study on this theme based on a recent shoot I did with a favorite movement practitioner, mia.

mia is an amazingly intuitive artist who improvises her movement by sensing the energy of the space around her, so we chose a glorious and deserted stretch of the central California coastline near sunset for our shoot.  We built in plenty of time, more than two hours, and I gave mia lots of space to move with very little direction on my part.  I had all my gear ready and was wearing beach attire myself so I could just let her create her art while following her and capturing her expressive movement using my own creative approach.

In the following images, presented as a photo essay with just brief captions explaining how they were made, I share the results of this collaboration.  You can view or purchase all of these images and many more in this gallery: mia beach shoot photo gallery.

My gear was simple: two camera bodies, one with a fast prime normal lens (and occasionally with a fast prime portrait lens), the other with a wide-angle zoom lens.  Obviously, these optics were selected so that I could alternate between capturing mia up close and documenting her motion within the broader environment.  All images were made with natural light only and were handheld.  A general piece of advice is to shoot lots of frames to ensure capturing your model during the moments when they express just the right sensibility, gesture, or emotion.  Memory card storage space is cheap and abundant, so always shoot more images than you think you need.

Using the wide-angle lens, I captured images of mia interacting with the space around her.  This “environmental portrait” technique helps create a strong sense of place.

Even with the glorious color palette of a California coastline near sunset, there were times I chose to render the images in black-and-white to achieve a timeless graphics art look.

Environmental portraits, full-body shots, and head shots are not the only options when shooting creative portraits.  Here I chose to capture only mia’s legs as she traced a circle in the wet sand.  Sometimes the part can be more interesting than the whole.

Shooting from a low angle just above the water, I captured a powerful vision of mia interacting with the ocean.  Obviously one has to be careful of one’s gear when choosing to shoot so close to salt water, but I love the resulting image made from this perspective.

Not every image needs to be tack sharp.  I like to create a sense of motion by using a slow shutter speed to blur the movement.  Here I was able to achieve a slow enough shutter speed by using my camera’s slowest native ISO setting along with a very small aperture setting, but sometimes in very bright light a neutral density filter has to be used.

Note that when shooting a backlit subject it is crucial to choose an exposure based on the light coming from the model rather than allowing your camera’s meter to choose the exposure for you (unless you are trying to create a silhouette).  Two techniques suitable for this situation are spot-metering on your subject’s body or dialing in at least two stops of exposure compensation.

As sunset approached, I shot a series of images using both wide-angle and closeup perspectives.  This shot nicely captures mia from a medium distance, close enough to see some detail in her expression while far enough away to include some sense of place.

The setting sun can evoke very powerful emotions.  It can be risky to include the sun in your images, so tread carefully.  Careless shooting into the sun can cause permanent damage to both the photographer’s eyes and the camera’s sensor.  This image was made moments before sunset under conditions I assessed to be safe, but if in doubt do not ever shoot into the sun.  

A wide-angle capture suggests mia’s celebratory motion as the sun sets, but she appears relatively small within this awe-inspiring natural environment.

At the moment of sunset, a parting shot is made where mia bids farewell to the day.  I chose an exposure partway between silhouette and spot-metering on mia’s body so as to show some detail on her expression while allowing the ocean and sky to shine.

I hope you’ve found these images to be inspiring and the associated tips to be helpful.  Now go out in your own neck of the woods make some images that integrate a sense of place into your favorite subjects!

Do you have techniques you use to infuse your local images with a strong sense of place?  Please share them here.

Want to read more posts about what to shoot while near home or traveling?  Find them all here: Posts about what to shoot.

Focus on How Weird Street Faire: A case study on simple techniques to capture winning images of festivals

As a professional travel photographer, I shoot regularly in nearly all genres of photography.  A typical day on the road might include shooting landscapes, wildlife, cityscapes, portraits, action (sports, dance, performance), and nighttime photography.  While I enjoy all types of shooting, my great joy as a photographer is capturing portraits of the people I meet.  Whether close to home or halfway around the world, getting to know the people and learning about their culture through making portraits of them is a wonderful experience.  And there’s no better way to capture images of many amazing people in a short time than by attending local festivals.  People tend to be their best selves at special celebrations like festivals and street fairs.  They dress exuberantly, dance with abandon, make new friends quickly, and (nearly always) are overjoyed to pose for photos.

I shoot about a hundred festivals and other special events every year, so I’ve learned a few tips about how to make the best images during these occasions.  In today’s post I share some simple but effective techniques for capturing great portraits at festivals and other gatherings, using San Francisco’s recent How Weird Street Faire as a case study.  How Weird is a vibrant and colorful, only-in-SF, annual celebration of individuality, tolerance, music, art, and hula hoops.  Read on to see some of my favorite images from this year’s festival, presented along with some discussion of how they were made.  To view more of my images, or to buy some, check out this gallery: How Weird photo gallery.

I see a lot of fellow photographers at events like How Weird shooting with huge telephotos and even tripods, like they’re after images of wildlife on a Kenyan safari.  In my opinion, they are missing the point.  We’re making portraits of people here, so use a normal or moderate telephoto portrait lens, preferably a fast prime lens, ditch the tripod and monopod at home, and get in close to chat with and get to know the people you’re photographing.  When you interact with people, you get a sense of what makes them special, allowing both you and them to capture that special trait in your photos.  Random sniping from far away with a long telephoto will yield far more bland and generic photos.  All of my images at How Weird Street Faire were made with a single camera body and one lens, my trusty 85mm f/1.8 portrait lens.  Sometimes simple is better, especially when it comes to capturing people at fast-moving events.

Larger groups can be challenging to capture in portraits, particularly in bustling spaces like those of a festival.  When they couple I was chatting with suddenly ran into a friend and they had a group hug, I quickly stepped back a few paces and made this expressive and engaging portrait.  It’s okay to break the rules sometimes–here, one of the subject’s faces is completely obscured and another’s is partially obscured, yet the portrait works because it captures the energy and affection of the moment.

When photographers argue that the “street photography” approach (candidly sneaking images of people who aren’t aware they’re present) is the best for capturing people’s true essence, I show them images like this one.  This wholly genuine and unguarded moment of the girl dancing was made with her full knowledge and permission.  The trick is to chat with the subject and get their permission for photography first, then to lay back for a while and let them go back to what they were doing.  After a few minutes, they’ll nearly forget you’re there and they will reveal their true selves.  But unlike shots you sneak without permission, now you have a subject happy to have you photographing them, and you can take your time and not have to rush your work in order to hide your shooting from them.

Often we see only the most obvious subjects at crowded, chaotic events like festivals.  It’s easy to spend all our time shooting people dancing, partying, and displaying their costumes, but I try always to look for the more hidden people and infrastructure that support the event.  This DJ was partially hidden atop the big dance stage and behind the banks of speakers, but she made a fun subject for this portrait.

Don’t be afraid to get in close.  This portrait really pops because the tight composition allows us to focus our attention on the symmetry and color of the subject’s hair and costume.  

The interactions between people are at least as much fun to observe and capture as the individuals themselves.  I had chatted with and photographed a group of people for a few minutes when I observed this fun interaction, so I stepped back and framed some shots of the two young people together.

While post-processing my images after the shoot, I decided to render this one in monochrome to achieve a gritty urban street scene sort of feel.  Often color can distract from the power of an image, so always consider which of your images could benefit from conversion to black-and-white.

In ordinary daily life, I find that perhaps two-thirds of people are willing to have their portrait made if the photographer spends some time getting to know them first and then asks politely.  But at a festival, nearly everyone is excited about posing for portraits.  The trick is to capture scenes where they show you their underlying personalities a bit, rather than just striking a cliched pose for the camera.  To achieve that here, I spent a few minutes shooting, asking the couple to pose in different styles and have fun with it.

Putting it all together.  Here’s a summary of the basic techniques I use when shooting portraits at festivals:  1) Use a fast prime normal or portrait lens.  2) Set your camera for a fast shutter speed (1/500 second or faster is good for dancing and other fast action), wide aperture (f/2.5 or wider is ideal except for large groups) to isolate the subject, and an ISO appropriate to the lighting of the scene (I used ISO 100 the whole day due to the bright outdoor light).  3) Get to know your subject before shooting, let them relax, and capture them during an authentic moment.  4) Try to compose the portrait with as uncluttered a background as possible; of course, this is often difficult at crowded festivals.  5) During post-processing, crop to clean up the scene and then vignette just a touch to further clean up busy backgrounds.

I hope this discussion of techniques to capture portraits during festivals has been helpful.  The best way to learn these techniques and to find your own style is to shoot and shoot some more!

Please leave a comment with your own thoughts and tips about how to make great images of people at celebrations.

Want to read more posts about photographic techniques?  Find them all here: Posts about techniques.

What’s Your Dream Photography Tour Destination?: Seeking your input for where to hold a photo tour in fall of 2019

Dear Readers,

Seeking your input!  In addition to the tours I’ve already announced to Myanmar to help save traditional cultural arts from extinction in January and to Chile and Easter Island for the total solar eclipse in June/July, I am also planning to lead a photography tour in the fall of 2019.  Where in the world would you like to go?  As with all of my photo tours, participants will learn via informal workshops held every couple of days as well as by shooting alongside me in the field.  My photo tours feature small group sizes for photographers at any level from beginner through semi-professional.  These tours cover all aspects of travel photography from shot planning to capture technique, and on to post-processing and image sharing, with an emphasis on learning to use the camera as a bridge to enhanced understanding of the land and people we visit.

Please share your thoughts about where you’d like to travel on a photography tour next fall via a comment on this blog post or via email to me (kyle.adler.2@gmail.com).  Thank you for your input!

Kyle

In the Nik of Time [Encore Publication]: Now owned by DxO, the Nik Collection offers leading-edge image editing tools

Update: Recently I updated to a new PC for my post-processing work and found that, not unexpectedly, the original free Google version of the Nik suite no longer worked with my new configuration.  Finally, my hand was tipped and it was time to upgrade to the paid version from DxO.  I’m pleased to report that this invaluable suite of image editing tools now works better than ever.  From my limited testing, it appears to run faster and with fewer issues than before.  The interface is also cleaner.  And of course we can now expect better support and more frequent fixes than when the tools were given away for free.

In 2017 Google announced that they would no longer provide support for the Nik suite of tools.  That meant you can still download the latest version of Nik, but it may not work with the other software you are running.  Many in the photography community were concerned because sooner or later as we upgrade our other software, Nik will cease working for us.  Fortunately, a company called DxO purchased the Nik suite of tools from Google a few months after Google ceased supporting the software, and just this month DxO announced their first Nik release.  Read on for more details about the Nik tools and DxO’s new release.

In 2012, Nik Software, a small company known for their image processing tools that emulated the look and feel of using old film, was quietly acquired by a somewhat larger company known as Google.  Google announced they were making the entire suite of Nik tools available for free to all users.  As mentioned above, Google ceased supporting the Nik suite as of 2017, but the software was quickly purchased by DxO who just announced their first release.  The good news is that with this new release the photography community now has a reasonable assurance that these industry-leading image editing tools will be supported well into the future.  The bad news is that the Nik suite is no longer free; DxO is charging $69 to download the software.  That’s still less than the $150 that Google charged users for this software prior to 2016, and it’s a very reasonable price for software of this scope and quality.

For photographers who wish to access the Nik tool set and don’t already own it, or for photographers for whom the tool set has ceased working, I recommend downloading the new release from DxO’s website now, as the introductory price of $50 will increase to $69 at the end of June, 2018.  For those of us who already have the software installed and for whom it’s still working just fine, I don’t see a need to upgrade to the paid version right now.  That’s because the new release, while more stable and better documented than the free older version from Google, does contain the same tools with the same functionality.  Personally, I will choose to wait until a new O/S or Lightroom upgrade forces my hand.  But I am very pleased to know that these wonderful editing tools will continue to be supported and developed into the future!

Here are my notes from the past two years of using the Nik suite of image editing software tools.  Its capabilities are leading-edge and would be well worth spending hundreds of dollars to obtain.  It doesn’t do everything, but what it does, it does better than tools such as Photoshop and Lightroom, each of which costs a good deal of money.  That Nik’s great capabilities are available for download for less than $70 is a wonderful value, and I strongly recommend you give them a try.

It’s important to note that the Nik Collection of software tools is not intended to be standalone image processing software.  It consists of a set of plugins, each specialized for a different specific purpose, that must be accessed by a general-purpose image editing application such as Photoshop, Lightroom, or Aperture.  I use Lightroom for nearly all of my post-processing, so I used that application to access the Nik Collection.

Once you have your general image editing application installed, then you can download the Nik Collection modules at the DxO website listed above.  When you are working in your application of choice, you will then have access to the various Nik Collection tools in the editing menus.  For example, when I select an image in Lightroom, I can access six of the seven Nik modules by pulling down the “Photo” menu and then pulling down the “Edit In” sub-menu.  One of the Nik modules, the HDR Efex tool, is accessed instead under the “File” and “Export with Preset” menu choices.

These are the seven Nik Collection modules included in the download:

Analog Efex Pro

Explore the look and feel of classic cameras, films, and lenses.

Color Efex Pro

A comprehensive set of filters for color correction, retouching, and creative effects.

Silver Efex Pro

Master the art of black-and-white photography with darkroom-inspired controls.

Viveza

Selectively adjust the color and tonality of your images without complicated masks or selections.

HDR Efex Pro

From natural to artistic, explore the full potential of HDR photography.

Sharpener Pro

Bring out hidden details consistently with the professional’s choice for image sharpening.

Dfine

Improve your images with noise reduction tailored to your camera.

So far, I’ve played around with just three of these tools.
Silver Efex Pro did a very good job of converting my test images to monochrome.  I’m pretty good at using Lightroom’s tools to convert color images to black-and-white, but they take a lot of practice to master.  In Nik’s Silver Efex module I was able to make some good choices very quickly.  For those who want to fine-tune their black-and-white conversions, there are very good tools for detailed control over the process.
I used Nik’s Dfine module to attempt to reduce noise in a favorite shot of the Milky Way over Yosemite Valley’s Half Dome.  The results of my quick trial looked comparable to what I had done in Lightroom, but I suspect if I took the time to learn the Nik tool more thoroughly, I could end up with even better results.
Finally, I tested Nik’s HDR Efex Pro tool.  This little gem is a joy to use.  Just select the series of shots from which you want to build an HDR (High Dynamic Range) image, export them to HDR Efex, and click a couple of buttons to generate the base HRD image there.  My default image looked pretty good, but the Nik tool has a wide range of presets that allow you to generate different HDR effects with the click of a button.  I tried several of these presets until I found one that perfectly suited the scene.  A few more small tweaks using the detailed adjustment sliders, and I was ready to save the HDR image back into Lightroom.  In the past I have been very disappointed with Lightroom’s built-in HDR tools, and only slightly more satisfied with Photoshop’s HDR module, but the Nik HDR Efex Pro plugin does an amazing job.  It’s both easier to use and generates better results than the other HDR software I’ve used.  Specifically, the Nik tool does a much better job than the other tools at producing natural-looking colors and at removing the “ghosting” effects from when the underlying images are just a little bit different from one another.  Now I’m eager to find the time to go back to some of my favorite HDR images and rebuild them using the Nik software!
For comparison, here is a favorite HDR image of mine, first shown after processing in Photoshop’s HDR tools and then shown after processing in Nik’s HDR Efex Pro tools.
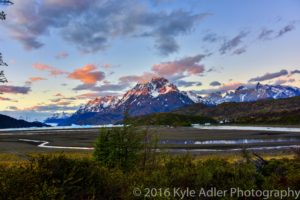
lrwm-lowres-5884This HDR image of Lago Grey with its glacier and the peaks of Torres del Paine National Park in Chile was processed using Photoshop’s HDR tools.  The colors appear unnaturally saturated and parts of the image (especially the tops of the mountains and the brush in the foreground) show some ghosting effects.
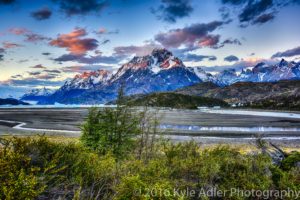
lrwm-lowres-5880-5884-hdrnikThis version was processed using the Nik Collection’s HDR Efex Pro tools.  The colors look much more natural and all parts of the image appear sharp and free from ghosting.
I am looking forward to revisiting many of my favorite images and reprocessing them using the Nik Collection’s tools.  I highly recommend this versatile, easy-to-use, and powerful suite of image editing modules.
Have you used the Nik Collection for your own photography?  What do you like and dislike?  Please share your thoughts here.
Want to read more posts about post-processing your images?  Find them all here: Posts on Post-Processing.

Join Me on a Cultural Arts Tour of Myanmar: Capture unique images of an endangered traditional performing arts culture

Dear Readers,

From January 3-11, I plan to join a special tour of Myanmar as the photographer for a not-for-profit organization working to preserve Burmese traditional performing arts that are rapidly vanishing. This tour includes unique experiences of meeting the master artists and their students behind-the-scenes. Having last traveled and photographed in Myanmar a few months ago, I share Arts Mandalay Foundation’s urgent mission to preserve these ancient cultural traditions. I’m expecting that my images, which I am shooting pro-bono, will help the NGO in their mission to train the next generation of performers and save these cultural treasures from extinction.

There are still spaces available on the tour. While I’m not officially running this as a photography tour (and will not profit directly from it), enthusiasts who join the trip will be shooting alongside me and I will be offering some informal photography instruction in the field. I’m also working with the director to set up some extra photo shoots with the artists.

Please join us! Whether you’re a photography enthusiast or not, this tour will be very special. More info here: Backstage Myanmar Cultural Tour.  Let me know if you have questions or are interested in booking.

Kyle

Faces of Myanmar [Encore Publication], Part II: Showcasing the Diversity of Burma’s People

My wife and I recently returned from an amazing 2.5-week adventure traveling through Myanmar.  Our itinerary took us from the main city of Yangon to the vast plains gleaming with ancient pagodas in Bagan; then to the former imperial capital and cultural hub of Mandalay; on to Kalaw, the gateway to many hill tribes of the region; and finally to Inle Lake, well known for its picturesque floating gardens and for the Inthe people with their unique traditional style of fishing.  While it was wonderful to view Myanmar’s gorgeous landscapes and fabled temples, what made this adventure truly unforgettable for us was its many opportunities to interact with Burmese people from many ethnic groups and all walks of life: Buddhist monks and nuns, villagers displaced by a typhoon 10 years ago who are still living in temporary bamboo huts with no running water, the Paduang hill tribe whose women traditionally wear heavy brass plates on their necks, an octogenarian master of the dying art form of Burmese marionette theater, young boys celebrating their initiation as novice monks, and the delightful girls who have found a caring home at an orphanage in Mandalay.  Burma is a photographer’s dream, filled with glorious pagodas, gorgeous vistas, and friendly, diverse cultures.

Yesterday’s and today’s posts showcase some of my favorite portraits, some of them not yet previously published, featuring a wide range of people we met during our adventure.  The portraits will be presented as a photo essay, but I will include brief descriptions of each and occasionally some commentary about how they were made.  You can click on any of these images to view or purchase them and many more from the Myanmar trip.  Yesterday’s post featured Part I, and today’s post comprises Part II.

A fascinating visit to Myawaddy Nunnery, where we had the opportunity to meet some of the more than 200 novice nuns who study there.  I composed this image to include the contrasting colors of the novices’ pink robes against the painted carved teak facade of the building.

Portrait of the abbess at Myawaddy Nunnery.  The lovely “bokeh”, or soft quality of the out-of-focus background elements, is created by using a very wide aperture on a lens known for having this property (in this case, an 85mm f/1.8 prime lens).  Even when traveling, it’s important to have the right lens for the right job.

The Mingun Bell, 13 feet high and weighing 90 tons, is the world’s second largest functioning bell.

A delightful visit to the Aye Yeik Mon Girls’ Orphanage. We were heartbroken to learn the stories of some of the abandoned girls who live here, but were uplifted to see the wonderful care and guidance they are receiving there now.

I had the opportunity to get to know 15-year-old Phyu Phyu at the Aye Yeik Mon Girls’ Orphanage. Abandoned by her mother at an early age, Phyu Phyu’s early life was challenging, but she has flourished under the care of the nuns at Aye Yeik Mon and is planning to continue her education and to enter a professional career.

We were invited into the Mandalay home of Oma and his family. His mother was a restaurant owner and chef for many years, so we were treated to an amazing Burmese meal.  It can be challenging to make portraits of groups, especially when young children are involved.  I shot several frames and chose one where the young boys are looking (nearly) directly at the lens, settling for some of the other family members to be looking elsewhere.

Kuthodaw Paya is called the world’s largest book because the entire canon of early Buddhist scripture is recorded on carved stone tablets housed in its hundreds of pagodas.  These young local women wanted me to pose for a selfie with them, so I asked them to return the favor.  Their brightly colored longyis (traditional Burmese attire) stand out nicely against the drab background of the pagoda behind them.

A quiet moment at the entrance to Shwenandaw Kyaung Monastery.  I used spot-metering based on the woman’s clothing so as to achieve proper exposure given the much brighter background.

A stop at the Kalaw morning market to purchase the produce for our visit to Myin Ma Htie village.

We visited the village monastery in Myin Ma Htie and met with the monk there.

On arrival at Myin Ma Htie, we are greeted by villagers who will be our hosts.  This portrait was carefully composed to provide nice soft natural lighting on the girl and to frame her in a pleasing way within the surrounding area.

Traditional spinning methods to create yarn from lotus plant fiber.  I was struck by the symmetry and the bright color of the yarn in this scene.  

A worker in a cheroot workshop demonstrates her craft. She makes about 1000 of these small and inexpensive cigars every day.  To make this portrait, I used my go-to 85mm portrait lens at a wide aperture and added just a small amount of balanced fill flash to evenly expose the subject’s face.

The Phaung Daw Oo Paya is one of Burma’s most sacred sites. Dating to the 11th century, this pagoda houses the four remaining Buddha statues that enclose relics from the body of the Buddha. Worshipers add a little gold leaf to these statues when they visit, so that today the shape cannot even be recognized as that of the Buddha.

A fisherman on Inle Lake demonstrates the ancient style of fishing with a netted basket.  I framed the shot through the fabric of the net to add texture and visual interest.

Meeting members of the Padaung ethnic minority, whose women are famous for wearing heavy brass coils to make their necks look longer.  This 18-year-old Padaung girl proudly wears the brass coils on her neck as a symbol of ethnic identity. She told us her younger sister chooses not to wear the ornaments as she goes to a Burman school where most of the other students are not Padaung. The tradition was often scorned as backwards during the military regime, but now young Padaung women are again often choosing to practice it.

Have you visited Myanmar?  What were your favorite photographic subjects?  Please leave your thoughts here.

Want to read more posts about what to shoot while traveling?  Find them all here: Posts about what to shoot.

All of these photos and many more from Myanmar are available for viewing or purchase here: Myanmar image gallery.

Missed Part I of this story in yesterday’s post?  You can read it here: Part I of this story.

Faces of Myanmar, Part I [Encore Publication]: Showcasing the Diversity of Burma’s People

My wife and I recently returned from an amazing 2.5-week adventure traveling through Myanmar.  Our itinerary took us from the main city of Yangon to the vast plains gleaming with ancient pagodas in Bagan; then to the former imperial capital and cultural hub of Mandalay; on to Kalaw, the gateway to many hill tribes of the region; and finally to Inle Lake, well known for its picturesque floating gardens and for the Inthe people with their unique traditional style of fishing.  While it was wonderful to view Myanmar’s gorgeous landscapes and fabled temples, what made this adventure truly unforgettable for us was its many opportunities to interact with Burmese people from many ethnic groups and all walks of life: Buddhist monks and nuns, villagers displaced by a typhoon 10 years ago who are still living in temporary bamboo huts with no running water, the Paduang hill tribe whose women traditionally wear heavy brass plates on their necks, an octogenarian master of the dying art form of Burmese marionette theater, young boys celebrating their initiation as novice monks, and the delightful girls who have found a caring home at an orphanage in Mandalay.  Burma is a photographer’s dream, filled with glorious pagodas, gorgeous vistas, and friendly, diverse cultures.

Today’s and tomorrow’s posts showcase some of my favorite portraits, some of them not yet previously published, featuring a wide range of people we met during our adventure.  The portraits will be presented as a photo essay, but I will include brief descriptions of each and occasionally some commentary about how they were made.  You can click on any of these images to view or purchase them and many more from the Myanmar trip.

Here is Part I, and tomorrow’s post will feature Part II.

A worshiper at Chaukhtatgyi Pagoda. I’m always on the lookout for ways to include local people when shooting monuments and other landmarks.  The human element adds great visual interest to travel images and also personalizes the photo, transforming a generic scene into a story.

We were shown around the Musmeah Yeshua Synagogue by one of the 17 remaining members of Myanmar’s only Jewish community.  Environmental portraits like this one include not only the person but also some other elements that help tell the person’s story, in this case the Torahs at the ark of the synagogue.

A worshiper at Shwedagon Pagoda, the most sacred Buddhist site in all of Burma.  At least 90% of the time I include people as a main element in my images, I obtain permission from them first.  I find that this approach, as well as being friendlier than shooting first and asking questions later, tends to lead to better portraits as there is an interpersonal connection between the subject and the photographer.  However, there are certain instances when asking first could interrupt the subject’s activities or negatively impact the dynamic being captured.  For this photo, I made no attempt to hide that I was shooting the woman, but I didn’t interrupt her meditation, either.

Armies of volunteer sweepers make the rounds at Shwedagon Pagoda to ensure the temple is kept spotless.  To shoot this large and fast-moving group, I positioned myself at a scenic spot, configured my camera’s setting in advance, then waited for the volunteers to move into position.

Rangoon’s Inya Lake, site of the former military junta’s brutal response to the 8888 uprisings and the Saffron Revolution, is now a peaceful place where young people picnic, make music, and go on dates.  When shooting strongly backlit subjects, be sure to use spot metering or exposure compensation unless you’re trying to create a silhouette.  

Street vendor in Yangon.

A fascinating visit to an informal housing settlement inhabited by people displaced by the devastating 2008 typhoon. A decade later they are still living in squalid conditions in bamboo huts with no running water. Here, children are filling containers with water from the lake and carrying 40 kg (88 pounds) of water, often more than their body weight, several miles to their families’ homes. This image is a favorite because it effectively combines the contrasting moods of the scenic beauty of the region with the hardship of the people living there.

As curious about me as I am about her, a young dweller in the informal settlement comes to say “mingalaba”.  I used a fairly narrow aperture to create enough depth-of-field allow some of the background to be emphasized in addition to the girl.

A traditional Burmese dance performance showcases the dancers’ grace and the beauty of their costumes.  Always look for an uncluttered background when composing and be sure to capture multiple shots so that one will be timed just right.

At the village market in Nyaung-U in the Bagan region.  I introduced myself to the vendor and received permission to make her portrait. At first she appeared stilted and posed, but as she tended to other customers and got accustomed to my being there, she returned to a natural state.

Escaping steam nearly obscures a worker at a Bagan workshop where pone ye gyi (a popular flavored soybean sauce) is made.  A portrait can become much more visually interesting when composed in an unexpected fashion.

The matriarch shows us around her family’s paper workshop where they make ceremonial fans for weddings and other events.  I made this image using my classic portrait technique: using a fast portrait lens (85mm f/1.8) nearly wide open to emphasize the subject, and choosing a location with nice soft lighting and as uncluttered a background as possible.

One of the family’s daughters kindly poses for a portrait. She wears thanaka, the tree bark paste that most Burmese women, and quite a few men, apply to their faces daily.

We had been invited by villagers to attend a Buddhist initiation ceremony, so we rose early and traveled to their village. The boys in the back row are preparing to start their service as novice monks in a monastery. All Buddhist boys in Myanmar are required to perform this service at some point during their childhood.  The girls in the front row are some of their sisters who are celebrating their ritual ear piercing.

The boys paraded through the village to the monastery on horseback, while the girls and some of the parents rode oxcarts.  Another classic portrait using a fast prime lens at a wide aperture to soften the background, this image also was made with a touch of balanced fill-in flash to reduce shadows on the subject’s face.

During an excursion to Phaw Saw Village outside Bagan, we met this artisan.


Have you visited Myanmar?  What were your favorite photographic subjects?  Please leave your thoughts here.

Want to read more posts about what to shoot while traveling?  Find them all here: Posts about what to shoot.

All of these photos and many more from Myanmar are available for viewing or purchase here: Myanmar image gallery.

Look for Part II of this story in tomorrow’s post!


Focus on Dublin [Encore Publication]: Ireland’s main city overflows with Guinness, literature, history, and music

We began our rambles through Ireland and Scotland with a whirlwind two-day stay in Dublin.  The capital of the Republic of Ireland, Dublin is well known as the home of Guinness beer and for its literary and historical legacy, but perhaps less known as a remarkable hub of live music and contemporary fine dining.  It’s also a marvelous place to make images that highlight the old and the new elements of this vibrant city.  Here’s a brief photo essay along with some discussion of how the images were made.

Perhaps the world’s grandest study hall, Trinity College’s Long Room is a stately palace to higher learning.  Located next to the vault housing the famous Book of Kells (where photography is not permitted), the Long Room is best photographed with a wide-angle lens using natural light.  Here I shot from one end of the hall looking up at the ceiling and upper gallery.  Be careful to watch your horizons when making an architectural image from such an angle.  Buy this photo

Live trad (traditional Irish folk) music is a staple of Dublin nightlife, and nowhere is it better than at the famed O’Donoghue Pub, where in the 1960’s bands such as the Dubliners sparked the Irish folks music revival.  Irish pubs are convivial and interactive places, where you can mingle with the performers and other locals.

To make portraits of the musicians, sit close to the “stage” (there’s rarely a true stage in the formal sense, but rather a performer’s area) and shoot with a fast normal or portrait lens using a high ISO setting.  It helps to get to know a few of the players during their breaks.  Buy this photo

Dublin is a world-class literary city, with ties to James Joyce, W. B. Yeats, Jonathan Swift, Oscar Wilde, G. B. Shaw, Samuel Beckett, and Seamus Heaney, among many other literary greats.  We took, and highly recommend, a literary walking tour led by scholar, author, and actor Colm Quilligan.  There are many photo opportunities to be found during this informative walk.  You can learn more about Colm’s walking tours here: http://www.dublinpubcrawl.com/writerswalk.htm.

A self-portrait made at The Duke Pub, where many of Dublin’s great authors took their liquid inspiration.  Remember to include yourself in some images, but always look for unusual perspectives.  Buy this photo

A park sculpture commemorates  the Great Famine of the 1840s.  To bring out the textures, I converted this image to black-and-white using Lightroom’s color channel tools, and boosted the contrast slightly.  Buy this photo

Dublin Castle dates from early Anglo-Norman times, and a guided tour provides a sweeping history of Dublin from its origins through the present day.

To photograph the Castle and Dublin’s other architectural gems, use a wide-angle lens.  Watch out for cluttered foregrounds and keep an eye on the lines at the edges of the frame, as it is tricky to avoid distortion when shooting up with a wide lens.  Here I also used a polarizing filter to add contrast to a rather bleak scene.  Buy this photo

The chapel within Dublin Castle offers many photographic possibilities.  Seek out the details in a place like this.  Here I’ve captured the beautiful (but, alas, no longer functioning) pipe organ.  I brought out the shadow detail and increased the vibrance during post-processing.  Buy this photo

It may or may not come as a surprise to learn that Ireland’s biggest attraction is the Guinness Storehouse.  While it’s easy to dismiss sites like this one–essentially a theme park dedicated to a beer brand–that would be a mistake.  The self-guided tour is fascinating for its historical, cultural, and architectural facets, and the view from the top-floor Gravity Bar (with an included pint of Guinness) is the best in Dublin.

The Guinness Storehouse was converted into a museum and tourist attraction, but happily they have retained much of the old brewing machinery, which makes a great photographic subject.  I used a touch of flash here to saturate the colors.  Buy this photo

My wife Mary pulls a perfect pint of Guinness.  It’s more fun to include traveling companions when they’re doing something locally inspired and interesting.  I used natural light with a fast portrait lens and relatively high ISO setting.  The cluttered background isn’t as distracting as it could be, because it documents the bustle of the place.  Buy this photo

Parting shot on our last night in Dublin.  Another trad music session.  This one (which also incorporates a self-portrait) was shot at the Cobblestone Pub.  It was an informal sit-in session, so I had the chance to chat with and really get to know several of the musicians before shooting their portraits.  Buy this photo

Have you visited Dublin?  What do you consider essential activities–and photographic subjects–in this city?  Please share your comments here.

Want to view posts about other travel photography destinations?  Find them all here: Posts on Destinations.

Mardi Gras SF 2018 [Encore Publication]: A case study on shooting action in low light

San Francisco has been celebrating Carnaval for 40 years, and for the past 5 years I’ve been documenting this wonderful event.  The anniversary season officially kicked off last night with San Francisco’s take on Mardi Gras.  I covered the small parade through SF’s historic Mission District and also the performances of several comparsas (like krewes or samba schools) at one of the event’s venues.  Today’s post showcases some of my favorite images from this year’s Mardi Gras while also serving as a case study for shooting fast action in extremely low light conditions.

Taking the approach of “if you can’t beat them, join them,” remember that when shooting action in low light it is okay occasionally to intentionally allow some motion blur to emphasize the movement.  Here I achieved a soft painterly effect by choosing a slower shutter speed to capture this image of a young dancer mustering for the parade.

The use of flash is required for much low-light action photography, but that doesn’t mean your images have to be harsh or unnatural looking.  A few hints: 1) Get the flash off your camera using a flash cord or remote control; 2) Use balanced fill flash instead of automatic flash for a more realistic look; 3) Dial down the flash’s power by using flash exposure compensation (I use -1 stop most of the time); 4) These settings often will require that you use a high ISO setting and a fast lens.

Use a fast prime lens to achieve a fast shutter speed along with a relatively shallow aperture to freeze and isolate your subject.  Most of these images were made with a 50mm f/1.4 lens.

In post-processing your images, consider these tips: 1) Apply some noise reduction to mitigate the digital noise associated with high-ISO shooting; 2) Adjust the white balance to render the colors you remember from the shoot (always shoot in RAW mode if possible to allow setting the white balance during post-processing); 3) Apply a touch of post-crop vignetting to emphasize your subject and reduce background clutter.

For group shots, try to find an uncluttered background and pose everyone as tightly as possible so that your fill flash will illuminate them evenly.  Don’t use a wide-angle lens for group shots!  Sure, doing so will make it easier to fit in all the subjects, but it also provides a very unflattering perspective for most people.  Here I shot with a 50mm “normal” lens and moved back to fit in the entire group.

Portraits work very well using balanced fill-flash techniques.  Be sure to find an uncluttered background and get the flash unit off the camera.  Here I bounced the flash off the awning of a building to achieve a soft effect relatively unencumbered by shadows.

By applying some of these techniques, you can capture fast-moving action even under extremely low-light conditions and still achieve realistic looking and flattering results.

Do you have suggestions for shooting action in low light?  Please share your thoughts here.

Want to read more posts about photographic techniques?  Find them all here: Posts about techniques.  And remember that all the images featured in this post as well as thousands more are available for viewing or purchase on my website–just click on any photo to view it in more detail.

Sneak Preview: Behind the scenes on my ongoing Human/Machine Dance Project

How does the human body move when interacting with artificial intelligence technologies? This is the question that my collaborator Carly Lave embarks on a year-long Fulbright grant to research. A talented dancer, choreographer, and scholar, Carly will present her research findings in visual form via a self-choreographed dance solo performance. I approached her to collaborate on a photography series informed by her research goals and artistry as a dancer. We explored several visual themes, each related to the timely question of how we humans will be transformed by increasing immersion into advanced technologies, including virtual reality, robotics, and interconnectivity. To complete this ongoing project, we will continue to collaborate across two continents during Carly’s research fellowship. Stay tuned!

In the meantime, I’d like to share a few early images from this work-in-process along with some words about how they were made.  It can be tricky to imagine a visual concept and realize it via photography, and all the more challenging when the concept is abstract like the ones Carly and I selected.  I’ll present four of our initial concepts, each illustrated with an image and a description of the techniques required to execute it.

  1. Virtual Reality Motion Study: Virtual meets reality as Carly’s body floats through the physical world while her motion is informed by her interactions with the virtual world playing inside her headset.This concept sounds simple but is quite difficult to execute photographically.  We wanted to capture Carly’s physical motion in the real world as she reacts to the experience of the VR world.  Images like these require a long time exposure (here about 15 seconds), which in turn necessitates shooting in a darkened photography studio.  I used a black backdrop and continuous LED lighting to illuminate Carly as she moved across the studio, with a single studio strobe light at the front right part of the set to capture her final pose at the end of the exposure.  The strobe was set to trigger as the camera’s shutter closed at the end of each shot (“rear curtain sync”).  Using this technique, Carly’s motion can be traced during the whole exposure but the vivid exposure is what we see last.  Considerable post-processing is then required to clean up the scene.
  2. Interconnectivity: Carly shared, “I found myself visualizing my body wrapped in cables coiled around my limbs and torso. I was thinking about the body in relation to embedded systems here, and how now all of our world is connected through cables either in the air or sea.”To shoot this visual concept, we used a dance studio with a mirrored wall.  Using different angles to obtain a variety of perspectives, I shot both Carly and her reflection as she improvised motion along the wall.  The technique conveys the impression of the interconnectedness between a human and a similar being across a network.  Post-processing was required to remove clutter and render the background as white.
  3. Human (de-)Evolution Series: A whimsical re-imagining of the classic ape-to-human evolution series, this montage asks us to consider whether technology contributes to or detracts from human evolution.This striking montage is actually quite straightforward to execute.  In a photography studio against a black backdrop, I shot images of Carly in each stage of the evolution series and then combined them using layers in Photoshop.
  4. Robotic Motion: Machines often perform the same tasks traditionally undertaken by humans, but the robot’s motion is constrained by its programming. How might the human dancer’s motion become similarly constrained if her movement is choreographed by programming instructions?For this concept, my job was fairly easy and Carly had to do the heavy lifting.  She choreographed movement indicative of robotic motion while I captured a series of images using a studio strobe light and a black fabric backdrop.

I hope this behind-the-scenes peek at my ongoing passion project will help inspire your own creative process.  It’s important to be personally and deeply invested in a project before you begin.  Select your partner(s) carefully and plan thoroughly.  Then the process becomes joyful and exhilarating as you begin to bring your concept to life!

Have you carried out a photography project?  Please share your key learnings–positive and otherwise–here!

Want to read more posts about what to photography while traveling or near home?  Find them all here: Posts about What to Shoot.


If You Can’t Be with The Camera You Love [Encore Publication]: How to make the best of it when you don’t have ideal kit with you

There’s an old adage that goes, “The best camera is the one you have with you.”  That is never more true than for travel photography.  As travelers, we have to compromise regarding what gear we pack for a whole trip, and then we have to compromise again with respect to what equipment we can pack on a particular day’s outing during the trip.  If a flight is involved, we’re often obligated to leave much of our gear at home so as to avoid having to check our precious photography equipment.  If a good deal of hiking, biking, or travel via public transportation is required, we may have to leave bulky or heavy items in the hotel room for the day.

Fortunately, it’s never been easier to ensure we always have at least some backup solution to keep shooting even when a key camera, lens, filter, or tripod has to be left behind.  The smartphone that nearly everyone carries with them at all times likely has a pretty darn good camera attached to it.  My Apple iPhone 6s, for example, comes with a 12 MP camera, incorporating a decent if small sensor and a tolerable quality and moderately fast (f/2.2) lens.  Even the smaller “selfie” camera has a 5 MP sensor.

No one will confuse the images made using this camera phone with those made using my professional DSLR camera and collection of lenses, but in a pinch I can get acceptable quality shots with just the phone’s camera.  The trick is understanding how to use your smartphone’s camera, or your small point-and-shoot camera, in the right way to capture the images, and then to post-process the images in such a way as to overcome the compromises built into the camera.

Just yesterday I found myself on a family day trip to the annual Scottish Highland Gathering and Games without my professional camera gear.  I made the best of things and shot all day with just my camera’s phone.  I’m fairly pleased with the resulting images, even though of course they would have been better had I had access to my regular camera and a few choice lenses and accessories.  Here are a few of my images along with some tips on how to get the best out of a not-so-great camera.

First of all, learn how to control your phone’s camera manually so that you can choose what part of the image you want to be in focus and what part of the image you want to drive the exposure.  Nearly all modern phone’s cameras allow you to touch the screen to select where on the image you want to set the focus and exposure.  In this photo of a Scottish traditional music performance, I set the focus point on the fiddler to ensure sharp focus on the musicians.  Then I adjusted the exposure by moving the vertical slider upward, in order to add some brightness to the image and avoid underexposing the backlit performers.

Touch your smartphone camera’s screen to select the focus point, and then move the exposure slider up or down to adjust the exposure separately from the focus point.  Buy this photo on my website

Better yet, take full manual control over your phone’s camera by installing an app.  There are good free and inexpensive apps for both iOS and Android.  The one I use for iOS is called “Manual” and is available on the Apple App Store: Manual app.  With such an app installed on your camera, you can specify manually exactly what settings you want to use for the focus point, aperture, shutter speed, ISO, flash, etc.  This level of control was essential for a shot like the one below.  The tossin’ of the caber, a “heavy athletics” event in which the contestants throw a 75-pound tree trunk as far as possible, requires a fast shutter speed in order to freeze the rapid action.

Note: Since I first wrote this post, I have started using a different iOS app to take manual control over my phone’s camera.  It’s called “ProCam 4” and it’s quite a bit more sophisticated, but as easy to use, as the “Manual” app.  You can purchase it on the Apple iTunes Store here: ProCam 4 App.

Using the “Manual” app I was able to focus on the athlete and choose a fast shutter speed to freeze the rapidly moving caber.   Buy this photo on my website

To capture this action shot of an indoor sheepdog trial, I had to set a fast shutter speed and increase the camera sensor’s sensitivity (ISO) to accommodate the quick action and the low-light setting.  Again, the Manual app allowed for this flexibility.  I also cropped the image during post-processing because the phone’s camera does not have a long enough focal length lens to zoom in closely on the subject.

Both manual selection of the ISO and shutter speed and cropping during post-processing are required to get a decent shot of action like this sheepdog trial.  Buy this photo on my website

To capture this image of a girl teaching young children how to dance around the maypole, I had to use all the elements we’ve been discussing here.  I used manual settings to choose a focus and exposure that were correct for this subject, forced the camera’s flash to fire to try to even out the harsh shadows across the girl’s face, and employed cropping and lighting adjustments during post-processing to achieve a pleasing composition.

Bringing it all together: To make this image of the maypole celebration, I manually selected the focus, exposure, and flash, and then cropped and adjusted exposure during post-processing.  Buy this photo on my website

Next time you can’t or just don’t have the best equipment with you, use the tips we’ve covered here to make the best of a challenging situation.

When did you have to make do with less than ideal gear for a shoot?  How did you make the best of it?  Do you have tips or tricks you can add?  Please contribute your thoughts using the comment box at the end of this post.

Want to read more post about photographic gear?  Find them all here: Posts on Gear.

Focus on Tanzania [Encore Publication]: Every wildlife photographer’s dream destination

There are very few destinations more exciting to us travel photographers than East Africa.  My family’s 2.5-week trip to Tanzania, with a brief stroll into Kenya, was a dream come true.  Operated by Overseas Adventure Travel, the adventure began with a pre-trip excursion to the Kilimanjaro region, then moved on to the regional capital city of Arusha and to safaris in Tarangire National Park, Olduvai Gorge, Serengeti National Park, and Ngorongoro Crater.  It goes without saying that the wildlife photography in Tanzania is second-to-none, but we found the authentic cultural interactions with the nomadic Maasai and other local people to be a highlight of the trip.

The usually shy Mount Kilimanjaro made a brief appearance as we awaited sunset near our lodge.  The glaciers that adorn this iconic landform are melting quickly as a result of climate change, so this is a place to visit soon.  I used a polarizing filter on a medium telephoto lens to reduce the haze and bring out the texture of the mountain, and I framed the shot through some branches near our campfire.

Mount Kilimanjaro lit by alpenglow.  Buy this photo

On a game drive in the Kilimanjaro region, we encountered this lovely lilac-breasted roller.  To capture this image, I used a long telephoto lens (500mm, which was equivalent to 750mm when fitted on this camera) and stabilized it on a beanbag that I rested on the top of the safari vehicle.  This is a very important accessory to bring with you on a safari, as you cannot fit a tripod in a safari vehicle and a monopod is awkward.  While the beanbag that I use is no longer available, this one is well reviewed by photographers and represents a good value.


Lilac breasted roller captured with a 500mm lens in the Kilimanjaro region.  Buy this photo

The cultural learning and interaction was a big part of this trip.  Here my older daughter is greeted by a young Maasai woman as we arrived at their settlement.  The Maasai are nomadic herders, usually moving from place to place to pasture their cattle throughout the seasons of the year.  It was a fascinating opportunity to meet them and learn about their way of life, and to make portraits with the Maasai people we met.

A warm welcome as we arrived at the first of two Maasai villages visited during our trip.  Buy this photo

I had a fun interaction with this young Maasai boy by showing him the images as I shot his portrait in various places around the village.  He had not seen many photos of himself.  Here he is posing in front of his family’s house.

A Maasai boy by his family’s shelter.  Buy this photo

Our visit to the bustling city of Arusha was intended to be a staging point for the game viewing excursions to follow, but we found Arusha to be a very interesting cultural crossroads.  Here is a shot of what passes for a towing service in the area, a broken-down van being pulled to a service station on top of a donkey cart.  Always be on the lookout for serendipitous moments like this one when you travel!

A street scene in Arusha, the region’s largest city.  Buy this photo

Along the road from Arusha to Tarangire National Park, we stopped to chat with a group of several young Maasai men.  They had recently undergone the ritual circumcision ceremony that marked an important milestone on their journey to become warriors.  For the next six months they would wear the special face paint while they underwent their final training.  Our local guide was very helpful in facilitating our conversation.  Through him, I asked this man’s permission to make a portrait.  This was shot with a moderate telephoto lens and a wide aperture to soften the background.

A young man nears the end of his journey to becoming a Maasai warrior.  Buy this photo

Tarangire National Park is a gem of a nature preserve that is often overlooked by visitors to Tanzania.  Be sure to visit Tarangire if at all possible!  Here’s a shot of a baby baboon in a group of baboons we were observing there.  When shooting backlit wildlife, use your camera’s spot metering mode with the focus point on the animal, so your camera won’t underexpose the main subject.

A playful baby baboon in Tarangire National Park.  Buy this photo

We stopped for a visit to a second Maasai settlement, very different from our first Maasai encounter.  This second group of Maasai were only semi-nomadic and lived much of the year in a more permanent settlement.  While their way of life was a bit less precarious, and included public education and solid housing, they still lacked a source of safe drinking water, a common problem in East Africa.  We presented the chief with a water filter we had purchased in Arusha, for use by the whole village.  This group portrait was made of the villagers when they accepted our gift of the water filter.

Maasai villagers with their new water filter.  Buy this photo

Serengeti National Park is the stuff we travel photographers’ dreams are made of!  Along with game walks and game drives in open safari vehicles, we also had the chance to soar silently above the Endless Plains in a hot air balloon.  This is an amazing way to view the migrations of the herds and the predators and scavengers that tag along.  This image was made by shooting down from the basket of our balloon toward a balloon closer to the ground.  You can see the trees and herds of wildebeest on the plains below.

Safari by hot air balloon.  Buy this photo

Of the hundreds of animal species we encountered, including so much more than just the Big Five, the leopard was one of the most elusive.  Here we spotted (as it were) a leopard napping in a tree in Seregenti National Park.  This shot was made with a long telephoto lens resting on a beanbag in our safari vehicle.  My go-to lens for wildlife photography is the Sigma 150-500mm f/5-6.3 lens.  It’s more economical than a Nikon or Canon super-tele, and it produces reasonably sharp images even when used at its widest aperture.  You can spend much more on this type of big glass if you want or need to, but I’ve found this lens works quite well for me.

A sleepy leopard yawns in a tree above the Endless Plains of Serengeti National Park.  Buy this photo

The migration of the herds is an annual event across the combined national parks of Serengeti in Tanzania and Maasai Mara in Kenya.  It’s a spectacular sight as millions of wildebeest, zebra, and gazelles slowly migrate across plains and rivers, occasionally being eaten by the predators who follow them.  To give a sense of the scale and the action, in this image I zoomed in on a group of wildebeest with a telephoto lens so as to compress the scene.

A small vignette from the massive migration of the herds across the East African plain.  Buy this photo

We were very fortunate to come across this quiet scene of a lioness with her newborn cubs.  We watched from a distance so as not to disturb this family as she cleaned and played with her two cubs, them mewing like housecats all the while.  The light was low in this glen, and the long telephoto lens was slow, so I stabilized it on a beanbag and shot at a higher ISO setting to allow for a reasonably fast shutter speed.  There was some noise in the image as a result of the high ISO (camera sensors weren’t as good at high sensitivities back in 2012), but I did my best to reduce the noise during post-processing.

A mother lion spends some quality time with her cubs.  Buy this photo

We visited a primary school in a small community.  This was one of the first schools in Tanzania to serve breakfast and lunch to students who walk miles each way to school and would have to double their daily walking distance if they had to return home midday for lunch.  My daughter enjoyed talking with students about their daily lessons.

Visiting a classroom at a rural primary school.  Buy this photo

Farewell to Tanzania!  My family enjoys a glorious African sunrise at our tented camp located right inside the national park.

A Serengeti sunrise.  Buy this photo

Want to see posts on other travel photography destinations?  See them all here: http://www.to-travel-hopefully.com/category/destinations/.

Have you visited East Africa?  What were the highlights of your trip?  Please share your comments here.

Rock Solid [Encore Publication]: Why you should always have a tripod with you

Tripods have had their ups and down, so to speak.  When photography was in its infancy, the wet plates used to make the images were very slow, so extremely long exposures were required and the cameras were big and bulky, so use of a big, heavy wooden tripod was essential.  It’s all the more remarkable when looking at the incomparable work of Ansel Adams to realize that in order to make these images he had to hike miles up steep mountain trails with a heavy view camera, several big and fragile plates, and an enormous tree trunk of a tripod.  As cameras became smaller and film faster, tripods went out of style except for certain low-light situations for professionals.  Now, more and more enthusiast photographers are recognizing the value of a sturdy tripod for capturing the best possible quality images of landscapes, buildings, and of course night scenes.  In some iconic travel spots, it’s hard to find space to shoot amidst the ocean of tripods.

Sure, they’re heavy and bulky, particularly when we’re hiking or walking for long stretches.  But a good solid tripod is essential for so many types of shots that I now carry one with me at nearly all times.

An example of a technique requiring a tripod even in bright light is high dynamic range (HDR) photography.  To make an HDR image, you shoot a series of photos of the exact same scene in rapid succession, varying the exposure by a little bit between each frame, and then use special software during post-processing to bring out all brightness levels in the image, from the dark shadows to the brilliant highlights.  But if the camera moves at all between the shots, it becomes harder to stitch the shots together into a beautiful HDR image.  I’ve been known to handhold some HDR shots, but I strongly recommend shooting them using a tripod.  Of course, you’ll also want a tripod for low-light and nighttime photography, and they’re very useful for landscape images where the high resolution of your camera’s sensor is called upon to render extremely fine detail throughout the scene.  And let’s not forget that to include yourself in a scene, use of a tripod makes life a lot easier.

Although I was shooting in bright sunlight, I needed a tripod to make this HDR image of Yosemite Valley peaks reflected in the Merced River.  If the camera moves at all between frames, it is harder to combine them into the final photo.  Buy this photo

For most travel situations, you’ll want a lightweight tripod that folds up to a portable size but still offers enough stability for most uses.  There are times, though, when I need to bring along my heavy and bulky professional tripod.  Whatever tripod you choose, be sure to fit it with a good quality head–ball heads provide a lot of flexibility and ease of use for travelers–and remember to take along the plate that attaches the tripod to your camera, if required.

My go-to lightweight travel tripod is the Manfrotto Be Free.  It folds up to an incredibly small size yet affords a surprising amount of stability.  The included ball head works well but is difficult to adjust for sensitivity.  This tripod is designed to fit into a specially designed pouch in my favorite travel photography backpack, also made by Manfrotto.

The SLIK 615-315 is a great tripod for use close to home or on trips where you will have constant vehicle support.  It’s very solid, supports a tremendous amount of weight, and can be adjusted for nearly any shooting situation.  I recommend you fit it with a good ball head for maximum flexibility.

A monopod can be a real problem solver when you need more stability than handholding or resting your camera on a vehicle or table will afford, but you can’t carry or use a full tripod.  I use the Manfrotto 681B model.

To be sure, if you know 100 photographers, you’ll hear 110 different opinions about tripods and the heads and plates that go with them.  The products listed above are my recommendations only, but I’ve had good experiences using them.  For those with a lot more money to spend, tripods and heads made by Really Right Stuff are much beloved by professional and well-heeled enthusiast photographers.

What combination of tripod, head, and plate do you use, and why?  Please share your recommendations here.  Tripods are one piece of gear with which we’re constantly experimenting, so bring it on!

Want to read more posts about photography gear?  Find them all here: Posts on Gear


Revealing Portraits [Encore Publication]: Inspirational women of India are struggling to empower themselves and others

Travel photography is about more than simply recording what we see and do during our trips.  It is more important even than creating art from our experiences while traveling.  I believe travel photography also has an important role to play in documenting and communicating to broad audiences the present situation facing underrepresented, repressed, and abused communities, and advocating for change to improve on the present situation.

Today’s post illustrates this point.  In a series of four portraits made during my recent travels in the north of India, I document several of the serious struggles faced by the girls and women of India–abuse of street children, poverty and lack of education, forced early marriage, and acid attacks–and show how these brave young women are working to empower themselves and others like them to end these abuses.

First, we meet a 17-year-old girl from the slums of New Delhi.  Let’s call her Sheela (the NGO supporting her work has requested that I not use her real time in order to protect her identity).  Sheela is the principal organizer of 10,000 street kids from similar slums across the sprawling city.  She helped start a newspaper, called Balaknama, to give a voice to the street kids and expose their stories of child labor exploitation, police harassment, and physical abuse.  Through her efforts and those of other kids from the streets, the editors who advise them, and the NGO that funds them, Balaknama has helped improve the lives of the poorest and most vulnerable residents of Delhi.  My portrait of Sheela is set in Balaknama’s offices and shows her calm and inspiring strength.  Lit by available light only, this image was made with a fast prime portrait lens, shot from a low angle so as not to condescend to the subject, and using a wide aperture to soften the background.  The feeling this image evokes is one of quiet power and a strong drive to expose and right the wrongs of her society.

Sheela, a 17-year-old resident of Delhi’s slums, organizes 10,000 street kids and reports for a newspaper run by and for the street children of the city.  Buy this photo

Next, we meet a girl who was born into poverty in Delhi and was forced at an early age to beg to earn money for her family.  Let’s call her Anika.  School was not an option for her.  However, Anika found a way to earn more and to avoid begging by selling bead necklaces on the streets of the city.  The portrait shows the contrast of her daily life: hopeful yet exhausted, bright yet uneducated, strong yet vulnerable.  This portrait was made using natural light with just a touch of fill flash to accentuate the saturated colors of her outfit and her wares.  The emphasis was placed on Anika by use of the fill flash, by exposing for her face, and by blowing out the overexposed background.

Anika is one of Delhi’s poorer residents.  Unable to attend school, she sells beaded jewelry to make a few rupees for her family.  Buy this photo

In a small village in rural Rajasthan, we met Parma at her modest house.  Forced to marry at the age of 11, Parma had four daughters at an early age.  She is fiercely committed to ensuring her daughters receive a good education so that they will have more options than she had.  Parma made the brave decision to become one of the first women to join a cooperative formed to allow women of the village to learn to make handicrafts in order to earn money for their families.  She and her husband faced considerable scorn from neighbors and relatives over her decision to earn her own income, but now many other village women have seen the success of this program and have also joined.  Parma is proud to have learned to sign her name and read a few words, thanks to her older daughters’ having taught her.  My portrait shows Parma in her kitchen with her third daughter preparing tea in the background and a neighbor child just in front of her.  The image radiates beauty, dignity, strength, and resolve.  In this environmental portrait, I wanted to portray Parma in relation to her home, her family, and her community, so I placed her in the center, exposing and focusing on her face, and allowing her daughter to be clearly identifiable yet slightly out of focus.

Parma, a child bride, vowed to educate her four daughters and works in a women’s cooperative to earn extra money to fulfill her promise.  Buy this photo

Finally, we meet Rupa at Sheroe’s Cafe in Agra.  Sheroes’ is a project founded by and for the women of India who are survivors of acid attacks. We were so inspired by meeting Rupa and learning about her story and her road to physical and emotional recovery after her brutal attack at the age of 15 by her stepmother.  Through this project, Rupa has gained the confidence and independence to leave home, meet other survivors and activists, build a business as a clothing designer, seek legal justice against her attacker, and access the surgical care required to reconstruct her face. The courage and resilience shown by Rupa and the other women we met at the cafe moved us to want to help their cause to educate people and improve the treatment of India’s women.  My portrait of Rupa is powerful because it doesn’t shy away from her scars but allows her courage, resilience, and beauty to shine through.  I got in close to Rupa using an 85-mm prime portrait lens and composed a head-and-shoulders image from eye level.  I exposed for her face and blouse, which she designed herself, bringing out the vibrant saturated colors.  A shallow depth-of-field ensured that Rupa’s face would be emphasized while the background would be soft.

Rupa was brutally attacked with acid by a relative when she was just 15 years old.  Rather than hide at home her whole life, she was empowered by the Stop Acid Attacks organization to live independently, fight for justice, and advocate to end acid attacks across India and Southeast Asia.  Buy this photo

I hope this series of portraits of four brave young women in India will inspire you, as their subjects inspired me, to advocate for improving women’s rights in this part of the world.  And more broadly, I hope you’ll recognize the power that travel photography has to give voice to the unheard and to fight for social change in the places where we travel.

Have you made the opportunity to advocate for change through your images?  Please share your story here!

Want to read more posts about what to shoot while traveling?  Find them all here: Posts on What to Shoot.


Travel Photographers of the World, Unite!: Join my Meetup group

Dear Readers,

I have organized a new Meetup group, Travel Photography Workshops, as a forum to connect and learn in a variety of different ways. Whether through photo walks, hands-on workshops, classes, exhibitions, and photography tours to locations around the world, our goal will always be to fuel our passion for travel photography as we grow our skills. Please join us! Details at: http://meetu.ps/c/3Yl63/vbccL/f.

Love to explore the world through a lens? Do you strive to capture authentic images of the people and places you visit? Excited about using your camera to build bridges across diverse cultures? Want to continually improve your photography in all genres? Then this meetup is for you!

Travel photography is thrilling because it’s about discovery and adventure. Whether we’re halfway around the world or a few short blocks from our home, our camera is a tool to capture the spirit of the places we visit and to share that spirit with our community. The travel photographer must be versatile, switching effortlessly among many genres including landscape, wildlife, cityscape, portrait, performing arts, nighttime, and street photography. Share your passion for travel photography with other like-minded enthusiasts, and build your skills in a supportive community.

We’ll connect and learn in a variety of different ways. Whether through photo walks, hands-on workshops, classes, exhibitions, and photography tours to locations around the world, our goal will always be to fuel our passion for travel photography as we grow our skills. Please join us!

Focus on Hong Kong [Encore Publication]: This iconic Asian crossroads city offers remarkable photographic opportunities

On our way back home after a few weeks of travel through Myanmar, my wife and I added a two-day stopover in Hong Kong.  While I’ve been to this iconic city many times, this was the first visit in more than 30 years during which I had some time to really explore and make some nice images.  Read on to sample a few of my favorite images.

My wife Mary poses along the lovely Tsim Sha Tsui Waterfront Promenade in Hong Kong.  There are so many images of this stretch of harborside land that it’s a good idea to differentiate yours by including a person, object, or activity in the foreground.  Here, I metered off Mary’s jacket and used a touch of balanced fill-in flash so that both she and the skyline would be properly exposed.

Hong Kong’s take on the Hollywood Walk of Stars features a mix of western and Chinese movie stars. This piece of street photography includes a live human cleaning the mural between the images of Clark Gable and Marilyn Monroe.

Nearly every visitor to Hong Kong takes the Peak Tram railway to the top of Victoria Peak.  But almost all of them spend their entire time atop this hill in the well-known shopping center, the Peak Tower.  We chose instead to hike the 3-mile Peak Loop around the entire summit of Victoria Peak, where we were treated to some jaw-dropping views of the city.  This image was made with a wide-angle lens fitted with a polarizing filter and using a narrow aperture and moderately fast shutter speed.  The circular polarizer should first be rotated to provide its maximum effect, then dialed back a bit to allow some of the beautiful reflections to be included.

Hong Kong is a beautiful city that is at its most gorgeous at night.  To capture this nighttime cityscape without a tripod, I rested my arms on a fence to steady the camera, used a high ISO sensitivity setting to allow for a relatively fast shutter speed, and employed the lens’ built-in vibration reduction feature to reduce camera shake.

On our second day in Hong Kong, we traveled to Lantau Island to gain a different perspective on the city’s past and present. A highlight of the day was our visit to a traditional fishing village, with houses built on stilts.

Hong Kong has had a severe housing shortage for centuries. In a modern attempt to alleviate the crunch, city planners have been building huge housing developments in the New Territories, like this complex on Lantau Island.  I shot the housing complex from a cable car from the Giant Buddha statue in the mountains down to the harbor.  I used a long telephoto lens to frame the structure in such a perspective as to show its interesting textures and patterns.  In post-processing, I converted the image to black-and-white for a graphic arts look that emphasized the recurring patterns, increased the contrast, and adjusted the color curves to make the image pop.

Hong Kong is a world-class dining destination.  On our last night there, we dined at the two-Michelin-starred Cantonese restaurant Yan Toh Heen.  In my food photography, I like to include complementary or contrasting elements, so in this composition I included both the crispy barbecued duck and the house signature cocktail, complete with gold leaf adornment.  The color palette is similar between the two elements, but the textures are very different.  I prefer not to light food images with flash because the color balance imparted by the flash unit is often unappetizing, so this image was made using available light only, with a fairly wide aperture setting to soften the background and a medium shutter speed to allow hand-holding.  To learn more about my approach to food photography, see this post: Post on Food Photography

All of these images and many more are available to view and perhaps purchase on my website.  Simply click on any image here to visit the full photo gallery.

Have you photographed in Hong Kong?  Please share your stories and tips here!
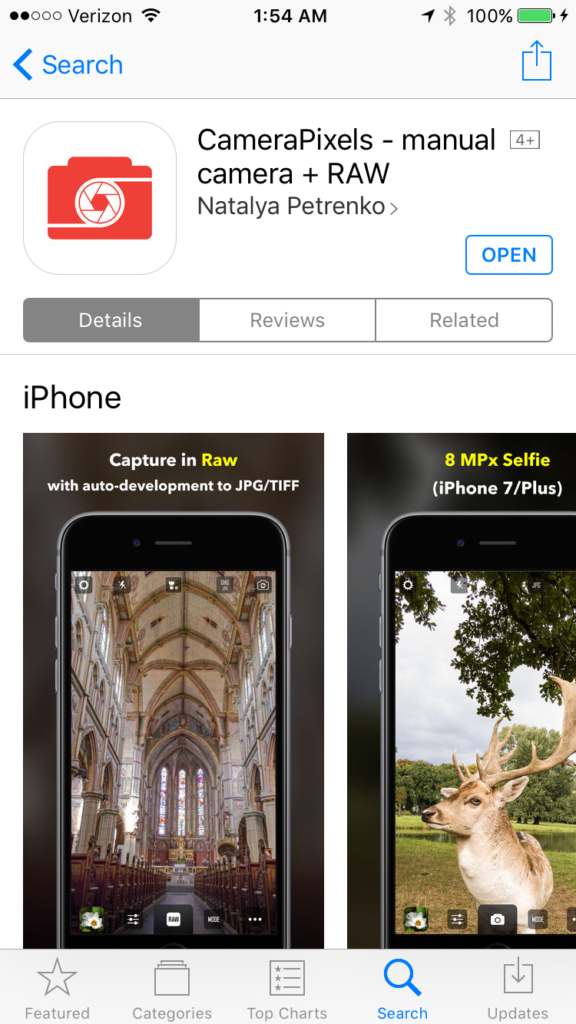
Want to see more posts about wonderful travel photography destinations?  Find them all here: Posts about destinations.

Brave New World [Encore Publication]: AI tools for photographers are improving

As a working professional photographer who also spent nearly 30 years as a technology manager/executive, I’ve long had an interest in the intersection between art/creativity and technology.  Recent attempts to marry photography with artificial intelligence have ranged from useful (facial recognition) to silly (Instagram filters) to hype (an expensive camera that several days after you shoot sends you only the images it deems worthy).  But as pattern matching algorithms improve and machine learning becomes more reliable, we are starting to see some amazing applications at the intersection of AI and photography.

I’ve recently been playing around with two good examples from Adobe.  Available only in the online version of Lightroom as “Technology Previews”, these tools enable you to search all your images for specific attributes and to have the AI automatically select what it determines to be your best photos.

To activate these new tools, go to https://lightroom.adobe.com, log in using your Adobe Creative Cloud credentials, and then click on the Lighroom logo in the upper left and select “Technology Previews” from the drop-down menu.  Click the check box next to “Best Photos”, and you’re good to go.

There are two main tools available at this time:

  1. Intelligent Photo Search: This is already very impressive technology.  You can search all or a subset of your images using any natural language term you want.  You could, for example, search all your images for photos of cats, or of mountains, or of dancers, or of waterfalls.  The more specific your search term is, the more accurate the results are likely to be.  When I searched for “waterfall” or for “dancer”, the AI seemed to get many or most of my photos featuring those themes, and only occasionally did it include photos that did not feature those themes.  When my search terms were broader, like “clouds” or “mountains”, the results were less accurate.  Aesthetic searches, say for the color “blue” or the effect of “motion” resulted in mostly accurate selections of images featuring these concepts.  While there are a few false matches, and likely quite a few more errors of omission of images that should have matched, this technology is quite useful in its current state.
  2. Best Photos Selection: This one is more of a work in process.  You can select any of your online galleries and ask the AI to select what it “thinks” the best photos are.  You can move a slider to increase or decrease how selective this tool is.  As a default, it shows you its picks for the top half of your photos, and then you can refine the selectivity to include more or fewer photos.  I tried this advanced technology using several of my recent photo galleries.  In most cases, it included my two or three favorite images in its initial selection of the top half of all the photos, but dropped them from its cut as I increased the selectivity.  In one gallery, for example, an image that was recently selected as a favorite by the editors of “National Geographic” was dropped by Adobe’s AI in the first cut of 10% of the images.  That image was quite artsy and abstract, and it’s not reasonable to expect that a machine could choose it as special.  Yet in another of my galleries, the AI included an image that recently won a major local competition in its final cut of just 1% of the images.  That image is a more traditional landscape that could reasonably be evaluated by a machine as a “good” photograph.

The bottom line here is that the applications of advanced technology to the art of photography are improving at an astonishing rate.  While neither of Adobe’s AI tools is as good as a human artist at selecting images by their features or their quality, both tools are off to an impressive start and one of them (Intelligent Photo Search) is already very usable.  I would not be surprised if, in a year or two, this technology advances to the point where machines can be making decisions about photography along with humans.  Both human and AI evaluations will have their strengths and weaknesses, and I can see them coexisting for the foreseeable future.  I recommend we all, as photographers, get steeped in this advanced technology and prepare for a future in which man and machine will both play a role in sophisticated evaluation of images.

Nikon’s New Mirrorless Cameras [Updated for Canon Mirrorless Announcement]: Impressive new technology catches and beats Sony, but issues remain

Update: Canon joins Nikon in announcing its first full-frame mirrorless camera system.  Read more about Canon’s new EOS R system here: The Verge article on Canon EOS R.  Canon’s initial launch will include a more extensive and useful lens lineup than Nikon’s, but both manufacturers have a lot of work to do in order to catch up with Sony’s portfolio of lenses.  Canon’s initial feature set seems less advanced than that of Nikon’s high-end Z7 camera.  It’s unclear at this time whether either Canon or Nikon will have an edge in usability over Sony’s design, but, frankly, Sony has set the bar very low with a complicated menu system and a poor set of controls.  It is becoming increasingly clear that mirrorless is the future of professional and enthusiast photography, but for the next few years DSLR technology will retain some key advantages.  Read on to see my original post from two weeks ago when the Nikon launch was announced.

=======

After months of teasing, Nikon has finally announced the details of their first-ever mirrorless camera launch.  The Nikon Z Series, with its first two models, the Z6 and Z7, represents the venerable company’s most ambitious new product launch in years.  Not surprisingly, the new full-frame Nikon models take aim squarely at Sony’s popular A7 III and A7R III models, with similar pricing and specs, respectively.  The Nikon Z6 will be priced at $1995.95 (body only) and the Z7 at $3399.95 (body only).  Initially only a 24-70mm f/4 “kit lens” and fast 35mm f/1.8 and 50mm f/1.8 prime lenses will be available, with more Z-mount lenses to launch in the future.  An adapter will also be available at additional cost to allow use of many existing F-mount lenses on the new Z Series bodies.

Details of the new cameras can be found on Nikon’s website: Nikon’s new mirrorless cameras.

While these new cameras offer very impressive technology and catch–and in many ways leapfrog–Sony’s mirrorless offerings, there are some disappointments specific to this Nikon launch as well as plenty of issues facing mirrorless cameras in general.

Regarding the shortfalls specific to the new Nikon Z6 and Z7, here are a few of my observations for how they fall short of my expectation:

  1. They lack a second memory card slot.  For pro shooters, this is a showstopper.
  2. The initial lens lineup will be very sparse, with only three lenses.  Over the next couple of years, Nikon will be rolling out additional lenses, but compared to the venerable F-mount glass lineup, the new Z-mount offerings will remain thin.
  3. The lens converter to enable use of existing F-mount lenses will have a considerable additional cost, won’t allow full auto focus and exposure on many existing lenses, and will likely cause the autofocus to perform slowly.

Mirrorless camera technology in general suffers relative to DSLR technology in substantial ways:

  1. They’re really not all that small and light relative to pro-level full-frame DSLR bodies.  And after the weight and bulk of the many lenses required by series shooters are factored in, the mirrorless kit ends up almost as heavy and bulky as a comparable DSRL system.  A related issue is that many shooters find the smaller mirrorless bodies to be unbalanced when fitted with a heavy and large professional lens.
  2. The electronic viewfinders (EVF) on mirrorless cameras have evolved quite a bit in recent years, but they remain difficult to use, in my opinion.  They suffer from flicker and slow refresh rates, and they just don’t provide a realistic view of the scene.  It’s like looking at the world through a miniature TV screen vs. seeing it through your own eyes.
  3. Replacing not only our existing camera bodies but also all of our lenses to make a full move to native mirrorless technology is a very expensive prospect.
  4. With no mirror to protect the sensor, it’s very easy to get dust and dirt on the sensor when changing lenses.
  5. The Sony A-series suffers from poor usability (most functionality is relegated to sub-menus that are difficult to navigate) and from scant weather sealing that doesn’t meet the needs of most professional travel photographers.  I’ll have to get the new Nikon Z-series in my hands to assess whether Nikon has resolved these issues for their new offering.

With Nikon now joining Sony in the pro-level full-frame mirrorless game, and with Canon gearing up to announce its own mirrorless offering, there is increasing evidence that mirrorless technology represents the future of photography.  That said, as of today there are plenty of good reasons to continue using DSRL technology for its robustness, better viewfinders, much fuller lens lineups, and investment protection.  I’ll be much quicker to upgrade my Nikon D810 bodies by buying a pair of Nikon D850 bodies than by purchasing Nikon’s Z6 or Z7 bodies.  Your mileage may vary, and I’m eager to hear feedback from “To Travel Hopefully” readers.

Please share your thoughts about the new Nikon Z-series and about mirrorless vs. DSLR technology in general!

Want to read more posts about travel photography gear?  Find them all here: Posts about Gear.