Focus on SAFEhouse Resident Artist Workshop [Encore Publication]: Documenting three very different and exciting new dance pieces

Recently I had the privilege of shooting both the tech rehearsal and first performances of three new dance pieces by very different, wonderfully talented, resident artists at San Francisco’s SAFEhouse for the Performing Arts.  SAFEhouse is a unique program that incubates emerging artists by giving them studio space, expert guidance, and public performances so they can grow and develop new work.  I thoroughly enjoyed getting to know each of the resident artists and having the opportunity to experience and document their pieces.

Each artist and work created a very different emotional affect, so I worked hard to shape my images according to how the performances made me feel.  As photographers we have the capability, like a painter or poet or dancer, to create our art in accordance with our emotions.  This is a point that is too easily forgotten when we’re out in the field shooting.  Today’s post shares a few of my favorite images of the tech rehearsal and performance for each of the artists, along with some brief discussion of how the images were made.

Dancer mia simonovic rehearses her highly improvisational new piece, “residue1”.  I loved her brave and fluid expression through motion of the feelings and sensations that were passing through her in the moment.  This work requires not only real-time improvisation but also the courage to be completely vulnerable on stage.  To capture the spirit of her piece, I made a series of images (one of which is shown here) of mia dancing with her own shadow.  I felt this image would be expressed most authentically in black-and-white, so I made the conversion to monochrome during post-processing.  Buy this photo

Seeking another method to capture the elusive and transient spirit of mia’s piece in a still image, I decided to try a series of images using a slower ISO and shutter speed to create some motion blur.  To enhance this effect, during post-processing I increased the contrast and vibrance until the visual impact came close to matching the emotional impact I felt during her piece.  Buy this photo

The next artist was Arina Hunter.  Her piece, “Dyspnea,” was unusual in that, instead of using a prerecorded sound score, she accompanied her motion entirely with sounds made by her own body.  Because these vocalizations and body percussion sounds were very soft compared to amplified music, I was able to make only a few images during her performance so as not to disturb the audience members.  Fortunately, I was able to capture many nice images during Arina’s tech rehearsal.  This one nicely captures her lovely expressive hand motions and facial gestures.  Buy this photo

Arina’s piece was very physical and covered a wide range of moves, poses, and expressions.  Here I captured her floor work by getting lying down on the floor of the stage myself so that I was shooting at the same level as her face.  Buy this photo

The final piece was presented by Maligrad Contemporary Dance Company, directed and choreographed by Molly Fletcher Lynch-Seaver.  This powerful performance spoke to me of violence and our complicity in standing by while it happens.  I wanted to capture this scene the way I felt it, which was like a gang rumble out of the movie “West Side Story,” so I shot straight into the action, allowing the brick walls and girders to frame the image, and converted to black-and-white during post-processing.  Buy this photo

This image was made near the end of Maligrad’s tech rehearsal.  When composing an image in which there’s a lot going on, I find it helps to think like a painter, specifically asking myself, “what elements do I want in the image vs. not in the image, and how do I want to arrange them?”  Buy this photo

During Arina’s live performance, I was only able to capture a handful of images due to the quiet sound score.  This was a favorite, as it reflects her expressive gestures in face, hands, and body.  Buy this photo

Because mia’s piece is so improvisational, it unfolded very differently in the live performance than in the tech rehearsal.  Knowing this in advance, and also knowing I could not move around during the performance like I could during the rehearsal, I just let myself be moved by her work, capturing the moments that spoke most strongly to me.  This image was made by shooting straight on but has a nice, soft visual appeal that matches her contemplative motion.  Buy this photo

This image, made during Maligrad’s live performance, is another example of the choices we photographers must make when framing a scene that includes multiple elements at different distances to the camera.  I chose to emphasize the dancer in the foreground by using a very narrow depth-of-field (low F-stop number), because I felt the story here was her pain at observing the warlike behavior of the background dancers.  Buy this photo

The final performance of the new works by these three artists-in-residence was Feb. 9, but if you live in the S.F. Bay Area you can follow their work and also look for other upcoming events at SAFEhouse for the Performing Arts.  I hope you’ve enjoyed my images and that I was able to provide a sense of how to shape our images to match the emotional feelings evoked by a performance.

How do you transform your emotions into images?  Please share your thoughts here.

Want to read more posts about what to shoot while traveling or near home?  Find them all here: Posts on What to Shoot.

When You Get Back Home [Encore Publication]: An introduction to the essentials of postprocessing

You may want to share some of your favorite images with friends and family right out of the camera while you’re still traveling, and as long as you’re not sharing so broadly that potential thieves may be alerted to your absence from home, that’s a fine thing to do.  To enable immediate and easy sharing, you can choose the setting available on many cameras to shoot both RAW and JPG files; the JPG images will often look pretty decent for sharing when they come straight from the camera, and you still have your much more detailed image data saved in the RAW files.

But when you get home from your trip, it’s worth making the effort to catalog and post-process the RAW files of your favorite images so that they will look their very best and so you will be organized for finding them in the future.  I’ll cover how to organize your catalog of images in a later post, but for now let’s take a look at the essentials of post-processing.

There are many software applications available to perform these tasks, but I strongly encourage you to check out Adobe Lightroom.  I use this tool, and nearly all professional and enthusiast photographers I know also use it.  You can license it along with other Adobe software on a pay-per-month basis as part of Adobe’s Creative Cloud, but it can also be purchased with a perpetual license (i.e., you purchase the software once and can use it forever), which is how I acquired it.

Once you have Lightroom installed on your PC, it’s easy to import your images from your camera’s memory card or from your PC’s hard drive and to organize your catalog of images using the software’s Library module.  When your images are in your Lightroom catalog, the software allows you to perform all post-processing you desire using its Develop module.  After shooting the image, my second-favorite part of the digital photography process is enhancing the the image in the Develop module.  The software package even gets its name, Lightroom, as the new digital equivalent of the work we older photographers formerly had to do in the darkroom, such as dodging, burning, and cropping our film negatives to get the images looking their best.

As an example of how a little post-processing can dramatically enhance an image, let’s take a look at a night shot I made of Copenhagen’s Christiansborg Palace, the seat of the Danish Parliament.  Here’s the “Before” picture:


Lightroom’s Develop module

The beauty of Lightroom’s method is that it doesn’t actually change your original image files as you edit them.  Instead Lightroom saves a roadmap of the various edits you make and stores this list of adjustments along with a pointer to the original file.  This is called “non-destructive editing”, and it allows you to edit your images to your heart’s content without overwriting or changing the originals at all.  You can go back as many times as you want later to revisit your edits and change them again and again.

Let’s look at this process in more detail.  Here is the basic Lightroom Develop module screen:

lightroom develop module

The left bar shows a thumbnail of the image you’re working on and a list of the most recent edits you have made.  The central part of the screen shows a larger version of your image and this can be zoomed in and out to work on details or the whole image.  The right bar has a histogram (a graph showing how many pixels in the image are at each brightness level from totally black to totally white) at the top, then a toolbar from which you can choose some of the editing tools quickly, and then a large area with sliders (only some of which are shown in this screenshot) that you move left or right to adjust various elements of your image.  The editing tools in Lightroom are comprehensive enough that I find I very rarely need to import an image into Adobe Photoshop to make really sophisticated edits; nearly all of the time, I can perform all of my post-processing using only Lightroom.

Some photographers spend a lot of time making major enhancements to their images, but I like to try to adjust my camera’s settings precisely enough that the image is made in the camera the way I envisioned it when shooting, so that I need to make only minor adjustments in post-processing.  While the exact steps of post-processing will be different for every image, here is my basic workflow (note that for the most part, I work from the top to the bottom of the adjustment tools found in the right bar):

  1. Adjust the white balance as needed.  Remember my advice to always shoot in RAW mode.  One of the advantages of RAW files is that you can adjust the white balance in post-processing, regardless of what your camera’s white balance controls were set for while you were shooting the image.  In JPG files you have much less control over the white balance after the fact.  Just choose a different preset white balance type (such as Daylight, Shade, or Flash) from Lightroom’s menu, or create a custom white balance yourself.
  2. Adjust the exposure as needed.  Use the histogram and the image preview pane to lighten or darken the whole image until it looks best.
  3. Adjust the contrast as needed.  Increasing contrast gives more separation between the darkest and lightest portions of the image, while decreasing contrast does the opposite.  I find that most images require the contrast to be increased slightly to moderately.
  4. Adjust the highlights and shadows as needed.  Highlights are the brighter parts of the image, and I find that often these need to be reduced in brightness to regain some detail that may have been lost in the camera.  Shadows are the darker parts of the image, and often these need to be made brighter to bring out lost shadow detail.  After the highlights and shadows have been adjusted, you may need to adjust the whites and blacks (very brightest and very darkest points in your image) if there are extremes of contrast present.  Most of the time I do not need to change the white and black points.
  5. Adjust the clarity as needed.  The clarity slider changes the contrast of the middle tones (neither the darker nor the lighter parts) of the image.  Usually images need a subtle increase in clarity to bring out the details in the texture.  Don’t overuse this tool or the image can become unnatural looking.
  6. Adjust the vibrance and/or saturation as needed.  Both of these sliders will change the concentration of the colors in your image, but vibrance tries to avoid changing the color of skin tones so images with people will often look more natural after increasing the vibrance than after increasing saturation.  Occasionally you might need to make adjustments to both vibrance and saturation, but usually I find a subtle increase in vibrance is sufficient.  Again, don’t overuse these tools or your image will start to look exaggerated and surreal (unless you’re going for those effects).
  7. Adjust the concentration of individual colors as needed.  Each color channel has its own slider to increase or decrease its saturation.  I don’t use these sliders often, but occasionally you may want to increase or decrease the saturation of just a single color.  For example, when shooting a landscape with sky or water, you may want to increase the blue saturation to bring out those parts of the image.
  8. If you want to work on your image in black-and-white, the color channels area is the tool I use to do the conversion from color to monochrome.  Click on the “B&W” tab above the individual color channel sliders, and then adjust the mix of how the colors are blended by increasing or decreasing each color’s slider to see how the black-and-white image looks.  I find that I often have to readjust the contrast slider at this point to get the image looking its best in black-and-white.
  9. There is some sharpening already applied to your image file by default, but if it looks too soft in the important areas, you can dial in some additional sharpening.
  10. When the image you’re editing was shot at a high ISO (sensitivity) and/or a very long shutter speed, there will likely be some noise in the image.  This can be managed somewhat in Lightroom’s noise reduction tool.
  11. Under basic lens corrections I will usually select all three of the check box items.  Lightroom knows how most camera and lens combinations work and can eliminate many of the optical glitches that would otherwise show up in the image.  Under manual lens corrections, I may need to rotate the image if the horizon wasn’t level when it was shot.
  12. All of the above adjustments affect the entire image.  After completing these adjustments, it’s time to make any selective adjustments that affect only a selected part of the image.  These selective adjustment tools can be found in the toolbar just below the histogram.
  13. Of these selective adjustment tools, the most generally useful is the cropping tool, which of course allows you to remove unwanted portions of the image on the sides, top, or bottom.  It’s always best to try to compose the image correctly in the camera, but cropping is often still needed in post-processing.
  14. The spot removal, filters, and adjustment brush are more complicated selective adjustment tools that can easily be subjects of additional posts in their own right.

These steps usually won’t all be needed for any one image.  If you have several images that were shot under similar conditions, you can select them all in the Library module and turn on Auto Sync, which then allows you to make the adjustments only once and apply them to all the selected images.  Another big time saver is creating your own presets, which are saved routines that you can call at the click of a button to automate tasks that would otherwise have taken multiple steps.  Unlike Photoshop, Lightroom was designed by Adobe specifically for photographers to use, so it is set up in such a way as to make life much easier for us to organize, edit, and share our images.

Here is the “After” version of our sample image of Copenhagen by night.  You can see how a few simple edits during post-processing can really make an image pop.

Buy this photo

I hope you’ve found this very basic introduction to the essentials of post-processing to be helpful.  Now it’s your turn.  What are your go-to techniques in editing your images?  Do you have tips and tricks that you’ve found make your life easier after you return from a trip?  Please share your thoughts in the comment box at the end of this post.

Want to read more posts about post-processing your images?  Find them all here: Posts on Post-Processing.

Beyond the Auto Mode [Encore Publication]: Take control of your images by learning to manually set exposure, focus, and more

Travel photography is so exciting and satisfying in part because it requires us to capture every kind of image in all kinds of shooting environments.  You could be heading out to shoot landscapes when suddenly a rare sighting of an animal transforms your activity into a wildlife shoot.  Or you may be on the road for your next destination when you stumble upon a colorful local festival, and now you’re shooting portraits of the revelers.  This rich diversity of subjects also creates one of the biggest challenges for travel photographers: how to be prepared for anything that comes our way.  For beginning photographers there is some comfort in using the Auto mode that nearly every camera offers.  After all, we’re more likely to get an acceptable shot this way, when the subject turns quickly from fast action to landscapes to the low light of evening, or to an indoor performance.  But in most cases, your camera’s Auto mode, which attempts to make its best guesses as to what settings to use given existing conditions, will yield only acceptable photos and not the striking and memorable images we’re after.

There is a better way.  Take control of your images by learning how to manually set your exposure, focus, and other aspects of your photo.  All advanced point-and-shoot cameras and all mirrorless and DSLR cameras allow you to set most functions manually.  Even some basic point-and-shoot models have a way to go manual, but often this will involve options buried deep in a menu somewhere.  And there are apps available for both iOS and Android smart phones that allow you to take manual control over your phone’s camera.  I use an iPhone 6S, and I’ve found the “ProCam 4” app to work very nicely for providing control over the phone’s camera setting for exposure, focus, and flash.  You can find it for less than $5 on the Apple App Store: ProCam 4 App.  Even without using an app, most smart phone cameras do allow you to override the automatic settings by clicking on the part of the image you want to be in focus and used for the exposure setting; usually you can also set the exposure based on a different area of the image from the area that you want to be in focus.  But the dedicated apps will give you greater control, as they allow you to choose the shutter speed, aperture, and ISO for each shot.

For this image of a whirling dervish in Goreme, Turkey, I wanted to blur the dancer so as to give a sense of the continual turning motion in the ceremony, so I used my camera’s shutter-priority exposure mode and selected a slower shutter speed.  Buy this photo

The key to successfully using your camera’s manual settings is to learn how they work and to practice at home, long before you actually take a trip.  Like anything else, selecting the settings we want on a camera takes practice.  In this digital era, it’s easier to learn because you can see the results of each setting immediately on your camera’s screen.  So dig out that camera user guide, or find it online, or search for a good tutorial.  But do learn how to adjust the key settings manually.

The first manual setting every photographer should learn is how to turn off your camera’s flash.  This sounds very basic, but I’m always amazed to see so many flashes going off in inappropriate places: museums that don’t allow flash photography, cultural performances, sports stadiums where the subject is thousands of feet away from the camera (the flash will only provide acceptable lighting for a few dozen feet, at most), and even the shy octopus exhibit at our local aquarium.  Believe me, you do not want to flash the octopus.  So learn how to turn your flash off, and be sure you actually do turn it off when you’re in a venue where flash is inappropriate or won’t help your image be better exposed.  Remember that glass reflects light, so you don’t want your flash on when shooting through windows of a vehicle or the glass windows of animal enclosures at zoos or aquariums.

Next, learn how to set your camera’s exposure manually.  The light meters built into today’s cameras are very smart, but they are also easily fooled by tricky lighting conditions.  The most common problem is backlighting.  If your subject is lit from behind, as many outdoor subjects are, your camera’s auto mode will likely expose for the brighter background and will leave your main subject underexposed.  You can adjust for this is several ways.  It may be good enough to just use your camera’s exposure compensation button to dial in, say, one extra stop of exposure.  Use your camera’s LCD screen and (if it has one) the histogram, to see how the subject is exposed with varying levels of compensation.  In some cases, you can use fill flash to fix backlighting problems.  To do so, manually turn on your camera’s flash, or attach a separate flash unit, and choose the setting for “fill flash” or “balanced TTL” (through the lens) flash mode.  Again, check exposure using your camera’s screen and histogram.  I find I usually get good results in tricky lighting conditions by using my camera’s spot metering mode, which tells the camera’s meter to use only the very center (or whatever area I select) of the image when choosing the exposure.

Other than allowing you to properly expose your main subject, manually setting the exposure also gives you control over what combination of shutter speed (how long the exposure lasts), aperture (how wide the lens is open), and ISO (how sensitive the camera is to light) you want for each shot.  If you’re shooting fast moving action like sports or wildlife, you will likely want to choose a fast shutter speed to freeze the motion (unless you want a blur effect as an artistic choice).  If you’re photographing a waterfall or sky and want to get some nice blurring of the water and/or clouds, you will probably want to choose a slower shutter speed.  Many times you want only certain parts of the image to be in focus.  A wide aperture (low F-stop number such as f/1.8) will give you a shallow depth-of-field, allowing only one part of the image to be in focus and blurring the other parts.  Conversely, a narrow aperture (high F-stop number such as f/16) will allow all parts of the photo to be in focus.  The final element determining exposure is the sensitivity of the camera’s sensor, measured by an ISO number.  Select a higher ISO (such as 1600 or above) only when you really need the extra sensitivity for very low-light subjects when a longer shutter speed or wider aperture is not suitable.  When you use very high ISO settings, the image will tend to have a lot of noise.  Today’s cameras are getting better at limiting noise at high ISO settings, and there are ways to reduce some of the effects of the noise using post-processing software, so my approach is to use as high an ISO as is required after considering the range of available shutter speeds and apertures.

To capture these professional beach volleyball players in sharp focus and to freeze the moment, I selected single-focus-point focus mode and chose the exact spot in the viewfinder where the players would be positioned, and also used my camera’s shutter-priority exposure mode to select a very fast shutter speed.  Buy this photo

The other major type of manual setting that you need to know how to use is focus.  Most cameras today do a pretty good job of choosing the right part of the image to focus on, but they often need some help from the photographer.  From simple smart phone cameras through professional DSLRs, the autofocus function almost always lets the photographer select what part of the image they want to be in focus.  If you keep your camera in fully autofocus mode and don’t help by selecting where your main subject is, it may very well guess incorrectly and put another part of the image as the center of focus.  So, learn how to select the focus point even while letting your camera’s autofocus mechanism actually choose the focus distance.  Sometimes a camera’s autofocus capability may not work for the conditions under which you’re shooting, and in these cases you need to turn off autofocus completely, and focus in manual mode.  Some instances when this is necessary are when shooting in very low light conditions, or when shooting in poor contrast environments (for example, your subject’s texture looks a lot like that of its background, or you’re shooting into the bright sun).  In these cases, turn off the autofocus function and adjust focus manually until the subject looks sharp.

It’s still fine to walk around during your travels with your camera set in fully Auto mode, just in case something very unexpected comes up.  But do know how to set the main functions manually so you’ll get the best possible images in the 95% of the shooting situations when you do have time to set up first.

Want to read other posts about photographic techniques?  Find them all here: http://www.to-travel-hopefully.com/category/techniques/

Do you have tips and tricks you can share on manually adjusting the camera’s settings to get great shots?  How about a time you kept the camera on Auto mode and got disappointing results?  Please share your thoughts using the comment box at the end of this post.

Join Me on a Photography Tour Next Summer!: From the Great American Total Solar Eclipse through the most scenic locations of the Pacific Northwest, this is a trip not to be missed

Dear Readers:

There are still a few spaces available on the Eclipse and Pacific Northwest photography tour this coming summer.  Please let me know if you are interested in learning more about it.

Kyle Adler

=======

If there’s a more thrilling experience anywhere on our planet than observing a total solar eclipse, I’ve not yet found it.  And the next one will be cutting a path across the USA on August 21.  I am partnering with a prominent solar eclipse tour company to lead a photography tour that begins in Salem, Oregon with this awe-inspiring event and continues through Oregon and Washington states to photograph some of the Pacific Northwest’s most scenic locations.  From Aug. 19-22 we will be part of a larger group of eclipse chasers, accompanied by leading eclipse expert Prof. Jay Pasachoff, preparing for, observing, and photographing this remarkable natural display in Salem.  Our small group of about 15 will then embark on a travel and photographic journey that will take us to the Santiam Wilderness, Bend, Newberry Volcano National Park, John Day Fossil Beds, Wallowa Mountains, Mt. Hood, Portland, Olympic National Park, and Seattle, among other memorable destinations.

Almost nothing can rival the stunning beauty and sheer excitement of observing and photographing a total solar eclipse.

I will be providing photography instruction for interested participants via daily workshops and in-the-field learning.  During our optional low-key workshops, we’ll review our recent images, plan our shot list for the upcoming locations, and cover techniques to make the best images possible.  While the drama of the eclipse and the breathtaking landscapes of the US Pacific Northwest will be obvious magnets for our photographic pursuits, we will also seek opportunities to make memorable images of the people we meet and of the wildlife and other attractions of the region.  Photographers of any level from advanced beginner through semi-professional will see their images improve, and non-photographer friends and family are welcome to either attend the daily workshops (even a smartphone camera can make great images) or enjoy a few minutes of extra time on their own.   You can enjoy this trip and make memorable images using whatever camera gear you wish to bring; it is not necessary to invest in specialized gear (although for the eclipse itself, a DSLR or mirrorless interchangeable lens camera equipped with an inexpensive solar filter will be helpful).

This tour begins in Salem, OR on Aug. 19 and ends in Seattle, WA on Sep. 2.  Find more details here: Eclipse and Pacific Northwest Photography Tour.  Please let me know if you have questions or are interested in participating on the trip.  Mary and I hope that you can join us for this rare opportunity to experience a total solar eclipse right here in North America and to visit the spectacular attractions of Oregon and Washington states!

Focus on Naatak “Airport Insecurity”: America’s premier Indian theater company launches a very timely show

Last night I had the privilege of shooting the tech rehearsal for Naatak’s new production, “Airport Insecurity.”  This is a vibrant and engaging show that is also very timely given what’s been going on in the news lately regarding immigration and several nations’ misguided attempts to secure their borders.  Naatak is America’s largest Indian theater company and I’ve been a fan for many years.  If you live in the San Francisco Bay Area, do try to catch a performance of the show, which runs through March 4 at Cubberley Theatre in Palo Alto.  You can learn more at Naatak’s website: Naatak “Airport Insecurity”.

Today’s post shares some of my favorite images from the tech rehearsal, including some behind-the-scenes shots of the actors preparing and the crew finishing the sets.  Although the play is based on a true story about an Indian-American techie stranded in a German airport, I will refrain from providing commentary on the action in each image, so as not to spoil the narrative. I will, however, provide a few technical tips regarding how the images were made.

Often the most compelling images of a theater production are not the ones made on-stage.  I always try to capture the backstory and behind-the-scenes activities, like this impromptu moment during make-up.  Buy this photo

It would be distracting and even potentially dangerous to use flash when construction is under way, so I used a fast prime lens and a high ISO setting to capture this image using available light.  Buy this photo

When possible, such as during a tech or dress rehearsal, I like to get down onto the floor of the stage to capture the action from a unique viewpoint.  Buy this photo

Sometimes a medium telephoto lens provides just the right perspective, in this case intimate without being intrusive.  Buy this photo

Careful attention to timing and to composition can elevate still images of theater. Buy this photo 

To capture this emotion-packed scene, I got in close using a medium telephoto lens and shot from the perspective of someone witnessing the interaction in the same room.  Buy this photo

I’ve said it before and will doubtless say it again: Shoot plenty of images in a continuous sequence to increase the odds of capturing just the right moment.  Buy this photo

To portray the couple’s sadness over their physical separation, I shot from the apron of the stage near the husband and chose a wide aperture so as to render the far-away wife in soft focus.  Buy this photo

A moment of celebration captured using a fast shutter speed.  To execute images with fast shutter speeds using available light only, I needed to use a fast lens nearly wide-open and a high ISO setting.  Buy this photo

The play’s final scene provides a sense of closure, so I wanted the image to be warm and reassuring.  The most pleasing perspective when making full-body images is frequently obtained by shooting parallel to the middle of the subject’s body.  Buy this photo

Curtain call!  I don’t like the distortion introduced when shooting a cast with a wide-angle lens, so to fit the entire cast in the frame using a normal lens, I moved to the back of the auditorium.  Buy this photo

How do you translate dramatic performances into still images?  Please share your thoughts here.

Want to read more posts about what to shoot while traveling and near home?  Find them all here: Posts on What to Shoot.

Focus on Yellowstone and Grand Teton: The oldest national park in the US remains one of the best photographic destinations

My last visit to Yellowstone National Park and its nearby cousin Grand Teton National Park was in June of 2011, and I am long overdue for a return trip.  These two gems of the US National Park system are among the world’s best photographic destinations.  Featuring an amazing array of mountain scenery, geothermal activity, wildlife, and human cultural records, Yellowstone and Grand Teton are, simply put, indispensable destinations for travel photographers.  In today’s post, let’s look at a few of my favorite images from the 2011 trip and discuss how they were made.  While the parks haven’t changed too much over the past six years, the state of the art of photographic gear certainly has changed a great deal.  Today’s cameras and lenses will afford photographers even more options for capturing the remarkable beauty of these parks.

Yellowstone N.P. has more geothermal activity than any other region of the world, and this activity manifests itself in many fascinating ways.  The Mammoth Terraces area of the park is known for its gloriously delicate and colorful silica terraces, including the one in this image.  For a great landscape image, it’s best to combine the main subject (here, the silica terraces) with striking foreground and/or background elements (here, the Teton Mountain Range, behind).  I used a circular polarizing filter to bring out the drama in the sky and the highlights in the mountain range, but I dialed back the polarizing effect a bit so as not to eliminate the gorgeous reflections in the pools.  Buy this photo

Yellowstone and Grand Teton N.P.’s are filled with fascinating wildlife, including American bison, elk, wolf, coyote, marmot, osprey, and many other mammal and bird species.  Here I’ve captured (in images, of course) an intrepid coyote that cut across our hiking trail.  For striking wildlife portraits, it’s best to use a medium to long telephoto lens so as not to have to get so close as to stress the animal (or risk your own safety).  Tack-sharp focus is important, and I always strive to frame the subject with as uncluttered a background as possible.  Buy this photo

Photographs that tell stories are perennial favorites.  I love the humor apparent in this image, which tells the story of a standoff between a large male bison and two park rangers attempting to shepherd a convoy of park visitors across the field to an interpretive nature program and barbecue dinner.  At the time this photo was made, the bison was winning.  Buy this photo

Just as in a portrait of a person, a wildlife portrait should capture the spirit of the subject.  This large marmot was sitting up as if to get a better look at us.  His expression is both comical and wise.  To maximize the chances of capturing just the right expression and position, frame the subject first, set the proper focus and exposure, and then shoot continuously for several seconds.  Buy this photo

The quaint Chapel of the Transfiguration, located amidst some of the world’s most lovely mountain scenery in Grand Teton N.P., is a wonderful photographic subject.  Here I framed the Tetons in the chapel’s window and fired an off-camera speedlight to illuminate the walls and altar of the church.  Buy this photo

The iconic Moulton Barn sits on a field in Grand Teton N.P. with the glory of the Teton Mountain Range arrayed behind it.  This landscape image was made with great care to ensure a pleasing composition including barn, mountains, and cloudy sky, as well as to expose for the wooden texture of the barn.  A small aperture (high F-stop number) was used to keep the entire scene in focus.  I used a polarizing filter to bring out the drama in the sky and mountains, as well as to concentrate the lovely green and blue colors.  The scene was further enhanced to achieve a pleasing balance through tone and saturation adjustments in post-processing.  Buy this photo

I was drawn to the texture and patterns of the cracked muddy ground in a geothermal area of Yellowstone N.P.  Composing the image to include just enough of the pattern as well as leading lines to draw the eye downrange, I converted it to black-and-white and made adjustments to contrast and tonal range in post-processing.  Buy this photo

Yellowstone’s Grand Prismatic Spring is a breathtaking feature that is almost impossible not to photograph well.  That said, there are techniques to capture it in all its glory.  Grand Prismatic Spring is one of the world’s few iconic subjects that is best photographed in the harsh light of mid-day, when the reflection from the direct sun most vibrantly brings out the array of colors.  Unless you can shoot it from above, looking directly down on the spring, it is best to include some foreground and background elements other than the spring itself, to provide context.  Here, I framed the spring through some lodgepole pine trees and included some forests and mountains in the background.  Buy this photo

Every visitor to Yellowstone N.P. will stop to observe some geyser eruptions.  But instead of just shooting straight on during mid-day into the eruption of a famous geyser like Old Faithful, seek out some of the lesser-known geysers at sunrise and sunset, and compose to include compositional elements other than the eruption itself.  This image, a favorite of mine, was made on a geyser basin at sunset.  I set up the camera on a steady tripod, set the exposure for a wide depth-of-field, and composed the scene to include the cracked earth and and the reflection of the sunset and eruption within the pools of sulfurous water.  Buy this photo

I can hardly wait to return to Yellowstone and Grand Teton National Parks!  I’m even more eager to visit during the winter than during the much more crowded summer months.  The rich array of scenery, wildlife, and otherworldly geothermal features elevate these parks to the pinnacle of travel photography destinations.

Have you visited Yellowstone and Grand Teton?  What did you find most remarkable?  What do you recommend your fellow travel photographers shoot while there, and what techniques do you use?  Please share your comments here.

Want to read other posts about travel photography destinations around the world?  Find them all here: Posts on Destinations.

Amazing Landscapes [Encore Publication]: How to make images that capture the spirit of the place

I love landscape photography.  To create a really successful landscape image, several elements have to converge: the lighting must have a pleasing quality, objects in the foreground and/or middle ground should be intriguing, leading lines should take the viewer on a journey through the image, and (usually) the sky must be dramatic and compelling.  I shoot a lot more mediocre landscapes than great ones, but when all the stars align (sometimes literally, during astrophotography shoots) and all those compositional elements are in place, the results can be amazing.

Let’s take a look at some of my favorite landscape images and talk about how they were made.
Buy this photo

While traveling in Svalbard to view the total solar eclipse of March 2015, my wife and I booked a safari via snowmobile to search for polar bears.  We covered 80 miles by snowmobile, much of that after dark.  The temperature averaged -5 degrees, with wind chill about 25 below zero Fahrenheit.  We rode out to an area now used as a campground, where an early settler and his wife lived a century ago.  This was glorious, otherworldly scenery encompassing ice fields, mountains, and the icy Barents Sea.  Svalbard is located so far north (closer to the North Pole than to mainland Norway) that the sunsets last for hours, so I set up my gear at the edge of the Barents Sea, composed the frame so that the eye is led out to the horizon by the slabs of ice and the range of mountains, and waited for the best light.  A polarizing filter added some drama to the sky.  A very long exposure was not necessary because there was no point to trying in blur the frozen water.  I shot several frames before the light became too dim and the temperature too bitter to continue.  This shot was the keeper!

Buy this photo

This landscape was shot during a recent trip through Turkey and is a good example of how sometimes we photographers just get lucky.  On arriving in the Cappadocian village of Üçhisar, we were thrilled to learn our hotel room was inside an ancient cave dwelling.  We awoke at 5:30 AM the next morning to the sight out our cave-hotel’s window of hundreds of hot air balloons launching above the “fairy chimneys” that dominate the Cappadocian landscape.  I got (mostly) dressed and rushed out onto our balcony, set up the camera on the lightweight travel tripod I carried on the trip, put on a wide-angle zoom lens, and started shooting as the sun rose.  I bracketed the exposure but because the light was perfect in this one shot, I did not end up combining multiple exposures into an HDR (high dynamic range) image.  Instead, this shot, one of the first of the morning’s session, was the clear choice.

Buy this photo

Chile’s Torres del Paine National Park is catnip for landscape photographers.  There are so many glorious subjects here that you can go crazy trying to photograph everything.  But Patagonian weather is notoriously changeable, and group travel doesn’t always afford photographers the chance to shoot at the right place at the right time of day with the right weather.  Fortunately, on our second night at the lodge on Lago Gray, I could see all the conditions were lining up for an epic image.  I skipped most of an excellent dinner so that I could set up my gear on the deck: camera with wide-angle lens, polarizing filter, steady tripod, and remote release.  I framed the image with a nice balance between sky, mountains, glaciers, lake, and foreground foliage.  And I started shooting.  I bracketed the exposure with 7-shot bursts, each one stop apart.  Later, in postprocessing, I combined a few of the shots from one burst into an HDR (high dynamic range) image using Lightroom’s photomerge feature.

Buy this photo

Closer to home, Yosemite is another photographer’s dream location.  While hiking to Dog Lake in Yosemite’s Tuolumne Meadows area, a freak hailstorm hit.  Suddenly the sky was hurling hailstones in biblical style and the formerly placid surface of the lake turned black with the force of the pelting ice.  What’s a photographer to do?  Start shooting, of course!  A tripod was impractical under these conditions, so I used a relatively fast shutter speed and shot handheld.  I took a series of bracketed exposures and combined them later using Lightroom into an HDR (high dynamic range) image.  For me, this image works because of the tension between the peaceful foreground of tree trunk and reeds, contrasted with the ominous sky and turbulent water.  The fallen tree and edge of the grasses provide nice leading lines from the peaceful to the violent portions of the frame.

Buy this photo

Another California landscape, this image was shot in the gorgeous Point Lobos reserve on California’s Central Coast.  As sunset neared, I set up camera and tripod right on the beach, shooting down onto the rocks and Pacific Ocean.  I used a neutral density filter to allow a very long exposure so that the water would blur.  I also attached a polarizing filter in an attempt to darken the sky and add drama to the image, but having two filters on the wide-angle lens did lead to some vignetting (the blocking of light at the edges of the photo), which I had to crop out in postprocessing.  This image was made from a single exposure with only minor adjustments to bring out the shadow details and saturate the colors.

Buy this photo

This year’s Perseid Meteor Shower was more active than we’ve seen in many years.  At the peak night of the shower, I headed out to a spot where a break in the trees allows a view over Crystal Springs Reservoir and the Santa Cruz Mountains.  We waited until about 2 AM so that the meteor activity was at a peak and the lights of the nearby towns were no longer bright.  Shooting with a wide-angle lens and a heavy professional tripod, I framed the image to include a pleasing foreground with trees, reservoir, and mountains, with most of the frame covering the dark sky.  I used a star finder app to shoot toward the galactic core of the Milky Way.  I set the camera to make 25-second exposures at f/4 and ISO 1600.  At this focal length, exposures longer than 25 seconds will cause the stars to appear blurry due to the motion of the earth.  And then I just kept shooting, one exposure after another, for nearly two hours.  Four meteors passed through the part of the sky in my image area during this time, and I combined the images that included them into one merged image using a software application called StarStaX.  While I like this image a lot, it could have been improved by finding a darker sky area (the lights from a nearby city caused the orange glow at the top of the mountains) and by bringing out the Milky Way a bit more prominently.  Now I know what to do during next year’s Perseid Shower!

A good wide-angle zoom lens is a must for landscape photography.  Many of the images featured in this post were shot with my Nikon 16-35mm f/4 lens.  It’s got great image quality and is well built, and I find it’s a great alternative (except perhaps for astrophotography where the extra speed is required) to the popular but very expensive Nikon 14-24mm f/2.8.

Want to see more articles on how to shoot travel images?  Find them all here: http://www.to-travel-hopefully.com/category/travel/shoot/

Now I’d love to hear from you!  What are your favorite landscape images, and why?  To what lengths have you gone to capture landscape photos?  Please share your thoughts in the comment box at the end of this post.

Focus on Naatak Mela ’16 [Encore Publication]: Five short plays in five different Indian languages

Note: Naatak’s next production, “Airport Insecurity,” runs from Feb. 24 through Mar. 4, 2017.  You can find more information here: Naatak “Airport Insecurity”.

Last December I was privileged to be invited by Naatak, America’s preeminent Indian theater company, to shoot their annual festival of short plays, Mela ’16.  I’m a loyal follower of Naatak, so I was thrilled to have the opportunity to photograph this exciting production.

The program is comprised of five short plays, each performed by a different cast and in a different Indian language.  I found all five plays to be powerful and vibrant, and truly enjoyed their diversity.  It was also a treat to get to know some of the cast, directors, and staff at Naatak.  In this post, I share a few images from the event along with some tips about photographing live indoor performances.

The lighting at Mela ’16 is first-rate, probably the best I’ve ever encountered when shooting live indoor performances.  This aids photography in two ways: 1) The color balance appears quite natural, and 2) The lighting is bright enough that you can shoot using a fast shutter speed and still keep noise to a minimum by choosing a reasonable ISO setting.

The first play, “Immortal,” is presented in Bengali and is based on a short story by Satyajit Ray.  It’s a mystery involving the unexpected death of a prominent scientist and treats themes of intellectual property rights, scientific ethics, and of course a love triangle.

With good continuous tungsten lighting handled by a talented tech staff, live indoor performances are a joy to shoot.  I used a fast normal lens and a fast portrait lens, both of them primes, so I could select a fast enough shutter speed to freeze action and still choose a slow enough ISO setting to minimize noise.  Buy this photo

The second play, “The Goat Slaughter Game,” is presented in Tamil and based on a short story by well known children’s author Roald Dahl.  It reminded me of an Agatha Christie mystery, but I won’t divulge which one so as not to give anything away.

During action scenes, try to anticipate the “decisive moment” when the drama unfolds.  When something key is happening, shoot liberally so as to maximize chances of capturing just the right instant.  This image is powerful because it captures the instant around which the whole play hinges, and because the fast shutter speed freezes that moment and the shallow depth-of-field isolates each of the two characters.  Buy this photo

The third play, “Look How Artfully I protected You,” is presented in Gujarati and based on a work by George Bernard Shaw.  This little farce is packed with drama and action, Bollywood-style.  The costumes and set provide vibrant colors and contrasts.  I loved shooting this piece.

Once again, the key to making memorable images of performances is to capture just the right instant where the dramatic tension is high.  In this image, the woman is trying to defuse a fight between her husband and her lover.  In post-processing, I cropped the image slightly so as to increase the tension and maximize the storytelling potential.  Buy this photo

The fourth play, “Logging Out,” is presented in Marathi and written by Dharmakiri Sumant.  It tells the story of a boy and girl falling in love, but with the twist that the girl wants to keep their relationship online and not meet in real life.  This piece was the most challenging to shoot because the two actors are physically separated within different areas of the stage and because the lighting was often very dim.

In low-light situations, shoot with a large aperture (small f-stop number) and a high ISO setting, and wait for moments when the action slows down to prevent motion blurring.  I like the moody atmosphere of this image, which reflects the loneliness of life online.  Buy this photo

The final play, “The Mud Wall,” is presented in Hindi and written by Narendra Kohli.  This was my favorite piece of the evening because it deals with many themes of modern Indian life, including wealth, class, bureaucracy, family dynamics, and treatment of women.  It was also a joy to photograph because it had so much dramatic action and tension.

This may be my favorite image from the whole event.  I love the dramatic tension and the irony of the slogan on the sign above the terrified family.  The usual tips apply here: use a fast lens, a fast shutter speed, and a reasonable ISO setting; frame the shot in advance on the area where the action will occur; and shoot many images.  In post-processing, I cropped a bit for dramatic effect and lowered the black point so that the backdrop appears completely black for more contrast with the actors.  Buy this photo

Mela ’16 is an exciting event and also very educational for those of us not intimately familiar with the varied cultures of India.  Since I can’t travel all the time, I try to seek out global learning experiences in my own backyard, and Naatak delivers on this promise.  If you live in the SF Bay Area, I encourage you to attend the final performance today.  And not to worry, each play is presented with easy-to-read supertitles in English, just in case your Bengali, Tamil, Gujarati, Marathi, or Hindi are not up to snuff.

What performances excite you?  Have you attended, or photographed, events that informed you about diverse cultural experiences?  Please share your thoughts here.

Want to read more posts about what to shoot while traveling or near home?  Find them all here: Posts on What to Shoot.

Focus on Vietnamese Tet Festival [Encore Publication]: A vibrant lunar new year celebration in America’s largest Vietnamese community

Most Americans are familiar with the Chinese New Year festivities that usher in the lunar new year in late January or early February, but most are not as aware of the Vietnamese cultural celebration of the start of the lunar year.  Called Tet, the Vietnamese new year’s festival has its own distinctive, bright, and colorful symbols and traditions.  By far the biggest Vietnamese community in the USA is in San Jose, California, which not coincidentally also hosts the largest Tet Festival each year in the US.  I’m fortunate to live quite near San Jose, and yesterday I was already collaborating with a favorite model in a studio one city north of there, so I decided to drop by and shoot the Tet Festival.  I’m very glad I did.  Today’s post presents some of my favorite images from the festival in the form of a simple photo essay.  I’ve included some discussion about how the images were made.

Welcome to the Tet Festival!  When shooting symbolic items, always check your background and find a point-of-view that is clean and compelling.  Buy this photo

An unusual cultural juxtaposition: Vietnamese belly dancing.  Here I used a fast shutter speed to freeze the motion and a relatively wide aperture to soften the background.  Capturing the right moment in the dance pattern is important, but it’s equally essential to capture the right facial gesture and eye contact.  Buy this photo

What’s scarier than a clown?  A drunken clown.  This fellow came out on stage with a bottle of beer and a bottle of whiskey, both of which he proceeded to drink onstage.  My wife and I suspect that this was an object lesson for the children in the audience, but we’re not certain.  Buy this photo

The fashion show of people watching the fashion show on stage.  Whether shooting landscapes, people, wildlife, or urban scenes, always remember to look in all directions.  Sometimes the most interesting subject lies in the opposite direction from the one you thought you were shooting.  Buy this photo

To capture this candid moment of young kids trying out the Vietnamese drums, I used a medium telephoto lens.  Most of the time I prefer to approach subjects before photographing them, but occasionally it’s preferable to shoot first and ask questions later, so as to capture the subject without self-awareness.  Buy this photo

Wearing many hats!  Buy this photo

This traditional Vietnamese dance troupe performed a series of dances, each representing one of the seasons of the year.  This was their Spring Dance.  The vibrant colors of the costumes and props contribute greatly to this portrait.  It’s also important to compose and crop the image carefully to achieve a pleasing result.  Buy this photo

Summer dance.  Buy this photo

I love this portrait thanks to the dancer’s look of contemplation and concentration.  To make an effective portrait in spite of the cluttered background, I used a medium telephoto lens set to a wide aperture to set the subject off from the background.  I also cropped the image in post-processing to remove extraneous background objects.  Buy this photo

Parting shot: A favorite portrait of a traditional Vietnamese dancer.  Buy this photo

What are your favorite cultural events and celebrations?  Please share your thoughts on how to successfully photograph them.

Want to read more posts about what to shoot while traveling or near home?  Find them all here: Posts on What to Shoot.

Stripped Down to the Bare Essentials: Cupid’s Undie Run supports Children’s Tumor Foundation

I’m fortunate to live in the San Francisco Bay Area, where fun, crazy, photogenic events–planned and spontaneous–occur nearly continuously.  But the zany and colorful annual event known as Cupid’s Undie Run, for which participants strip down to their underwear and run through the city’s streets to raise money for Children’s Tumor Foundation, is actually held in dozens of cities around the world.  The San Francisco version was quite small this year, in spite of 60-degree mostly sunny weather, but it was as energetic, irreverent, and just plain fun as ever.  Today’s post features a few of my favorite images from this Valentine’s Day inspired event.  This time, it’s just for fun; I’m not going to annotate the images with a lot of detailed information about how they were made.  Enjoy, and consider supporting this valuable charitable cause: Children’s Tumor Foundation.

In between round of margaritas, a quick run along San Francisco’s waterfront.  Buy this photo

Happily, the weather was unseasonably warm and dry.  Buy this photo

The “finish line” is the front door of the pub.  Buy this photo

It wouldn’t be Cupid’s Undie Run without Cupid.  Buy this photo

Speaks for itself.  Buy this photo

A quick reminder about how to make a stunning portrait: 1) find soft and appealing lighting, 2) get in close with a medium portrait lens, 3) select a wide aperture for shallow depth-of-field.  Buy this photo

I love this town!  Buy this photo

Look for this fun event in your town next year around Valentine’s Day.  And, whether you’re traveling around the world or right in your home town, seek out those fun and quirky happenings that yield eye-catching images.

What are some of your favorite events to shoot, and why?

Want to read more posts about what to shoot while traveling or near home?  Find them all here: Posts on What to Shoot.
Followup–To JPEG or Not to JPEG: For many RAW shooters there is no need to use RAW+JPG

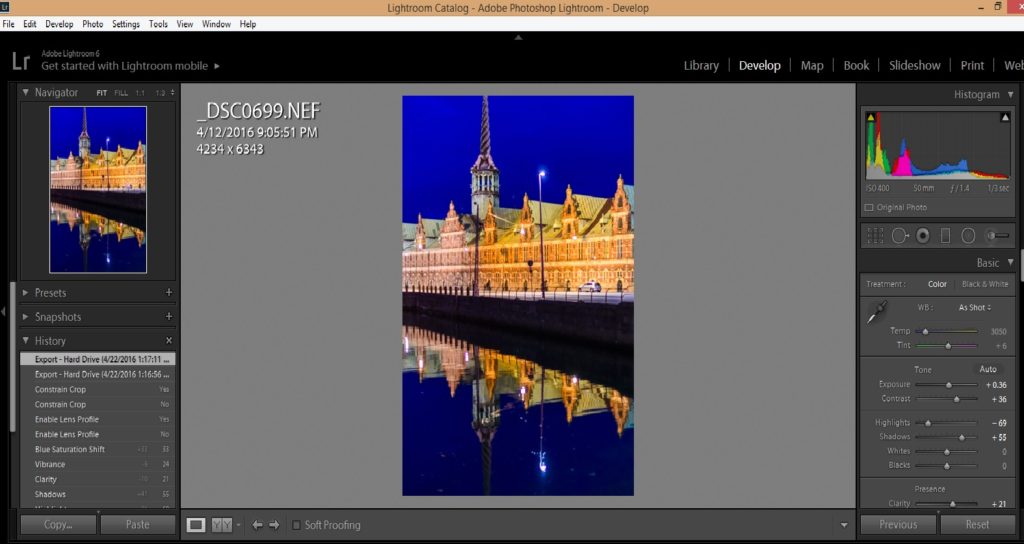
Two weeks ago, I published the following post in which I explained why I was transitioning away from shooting RAW+JPEG to shooting only in RAW format.  Just a quick follow-up to share that over the last two weeks, I have executed more than a dozen photo shoots in RAW mode only, and I also have gone back to nearly all my archives of older shoots and deleted all the JPEG files where the same image was also stored in RAW format.  What are the results so far?  I’ve recovered about 20% of my hard disk drive’s space, so everything now runs faster on my PC and I’m not always struggling to free up enough space for each day’s new shots.  Furthermore, my shoots are going more smoothly because I don’t need to wait for the camera’s buffer to clear as it attempts to write both RAW and JPEG versions of each image to the memory card, and because I don’t need to change memory cards nearly as often.  And I’m happy to report that thus far I have had absolutely no issues as a result of making this major change to my workflow.  If you’re still shooting RAW+JPEG, now may be a good time to examine whether the extra burden is worthwhile in your own workflow.  The original article from two weeks ago follows.

=======ORIGINAL POST FROM FEB. 4, 2017=======

Regular readers of To Travel Hopefully already know that I always shoot in RAW mode, and most likely you do, too.  I’ve written repeatedly about the major advantages of RAW vs. JPEG format.  For a refresher, here’s a good summary post on the topic: Post on RAW Mode.  I concluded this previous post with a recommendation to shoot in RAW+JPEG mode, where the camera writes out the image data in both its native RAW format and in the familiar but problematic JPEG mode.  Here’s the relevant paragraph from that older post:

I recommend shooting in RAW+JPEG all the time, unless you know you will need the slightly faster shooting speed or extra storage space of JPEG alone.  Doing so will give you the best of both worlds: a quick and easy JPEG to share right out of the camera, and the much more detailed data in the RAW file from which to bring out the nuances in color, texture, and exposure later during post-processing.  If you use JPEG alone, you’ll be throwing away image information you may wish you had later.

But right now, I’m in the middle of making a major transition in my workflow.  I’ve stopped shooting in RAW+JPEG mode and am now storing my images only as RAW files.  Moreover, I’m cleaning up my PC’s hard drive by revisiting many of my directories from shoots over the past few years and deleting all of the original JPEG files (obviously, I am keeping the JPEGs that I exported from Lightroom after post-processing the original RAW files).

Why would I do such a thing, you may ask?  There are several major reasons:

  • I don’t end up using the JPEG files: Shooting in RAW+JPEG had become a crutch for me.  I had been using this mode because I was afraid of not having JPEG versions of all my images, in case I decided post-processing the RAW files was too much work or if I wanted to share certain images right out of the camera.  But I’ve been realizing that I never share JPEGs right after shooting.  They just don’t look good enough for most professional work, so I need to post-process the good ones before delivering them to anyone.  You may have clients who need to see some rough JPEGs immediately after the shoot.  I know some wedding photographers who promise this immediate preview to their clients.  But I don’t have this requirement, so the JPEGs were just sitting on my hard drive, unused, forever.  And it’s so easy to export quick-and-dirty JPEG files from Lightroom shortly after the shoot.
  • Duplicate JPEG files slow down shooting: The RAW+JPEG mode tells the camera to write out two different formats for every image you shoot.  This slows down your shooting by bogging down the camera’s processor, and it also fills up the camera’s buffer more quickly, requiring a disruptively long wait to resume shooting.  It also fills up memory cards more quickly.  While JPEG sizes vary from image to image due to compression algorithms, I find they average about 1/3 to 1/2 the size of my camera’s RAW files.  That’s a lot of extra space on the memory card, so I have to stop shooting to change cards more often.
  • Duplicate JPEG files take up a lot of disk space: Even though my main laptop PC has a 1.5 TB hard disk drive, I find it is always filling up, which considerably slows down workflow and requires bothersome housekeeping to clean up.  Storing unneeded JPEG versions of my many tens of thousands of images wastes a lot of disk space.
  • Those JPEGs slow down workflow: Even though Lightroom has a useful option to import only the RAW version into your catalog, and it keeps track of the duplicate JPEG version of the same image, having both files on your hard drive still slows down post-processing and image maintenance tasks.

I know that some photographers really do need to have JPEG files of their images.  They may be delivering images right out of the camera via a wireless connection to a cloud server that supports only JPEG format.  They may not get to post-processing for some time after the shoot and want to remember what the image looked like with the camera’s settings applied (although here one should note that Lightroom and other RAW viewers will access your camera’s settings via the thumbnail image embedded within your image’s RAW file).  They may really love their camera’s black-and-white conversion tool or other in-camera editing tools, which work only with the JPEG format.  There are quite a few situations in which you may truly require a JPEG version of your images.  But I haven’t encountered these situations in my own recent work and don’t expect to in the foreseeable future.

So, that’s the backstory on why I’m moving from shooting RAW+JPEG to RAW only.  I’m even taking the drastic step of going back to recent shoot directories on my PC and deleting the original JPEG versions of the images.  I’ll report back in a few weeks to provide an update on how this works out for me.  In the meantime, if you’re shooting in RAW+JPEG mode, you may also want to think about whether doing so genuinely helps your workflow or simply is wasting your resources.

Do you shoot RAW+JPEG, RAW only, or some different format?  Why?  Please share your experiences here.

Want to read more posts about photographic techniques?  Find them all here: Posts on Techniques.

Will Photography Soon Be Obsolete? [Encore Publicaton]: Musings on AI as artist

A friend recently pondered via a social media post whether we will have photography as we know it in the future, or if artificial intelligence (AI) will soon generate all of our images.  With tens of millions of people now capturing snapshots on their phones’ cameras and instantly applying AI-generated filters to enhance or modify the images, we can certainly observe an increasing trend toward computer involvement in the making of photos.  But I don’t believe AI will replace the artist’s eye in the making of fine-art photographs for quite some time to come.  Here are a few semi-random musings on this theme.

A machine can certainly generate bad art.  In college in the mid-1980s, I wrote a program for my Computer Science final exam that composed musical canons (pieces in which each voice plays the same melody together, but starting at different times).  My code used a semi-random configuration of musical intervals as the opening melody, then applied a simplified set of the rules of counterpoint (how musical lines are allowed to fit together) to complete the canon.  I received an “A” for this project, but truth to tell, any listener familiar with classical music could instantly discern that the pieces composed by my program weren’t anything like the lovely canons written by Telemann, for example.  In other words, my AI didn’t pass the Turing Test.

In the more than 30 years since I wrote that program, AI has progressed by leaps and bounds.  Computers can now generate poetry, classical and jazz music, and even paintings that many non-experts judge as products of human artistic creativity.  I’m fascinated by the progress, but so far the best of the AI-generated “art” is really just imitation and trickery: it takes a seed of something original such as a photograph or a melody, and transforms it using a set of complex rules that could be described as a pre-programmed artistic style into something pleasant enough but not inspiring.

In his landmark 1979 book, “Gödel, Escher, Bach: An Eternal Golden Braid,” Douglas Hofstadter amazed the world by demonstrating comparable interlocking themes of grace and elegance among the very different disciplines of mathematics, visual art, and music.  He even speculated on the ability of machines to create works of great insight.  But Hofstadter’s proposed approach differed from that of the AI field that has developed since then in that he favored teaching machines to create via an understanding of how the human mind creates, as opposed to today’s AI approach of taking mountains of data and throwing brute force calculations at it.  To my eye, ear, and mind, this brute force method is the reason most of today’s attempts to artificially emulate the creative process are not insightful and do not add anything to their genres.  And so far, the vast majority of these attempts fail their respective Turing Tests.  That is, humans can tell it is a machine and not a human generating the “art.”

Applying these musings to the art of photography, what do see today?  To be sure, more images are being generated today than ever before in human history, and the art of photography is being devalued by its sheer pervasiveness.  Everyone captures images now, and most of them believe that makes them photographers.  While photographers have always required the involvement of a machine in the creation of their art, good photographers have always relied on their artistic vision, the so-called artist’s eye, to create images that are special.  I don’t believe that all the Meitu and similar AI filters that abound today are creating any photographic art that adds insight or helps interpret the world around us.

One very central component in photography is composition.  How does the photographer choose what elements to include in the image, and how will these elements be combined?  Read my recent post on composition here: Post on Composition.  This vital aspect of photography does use some “rules”, such as the Rule of Thirds, Leading Lines, Framing Elements, Point of View, Foreground/Background, and Symmetry and Patterns.  Rules, of course, can be programmed into an AI so that the machine can emulate the way humans create.  But in photographic composition, the “rules” are really just guidelines for getting started.  A good photographer knows when to break the rules for artistic impact.

Even the dumbest devices are capable of generating images.  Security cameras can capture images that we would consider to be rudimentary documentary photographs.  Given long enough, a security camera might accidentally capture what we would consider to be a good street photography image, because after capturing millions of dull scenes, sooner or later the camera will catch a random alignment of interesting elements.  It’s like thousands of monkeys typing random characters: given enough time, one of them will coincidentally type out a Shakespeare sonnet or even a full play.  As wearable computing devices become more pervasive, many people’s lives will be documented in real-time via the capture of millions of images.  Some of these may be interesting to their friends and perhaps the general public.  A few may even have artistic value.  But true artistry isn’t characterized by coincidence.

I don’t doubt that eventually we will get to the point where machines can create images as good as much of what humans can create.  I think we’ll get there, but it will take a long, long time.  And in the meantime, the role of photographer as artist, experimenter, and interpreter of the world around us will continue to be central to our society’s need for communication and expression.

What do you think about the future of photography?  Will we soon see machines creating much of our imagery?  How about our good, artistic imagery?  Please share your thoughts here.

Flashback: A simple and cheap accessory to improve your lighting

IMPORTANT UPDATE ON AUGUST 11, 2017:

Dear Readers,

I must retract my support for the Vello off-camera flash cord.  It is cheaply made and recently and suddenly failed, disabling my camera during an important client shoot.  I ended up paying over $300 to have the failed Vello accessory removed from my camera, and I lost use of my camera for more than a month while the repairs were being done.

Since this failure occurred, I’ve been very happily using a genuine Nikon brand off-camera flash cord:

The Nikon unit costs more than the Vello unit, but in my estimation it is much more solid and reliable.  I strongly urge all photographers to stay away from the Vello cord.

Here is the original post for reference, but please understand that I retract my support for this product.

=======

When it comes to gear, a lot of photographers will spend a lot of cash on a camera body, lens, or tripod head that they hope will magically elevate the quality of their images.  I’ve said it before, and I’ll say it again: great images are made by great photographers, regardless of the gear they use.  I find that in most cases, spending a lot of money on a new piece of kit will not result in dramatically improved images, at least not right away.  But sometimes it’s a little, inexpensive accessory that can immediately transform our images.  A good polarizing filter, for example, can almost magically improve landscape images by enhancing skies and mountains and reducing unwanted reflections.  In today’s post, I sing the praises of another inexpensive accessory that can make a big difference: the off-camera flash cord.
CubaThis portrait of a student at a Cuban school is compelling for its subject’s poise and its strong color scheme, but the lighting from the hot-shoe mounted speedlight is a bit harsh.  Buy this photo

Using your camera’s built-in flash or a speedlight mounted to the camera’s hot-shoe provides lighting that is aimed directly toward your subject from the plane of the camera’s sensor.  This light will bounce off the subject and come directly back to the camera, which makes for quite harsh lighting, often severe shadows, and red-eye or other unwanted effects.  These often undesirable characteristics can be mitigated a bit by using the flash unit’s tilt head to bounce the light off a wall or ceiling, or by dialing back the power of the flash’s output, but direct flash lighting is rarely the most attractive.

Instead, get the flash unit off the camera to enhance the lighting.  By purchasing an inexpensive off-camera flash cord, you can connect the flash to the camera’s hot-shoe while having the freedom to hold the flash away from the camera and to aim it any way you like.  I usually hand-hold the flash in my left hand while holding the camera in my right, but occasionally it is necessary to have both hands on the camera, in which case a bracket or stand can be used to hold the flash.  Depending on the situation, I will either aim the flash head toward the subject or bounce the flash off another surface such as a ceiling, wall, or even my own clothing.  With the off-camera flash cord, there is much more flexibility in how to position and aim the flash.

NOTE: I RETRACT MY SUPPORT FOR THIS ACCESSORY.  SEE THE NOTE AT THE TOP OF THIS POST.  Here is the flash cord I use.  It’s an independent brand (not made by Nikon, my camera’s and flash unit’s manufacturer), but I’ve found it to be at least as reliable, usable, and durable as the manufacturer’s own cord.  Best of all, this accessory costs less than $20, making it one of the best bargains I’ve encountered in the photographic accessory space.

The results from getting the flash unit off of the camera can be dramatic.  This image from Carnaval San Francisco is striking for the subject’s vibrant color and energetic sense of motion.  There are few visible shadows on her face, and the lighting is natural looking and even.

USAGetting the flash unit off of the camera’s hot-shoe yields even and natural lighting that is free from the harsh appearance and unflattering shadows often found in flash photography.  Buy this photo

There are other methods you can use for off-camera flash.  These days, many photographers use wireless triggers for the camera and flash to communicate.  If this setup works for you, great, but I’ve found a good old-school flash cord to be more reliable than wireless.

Try getting your flash off of the camera with a cord or wireless setup.  I think you’ll be very pleased with the results and the return on investment is likely to be higher than with most other gear purchases.

How do you use flash in your photography?  Any indispensable little accessories in your bag?  Please share your thoughts here.

Want to read more posts about photographic gear?  Find them all here: Posts on Gear.


Meteoric Rise [Encore Publication]: How to shoot the Perseid and other meteor showers

While the Geminid Meteor Shower in December and the Perseid Meteor Shower in August are the best-known, each year there are quite a few major meteor showers that afford great opportunities for seeing meteor activity.  Here is a partial list, courtesy of Sky & Telescope:

Major Meteor Showers in 2017
Shower Radiant and direction Morning of maximum Best hourly rate Parent
Quadrantid Draco (NE) Jan. 3 60-100 2003 EH1
Lyrid Lyra (E) April 22 10-20 Thatcher (1861 I)
Eta Aquariid* Aquarius (E) May 6 20-60 1P/Halley
Delta Aquariid Aquarius (S) July 30 20 96P/Machholz
Perseid* Perseus (NE) Aug. 12 90 109P/Swift-Tuttle
Orionid Orion (SE) Oct. 21 10-20 1P/Halley
Southern Taurid* Taurus (S) Nov. 5 10-20 2P/Encke
Leonid Leo (E) Nov. 17 10-20 55P/Tempel-Tuttle
Geminid Gemini (S) Dec. 14 100-120 3200 Phaethon

* Strong moonlight will interfere with these showers.

Source: Sky & Telescope

While it’s still technically tricky to make great images of a meteor shower, today’s technology certainly makes it possible for those of us without astronomical budgets to do so.  I shot some nice images of last summer’s Perseid shower and would have been out there shooting the Geminids last December except that the cloud cover here in the San Francisco Bay Area was 95-100%.  Here’s a composite of several images I shot last August of the Perseids.

A composite image made up of one long exposure for the lake, mountain, and trees, plus several 25-second exposures capturing the individual meteors I observed over a 2-hour period.  Buy this photo

Most of the techniques you need for capturing a meteor shower are the same as for capturing the Milky Way.  Review my post from a few weeks ago for a refresher course: Post on Milky Way Photography.

The special challenge when shooting a meteor shower is that meteors can occur anywhere in the sky.  Even with a very wide-angle lens, such as a 14mm or 16mm lens on a full-frame camera, only a small portion of the sky can be covered.  As we are limited to a maximum exposure time of about 25-30 seconds with a 14mm or 16mm lens so as to avoid blurring the stars into star trails, it’s clear that we have to shoot a lot of consecutive images to be likely to capture several meteors throughout the night.  We then use software such as Photoshop to combine the images in which meteors are visible into a single composite image showing all of the meteor activity we captured during the night.

A good tutorial on shooting meteor showers, illustrated with amazing images by Glenn Randall, can be found here: Glenn Randall post on photographing meteor showers.

Have you photographed a meteor shower?  What techniques did you use?  Please share your experiences here.

Want to read more posts about photographic techniques?  Find them all here: Posts on Techniques.

Cool, Calm, and Composed [Encore Publication]: All the technology in the world can’t replace your vision when composing images

Photographic composition is the process of determining which elements to include in the image and how to combine them in an artistically pleasing way.

What makes a great photograph?  You’ll hear many different answers to this question from different people, but to me a great photograph needs to integrate at least three of these four elements: compelling subject, beautiful light, flawless technical execution, and thoughtful composition.  Assuming we can find a great subject and either find or manufacture lovely lighting, the technology in modern cameras can assist us in certain technical matters such as exposure and focus.  But even the best of today’s AI technology can’t replace the artist’s vision when it comes to photographic composition.  For more of my musings on the application of AI to photography, see yesterday’s post: Post on AI and Photography.

Today’s post presents a quick primer on some of the guidelines that can help us compose our images.  But keep in mind that there are no hard-and-fast rules when it comes to composition.  The photographer must choose which “rules” to use when composing, and when to break some rules.

      • Rule of Thirds: One of the first compositional tools most beginning photographers learn is the so-called Rule of Thirds, which states that strong composition is achieved by placing key elements along the imaginary lines that divide the frame into thirds vertically and horizontally; better yet, try to place the most important parts of the subject at the intersection of a pair of these lines.  This portrait I made of two sisters in Arusha, Tanzania, places each sister’s dominant eye at an intersection point of two of the imaginary dividing lines.

Tanzania Buy this photo

          • Leading Lines: Another tool to aid in composing strong images is using the natural lines in the image to draw the viewer’s eye into the frame.  This landscape made while hiking part of the Sheep’s Head Way in southwestern Ireland incorporates the leading lines of the ancient stone wall, the rainbow, and the coastline to draw the eye down to the sea, over the rainbow, and across the coast.

 Buy this photo

          • Framing Elements: Using natural frames within the image to set off the main subject can be a useful technique.  Look for doors and windows in a population center, or for natural arches, trees, and other landforms in a natural setting.  This night landscape made in Yosemite National Park frames the Milky Way within a ring of trees and granite walls.

 Buy this photo

          • Point-of-View: Think about how the different elements in the image will appear in the perspective of your location.  I could have shot this portrait of a man with his duck at a street fair in San Francisco straight on with them both looking into the lens.  Instead, I chose a viewpoint that was very close to the duck’s head, shooting up from its perspective and relegating the human to the background and edge of the frame, nearly out of focus.  This changes the nature of the portrait to a more humorous and offbeat tone, which matched the occasion of the How Weird Street Faire.

USA Buy this photo

          • Background: Always be at least as aware of your background as your foreground subject matter.  Careful choice of background to support your image’s overall theme is one of the surest ways to elevate your image.  In many cases it is desirable to have a clean, uncluttered background, but for this image of the San Francisco Pride Parade, I wanted the background to support the theme of solidarity and strength in numbers.  While the main subject in the front is the only element in crisp focus, the layers of marchers with flags behind him supports the concept he is not alone.

 Buy this photo

        • Patterns: Composing an image around a recurring pattern can add considerable dramatic impact.  I framed this image of miners’ cottages in Svalbard, Norway by isolating the repeating pattern of houses, each in a different vivid color, against the stark white of the snow and bleak sky.

 Buy this photo

  • Symmetry: Images with symmetry along one or more dimensions are often striking and artistically pleasing.  The subject can have natural symmetry, such as in a face, or can be framed with its reflection to create symmetry.  I framed this image of a resting alligator with its reflection in the Louisiana bayou waters to create a dramatic symmetry.

 Buy this photo

Keep these guidelines in mind as you choose how to compose your images, but remember that which one(s) you apply will depend on the image, that its okay to break the rules, and that ultimately you are the artist and what you envision, not what the rules state, is correct for you.

What guidelines help you compose your best images?  Please share your thoughts here.

Want to read more posts about photographic techniques?  Find them all here: Posts on Techniques.

To Travel Hopefully is Taking the Day Off: Please help support this site

Dear Reader,

To Travel Hopefully is taking the day off, but don’t worry, we’ll be back with fresh new content soon.

In the meantime, please take a look at the helpful travel photography tips and inspiring images in our archived posts.  Just select a category (Destinations, Gear, Techniques, Travel, etc.) from the right nav bar, or choose a month under Archives, and browse to your heart’s content.

While you’re here, take a moment to tell your friends and family about us.  Anyone who enjoys travel and wants to improve their photography will find great daily content here, including inspiring images from around the world and tips and tricks for making the best possible photos.  You can email any post or share it via social media with the click of one of the buttons at the end of each post.  And if you enjoy To Travel Hopefully, please click in the right nav bar to subscribe via email or RSS feed, so you won’t miss a single post.

And finally, please consider supporting this site by purchasing some of my photos, browsing for some great gear via the Amazon links, or clicking on some of the ads that interest you.

My holiday special promotion ended on Dec. 31, but I have lowered most of my regular prices considerably.  Fine art prints and novelty items are available in a wide variety of sizes and price ranges for nearly every image in my portfolio.  Please take a look at Featured Photos to see a sampling of my images available for purchase.

Thank you for visiting To Travel Hopefully!  Without your support, this project cannot continue providing you with daily content including inspiring travel photos and tips and tricks for making great images.

Warm regards,

Kyle Adler


The Things We Carry [Encore Publication]: Basic Gear for Travel Photography, Part II

Kyle Adler photographer travel photography

Let’s pick up the gear discussion where we left off on the recent post.  Last time, we covered cameras and lenses.  Now we’ll talk about flashes, tripods, accessories, bags, and other essential kit.

Flash Units

Your camera most likely has a built-in flash, and in many cases that can be good enough to provide some fill-in lighting for backlit subjects or even to serve as a main light in very dark situations.  But for more flexible control over how much light you want, the quality of that light, and where that light comes from and goes to, you will likely want to have a separate flash unit.  I use the Nikon SB-910, which is powerful and flexible enough for most settings.  It has been discontinued and replaced by the Nikon SB-5000, but the older model is often still available.

Whatever flash you use, it is best to attach a diffuser of some sort to soften the otherwise very harsh light of the flash.  I also keep my camera set to lower the flash output by 1 stop, and I only override this setting occasionally.  Flash is often best when used sparingly.

Tripods

For most travel situations, you’ll want a lightweight tripod that folds up to a nice portable size but still offers enough stability for most uses.  There are times, though, when I need to bring along my heavy and bulky professional tripod.  Whatever tripod you choose, be sure to fit it with a good quality head (ball heads provide a lot of flexibility and ease of use for travelers) and remember to take along the plate that attaches the tripod to your camera, if required.

My go-to lightweight travel tripod is the Manfrotto Be Free.  It folds up to an incredibly small size yet affords a surprising amount of stability.  The included ball head works well but is difficult to adjust for sensitivity.  This tripod is designed to fit into a special pouch in my favorite travel photography backpack, also made by Manfrotto.

The SLIK 615-315 is a great tripod for use close to home or on trips where you will have constant vehicle support.  It’s very solid, supports a tremendous amount of weight, and can be adjusted for nearly any shooting situation.  I recommend you fit it with a good ball head for maximum flexibility.

A monopod can be a real problem solver when you need more stability than handholding or resting your camera on a vehicle or table will afford, but you can’t carry or use a full tripod.  I use the Manfrotto 681B model.

Accessories

We photographers love our toys!  While it is easy to get carried away and purchase every cool accessory that comes along, I will try to limit the recommendations here to a handful of truly essential items.  And don’t forget the little things like lens cleaning cloths, a blower brush for dust, and of course extra batteries and chargers for your camera and flash.

Three kinds of filters are essential gear for most photographers.  I’ll cover each type below.  Note that you must use a filter that is the correct size to attach to your lens.

It’s a good idea to keep a UV filter attached to your lenses at all times, as this helps protect the front element of the lens from scratches.  Use a good quality filter, though, as the poorer ones can affect image quality.  I would recommend removing the UV filter when shooting with certain other combinations of filters, as the edges of the image can be cut off (vignetting) with too thick a stack of filters on the end of the lens.  I’ve had good luck with Hoya UV filters.

The second must-have type of filter is the circular polarizer.  A polarizing filter can reduce glaring reflections and can darken skies and enhance natural colors.  This little gadget is almost a secret weapon for making images that really pop.  Again, I like the Hoya products, which are thin, well made, and perform as they should.

The final essential filter is the neutral density filter.  These reduce the amount of light that reaches the camera’s sensor, so you can use slower shutter speeds to blur motion, or so you can use a wider aperture to get a shallow depth-of-field, even in bright sunlight.

Another essential is a good remote release for your camera.  I know plenty of photographers who still use the good old trusty wired (or cable) releases.  I like to be able to move away from the camera when shooting remotely, so I favor a wireless release such as the RFN-4s Wireless Remote Shutter Release.

Smartphones

Most of us would never consider leaving home without our phone, and there are additional good reasons to carry yours with you when you are photographing at home or around the globe.  First, the cameras in today’s better phones are now good enough to make quite good images.  I’ve been very impressed with the quality of the main camera, and even the selfie camera, on my Apple iPhone 6S.  But your phone is also an essential photography tool because there are some very good apps to help you plan, shoot, and share your images.  There are too many to list here, but I’ll plan a future post to share some of my favorites.

Bags

Aside from cameras and lenses, no other category of gear gets photographers arguing quite so heatedly as bags.  For a travel photographer, your bag must be highly protective and durable yet lightweight, fit your gear well but with the flexibility to change out kit as needed, and preferably not advertise that you have expensive camera equipment inside.  The choice of what bag to use is a very personal one, but I’m still going to recommend my three favorites.

For those times when you need to bring most or all of your gear on a trip, I like the Tamrac 5586 Expedition 6x Backpack.  It carries a lot of gear snugly and flexibly, and it doesn’t look like a camera bag so it’s less likely to invite the wrong kind of attention.  It will almost always be accepted as carryon on flights, but it is a bit bulky and heavy for all-day, everyday use while traveling.  I’ll often use this bag to get all my gear to my first destination, then pack a day bag for just the gear I’ll need for each day of the trip.

My current favorite bag for day use for nearly any shooting situation near home or while traveling is the Manfrotto MB MA-BP-TRV Advanced Travel Backpack.  It can fit a reasonable amount of gear while leaving room for non-photography items like a jacket or a water bottle (yes, even photographers occasionally have to drink or stay warm).  It disguises your gear pretty well, has good rain protection, and even sports a special sleeve for carrying the Manfrotto Be-Free Travel Tripod.

For carrying just a few pieces of gear around town or close to home or hotel, a shoulder bag can work well.  This is the best setup for quickly accessing your gear while shooting, but it can be tiring to carry the weight across one side of your body if you have a lot of trekking to do.

Software

For post-processing my images, I use both Adobe Lightroom and Adobe Photoshop Elements.  I can do 90% of my processing using just Lightroom, but occasionally I do need the added power of Photoshop.  While I still use the perpetual license software versions, by now most photographers have gone over to the monthly licensing structure that Adobe calls the Creative Cloud.

What gear can’t you live without?  Have you discovered any little gadgets that improve your images or make life easier for photographers?  Please share your thoughts in the comment box.  I’d love to get your ideas!

Want to read more posts about photographic gear?  Find them all here: Posts on Gear.


The Things We Carry [Encore Publication]: Basic Gear for Travel Photography, Part I

In today’s post, we’ll cover cameras and lenses.  I’ll post again soon with Part II, which will discuss flash units, tripods, accessories, bags, and other essential gear.

One of the biggest challenges we face as travel photographers is what gear to carry with us.  On the one hand, we have to be ready for anything.  It’s quite possible we will have to shoot landscapes, wildlife, portraits, architecture, indoor performances, and night scenes, often all on the same day.  On the other hand, there’s a practical limit to how much we can carry without being turned away by airline personnel or damaging our bodies.  And who really wants to travel with 75 pounds of photo kit?

Here is my basic setup for travel.  Note that my gear is suitable for a professional or enthusiast photographer on a not-unlimited budget (my wife keeps me from getting carried away).  There are less expensive alternatives for most of the gear I carry, and those on unlimited budgets can spend much, much more than this.  I will adjust what I bring depending on the specifics of the trip.  For a safari in East Africa, that 500mm lens is essential, but I wouldn’t want to lug it on a hiking trip in Ireland.  On a trip to view a total solar eclipse, I’ll need that rock solid but very heavy professional tripod, but on most trips my lightweight travel tripod is good enough, thank you.  But the following list of items comprises the core of my basic travel gear.

Cameras

There is no one-size-fits-all when it comes to your choice of camera.  These days, even a simple point-and-shoot camera or a smartphone camera is capable of making very good images.  But if you’re willing to carry a bit more weight and to learn how to use it before you take it on your first trip, a mirrorless interchangeable lens camera or a digital single-lens reflex (DSLR) camera will give you much more flexibility.  I use a DSLR, but more and more of my photographer friends are switching over to mirrorless cameras.  It’s really a matter of personal choice, and if you’re not planning to carry a lot of specialized (and heavy) lenses with you, the smaller size and lighter weight of a mirrorless camera may make up for the loss of certain features.  For very photo-intensive trips where it would be impossible to replace a lost or broken camera, such as an African safari, I will pack two DSLR camera bodies, but often I take a chance and bring just one.  Whatever camera you take on your trip, make sure you know how to use all its features and have tested it thoroughly before you leave, and if you’ve been using it for a while, have it cleaned in advance of your departure.  Note that while I am a Nikon shooter, comparable gear is available from Canon for DSLR afficianadoes.  In the high-end mirrorless arena, Sony’s Alpha a7R II is favored by many professionals and enthusiasts.

My go-to camera is the Nikon D810.  This is a professional model and not for beginners, but it really does do it all.  The resolution is extraordinary, it performs superbly in very low-light situations, the autofocus is fast and flexible, it’s continuous burst shooting speed is good enough, and I love the feel of the camera in my hands and the control it offers over all settings quickly.  I’ve put this baby through hell and high water, but it always comes through for me.

Lenses

For beginning users of interchangeable lens cameras, or for seasoned photographers who need to travel light, a small and lightweight “walkaround lens” may be all that you need to bring for a day’s shooting.  Mine is the Nikon 24-85mm f/3.5-4.5 lens.  It’s a good value for a well-built if not quite professional grade lens, and while not particularly fast, it does offer vibration reduction which allows you to shoot at slower shutter speeds while controlling for camera shake.  I recommend this lens for users of cameras with full-frame sensors who want a small, light, and fairly durable lens for those situations when you want to be ready for most anything.

It’s a good idea to have a wide-angle zoom lens for landscapes, architecture, and other situations where you need to include a lot of area in the frame or want a more uncluttered or exaggerated perspective.  I use the Nikon 16-35mm f/4 lens for this purpose.  It’s got great image quality and is well built, but it is rather heavy and bulky.

A telephoto zoom lens is a must-have for most travel photographers, as it allows you to shoot many wildlife subjects as well as emphasize details in all subjects you encounter.  A longer lens also can be used to provide a compressed perspective that makes far-away subjects appear to be closer to foreground subjects; this perspective can be very powerful in landscape images.  My primary tele zoom is the Nikon 70-300mm f/4.5-5.6 VR lens.  While this lens is built on aging technology and doesn’t always feel as solid as more professional lenses, it is relatively small and lightweight, fairly inexpensive, and provides a very effective vibration reduction function.  This lens has been a staple in my bag for many years, during which time I’ve used it to capture some of my favorite images.


You may never need a super-telephoto lens.  They tend to be expensive, bulky, and heavy, and on many trips you won’t need it.  But for those trips when you expect to encounter lots of wildlife or want to capture astronomical events like an eclipse or transit of a planet, a very long lens is essential.  Mine is the Sigma 150-500mm f/5-6.3 lens.  It’s more economical than a Nikon or Canon super-tele, and it produces reasonably sharp images even when used at its widest aperture.  You can spend much more on this type of big glass if you want or need to, but I’ve found this lens works quite well for me.

So far, we’ve talked about zoom lenses.  It’s also a good idea to carry a few prime (fixed focal length) lenses.  These tend to be faster, higher quality, and less expensive than zoom lenses in the same category.  The downside, of course, is that you have to “zoom with your feet,” that is, find a vantage point that works to compose your image without benefit of changing the lens’ focal length.

If you pack only one prime lens, it most likely will be a “normal” lens, that is one with a focal length of about 50mm for a full-frame camera or about 35mm for a crop-sensor camera.  I carry the Nikon 50mm f/1.4G lens.  This is the one I use in very low-light situations or to get a really shallow depth-of-field.

I think my current favorite lens of all is my Nikon 85mm f/1.8G lens.  This is a classic portrait lens and provides a flattering perspective and great image quality when your subject is a human being.  I use it for nearly all of my portrait work these days.  But this lens also shines for nature and action photography where you don’t need a really long focal length.  It renders really lovely “bokeh”, or the soft quality of the out-of-focus parts of the image.

A wide angle prime lens can be useful for landscapes, architecture and interiors, and astrophotography, among other purposes.  I like the Nikon 24mm f/1.8.


Stay tuned for Part II of our gear discussion, to be posted soon on this same Bat Channel.

What’s your go-to camera and which are your indispensable lenses?  Add your thoughts to the comment box at the end of this post!

Want to read more posts about photographic gear?  Find them all here: Posts on Gear.


Focus on SAFEhouse Resident Artist Workshop: Documenting three very different and emotionally moving new dance pieces

Last night I had the privilege of shooting both the tech rehearsal and first performances of three new dance pieces by very different, wonderfully talented, resident artists at San Francisco’s SAFEhouse for the Performing Arts.  SAFEhouse is a unique program that incubates emerging artists by giving them studio space, expert guidance, and public performances so they can grow and develop new work.  I thoroughly enjoyed getting to know each of the resident artists and having the opportunity to experience and document their pieces.

Each artist and work created a very different emotional affect, so I worked hard to shape my images according to how the performances made me feel.  As photographers we have the capability, like a painter or poet or dancer, to create our art in accordance with our emotions.  This is a point that is too easily forgotten when we’re out in the field shooting.  Today’s post shares a few of my favorite images of the tech rehearsal and performance for each of the artists, along with some brief discussion of how the images were made.

Dancer mia simonovic rehearses her highly improvisational new piece, “residue1”.  I loved her brave and fluid expression through motion of the feelings and sensations that were passing through her in the moment.  This work requires not only real-time improvisation but also the courage to be completely vulnerable on stage.  To capture the spirit of her piece, I made a series of images (one of which is shown here) of mia dancing with her own shadow.  I felt this image would be expressed most authentically in black-and-white, so I made the conversion to monochrome during post-processing.  Buy this photo

Seeking another method to capture the elusive and transient spirit of mia’s piece in a still image, I decided to try a series of images using a slower ISO and shutter speed to create some motion blur.  To enhance this effect, during post-processing I increased the contrast and vibrance until the visual impact came close to matching the emotional impact I felt during her piece.  Buy this photo

The next artist was Arina Hunter.  Her piece, “Dyspnea,” was unusual in that, instead of using a prerecorded sound score, she accompanied her motion entirely with sounds made by her own body.  Because these vocalizations and body percussion sounds were very soft compared to amplified music, I was able to make only a few images during her performance so as not to disturb the audience members.  Fortunately, I was able to capture many nice images during Arina’s tech rehearsal.  This one nicely captures her lovely expressive hand motions and facial gestures.  Buy this photo

Arina’s piece was very physical and covered a wide range of moves, poses, and expressions.  Here I captured her floor work by getting lying down on the floor of the stage myself so that I was shooting at the same level as her face.  Buy this photo

The final piece was presented by Maligrad Contemporary Dance Company, directed and choreographed by Molly Fletcher Lynch-Seaver.  This powerful performance spoke to me of violence and our complicity in standing by while it happens.  I wanted to capture this scene the way I felt it, which was like a gang rumble out of the movie “West Side Story,” so I shot straight into the action, allowing the brick walls and girders to frame the image, and converted to black-and-white during post-processing.  Buy this photo

This image was made near the end of Maligrad’s tech rehearsal.  When composing an image in which there’s a lot going on, I find it helps to think like a painter, specifically asking myself, “what elements do I want in the image vs. not in the image, and how do I want to arrange them?”  Buy this photo

During Arina’s live performance, I was only able to capture a handful of images due to the quiet sound score.  This was a favorite, as it reflects her expressive gestures in face, hands, and body.  Buy this photo

Because mia’s piece is so improvisational, it unfolded very differently in the live performance than in the tech rehearsal.  Knowing this in advance, and also knowing I could not move around during the performance like I could during the rehearsal, I just let myself be moved by her work, capturing the moments that spoke most strongly to me.  This image was made by shooting straight on but has a nice, soft visual appeal that matches her contemplative motion.  Buy this photo

This image, made during Maligrad’s live performance, is another example of the choices we photographers must make when framing a scene that includes multiple elements at different distances to the camera.  I chose to emphasize the dancer in the foreground by using a very narrow depth-of-field (low F-stop number), because I felt the story here was her pain at observing the warlike behavior of the background dancers.  Buy this photo

The final performance of the new works by these three artists-in-residence was Feb. 9, but if you live in the S.F. Bay Area you can follow their work and also look for other upcoming events at SAFEhouse for the Performing Arts.  I hope you’ve enjoyed my images and that I was able to provide a sense of how to shape our images to match the emotional feelings evoked by a performance.

How do you transform your emotions into images?  Please share your thoughts here.

Want to read more posts about what to shoot while traveling or near home?  Find them all here: Posts on What to Shoot.


Focus on Svalbard [Encore Publication]: Breathtaking beauty at the top of the world

My wife and I area avid eclipse chasers.  One of the joys of seeking out total solar eclipses is their geographic dispersion: each total eclipse can be viewed only from a narrow band of land or sea whose swatch could cut across any corner of the globe.  This means the dedicated eclipse junkie could, and eventually will, end up traveling to nearly any given remote spot on the planet.  In March, 2015, we had the opportunity to observe and photograph a total solar eclipse in Longyearbyen, the only population center in Svalbard, the vast island in the Norwegian Arctic.  This wonderful trip was conducted by A Classic Tour Collection (http://aclassictour.com/travel-company/), specialists in eclipse tours. Home to more polar bears than humans, Svalbard is a place of remarkable pristine beauty located closer to the North Pole than it is to mainland Norway.

In a previous post I provided a primer on eclipse photography.  You can review that post here: Post on Eclipse Photography.  And don’t forget you can join my wife and me for our photography tour including the total solar eclipse and the Pacific Northwest in August-September 2017: Eclipse and Pacific Northwest Photography Tour.

Today’s post focuses on Svalbard’s photographic treasures.  The village of Longyearbyen itself is very distinctive.  The world’s northernmost permanent settlement, it was built to enable the mining industry in the region.  The landscape and architecture are very unusual and starkly beautiful.

This row of miner’s cottages, each painted a vibrant color, makes a nice subject.  I overexposed the foreground and background snow to emphasize the richly saturated colors of the houses.  Buy this photo

Any Arctic location affords the possibility of seeing the Aurora Borealis (Northern Lights).  The conditions must align properly: dark sky, clear weather, and it helps to be near a peak in the solar cycle.  While I’ve seen more impressive displays in the past, the aurora we observed in Svalbard was still impressive.

To capture the Northern Lights, use a fast wide-angle lens and a sturdy tripod.  As a starting point for exposure, try an ISO setting of about 800 and shutter speeds from about 4-15 seconds.  Experiment to see what works best.  Buy this photo

The stark icy landscapes surrounding Longyearbyen are otherworldly.  I photographed this glacier-covered mountain near sunset, and we enjoyed the excitement of climbing it the next day.

To make this image of an icy butte on the outskirts of the village, I used a tripod and exposed using spot metering for the rocky parts of the mountain.  Buy this photo

When shooting in very cold climates like Svalbard in March, it’s important to keep both your gear and yourself safe and functional.  Check out this post on shooting in extreme conditions: Post on Extreme Conditions.

One of the trip highlights was a polar bear safari by snowmobile.  Zipping along pristine ice fields at speeds up to 75 km/hour while the Arctic sun slowly set was thrilling.  Our turnaround point was an old campsite on the shore of the Barents Sea.  It truly felt like the edge of the world.  Due to an incident earlier in the day, in which a group of campers was attacked by a polar bear and forced to shoot it, we did not encounter any of the skittish bears that night.  We did, however, see the doomed animal’s footprints in the fresh snow.

My wife hikes alongside the tracks of a polar bear shot to death earlier the same day.  This dramatic image was made in near total darkness, so I was forced to use flash as the main lighting source.  In these situations, I dial down the power of the flash by at least one stop and try to position it for maximum dramatic impact.  Buy this photo

One of my favorite images from the trip, this was made on the shore of the Barents Sea at sunset.  Landscapes like this one need to be composed especially carefully to best showcase elements in the foreground, middle ground, and background.  I chose a vantage point low to the ground to emphasize the ice floes.  While I also experimented with using a bit of fill flash, I preferred this image with natural light only.  Buy this photo

On eclipse day, there is a palpable air of excitement.  Here is a shot of astronomer and leading eclipse expert Jay Pasachoff preparing for the eclipse along with one of his students.

Even during an exciting event like a total solar eclipse, it’s important to remember to document the people and activities in your group.  Buy this photo

The diamond ring effect signals the start of the period of totality.  Buy this photo

After the eclipse viewing, we enjoyed a dogsled ride back to Longyearbyen village.  I wanted to capture the feeling of exhilaration as the dogs pulled us rapidly along the snow fields into a wide-open horizon.  To capture that emotion, I shot from the perspective of the rider, handheld, using a fast shutter speed and a fairly wide focal length.  Buy this photo

Wildlife is a favorite genre of photography in nearly any region.  During our ascent of a glacier-covered mountain, we were fortunate to observe several Svalbard reindeer, the world’s smallest subspecies.  I used a telephoto lens and exposed for the animal’s fur, as using an auto mode would have underexposed the main subject due to the bright snowy background.  Buy this photo

Longyearbyen is the world’s northernmost settlement, so it stands to reason it would contain the world’s northernmost church.  Care must be taken when photographing architecture using a wide-angle lens not to distort the perspective.  Buy this photo

Your intrepid author photographing the total solar eclipse.  Buy this photo

Parting shot: After returning from Svalbard, I created this montage of several images each depicting a different phase of the eclipse.  Buy this photo

I hope this article inspires you to want to visit Svalbard.  While extra effort is required to visit the world’s most remote and extreme destinations, the returns are enormous in terms of the beauty and unique photographic experiences.

Have you visited Svalbard or other Arctic destinations?  What was most memorable?  Please share your thoughts here.

Want to read more posts about travel photography destinations?  Find them all here: Posts on Destinations.

Focus on Dance Brigade’s “Gracias a la Vida: Love in a Bitter Time” [Encore Publication]: Creative approaches to shooting inspiring performances

This weekend, I had the privilege of shooting the dress rehearsal for a new show highlighting 40 years of activism through the arts, presented by San Francisco feminist and multi-cultural dance company, Dance Brigade.  Their work was extremely powerful and moving.  Not only was it artistically and technically astonishing, but the show was truly inspiring as a testament to the power of artists fighting for social justice.  In the current era we need this power to be wielded widely and wisely to balance the widespread injustice all around us.

When shooting work as inspiring as this, I often choose less traditional and more creative approaches to presenting my images.  In short, the medium should match the message, so when the message is as powerful as Dance Brigade’s performance, I believe the medium should rise to the occasion.  So, in addition to making some traditional documentary images shot looking directly toward the performers with an eye toward capturing the obvious, I also strove to capture some different and unusual perspectives on the performance.  I present some of them in the post with short descriptions of my intent for each image.

The usual rules for shooting a live indoor performance still apply.  Gain permission to shoot in advance directly from the show’s producer.  Use a fast lens and high ISO setting so as to be able to preserve a fast shutter speed to freeze action while still avoiding use of flash, which distracts performers and crew.  Turn off your LCD display and check your images only when there’s a break in the action.  Use the quietest shutter mode your camera supports.  And never use a tripod or monopod unless you have explicit permission from the producer.

Wait for the telling moment: There are instants during live performances that distill the overall message down to its essence.  Seek those moments.  Buy this photo

Tell a story: Just as a good performance is designed to reveal key messages to the audience at the appropriate time, so should the photographer capture images that disclose the underlying narrative.  This image of the climax from a piece on the plight of refugees captures the essence of the story.  Buy this photo

Find an unusual perspective: When shooting behind-the-scenes such as at a dress rehearsal, you have the opportunity to find just the right combination of vantage point and lens to make your images really pop.  This image was made from the lip of the stage.  I had to lean forward across the front of the stage and shoot upward.  I love this shot because it captures the artist from her eye level just at a decisive moment in the drama.  Buy this photo

Document the power of the performance: This piece started quietly and worked up slowly to a frenzy of pent-up anger and activism.  I found the best vantage point and waited for the perfect moment.  Buy this photo

Know when to break the basic rules of composition: Sure, most of the time you want to avoid cutting a performer’s head off.  But I saw the latent energy inherent in the unorthodox framing of this image.  By shooting from the static artist’s level and capturing only part of the jumping artist’s body, I transformed the image into a bolder statement that supported the message of the piece.  Buy this photo

Gain perspective: Not every image needs to include the whole environment.  Sometimes it’s more powerful to capture just the salient part.  Buy this photo

Capture a moment of pure joy: Shoot lots of images so that you can choose the ones that really make an impact.  The bold colors, shallow depth-of-field, and simple composition of this image work to emphasize the dancer’s aura of joyful triumph.  Buy this photo

Use black-and-white: This image cried out for me to convert it to monochrome.  Its raw documentary power and gritty, graphic nature are more compelling in black-and-white.  Buy this photo

Don’t be afraid to use selective focus: It’s okay for certain elements of your subject not to be in sharp focus.  I chose a narrow depth-of-field in order to obtain selective focus on just the performers in the middle of this triumphant circle.  The soft focus on the dancers in the foreground and far background only serve to enhance the dramatic power of the image.  Buy this photo

I hope this essay provides some ideas for how to shoot creative images that amplify the power of your message.  Modern digital photography provides us with so many tools for making images that go beyond the pure documentary function to also enchant our viewers with imagination.  A performance as moving as Dance Brigade’s “Gracias a la Vida: Love in a Bitter Time” deserves more than a straightforward narrative capture.  I tried to make some images that supported their messaging with a creative visual style.  Continue to capture the obvious message in your images, but keep shooting to go beyond the documentary.  Go wild, and see what you can achieve!

How do you go beyond the obvious to capture images that pop?  Please share your ideas here?

Want to read more posts about what to shoot while traveling or near home?  Find them all here: Posts on What to Shoot.

Approach with Care [Encore Publication]: Sensitive photographic practices help keep wildlife wild and healthy

Photographing wildlife in its natural habitat is one of the most exciting and rewarding activities I can imagine.  From researching the species’ behavior to seeking it (sometimes for days) in the field, to that wonderful moment its image is captured on our memory card and to the thrill of viewing that image when we return from the field, there’s something truly magical about this genre of photography.

Observing and photographing animals in the wild, such as this rare wildcat along Turkey’s Turquoise Coast, is thrilling.  Strive to put the animal’s welfare ahead of your image-making.  Buy this photo

Done properly, wildlife photography can have zero to very modest negative impact on the creatures whose images we capture.  In fact, photographers have done a great deal over the decades to help preserve wildlife through sharing images that inspire local people, governments, and the public to protect endangered species.

But by stalking and encroaching on a species’ territory, we photographers also put wildlife at risk of harm.  Improperly engaging with animals with the intent of photographing them can cause a predator to starve by allowing its prey to escape, cause another creature to become prey by distracting it from its natural wariness, stress the animal to harmful levels, or acclimatize them to being around humans.

Here are some important guidelines for photographing wildlife in as safe a manner as possible:

  1. Do your homework: The more you know before you set out to encounter a creature, the less likely you are to cause it harm inadvertently.  If you will be going with a safari or tour, research the outfit first to make sure they follow the highest ethical standards.  Get to know the behavior of the species you are seeking.  What is their daily and seasonal routine?  Where is their habitat?  What do they eat and what eats them?  What is a safe distance from which to view them?
  2. Keep a respectful distance: As kids we were told to keep away from wildlife for our safety, but as photographers we also need to consider how far away we must stay in order not to cause the animals undue stress.  Knowing where their meal ticket comes from, some safari and tour operators are willing to break park or preserve rules and approach the animals very closely so their clients can get great photos.  Do not encourage this.  Aside from the harm this stress can cause the animal, a stressed animal will look stressed in your photo and is more likely to bolt and leave you with no photo at all.  So, use a long telephoto lens, keep your distance, and both your subject and your images will be the better for it.
  3. Show special respect for the young: Baby animals are extremely vulnerable and should be treated with special care.  If you are traveling with a tour, defer to your guide’s knowledge.  If you’re on your own, be sure you’ve done your homework first, and err on the side of caution.Young animals, such as this baby baboon in Tanzania’s Serengeti National Park, should be photographed with special care.  I made this image using a long telephoto lens and shot from a safari vehicle parked at a respectful distance.  Buy this photo
  4. No kidding–don’t feed the animals: It seems almost too obvious to have to state, and yet nearly every day I encounter humans attempting to feed wildlife.  In Yosemite National Park, a number of bears must be killed each year because they have become dependent on humans for food.  At your local city park, you’ll probably observe people trying to feed the birds or squirrels.  And of course there are the big news stories (the recent major one was about the killing of the beloved Cecil the Lion) about hunters baiting animals with food.  A well placed and properly maintained bird feeder in the backyard may be okay, but no other attempts should be made to feel wildlife.
  5. Come back another time: In today’s networked world, word about rare animal sightings travels quickly.  If you hear about a sighting while traveling or near home, chances are many other photographers and watchers have also heard about it.  Multitudes of humans crowding around an animal will put it under undue stress and will also ensure you won’t make a great portrait of it.  Come back another time when there are fewer other people.  No photo opportunity is so irreplaceable that we should put the wildlife at risk.

With a little knowledge and courtesy, photographers can make great wildlife images while helping preserve and protect their subjects and keeping the wildlife wild.  Conversely, without respect or information about the local fauna, we run the risk of putting them at grave risk.  As the saying goes, make good choices!

The world’s smallest species of reindeer, the Svalbard reindeer is at risk due to global climate change.  Cautious and respectful photographers can use their images to help protect and preserve at-risk species.  Buy this photo

Do you have best practices about shooting (with a camera, that is) wildlife in the field?  Have you observed human behavior–positive or negative–that serves as an example?  Please share your thoughts here.

Want to read more posts about what to shoot while traveling or near home?  Find them all here: Posts on What to Shoot.


New Year’s Resolutions [Encore Publication]: My opinionated list of the top 5 promises all travel photographers should make and keep

Personally, I’m not a big fan of new year’s resolutions.  Common sense dictates that if we really want to make change in our lives, we should resolve to take specific steps toward that change every day.  Promises we make on December 31 each year will most likely be broken by January 15.  That’s certainly what I’ve observed over many years on the running trails and gyms where I’ve run or worked out daily.  A huge surge in attendance begins on January 1 and dissipates within about two weeks.

So I waited a couple of weeks to share my thoughts on what we travel photographers should resolve to do differently.  Since these aren’t technically “new year’s resolutions,” it’s my hope that these practices will stick.

  1. Book that once-in-a-lifetime trip now:
    Visit that exotic destination you’ve always wanted to see!  Buy this photo
    That travel photography “bucket list” needs to be emptied before you kick the proverbial bucket.  I know too many people who always found excuses to put off taking the trips they most desired, until it became too late for them.  The kids are too young, my job is too demanding right now, I can’t afford the cost.  I’ve made these excuses, too.  But the one thing we can’t live a full life without and can’t ever lose once we’ve attained it is experience.  Every trip I’ve taken helped me grow as a person and as a photographer, and also helped me grow closer to my family and other travel companions.  So book that trip today and go this year.  You won’t regret it.
  2. Just get out there and shoot:
    USAThere are countless exciting subjects for your photography within a few miles of your home.  Buy this photo
    Even professional travel photographers can’t be on a lengthy shoot in an exotic part of the globe all the time.  So, book those once (or a few times) in a lifetime trips as soon as feasible, but in the meantime find some wonderful local attractions where you can hone your craft by making compelling images.  I love to shoot little-known local cultural events such as street fairs and performances of dance, theater, and music.  It’s also a great pleasure to find scenic spots near home where we can make some striking landscape images that haven’t been shot thousands of times before.  Remember, you’re the local expert near your home, so seek out frequent opportunities to shoot in your own community.
  3.  Learn to use your camera as a tool to bridge the gap between your culture and the culture of the land you’re visiting:
    CubaPhotography can bring us closer to the people we meet on our journeys.  Buy this photo
    Instead of letting your photography separate you from the people you’ve come to learn from, resolve to turn your image-making into an opportunity to meet more people and get to know them more deeply.  Check out my pillar post on how to do this: Post on Photography as a Cultural Bridging Tool.
  4. Approach wildlife with respect:
    The more we learn about and respect the fauna we encounter during our travels, the healthier they will emerge from the experience (and the better our images will turn out).  Buy this photo
    A photo safari is a life-changing experience and should be on every travel photographer’s list.  But just as our cameras can be used either to alienate local people or to bond with them, so can photographing animals be used to harm them or to respect and help preserve them.  Read this post for more detailed tips (Post on Wildlife Photography), but in the meantime I will summarize by emphasizing the importance of prioritizing the animal’s welfare ahead of our desire to get an amazing shot of it.  Getting too close to wildlife will stress the animal and could even cause it to become lunch (or cause a predator to starve by losing its meal).  The more we get to know a species’ behavior before encountering it in the wild, the better our images will be and the healthier the animal will emerge from the encounter.
  5. Continually improve technique:
    I strive to hone my technique with every shoot.  Buy this photo
    There are more important elements in photography than technique, but a mastery of technique does help us make the images we want, so I always work to improve mine.  If you haven’t already gained the confidence to shoot in manual mode, start learning now.  Remember that while cameras have become very smart, they aren’t artists and they can’t know what the photographer is trying to achieve, so learn to take control of your camera’s settings today.  Here’s a short post listing five key techniques that will help your images stand out: Post on Top Five photography “hacks”.

So, resolve to take that trip of a lifetime, shoot locally while you’re waiting for it, learn to use your camera as a tool to interact beneficially with the people and the wildlife you meet during your travels, and work to hone your technique.  I’ll be doing the same!  Happy trails in 2017.

What do you resolve to do in 2017?  Please share your thoughts here.

Focus on Tourettes without Regrets: Adventures shooting a long-running underground performance event in Oakland

When I’m not traveling, I am fortunate to live in the San Francisco Bay Area, where there is never any shortage of amazing photographic subjects.  In a typical week I conduct about 3-4 shoots and I’m always on the lookout for new experiences that will enhance the diversity of my portfolio.  Recently I was invited to shoot the latest monthly show of Tourettes without Regrets, a long-running underground performance held in Oakland, California.  Attracting an extremely diverse and hip young audience, Tourettes presents a completely different variety show each month that can be described as equal parts comedy, poetry slam, circus, battle rap, and burlesque.  While the show is remarkably edgy and raucous (this is a PG-13 rated blog, so you’ll have to visit my main portfolio website to see many of the edgier images), in true Bay Area style it never puts anyone down and instead celebrates all of our differences.  A hot, smoke-filled, jam-packed warehouse, entirely dark save for a few bizarrely colored LED spotlights, is not an environment that is particularly photography-friendly, but I was able to make some nice images through perseverance and creative post-processing.  In this post, I share some of my favorite images along with a bit of discussion about how they were made.

Emcee and Tourettes without Regrets curator, Jamie, introduces the show.  The warehouse was so packed with young spectators that I had to shoot around them with a moderate, fast telephoto lens.  In post-processing, I cropped the image to remove unwanted elements and adjusted the shadow tones to darken the background.  Buy this photo

This month, the show’s theme was “F*** Valentine’s Day”, so each act consisted of a pair of performers.  These two ladies presented an aerial act that was mesmerizing but challenging to shoot due to the long distance to the subject, low light conditions, and strangely colored LED spotlights.  I cropped the image in post-processing and converted it to black-and-white to avoid the strange color cast.  Buy this photo

This skit depicts a woman breaking up with her boyfriend, who then tries to win her back with tears, money, and even a marriage proposal.  Nothing works, until he begins to treat her poorly, at which point she decides she wants him, after all.  The image captures an apt moment in the drama.  Buy this photo

A Crocodile Dundee-style knife thrower and his lovely assistant prepare to terrify a volunteer from the audience.  To capture this act I had to use a high ISO setting and fast lens due to the low lighting and the requirement for a fast shutter speed.  During post-processing, I converted to black-and-white, increased the contrast and adjusted the color channels to enhance the dramatic feel, applied noise reduction to reduce problems associated with the high ISO setting, and cropped to remove extraneous elements.  Buy this photo

A hip hop dancer amazes the crowd.  A fast shutter speed was essential to freeze the motion.  Obviously, to achieve a fast shutter speed, I needed to use a fast lens and high ISO setting.  Shoot lots of frames in situations like this one, because you can never be sure when the best exact instant will present itself.  Buy this photo

This scene from a battle rap, where two freestyle rappers trade insults, captures the essence of their interaction.  Note the shallow depth-of-field places the emphasis on the performer not rapping at the time, with only the outstretched left arm of the other rapper in focus.  I then converted to black-and-white to remove the color cast and cropped tightly using a square aspect ration to achieve an edgy Instagram-style image.  Buy this photo

What are some of your favorite subjects to shoot in your neck of the woods?  What events epitomize for you the area in which you live?  Please share your thoughts here.

Want to read more posts about what to shoot while traveling or near home?  Find them all here: Posts on What to Shoot.

To JPEG or Not to JPEG: For many RAW shooters there is no need to use RAW+JPG

Regular readers of To Travel Hopefully already know that I always shoot in RAW mode, and most likely you do, too.  I’ve written repeatedly about the major advantages of RAW vs. JPEG format.  For a refresher, here’s a good summary post on the topic: Post on RAW Mode.  I concluded this previous post with a recommendation to shoot in RAW+JPEG mode, where the camera writes out the image data in both its native RAW format and in the familiar but problematic JPEG mode.  Here’s the relevant paragraph from that older post:

I recommend shooting in RAW+JPEG all the time, unless you know you will need the slightly faster shooting speed or extra storage space of JPEG alone.  Doing so will give you the best of both worlds: a quick and easy JPEG to share right out of the camera, and the much more detailed data in the RAW file from which to bring out the nuances in color, texture, and exposure later during post-processing.  If you use JPEG alone, you’ll be throwing away image information you may wish you had later.

But right now, I’m in the middle of making a major transition in my workflow.  I’ve stopped shooting in RAW+JPEG mode and am now storing my images only as RAW files.  Moreover, I’m cleaning up my PC’s hard drive by revisiting many of my directories from shoots over the past few years and deleting all of the original JPEG files (obviously, I am keeping the JPEGs that I exported from Lightroom after post-processing the original RAW files).

Why would I do such a thing, you may ask?  There are several major reasons:

  • I don’t end up using the JPEG files: Shooting in RAW+JPEG had become a crutch for me.  I had been using this mode because I was afraid of not having JPEG versions of all my images, in case I decided post-processing the RAW files was too much work or if I wanted to share certain images right out of the camera.  But I’ve been realizing that I never share JPEGs right after shooting.  They just don’t look good enough for most professional work, so I need to post-process the good ones before delivering them to anyone.  You may have clients who need to see some rough JPEGs immediately after the shoot.  I know some wedding photographers who promise this immediate preview to their clients.  But I don’t have this requirement, so the JPEGs were just sitting on my hard drive, unused, forever.  And it’s so easy to export quick-and-dirty JPEG files from Lightroom shortly after the shoot.
  • Duplicate JPEG files slow down shooting: The RAW+JPEG mode tells the camera to write out two different formats for every image you shoot.  This slows down your shooting by bogging down the camera’s processor, and it also fills up the camera’s buffer more quickly, requiring a disruptively long wait to resume shooting.  It also fills up memory cards more quickly.  While JPEG sizes vary from image to image due to compression algorithms, I find they average about 1/3 to 1/2 the size of my camera’s RAW files.  That’s a lot of extra space on the memory card, so I have to stop shooting to change cards more often.
  • Duplicate JPEG files take up a lot of disk space: Even though my main laptop PC has a 1.5 TB hard disk drive, I find it is always filling up, which considerably slows down workflow and requires bothersome housekeeping to clean up.  Storing unneeded JPEG versions of my many tens of thousands of images wastes a lot of disk space.
  • Those JPEGs slow down workflow: Even though Lightroom has a useful option to import only the RAW version into your catalog, and it keeps track of the duplicate JPEG version of the same image, having both files on your hard drive still slows down post-processing and image maintenance tasks.

I know that some photographers really do need to have JPEG files of their images.  They may be delivering images right out of the camera via a wireless connection to a cloud server that supports only JPEG format.  They may not get to post-processing for some time after the shoot and want to remember what the image looked like with the camera’s settings applied (although here one should note that Lightroom and other RAW viewers will access your camera’s settings via the thumbnail image embedded within your image’s RAW file).  They may really love their camera’s black-and-white conversion tool or other in-camera editing tools, which work only with the JPEG format.  There are quite a few situations in which you may truly require a JPEG version of your images.  But I haven’t encountered these situations in my own recent work and don’t expect to in the foreseeable future.

So, that’s the backstory on why I’m moving from shooting RAW+JPEG to RAW only.  I’m even taking the drastic step of going back to recent shoot directories on my PC and deleting the original JPEG versions of the images.  I’ll report back in a few weeks to provide an update on how this works out for me.  In the meantime, if you’re shooting in RAW+JPEG mode, you may also want to think about whether doing so genuinely helps your workflow or simply is wasting your resources.

Do you shoot RAW+JPEG, RAW only, or some different format?  Why?  Please share your experiences here.

Want to read more posts about photographic techniques?  Find them all here: Posts on Techniques.