What Patreon Benefits would be of Interest?

Dear Readers,

I am in the process of launching a page on Patreon, an online platform that brings together creators and communities who wish to support their work.  Yes, this is partly a response to the COVID-19 pandemic that has made it impossible to work as a full-time professional photographer for a few months at least.  But in general it is an expensive prospect to offer “free” travel photography expertise via a daily blog, this Meetup group, and the other forums in which I create content.  Furthermore, I am working on several long-term passion projects, including the ongoing award-winning “Human/Machine Dance Project” (https://www.kadlerphotography.com/Featured-Images/HumanMachine-Dance-Project-with-Carly-Lave/) and two book projects; these longer-term creative projects aim to tell the stories of people, places, and cultures that deserve to be shared and that will use the photographic medium to build connections around the world.  But unlike most of my work, these projects are not for specific paying clients and so do not generate short-term revenue.  Support from residencies, grants, and platforms like Patreon will help make this work possible.

One of the advantages of supporting an artist on Patreon is the availability of reward levels with certain benefits depending on the level of support.  I’m considering offering benefits at various levels that could include some of the following:

1) Access to posts sharing new work, behind-the-scenes info, and insights into how the images are made

2) One-time or occasional mailing of physical prints of selected work

3) Group or 1:1 chats covering various topics of interest

4) High-resolution downloads of selected work

5) Others?

Please let me know what benefits you think would be of most interest.  I am eager to tap this community’s insights into what you would find most valuable.  Thanks for your help!

Cheers,

Kyle

Your Input is Requested

Dear Readers,

Now that many of us are under “house arrest” and can’t readily take to the trails, highways, and skies to seek our next photographic adventure, this is a great time to enhance our skills via remote learning.  I am requesting your input on topics of interest for small group online workshops and/or 1:1 distance learning sessions.  Last week I offered workshops on taking manual of your exposure settings and on post-processing in Lightroom.  Neither session was well enough attended to be able to continue that model.  I suspect there are topics and/or workshop formats that would appeal to a broader group within our To Travel Hopefully community, so please let me know your thoughts.  We can cover anything in the photographic process from travel and shot planning to capture techniques to post-processing and image sharing/publication.  In 1:1 sessions I can cover any topic(s) you personally would like to learn.  An obvious example is to do remote portfolio reviews, where you share a few of your key images and I provide a professional assessment of what works and what can be improved.  Portfolio reviews are a key learning tool for photographers at all levels.  Please share any other ideas you may have for topics.

During this time of serious financial challenge for may of us, I want to keep these sessions affordable, so I will continue to make the workshops “pay what you can”, and I will offer a reduced rate of just $50 for a 45-minute 1:1 session (a reduction by more than 1/3 of my usual rate).  This is an unusual opportunity to continue our travel photography journey from home during a difficult time in the world.  I look forward to hearing your thoughts and to working with you to improve your photographic skills!

Cheers,

Kyle

Remote Services Available for Photography Lovers

Dear Readers,

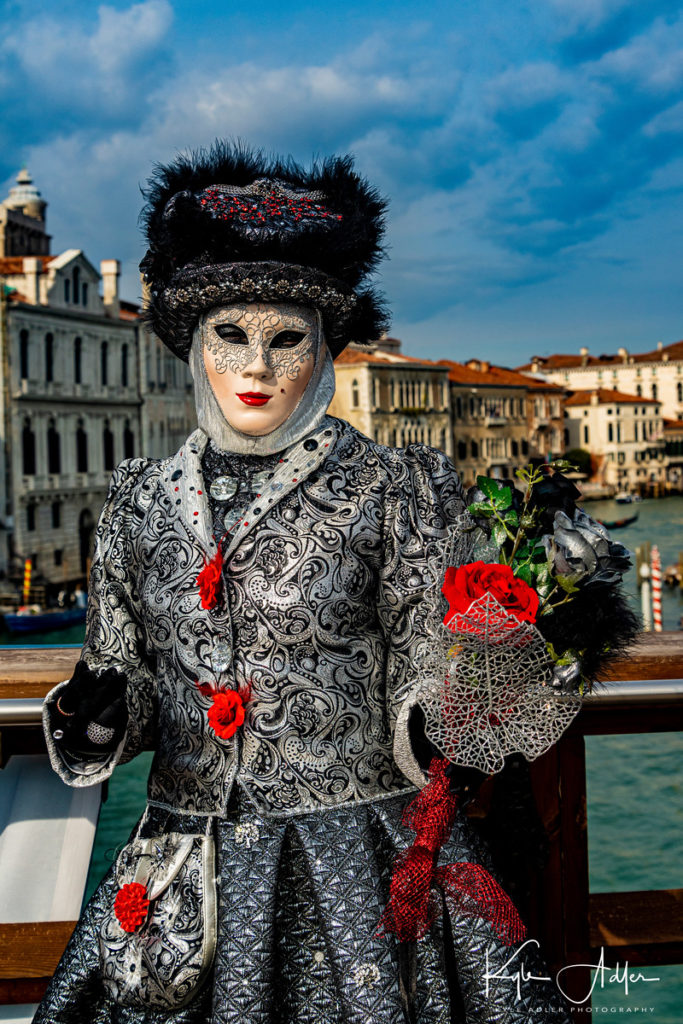
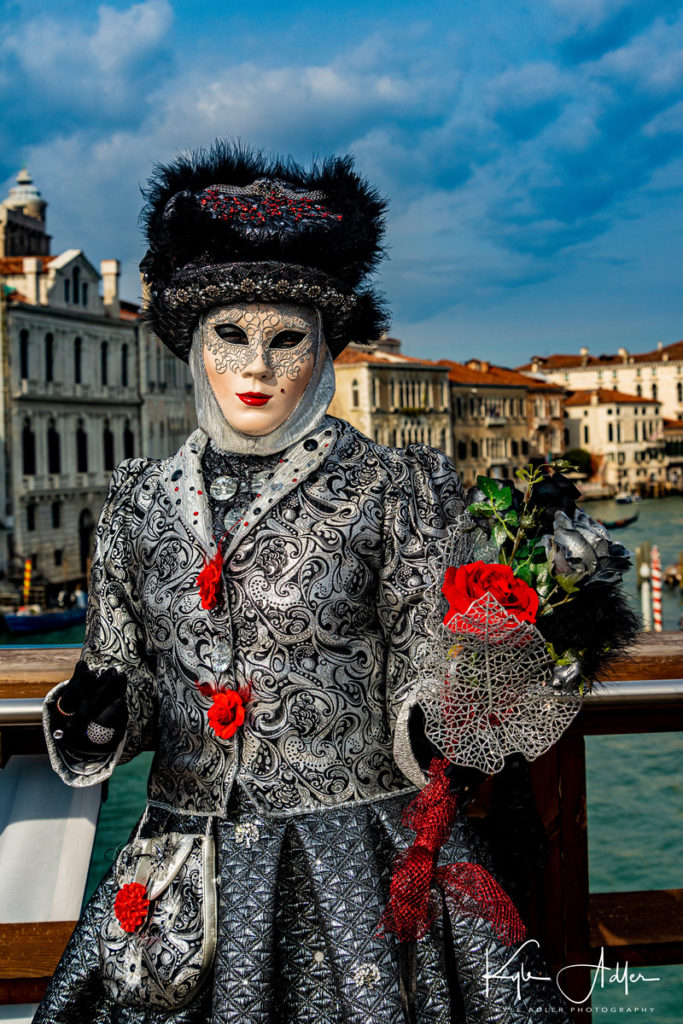
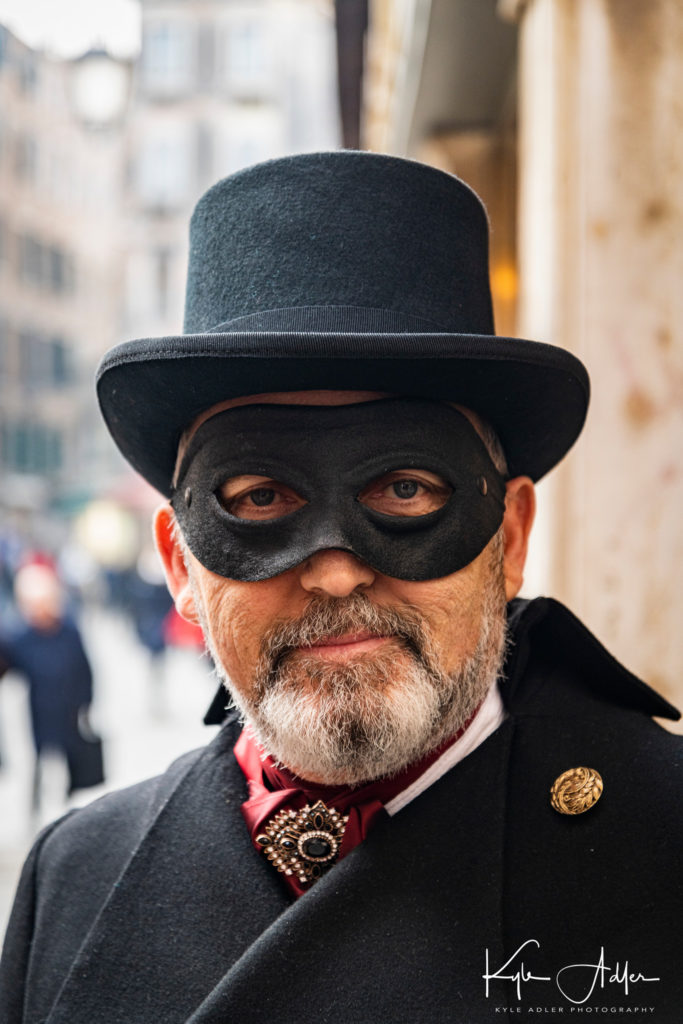
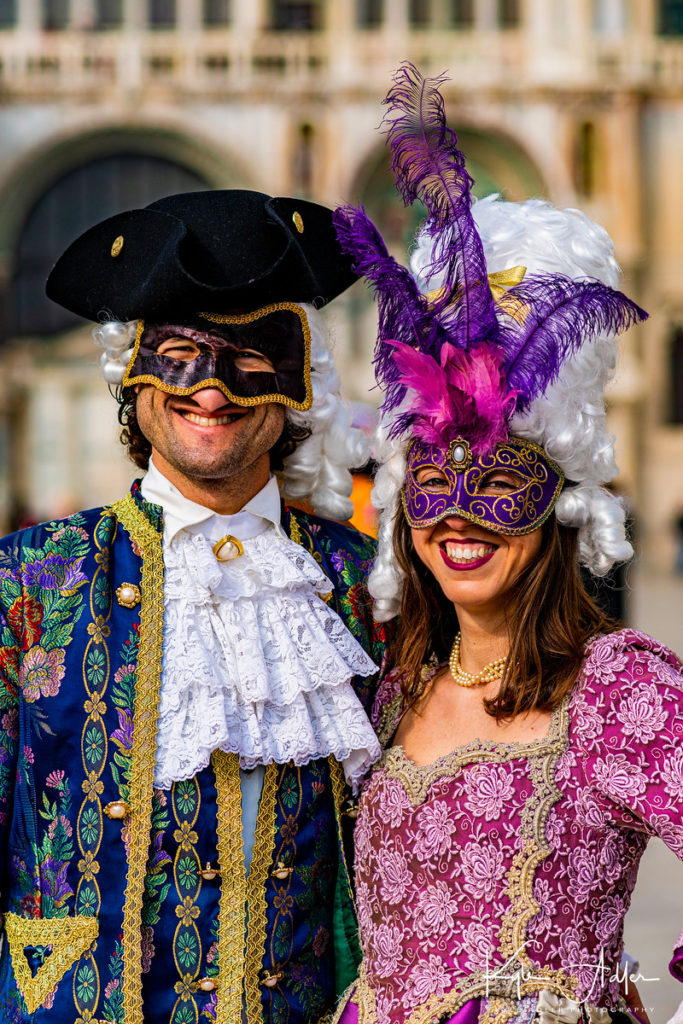
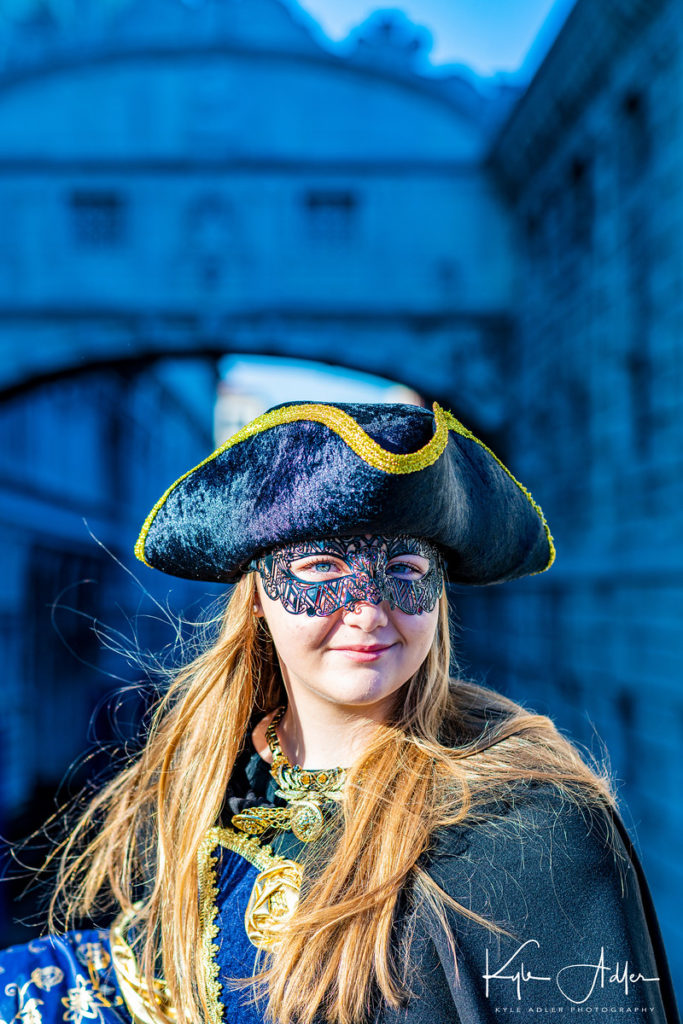
How quickly the world can change. I captured this image of the early days of Venice’s spectacular Carnival just a month ago, before there were any known cases of COVID-19 in Europe. Carnival was subsequently canceled and now Italy, Spain, and parts of China and the US are locked down.

The SF Bay Area is now under lockdown. No leaving our homes except for essential shopping or urgent medical appointments. This is the right thing to do to protect the most vulnerable among us, and soon I suspect the whole of the US will face similar restrictions. But as a full-time professional photographer specializing in travel, performing arts, and cultural events, I now have effectively no revenue stream. There are many people who are much worse off right now, including those who have been laid off and those who live from day to day; they need our attention most critically. I run a very lean business, so it can survive for a few months, but not longer. I’m excited to continue to collaborate now, with my clients old and new, to drive shared growth for after this health crisis has abated. And the absence of having a busy daily schedule of photo shoots and publication deadlines affords me the opportunity to explore some new business models, such as Tiktok (for short video content creation) and Patreon (a micro-finance/crowdfunding platform to connect patrons with artists). More is coming soon on those possible new directions.

In the meantime, I’m offering the following services remotely and would love for you to get involved:

1) Remote Learning: Are you a photography enthusiast looking to improve your craft? Want to learn how to hone your capture technique, discuss a particular photo project or issue, or practice post-processing your images? I am an experienced and highly rated instructor. While I can’t teach right now via my usual photo tours in destinations around the world or face-to-face classes and workshops, I am available to schedule 1:1 and small group remote learning sessions. Please share your thoughts about what topics you think are of interest to the photo enthusiast community, or PM me with your request for a 1:1 session.

2) Post-processing: Do you have a bunch of good images sitting around that you don’t have the time or skill to post-process? I can help. PM me to let me know what you have in mind and I’ll provide a very reasonable quote.

3) Fine-art Prints: I’ve exhibited my work internationally and won a number of major awards. Have a look at my portfolio (https://www.kadlerphotography.com/Featured-Images/Featured-Photos/) and, if you are so moved, purchase some prints or other photo products directly from my website. My prices are extremely reasonable, and wouldn’t your home look better with a few new art pieces hanging in it? Fine-art prints make great gifts, too, so consider cheering up your friends during this challenging time.

4) Book Me: This public health crisis will pass, and I want to be your photographer when we’re able to return to a mostly normal existence. Portraits, headshots, events, performing arts, commercial/corporate photography, travel and lifestyle work: I do it all (except for weddings). No need to settle for routine cookie-cutter photos when you can have distinctive artistic work for approximately the same price. I’m offering a discount for late April, May, and June bookings made during the next three weeks, with the understanding that they may be rescheduled with no penalty if the current situation persists.

Stay healthy, and thank you for your support!

Kyle

“To Travel Hopefully” is Taking a Pause: Please stay healthy, and see you on the other side!

Dear Readers,

For more than three years it has been my pleasure and privilege to provide daily content to inspire, educate, and inform on all topics related to travel photography. During these challenging times, as the COVID-19 pandemic brings most discretionary travel to a halt in most of the world, I’m feeling torn: on the one hand, it seems frivolous and a bit tone-deaf to continue publishing a travel photography blog when nearly all members of our community (including myself) are grounded for the foreseeable future; while on the other hand, I do hear from readers that these daily posts are enjoyable and informative even in the absence of imminent travel possibilities.

This is a challenging time for all of us. As a full-time professional photographer whose business consists primarily of travel assignments, capturing the performing arts, and face-to-face teaching, I am now effectively shut down and making no revenue. I’m relatively fortunate compared to many others: my business can survive for up to a few months, while many gig economy and other service workers will lose everything in just a few weeks or days. If you have steady employment and a regular paycheck, give thanks, but also please remember to help those who may be less able to weather this storm. Particularly for many in the travel and arts industries, the next few weeks will likely present an existential threat. I know we all want these industries to be strong still when we all emerge from the current situation.

For now, I’ve decided to give “To Travel Hopefully” a hiatus and resume publishing when the current public health crisis has subsided and normal travel can be resumed. We’ll be back, hopefully soon, with some all-new content based on my recent adventures covering the Carnival in Venice (just before the Coronavirus outbreak shut down the festivities) and travel in Slovenia and Croatia, as well as with some of your favorite pillar posts from our archives.

In the meantime, if you’re hankering for a”To Travel Hopefully” fix, just search the archives for some topics of interest or pick a random month or date to peruse some previous posts.

I would like to hear your thoughts about the impact of the COVID-19 pandemic on your life and your relationship to travel and photography, as well as your ideas about where we can go with “To Travel Hopefully”. Please leave your comments at the end of this post.

I truly appreciate your ongoing enthusiasm for what we’re doing here at “To Travel Hopefully”–building a community based on a shared passion for travel photography and its power to build bridges between people and cultures around the world. Stay healthy, watch over those who are vulnerable medically and financially, and see you soon on the other side!

I’ll leave you with a few favorite images of Venice’s Carnival just before the first COVID-19 cases were diagnosed and the celebrations cut short.

Kyle

The Harsh Realities [Encore Publication]: How to shoot in extreme conditions


Travel is exciting because it exposes us to new environments from which we can learn about the diversity of the world and our own place within it.  But travel also can expose our expensive and sensitive photo gear to extreme conditions.  Heat, cold, humidity, dryness, wind, dust, sand, salt, water, and physical shocks are among the harsh realities of travel photography.  Let’s examine some of these hazards and discuss how to mitigate the potential harm.

  • Cold: Extremely low temperatures can cause all kinds of problems with modern electronics, including cameras.  Batteries don’t hold their charges very well in frigid conditions, so you need to carry extra batteries and keep them warm in your pocket or inside your parka.  Also expect to be recharging them more frequently than in warmer climes.  The LCD displays on your camera (and other devices such as your smartphone) can stop working partially or completely in very cold temperatures.  I’ve found there isn’t much that can be done when this happens except to try to gently warm the device, but that can be difficult when in the field shooting.  Fortunately, most of the time the display will return to normal functioning when it warms up.  Remember that very cold air is usually also very dry air, so be careful of condensation when getting out of the cold and returning to the warmth of an indoor environment.  The moisture that condenses on the inside of our lenses and electronic equipment can be damaging, so it’s best to let the gear warm up again while inside a sealed bag to prevent excessive condensation.  A large freezer-style bag works well for this purpose; just remember to place your camera and lens in the bag before coming inside from the cold.  Avoid lens changes in extreme cold conditions whenever possible.
  • Extreme cold, such as in Svalbard, can cause problems with the operation of batteries and LCD displays, and with condensation.  Buy this photo
  • Humidity: Excessive humidity can also cause condensation and fogging of the glass surfaces and displays on your gear.  In very humid conditions there is lots of moisture in the air, while in air conditioned vehicles and hotel rooms there is less moisture.  That means your lenses and LCDs will likely fog up quickly after leaving the air conditioned comfort of your hotel or vehicle.  To mitigate this problem, try to store your gear in an area that is less air conditioned, such as a storage area or bathroom.  And when you leave your hotel or car, keep the gear inside your camera bag to help prevent the buildup of moisture.
  • Wind and Dust: Recall that we’ve discussed many times in other posts the need to keep a UV (or haze) filter permanently attached to all lenses.  This protects the lenses from scratching damage, but has the secondary effect of protecting against dust building up on the front surface of the lens.  Dusty areas are also a good place to keep your lens cap on except when you are actually shooting.  Rule Number 1 in dusty environments is never, ever to change lenses outside unless it is absolutely necessary.  I like to carry two camera bodies with different lenses so that I can shoot with both lenses without the need to change in the field.  And if you do get dust on the camera’s viewfinder, lens, LCD, or mirror, you should have a good blower brush and soft lens cloth with you so you can clean it off.  I do not recommend trying to clean your camera’s sensor yourself unless you are confident you have the skills and equipment to do it properly.  Instead, turn on your camera’s sensor-cleaning function, if it has one, to try to prevent dust buildup, and heed the caution never to change lenses in dusty or windy environments.  A few small specks of dust on the sensor can even be removed in post-processing, although this becomes very difficult if the sensor is badly marred by the stuff.  I have a friend who is an ophthalmologist as well as an avid photographer, and he is one of the few people I know who will clean his own camera’s sensor.  I have a wonderful photo of him in full surgical regalia, using a microscope and surgical instruments to do the job.  For the rest of us, bring the camera to a good repair shop after your trip ends and before the next big adventure begins.
  • Physical Shocks: Travel is the school of hard knocks for camera gear.  Safari vehicles, “puddle hopper” bush planes, and long bus rides over bumpy roads are the norm for adventure travelers.  Once the gear takes a punishing blow that damages it, there is very little to be done in the field.  My best advice is to carry your gear in a very good padded bag with snug fittings around each piece, and to bring a backup camera body and lenses in overlapping ranges of focal lengths to ensure redundancy in the event of a mishap.

Game drives while on safari are near the top of every photographer’s “bucket list,” but the harsh realities of jolts, dust, and humid heat can threaten your sensitive camera gear.  Buy this photo

There’s an old saying, “If you can’t run with the big dogs, stay at home on the porch.”  If we were the types of photographers who wanted to avoid all these hazards, we’d just stay at home, right?  But travel photographers are the adventurous sort, and we consider these risks to be a cost of the intense pleasure we derive from shooting all kinds of fascinating subjects in new environments all around the world.  Plan well to minimize problems, bring extra gear for redundancy, and when something does go wrong keep a positive attitude: you’ll be well rewarded when you get home and have unique images as a souvenir of your efforts!

When have you faced extreme conditions for your shoots, and how did you overcome them?  Please share your thoughts here.

Want to read more posts about what to shoot while traveling?  Find them all here: Posts on What to Shoot.

Revisiting Your Old Friends [Encore Publication]: Take a fresh look at your older images with new postprocessing

In today’s digital photography world, images are made as much in post-processing as they are in the camera.  We only get one chance at creating the image in the camera: the choices we make to compose the image, focus, expose, and fire the shutter at just the right moment are behind us the instant the shutter is released.  But the choices we make after the fact, using image processing software such as Adobe Lightroom, can be revisited as many times as we wish.  Because Lightroom is a non-destructive editor, meaning it keeps the original image file intact and just records the editing choices we make in its catalog, we can return to the image again and again, making slightly or entirely different choices.

When I return from a trip, I try to select the best raw image files and apply some post-processing within a few days.  That’s so I don’t agonize endlessly about creative choices, which would severely increase the turnaround time for sharing the images with the world.  But increasingly I find it is a good practice to return with a fresh eye to images I made some time ago, applying some different post-processing choices to render the image differently.

There are three scenarios under which I often revisit my older images:

      • The images are very old and were shot using film in the pre-digitial era.  In this scenario, scan the transparency (slide), negative, or print and then apply post-processing to the digital scan.

lr-00559_s_r13akqwcgmq0559

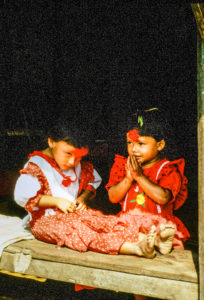
Here’s the original scan of a 35mm color slide (transparency) shot during a 1991 trek in Nepal’s Anapurna region.  The image is grainy and the background behind the girls’ heads is distracting.  I decided to clean it up a bit using Lightroom.

NepalWith just a few minutes of tweaking using Lightroom, I was able to crop the image for more dramatic impact, render a true black background, reduce the grainy noise in the shadow areas, and enhance the saturation of the colors.  Buy this photo

    • The images were shot digitally but were made before I started routinely using image-processing software such as Lightroom.  In these cases, I like to apply post-processing to see what artistic options I may have missed in the earlier digital years.

This old Scandinavian stave church was shot as a color image in 2005.  It is so high-contrast that it appears nearly monochromatic on the display screen.  It’s a striking image, but looking at it today I wondered how much more effective it would be as a true black-and-white photo, so I decided to revisit the image using Lightroom.

Here’s the same digital image file, but converted to black-and-white using Lightroom’s color channel processing module.  I boosted the contrast even further and then adjusted each color’s saturation in the black-and-white mix to achieve the exquisite texture of the snow on the ancient building’s roof.  Buy this photo

  • The images are more recent, but I want to make some new creative choices.  Here the idea is to render the image in a different way to achieve a different end result.  For example, an image I initially processed in color may turn out to make a lovely black-and-white photo.  Or perhaps I crop a crowd scene to emphasize just one or a few of the people within it.  The choices are nearly limitless.

Reviewing my favorite images from a recent trip to New Orleans, I saw this shot of a characteristic French Quarter balcony and realized it would be even more powerful if certain colors were more saturated.

A brief session in Lightroom’s Develop module was all it took to boost the saturation of the blue and red channels and to adjust the shadow and black point tonalities.  The resulting image more closely reproduces the emotional experience I recall when viewing this scene live.  Buy this photo

Take a look at some of your older images.  Which ones would you like to revisit and give a fresh new look?  Do you regularly return to work on your library of existing images?  Please share your thoughts here.

Want to read more posts about post-processing your images?  Find them all here: Posts on Post-Processing.

Focus on Myanmar [Encore Publication]: Burma is a fabled destination for travel photographers and is more accessible now than in many years


Iconic Burmese scene: An Intha fisherman with the tools of his trade as the sun sets on Inle Lake.  We hired a boat captain at sunset to position us so that we could photograph the fishermen silhouetted by the setting sun with the mountain behind. 

My wife and I recently returned from an amazing 2.5-week adventure traveling through Burma.  Our itinerary took us from the main city of Yangon to the vast plains gleaming with ancient pagodas in Bagan; then to the former imperial capital and cultural hub of Mandalay; on to Kalaw, the gateway to many hill tribes of the region; and finally to Inle Lake, well known for its picturesque floating gardens and for the Inthe people with their unique traditional style of fishing.  While it was wonderful to view Burma’s gorgeous landscapes and fabled temples, what made this adventure truly unforgettable for us was its many opportunities to interact with Myanmar people from many ethnic groups and all walks of life: Buddhist monks and nuns, villagers displaced by a typhoon 10 years ago who are still living in temporary bamboo huts with no running water, the Paduang hill tribe whose women traditionally wear heavy brass plates on their necks, an octogenarian master of the dying art form of Burmese marionette theater, young boys celebrating their initiation as novice monks, and the delightful girls who have found a caring home at an orphanage in Mandalay.  Burma is a photographer’s dream, filled with glorious pagodas, gorgeous vistas, and friendly, diverse cultures.

Our Burmese adventure began in the largest city, Yangon, also known by its former colonial name of Rangoon.  Rangoon strikes a lovely balance between bustling modernity and soulful history.  Steeped in British Colonial architecture, the city has an old-world charm, and its busy streets connect neighborhoods shared peacefully by many ethnic groups and religions as they wend their way around countless ancient pagodas.  When many of us think about travel to Burma, the first thing that comes to mind is often the dire news coverage of the terrible mistreatment of the Rohingya people in the northern part of Rakhine State (which is not visited on this trip).  While I left Myanmar with a deeper understanding of the complexity of this conflict and still have the impression that the government needs to do more to end this appalling humanitarian nightmare quickly, I can also say that as a traveler on this adventure you will feel safe, you will get to know some of the friendliest people you’ve ever met, and you will see Buddhists and Muslims living in harmony in many other parts of the country.

Just arrived in Yangon (Rangoon), we visited Chaukhtatgyi Pagoda, which houses one of the world’s largest reclining Buddha statues.  To make this image of a worshiper praying in front of the statue, I fitted a fast wide-angle lens, composed carefully so as not to distort the lines, and used a narrow aperture to achieve enough depth-of-field so the entire scene would be in focus.  These choices require use of a high ISO sensitivity. 

 Armies of volunteer sweepers make the rounds at Shwedagon Pagoda, Burma’s holiest Buddhist site, to ensure the temple is kept spotless.  It can be hard to photograph large moving groups of people while maintaining good composition.  I positioned myself ahead of the group and composed the shot to capture the pagoda in the background, allowing the sweeping team to walk into my frame.  I had already requested permission from their leader to photograph the group.


A fascinating visit to an informal housing settlement inhabited by people displaced by the devastating 2008 typhoon. A decade later they are still living in squalid conditions in bamboo huts with no running water. Here, children are filling containers with water from the lake and carrying 40 kg (88 pounds) of water, often more than their body weight, several miles to their families’ homes.  I love this image because it combines scenic beauty with a poignant human story, achieving a strong sense of place.  Using a wide-angle lens, I composed the scene around the lake and sky before the children entered the frame.  Timing was important here to ensure the children and their reflections were composed harmoniously.  It can help to take several shots of such scenes to increase the likelihood that one will be perfectly composed.

Not accustomed to visitors, these boys from the “bamboo village” are checking me out as much as I am them. I got down low to be at eye level with the boys and used a narrow aperture to maximize depth-of-field.  Some of the kids had never seen photos of themselves before, so I made sure to let them all see my images on the camera’s display. 

From Rangoon, we flew to Bagan in the center part of Myanmar.  Bagan is remarkable for its wide plains strewn with thousands of golden pagodas, some very ancient, that glimmer especially beautifully in the early morning and late evening light.  If you are offered the opportunity to take a hot air balloon ride over Bagan, do not miss it.  This was our fifth hot air balloon excursion to date, but easily the most dramatic and memorable one.

Bagan splendor: as we soar silently over the plain in the gondola of our hot air balloon, the early morning light reflects off hundreds of golden temples as the mist slowly burns off the ground.  A wide-angle lens and a fast shutter speed are required to capture a sprawling vista such as this one from a moving vehicle.  I typically underexpose scenes containing mist or fog so as not to lose the details in the shadows.  Exposure can be adjusted later during post-processing.

Escaping steam nearly obscures a worker at a Bagan workshop where pone ye gyi (a popular flavored soybean sauce) is made.  Always be on the lookout for unusual ways to compose portraits.  I enjoy environmental portraits that include not only the person’s face and body but also their surroundings.  These images tell a more complete story about the subject: where do they live, what do they do, how do they do it?

The patriarch’s daughter shows us around her family’s paper workshop where they make ceremonial fans for weddings and other events.  She wears thanaka, the tree bark paste that most Burmese women, and quite a few men, apply to their faces daily. In addition to serving as a form of cultural identity, the thanaka also functions as sunscreen.  For classic portraits like this one, I use a fast portrait lens, specifically an 85mm f/1.8 lens, which is perfect for rendering super sharp focus on the subject while beautifully softening the background to really emphasize the person.  To achieve this lovely effect, use a wide aperture to obtain a narrow depth-of-field, and of course try to find a spot with beautiful soft lighting and an uncluttered background.

The moon rises over an ancient pagoda in the Bagan region.  Whenever possible, try to make landscape images early in the morning or late in the afternoon during the so-called “golden hour”, when the soft sunlight casts a lovely glow.  I used a telephoto lens to compress the temple spires with the moon in the background.

We had been invited by villagers to attend a Buddhist initiation ceremony, so a few of us rose early and traveled to their village. This portrait depicts one of the village boys who are preparing to start their service as novice monks in the local monastery. All Buddhist boys in Myanmar are required to perform this service at some point during their childhood.  I applied the same portrait-making techniques for this image as for the previous image.  Always take several shots to increase your chances of getting one with the perfect expression.

Leaving Bagan behind, we traveled next to Mandalay, the capital city of the last Burmese kings and still in many ways its spiritual capital.  Some of our most unforgettable cultural encounters were here.

A fascinating visit to Myawaddy Nunnery, where we had the opportunity to meet some of the more than 200 novice nuns who study there.  As the nuns filed by us on their way to lunch, I was immediately drawn to the juxtaposition of the colors: the girls’ pink robes against the gold and teak work of the nunnery building.  I found a good vantage point and composed carefully to capture procession of the nuns as a “leading line” to draw the viewer’s eye back to the entrance of the convent and then up and back across the galleries of the convent.

Sunset at the U Bein footbridge in the ancient royal capital of Amarapura, just outside of Mandalay.  The U Bein is the world’s longest wooden bridge and is especially beautiful at sunset.  We hired a small boat to row us to the center of the lake in a good position to photograph the bridge silhoutted by the setting sun.  To capture as much of the very long bridge as possible, I used a very wide (16mm) lens, which left a lot of space with sky at the top and water at the bottom of the frame.  In post-processing, I cropped the image to this non-standard aspect ratio to include the bridge, the sun, and their reflections in the lake but removing the empty space above and below.  Remember to consider all aspects ratios for your photos; sometimes, unusual proportions work best.

An octogenarian monk walks a prayerful circuit around the ruins of the massive Mingun Paya, severely damaged by an earthquake about 200 years ago.  Had it not been left unfinished and then mostly collapsed by the earthquake, Mingun would be by far the world’s largest pagoda today.  I had already asked the monk’s permission to photograph him, so I waited by a corner of the path around the temple until he walked into the frame.  With such a large space as this, care must be taken when composing so as not to have distracting elements in the background.

A delightful visit to the Aye Yeik Mon Girls’ Orphanage was a highlight of our trip. We were heartbroken to learn the stories of some of the formerly abandoned girls who live here, but were uplifted to see the wonderful care and guidance they are receiving there now.  Here, my wife Mary hugs one of her new friends farewell as we prepare to depart the orphanage.  To catch these fleeting lovely moments, the photographer has to be all set up and ready in advance.  I had my trusty portrait lens on the camera and all the settings made before the encounter, so when the moment arrived all I had to do was shoot.

For our home-hosted dinner, we were invited into the Mandalay home of Oma and his family. His mother was a restaurant owner and chef for many years, so we were treated to an amazing Burmese meal.  In this portrait I wanted to capture several members of the family as well as the setting of their home, so I used a wide-angle lens.  Because it was fairly dark and a narrow aperture was required for depth-of-field, I used a touch of fill-in flash.  The trick when using flash is to get the flash unit off of the camera (I use a cord to connect the flash to the camera, but a remote control can also be used) and to use less flash output than your camera’s meter tells you to use.  This approach will yield natural-looking results even with use of the flash.

A quiet moment at the entrance to Shwenandaw Kyaung Monastery.  I’m always looking for dramatic and unusual ways to frame my images.  Here the ornately carved teak door to the monastery became a lovely device to frame this young woman (from whom I had already obtained permission to photograph her) wearing a vividly colored longyi, the traditional attire in Myanmar.  It can be tricky to set exposure correctly in severely backlit images like this one.  Don’t rely on your camera’s meter to get it right, but instead use spot-metering if your camera offers this feature to set the exposure based on the most important part of the composition, in this case the woman’s garment.

We arranged a visit to a marionette show in Mandalay. One of the few companies continuing to practice this ancient tradition, Mandalay Marionette Theatre is headed by an 84-year-old puppet master who is teaching younger people the dying art form.  Our seats were quite far back in the small theater building, so I used a medium telephoto lens.  Because the stage was quite dark and the lens quite slow, and because a fast shutter speed was required to freeze the action, I had to use a very high ISO sensitivity setting.  Many modern cameras handle low-light situations well, so don’t be afraid to boost up the ISO setting when necessary.  You can remove most of the resulting noise from image later during post-processing. 

Reluctantly we departed Mandalay and from there drove through the village of Myin Ma Htie for a Day in the Life experience before spending a day exploring Kalaw, the gateway town for those venturing into the hill tribe area.  After Kalaw, we continued to the Inle Lake region where we had the opportunity to interact with members of the ethnic minority hill tribes who have been living there for centuries.

Visiting one of the few remaining fabric workshops where lotus plant fiber is woven into textile products. This worker uses traditional spinning methods to create yarn from the lotus fiber.  I was struck by the symmetry of the large and smaller spinning wheels on either side and by the vibrant color of the yarn.  To capture this image, which was made using natural window light only, I knelt on the floor and shot with a moderate wide-angle lens, ensuring I composed for the symmetry and exposed for the woman’s face.

The houses along the shores of Inle Lake are built on stilts to allow for the rise and fall of the water level during the year.  Nearly all exploring in this region is done by small motorized dugout boats, so care must be taken when composing and shooting.  If your camera or lens has an image stabilization feature, you’ll want to use it when shooting from moving vessels.  It’s also important to watch the lines in your image (the lines could be the horizon, the lakeshore, or a building, for example) in order to keep them level, so as to avoid the subject appearing to “fall off” one side of the frame.

Meeting members of the Padaung ethnic minority, whose women are famous for wearing heavy brass coils to make their necks look longer. This 18-year-old Padaung girl proudly wears the brass coils on her neck as a symbol of ethnic identity. She told us her younger sister chooses not to wear the ornaments as she goes to a Burman school where most of the other students are not Padaung. The tradition was often scorned as backwards during the recent military regime, but now young Padaung women are again often choosing to practice it.  The methods I used to make this portrait should sound familiar by now: choose a spot with soft and pleasant lighting and an uncluttered background, and shoot with a fast prime portrait lens using a wide aperture to soften the background.

Glorious temple complex above Inthein Village.  I was interested to note that a large group of travelers from National Geographic Expeditions was also there, led by another professional travel photographer, but they were all shooting the tops of the spires using telephoto lenses.  To me, the real story here was the harmonious whole of the temple, so I took the opposite appraoch and shot with an ultrawide-angle lens, getting down low to include as much sky as possible in the background.

After an inspirational three days on Inle Lake, we flew back to Rangoon for a quick half-day stop before returning home.  This gave us the chance to visit some of the sites in the city that we had missed at the start of the adventure or to revisit some that we especially enjoyed.

Back in Yangon for our final day before flying out to Hong Kong, we visited the large central Bogyoke Aung San Market, also known as Scott Market. In this image, a group of young novice nuns meanders through the thousands of stalls asking for alms.  I waited at the entrance to this shop and composed the image there, capturing the varied expressions on the girls’ faces as they walked and chanted.  The situation was tricky because the lighting was mixed (part sunlight and part ghastly fluorescent light) and the shop was cluttered, but I did the best I could to emphasize the nuns in the composition and correct for white balance during post-processing.

Have you visited Myanmar?  Please share your thoughts about this destination: what to see and do, and how to capture memorable images from this remarkable place.

Want to read more posts about travel photography destinations?  Find them all here: Posts about destinations.

Portrait Photography Gear [Encore Publication]: Affordable kit for making great portraits

Whether in my home town or traveling around the world, I love to shoot portraits.  There is something magical about creating an image that captures the essence of a person.  It can be daunting for many photographers to describe what gear they think is required to make professional-quality portraits: we often visualize a fully equipped studio with tens of thousands of dollars’ worth of high-end lights, modifiers, and backgrounds.  The reality is that we can make portraits of publication quality, shot on location and using kit that costs far less.  Here I outline a basic setup that is portable enough to pack on nearly any trip and costs only a few hundred dollars (not including your basic DSLR or mirrorless camera body).

Really all you need to get great people photos is a good portrait lens and a little know-how.  Make sure to set exposure and focus on your subject’s face.  I often use my camera’s Spot metering mode to get the correct exposure in tricky lighting conditions, such as when the subject is backlit.  In these conditions, it can also be helpful to fill in any harsh shadows on the subject’s face by using a touch of flash with a diffuser attached or a reflector.  That’s really all the gear you need: camera with portrait lens, flash unit, and a reflector kit.  Let’s look at the gear and basic techniques.

My indispensable portrait lens is the Nikon 85mm f/1.8G lens.  I shoot at least three-quarters of all my portraits, whether in the studio or on location, using this one piece of glass.  This is a classic portrait lens and provides a flattering perspective and great image quality when your subject is a person.  But this lens also shines for nature and action photography where you don’t need a really long focal length.  It renders really lovely “bokeh,” or the soft quality of the out-of-focus parts of the image.

This portrait of a grandmother and granddaughter at Carnaval San Francisco was made with natural light using an 85mm lens at a wide aperture to throw the background into soft focus.  Because no flash or reflector was used, there are some shadows on the subject’s faces, but I like the shallow depth of field that really emphasizes the subjects, and this would have been difficult to achieve with the slower shutter speed required to synchronize with a flash.  Also, carrying a reflector through the hustle and bustle of a chaotic street fair can be impractical.  I’m very pleased with this image even with a few shadows.

This portrait was shot using natural light only.  Some shadows are visible on the faces, but the effect is not unpleasant, and the soft focus from shooting without a flash is very effective.  Buy this photo

Your camera most likely has a built-in flash, and in many cases it is good enough to provide some fill-in lighting for backlit subjects or even to serve as a main light in very dark situations.  But for more control over how much light you want, the quality of that light, and where that light comes from and goes to, you likely want to have a separate flash unit.  I use the Nikon SB-910, which is powerful and flexible enough for most settings.  It has been discontinued and replaced by the Nikon SB-5000, but the older model is often still available.

Whatever flash you use, it is best to attach a diffuser of some sort to soften the otherwise very harsh light of the flash.  I also keep my camera set to lower the flash output by 1 stop, and I only override this setting occasionally.  Flash is often best when used sparingly.

This next image was shot at the same location as the previous one, but here I used an off-camera flash with diffuser to provide fill lighting on the subjects’ faces, thus reducing the shadows.  The only downside of using flash on location is that a slower shutter speed (typically about 1/160 of a second or slower) must be used, which in turn requires a smaller aperture (here it is f/8), and this can lead to more distraction from in-focus backgrounds.  I could have mitigated this problem by attaching a neutral density filter to block some of the light and allow a larger aperture.

This group portrait was made under similar conditions to the previous image, but here a fill flash was used to soften the shadows.  Buy this photo

An inexpensive accessory can provide the best of both worlds for on-location portraiture.  For less than $20 you can purchase a reflector kit with a variety of different colored reflectors and diffusers.  The reflectors are used to bounce some of the sun’s light back onto the face of the subject, thereby filling in any harsh shadows, while allowing you to shoot at any combination of aperture and shutter speed you choose in order to soften the background.  Each color of reflector imparts a different mood to the image.  An added bonus is that you can preview the precise effect the reflector has in your viewfinder or on your LCD screen.  Really the only downside of using a reflector in the field is that they are bulky to carry and often require an assistant to hold in place while you shoot.

This is the reflector kit I carry with me to most portrait shoots.  It’s high quality, very portable, and affordable.

This portrait was made by metering off the face of the model, choosing a wide aperture to blur the background, and bouncing some sunlight onto her face using the gold reflector from the kit mentioned above.

Using a reflector to bounce sunlight onto your subject’s face can reduce shadows while allowing you to retain full control over your aperture and shutter speed.  Buy this photo

There you have it: my formula for getting professional-looking portraits in the field with relatively inexpensive gear that’s easy to carry and use.

What is your favorite gear for portraiture?  Please share your thoughts in the comment box at the end of this post.

Interested in other posts about photography gear?  See them all here: http://www.to-travel-hopefully.com/category/gear/.


Prime Time [Encore Publication]: Why a prime lens is often better than a zoom

Most photographers make most of their images using a zoom lens.  Aside from smartphone cameras, which typically feature a fixed focal-length lens, nearly every camera today comes with a zoom lens attached.  Most point-and-shoot and compact cameras do not have interchangeable lenses, so the zoom lens that comes with the camera is the only choice, while most mirrorless and DSLR cameras have interchangeable lenses.  That means these more advanced cameras offer the choice of using a broad range of different lenses, including both zoom and prime (fixed focal-length) lenses.  While many photographers own one or several prime lenses, from my observation the vast majority shoot nearly all of their images using one of their zoom lenses instead.  In today’s post, I make the case for using prime lenses in many, or even most, shooting situations.

This portrait of a Delhi girl outside India’s largest mosque is lovely and effective, but because I didn’t have time to change lenses and was forced to use my slower walkaround zoom lens, the depth-of-field is quite deep, making for a somewhat distracting background.  Buy this photo

Zoom lenses have one clear advantage over prime lenses: they offer a range of focal lengths, which helps the photographer compose the image without having to walk closer to or farther away from the subject.  But even here I would argue that in most cases it aids creativity to “zoom with the feet,” or walk around to compose the best shot.  Even when this isn’t possible, a high-resolution digital image can easily be cropped in post-processing to achieve the composition the photographer had in mind.

But prime lenses have many advantages over zoom lenses.  First, they are nearly always sharper and generally higher quality than zooms, because they don’t require extra internal glass elements to enable the zooming.  While zoom lenses have improved in optical quality over recent years, it remains the case that prime lenses offer a quality advantage.  Second, prime lenses are typically smaller and lighter than zooms.  This is a blessing especially to travel photographers.  Third, primes are less expensive than zooms of similar optical and build quality.  That means you can buy two or three different prime lenses for the price of one zoom lens covering a similar range of focal lengths.  And fourth, primes are usually faster (i.e., offer a wider maximum aperture size) than zooms.  This last point is a big advantage for many types of shooting, because a wide aperture (small F-number) lets in more light, allowing use of faster shutter speeds and lower ISO settings in low-light conditions.  This is a real boon for nighttime and astro-photography.  A wide aperture also results in shallow depth-of-field, which emphasizes the main subject by softening the focus of the background.  The best lenses offer a pleasing “bokeh”, or pleasant blurring of the out-of-focus elements of the image.  This effect makes for extremely effective portraits as well as wildlife images, but is also useful for other types of photography.


This portrait, made with my current favorite lens, an 85mm f/1.8 portrait lens, offers very sharp focus on the subject’s face and pleasing bokeh, or soft blurring of the out-of-focus background.  It would not have been possible to make this portrait using a zoom lens because the maximum aperture would be too small to achieve the soft background effect.  Buy this photo

I shoot a lot of performing arts events (dance, music, theater), which typically take place indoors where the light is very dim and frequently feature fast-moving action requiring a fast shutter speed.  Using a prime lens allows me to shoot at an action-freezing shutter speed without having to use extremely high ISO settings that introduce noise into the images.  And again, the pleasantly blurred backgrounds help set off the very sharp main subject for a striking overall effect.

I captured this image of a samba dancer at a dress rehearsal under very low-light conditions.  Using my 85mm f/1.8 prime portrait lens, I was able to freeze the motion using a fast shutter speed, keep the ISO at a reasonable level to avoid noise, and render a nice soft background.  Buy this photo

I would estimate that most enthusiast and professional photographers shoot about 80% of their images using zoom lenses.  My own usage pattern is the opposite, that is, I shoot about 80% of my images using prime lenses.  For some purposes, a zoom lens is still required, but it’s surprising how often we can achieve better results using a prime.  Prime lenses are smaller, lighter, less expensive, higher quality, and faster than zoom lenses.  I encourage you to dig out your prime lenses if you have a few, or borrow, rent, or buy one or two (remember, they are much less expensive than comparable zoom lenses) and try shooting with them exclusively, or at least much of the time, for a week or two.  Compare your images made with the primes vs. the ones made with zooms and come to your own conclusions.  If you’re like me, you’ll find that a prime lens is the right tool for most photographic jobs.

Here are my three favorite prime lenses, a “normal” lens, a medium telephoto or “portrait” lens, and a wide-angle lens:

If you pack only one prime lens, it most likely will be a “normal” lens, that is one with a focal length of about 50mm for a full-frame camera or about 35mm for a crop-sensor camera.  I carry the Nikon 50mm f/1.4G lens.  This is the one I use in very low-light situations or to get a really shallow depth-of-field.

I think my current favorite lens of all (including primes and zooms) is my Nikon 85mm f/1.8G lens.  This is a classic portrait lens and provides a flattering perspective and great image quality when your subject is a human being.  I use it for nearly all of my portrait work these days.  But this lens also shines for nature and action photography where you don’t need a really long focal length.  It renders really lovely “bokeh”, or the soft quality of the out-of-focus parts of the image.

A wide-angle prime lens can be useful for landscapes, architecture and interiors, and astro-photography, among other purposes.  I like the Nikon 24mm f/1.8.

What are your preferences regarding use of prime vs. zoom lenses, and why?  Please share your experiences in the comments box.

Want to read other posts about gear?  Find them all here: Posts on Gear.


Panama’s “First Cry of Independence” Celebrations [Encore Publication]: Serendipitous timing allowed me to capture images of a rarely seen festival

Departing Panama City for the historic and folkloric region of the Azuero Peninsula, we were very fortunate to arrive in the little town of Chitre on the day they celebrate Panama’s “First Cry of Independence”. The push for independence from Spain began here, then spread to the rest of the country. Whether halfway around the world or right in my home town, I’m always thrilled to have the chance to capture the special energy and tradition of a festival or celebration. The excitement is even greater when the festival, like this one, is off the tourist track and seen by very few people other than locals.  In today’s post I share some favorite images from the first two days of this festival, along with some notes about how they were made. Click on any of the images to visit my Panama photo gallery, where you can browse and purchase many more images from this remarkable country.

It’s a good idea to grab some “establishing shots” when photographing any festival or other large event. These images are made from a longer distance and/or with a wider lens than the close-up images that constitute the bulk of most portfolios. The establishing shots give a sense of scale so the viewer can understand the context for the other images. Here I used a slightly wide-angle lens to frame some of the parade participants against the lovely colonial church in the town’s main square.

Because festivals are very busy events, it’s important to look for clean backgrounds insofar as possible.  To make this portrait of two young Panamanians dressed in the national costume known as the pollera, I composed so as to minimize clutter in the background and also used a wide aperture (small f-stop number) to render the background in soft focus.  Too often photographers compose based only on the main subject, but a clean background is at least as important to the success of the image than an interesting foreground subject.

Not all portraits need to include the subject’s full face. I shot this colorfully attired marcher in profile so as to give a sense of color and motion, while revealing only one side of her face.

This young participant shows off her traditional Panamanian costume called a pollera. A wide aperture sets her off from the other participants in the background, while a fast shutter speed freezes the motion of her swirling pollera.

In this image I captured the whole contingent of young women in their variously colored polleras. The lighting conditions were harsh, so I set the exposure manually be metering on the fabric of their costumes. In post-processing I had to adjust the highlights and shadows to ensure the subjects were evenly illuminated.

The second day of independence festivities are celebrated in the small town of Villa de los Santos. I asked this parade participant to pose for a portrait in a spot with a clean background and lovely soft lighting, then got in close with a fast prime portrait lens set to a wide aperture (small f-stop number) to throw the background out of focus.  Soft lighting (which can be obtained by shooting near sunrise or sunset, or by moving the subject into a shaded area) makes vivid colors truly pop and flatters the subject of your portrait.

To make this portrait of a participant wearing a fanciful mask, I asked him to pose in a somewhat less cluttered spot, then made the image using a very shallow depth-of-field to emphasize the mask and throw the background into very soft focus.

The “First Cry of Independence” festivities last well into the night.  The extremely low-light conditions offer a photographer’s dilemma: either continue to shoot using only available light (and accept the added visual noise and motion blur) or switch to using flash (and live with its short coverage distance, artificial color cast, and distraction to the subjects).  I chose to work with just available light, boosting my camera’s ISO sensitivity setting to as high as I could get away with and using a fast prime lens at a very wide aperture to gather as much light as possible, which in turn allowed the use of a reasonably fast shutter speed.  The results are lovely: sharp dancers in the foreground with just a touch of motion blur, soft focus on the dancers and buildings in the background, and a soft and painterly feel for the scene that to me feels quintessentially Panamanian.

Sometimes it can be effective to embrace rather than avoid a cluttered background and to include it as part of the overall mood of the scene. That was my approach in making this image. I got in relatively close to the dancers in the foreground, using a moderate aperture setting to render the background crowds of spectators in soft focus, but still easy to discern. This gives the viewer a sense of being a part of the bigger celebration even while observing this intimate scene featuring the young couple.

I hope you’ve enjoyed this photo essay on the first days of Panama’s independence celebrations. Have you experienced a little known local festival or celebration? Please share your experiences by leaving a comment here.

The Sharpest Tack in the Box [Encore Publication]: How to achieve sharp focus in tricky shooting situations

One of the most important elements of an image is focus, and even an untrained viewer can tell immediately when a key part of the image is not in sharp focus.  The stakes are even higher when we consider that poor focus is nearly impossible to correct in post-processing.  Most of us rely on our camera’s autofocus functionality to help us achieve tack-sharp focus while shooting, but as with every other automated system in a camera, even very sophisticated autofocus mechanisms can go awry, especially when we’re faced with tricky shooting situations.  Here’s a quick guide to minimizing focus problems and achieving sharp focus in nearly every shot.

Scenes with low contrast, such as in this image of ice floes on the Barents Sea in Svalbard after sunset, can fool even sophisticated autofocus systems.  Override your camera’s autofocus system and instead shoot manually in these conditions.  Buy this photo

  1. Make sure to select the part of your image that you want to be in sharp focus.  It sounds like a no-brainer, but surprisingly frequently the reason an image’s main subject is not in focus is because the photographer never told the camera’s autofocus system what to focus on.  Remember that as with any assistive technology, a camera’s autofocus system is just a collection of hardware and software designed to make a best guess about what the user wants.  If you leave your camera set to full autofocus mode, it does its best to identify what its software determines is likely to be your intended subject.  A human face, for example, is likely to be what you want to have in sharp focus, so the camera focuses on that.  But often the camera does not guess correctly.  Nearly every camera, including the one in your smartphone, allows you to manually select your desired focus point, often by simply touching the desired part of the image on the screen.  Be sure to check what your camera is doing and correct it by manually selecting the focus point if it guesses wrong.
  2. Recognize that your camera’s autofocus system will likely not work in certain tricky conditions. Most autofocus systems work by looking for areas of the image where the contrast is changing, such as at the outlines of a person or a building.  But in very dim lighting, or when the main subject is badly backlit, or in scenes with very low contrast (think of a stormy sky or the waves of an ocean), the autofocus does not work.  Recognize these deficiencies and be prepared when shooting in these conditions to take manual control.  Every camera has a mechanism to manually select focus, and you need to know how to use that feature.
  3. Choose the autofocus method best suited to your shooting needs.   Most advanced or professional cameras allow you to choose among several different types of autofocus methods.  Often, the first choice is between single-focus mode or continuous-focus mode.  Choose single-focus mode when your subject is relatively stationary and you must have precise focus achieved before releasing the shutter.  For subjects that are moving quickly or where you need to time your shot exactly, even at the expense of not yet having perfect focus, you should choose continuous-focus mode.  Within each of these modes, your camera may offer sub-choices, such as letting you manually choose the exact focus point you want or choosing a range of points from which the camera selects focus based on the motion of the subject.  This is rocket-science technology, but fortunately it is pretty straightforward to choose the desired method once you understand what each one does.  Read your camera’s manual and always practice in the different focus modes before going on any important shoots, especially on a major trip.
  4. Circumvent the whole problem by choosing a wide depth of field.  Sometimes the best artistic choice requires a narrow depth of field so that only the main subject is in sharp focus, and sometimes the light is too dim to choose a narrow aperture, but if you can make the shot work with a wide depth of field (in other words, using a small aperture, represented by a high f-stop number), then you don’t have to worry about focus at all.  In most situations, universal focus from several feet away from your lens through infinity is achieved at apertures of about f/16 or smaller.

Capturing tack-sharp images of fast-moving wildlife like the cheetah requires selection of an autofocus mode capable of dynamically refocusing on the moving subject.  For this shot of a cheetah in Serengeti National Park in Tanzania, there was the added challenge of having low contrast between the animal and the background.  I chose my camera’s continuous-focus mode with predictive focus so the camera would anticipate where the cheetah was moving and focus ahead of the shutter.  Buy this photo

By using these tips, you can achieve tack-sharp focus where you want it in nearly all of your images, whether you’re shooting with a simple point-and-shoot or phone camera, or the most advanced professional camera.  Any camera frequently makes the wrong guess about where the focus point should be, so do not rely blindly on autofocus.  It’s worth investing some time to learn how to configure autofocus appropriately for any shooting situation, and how to turn it off and instead focus manually when required.  Happy shooting!

How do you achieve sharp focus in tricky conditions?  Please share your thoughts in the comment box at the end of this post.

Want to see more articles about techniques?  Find them all here: http://www.to-travel-hopefully.com/category/techniques/.

Top Tips for Great Travel Images: These five simple “hacks” will result in more professional images

Festivals and street fairs can be challenging to shoot due to backgrounds cluttered with people, buildings, and cars.  To make this portrait of grandmother and granddaughter at Carnaval San Francisco, I got down low so that most of the background was covered by the cloth of the costume, and I used a wide aperture to throw the hectic street scene into soft focus.

The web is positively overflowing with “life hacks,” simple tips and tricks to save us all time and effort and to achieve better results.  Some lists are better than others, but it is in the spirit of these lists that I bring you this compilation of five simple travel photography hacks.  These techniques are not difficult and do not require expensive gear.  They work equally well for your photography whether traveling or at home.  And I promise that if you follow them, your images will improve.  Pros do these things almost automatically; to us, it’s hygiene, like tooth brushing.  If you read no other post about photography, read this one.

  1. Avoid cluttered backgrounds: So often the travel images of a professional stand out from those of amateurs simply because they took careful notice of what was in the background while composing the shot.  Try to frame your subject against a clean backdrop such as a dark-colored wall or the sky.  If there’s no way to avoid including some clutter in the background, at least use a wide aperture (low F-stop number) to throw the background into soft focus.  I’m always reminding my students–and myself–to pay at least as much attention to composing the background as the main subject.
  2. Watch your horizon: Frequently, we’re so intent on composing the main subject within our viewfinder that we forget to check whether the camera is level before firing the shutter.  An uneven horizon can give the impression of vertigo, like the subject is going to fall out of the frame.  Some cameras have a virtual horizon function to show you whether the horizontal and vertical axes are level, but whether you use it or not, be sure to check visually that the edge of the image looks correct.
  3. Achieve sharp focus: The one characteristic of an image that even the most inexperienced viewer can identify immediately, and one that’s almost impossible to fix in post-processing, is poor focus.  Today’s cameras are so easy to use that we often overlook this most basic element.  The camera can’t know for sure what subject you intend to have in focus; it can only make its best guess.  So take the extra fraction of a second while composing your image to move the camera’s focus point onto the main subject (even smartphone cameras have this capability).  Or use a small aperture (high F-stop number) to provide a wide depth of field so that essentially everything is in focus.
  4. Choose the correct exposure: Another very basic element of any photograph, exposure can only be correctly chosen by the photographer, not by the camera.  Your camera’s Auto mode can be fooled very easily by many tricky situations, most commonly by backlighting of the subject.  It’s fine to use the camera’s guess as a starting point, but nearly every camera (including smartphone cameras) have a way to manually override this guess, so learn how to do this and add in about a stop or two of extra exposure if your subject is backlit, more if the backlighting is severe.
  5. Turn off the darned flash: Most cameras have a mode where the flash fires automatically if the meter determines the extra light is needed.  This is rarely a good thing.  Far better to turn off the auto flash setting and make your own decision about when to use the flash.  Otherwise, your low-light images could end up with an eerie, unnatural color cast or your far-away subject could be underexposed (a flash typically lights an object only a few feet away from the camera, so why fire the flash when you’re photographing an object hundreds of yards or even miles away?).  Worse, if you are shooting through glass or another reflective surface, your flash reflects off the surface, ruining your whole image.  Worse still, your flash may blind everyone else near you in a very dim setting, damage sensitive artwork, or scare or anger nearby wildlife.  I’ve seen countless visitors ejected from museums, zoos and aquariums, and other wonderful destinations because they hadn’t figured out how to override their camera’s auto flash setting.  Just turn off the darned flash, and use it manually when appropriate.

To properly expose a backlit subject, you will usually need to override your camera’s automatic exposure mode.  Two easy methods are to use your camera’s spot meter (if available) to set the exposure based on the area where the subject is, or to use exposure compensation to dial in an extra 1-2 stops of exposure.

Learn these simple techniques and follow them whenever you shoot, and you’ll start making images that stand out from the crowd.  Remember, you, and not the technology inside your camera, are the creative force behind your images.

What are your favorite tips and tricks to ensure you make the best images possible?  Please share here!

Want to read more posts about photographic techniques?  Find them all here: Posts on Techniques.

Bracketing: Hedging Your Bets [Encore Publication]: In challenging shooting conditions, exposure bracketing is a great insurance policy

In the old film days of photography, it would be days or even weeks after shooting before we could see the results.  I would routinely use a procedure called “bracketing” to make a series of shots, each at a slightly different exposure, to increase the odds that one would come out decently exposed.  Even today, when digital photography allows us to see the results immediately, there are two good reasons to employ the exposure bracketing technique: 1) it can be hard to assess on a small LCD screen in bright daylight and while in the excitement of shooting whether the exposure is really correct, and 2) when the contrast between the brighter and dimmer parts of the scene is high we may want to stitch several different exposures together using software to create a high dynamic range (HDR) image later.

Tricky subjects, like this tiny Svalbard reindeer against a glacier background, benefit greatly from exposure bracketing.  From a series of 5, 7, or even 9 images shot at slightly different exposures, you can choose the one with the correct exposure for the conditions.  Buy this photo

So there are still good reasons to use exposure bracketing, and fortunately, it is quite easy to employ this technique.  Here’s how.

If possible, mount your camera on a tripod when using bracketing so it won’t move between exposures.  Then you can combine several of the exposures into an HDR image later if desired.

If your camera has a bracketing button or menu item, use it to specify how many shots you want to take (I usually shoot 5 or 7 different exposures when bracketing) and how much you want to vary the exposure between each shot and the next (often I choose a 1-stop difference).  If your camera lacks this feature, you can still use bracketing by manually adjusting the exposure between each shot and the next; just use your camera’s exposure compensation control to dial in first -2 stops, then -1 stop, then 0, then +1 stop, and finally +2 stops.

I like to set my camera for continuous shooting while bracketing.  That way, I just hold down the remote shutter release and the camera shoots all 5 or 7 exposures in rapid succession.  But it’s fine to shoot each frame individually in single release mode, if you prefer.

There are some subtleties to think about when employing exposure bracketing.  Some cameras let you choose whether to vary the aperture, the shutter speed, or the ISO setting, while holding the other two settings constant.  In most cases, I prefer to vary the shutter speed and hold the aperture and ISO settings constant, because changing the aperture affects the images’s depth-of-field, and changing the ISO setting can affect the noise in the image.

Later, during post-processing, you review the images and choose the one that is properly exposed.  Or if the scene is very high contrast, you can use photo editing software such as Lightroom or Photoshop to stitch several frames in your series together into an HDR image, which ensures good exposure from the brightest to the darkest tones in your photo.

Several exposures were shot using bracketing and then combined in Photoshop to create this HDR  image.  All tones from the darkest shadows on the mountain walls to the brightest highlights on the icebergs and lake are properly exposed in the final image.  Buy this photo

Have you used exposure bracketing techniques?  What are your best practices?  Do you use this process mostly for selecting the best exposure or for creating HDR images?  Please share your thoughts here.

Are you interested in learning new travel photography techniques?  Follow this link to see all the posts on techniques: Posts on Techniques.

Beyond the Postcard Shot [Encore Publication]: Some sites are so iconic, you have to think differently to get a unique shot

Much of the joy of travel photography is seeking out and capturing images of little-known places and the ordinary daily lives of the people who live in them.  But when we’re traveling it is also inevitable that we’ll come face to face with the world’s most famous, overexposed, iconic sites.  You know, those places that are so often documented and discussed that we automatically associate them with the city or country where they are located.  London has Big Ben, Paris has the Eiffel Tower, San Francisco has the Golden Gate Bridge, Tibet has Potala Palace, India has the Taj Mahal, Cambodia has the Angkor Wat temple complex, and so on.  These sites have been photographed and shared so many millions of times that they are ingrained in our visual memories.  But there are ways we can approach and photograph the world’s iconic sites so as to avoid the “postcard shots” and create something different.  In today’s post, we’ll explore a few methods you can use to make less familiar images of the world’s most familiar locations.

Focus on part rather than the whole: Instead of capturing an iconic site such as London’s Big Ben with a normal or wide-angle lens to include the whole structure, try using a longer lens or getting up close to capture just a portion.

Big Ben is nearly always photographed from a distance using a normal or wide-angle lens to include the whole tower.  Here I used a medium telephoto lens looking up at the clock’s face to emphasize some of the detail on the facade.  Buy this photo

Embrace the crowds: Instead of working to remove the hordes of visitors from images of iconic locations, sometimes it is effective to embrace the crowds.  This can create a “nod and a wink”, self-referential photo that tells the viewer we all know this site is a tourist draw.  In this image of Stonehenge, I used a wide-angle lens to include not only the monoliths but also the long line of visitors who have come to see them.

Intentionally including the hordes of visitors in some of our images can give a different effect from the usual photos in which we attempt to remove the people.  Buy this photo

Try a different time of day: Many of the world’s most famous sites are associated with a specific time of day or lighting conditions.  The Golden Gate Bridge, for example, is often photographed at sunset or as the banks of fog roll over it.  Tibet’s Potala Palace is usually pictured by day.  So, for a different view of this lovely temple/palace complex, I visited it by night.  The resulting images offer a different mood from the postcard shots.

A different time of day can yield very different images from the usual ones.  Here, Potala Palace is captured by night, a seldom seen view that offers a very different mood than the postcard pictures.  Buy this photo

Incorporate unexpected visual elements: We associate certain visual themes with iconic locations, so surprise your viewers by including unexpected elements in your images.  I especially enjoy incorporating anachronistic visuals, such as a Buddhist monk speaking on a cell phone (though even that is becoming something of a cliche these days).  In this image of Delhi’s iconic Qutub Minar, I framed the shot first and then waited for the jetliner to enter the frame just behind the minaret.

Including non-contextual visual references in our shots of iconic sites can surprise the viewer.  This image of Delhi’s ancient Qutub Minar minaret incorporates a modern jet airplane for a mashup of old and new.  Buy this photo

Find a different vantage point: The Taj Mahal is a gloriously lovely building, but its true beauty is often overlooked by photographing it straight on from the iconic vantage point across the reflecting pool at the main entrance to the site.  Instead, try capturing the Taj from an unusual vantage point, such as the Moonlight Garden across the river from the back of the Taj.  The resulting image will surprise the viewer by offering a less-seen perspective and by framing the iconic site in an unusual context.

This image of the back side of India’s iconic Taj Mahal was made from the Moonlight Garden across the river.  Freed from the usual framing of the front of the Taj with its reflection in the pool, the viewer can truly appreciate the gracious beauty of the structure itself.  Buy this photo

Next time you visit one of the world’s most overexposed sites, try making some images using one of more of these new approaches to surprise the viewer with something different.  Avoid the cliches by emphasizing just certain portions of the site or by including crowds or non-contextual elements in your images.  Shoot from a different vantage point or at an unexpected time of day.  There’s really no need to add one more to the heap of millions of identical photos of these places, so go wild and try something unique!

How have you created unusual images of the world’s most iconic locations?  Please share your thoughts here!

Want to read more posts about what to shoot while traveling?  Find them all here: Posts on What to Shoot.

I Feel Like a Kid in a Candy Store [Encore Publication]: Capturing the spectacular SF Movement Arts Festival

Note: If you live in the SF Bay Area, please plan to attend the 2020 installment of this amazing event on January 24 at Grace Cathedral.

As an official photographer once again for this year’s SF Movement Arts Festival, I look forward to the privilege and pleasure of capturing images of most of the more than 300 talented and diverse performers who will participate in this year’s version of this amazing event. If you live in the SF Bay Area, please plan to attend this coming Friday, January 24.

This epic event of breathtaking beauty and scope brings together many of my favorite choreographers and dancers–those with whom I collaborate throughout the year, their younger students, and some who I’ve never met before–representing a tremendous range of movement practices and dance styles, and throws them all into the grand interior spaces of San Francisco’s iconic Grace Cathedral. My assignment, truly a labor of love, is to stay all day and all night: for the rehearsals, side photo shoots, and the performance, in an effort to capture images of nearly every performer in the festival. Truly, I feel like a kid in a candy store, having the opportunity to make images with so many amazing movement practitioners in this ethereal space, all in one day.

Today’s post, presented as a simple photo essay, shares some of my favorite images from this mind-boggling event. All I will add in the way of technical notes are a few points my regular readers will already know to expect from me:

  • When shooting fast-moving action in a relatively dark space, use as fast a lens as you can given your focal length needs, boost your camera’s ISO sensitivity setting to as high as you can get away with, and choose an aperture as wide as possible given the depth-of-field you seek
  • Choose a shutter speed that is fast enough to freeze the performers’ movement, unless you’re intending to create an artistic motion blur
  • Watch your backgrounds: what’s behind your main subject is as or more important than your subject itself, so try to choose a pleasing or less distracting background whenever possible, and keep your horizons level
  • Compose your images with an eye toward putting your viewer within the performance to experience the beauty, athleticism, and grace first-hand
  • Shoot lots of images because the performers’ body postures, gestures, and facial expressions will change in an instant and you want to be sure to capture a few frames that bring out their very best.

You can view and purchase all of the images in this post, and many more, by visiting my web gallery here: SFMAF Photo Gallery .

I hope you’ve enjoyed this small sampler of images from the incredible SF Movement Arts Festival. You can view and purchase all of these and many more by visiting my web gallery here: SFMAF Photo Gallery .

Do you have a favorite festival or cultural event that inspires and excites you so thoroughly that you feel you could photograph it every day? What are your go-to techniques for capturing images at these events? Please share your thoughts here!

Brave New World [Encore Publication]: AI tools for photographers are improving

As a working professional photographer who also spent nearly 30 years as a technology manager/executive, I’ve long had an interest in the intersection between art/creativity and technology.  Recent attempts to marry photography with artificial intelligence have ranged from useful (facial recognition) to silly (Instagram filters) to hype (an expensive camera that several days after you shoot sends you only the images it deems worthy).  But as pattern matching algorithms improve and machine learning becomes more reliable, we are starting to see some amazing applications at the intersection of AI and photography.

I’ve recently been playing around with two good examples from Adobe.  Available only in the online version of Lightroom as “Technology Previews”, these tools enable you to search all your images for specific attributes and to have the AI automatically select what it determines to be your best photos.

To activate these new tools, go to https://lightroom.adobe.com, log in using your Adobe Creative Cloud credentials, and then click on the Lighroom logo in the upper left and select “Technology Previews” from the drop-down menu.  Click the check box next to “Best Photos”, and you’re good to go.

There are two main tools available at this time:

  1. Intelligent Photo Search: This is already very impressive technology.  You can search all or a subset of your images using any natural language term you want.  You could, for example, search all your images for photos of cats, or of mountains, or of dancers, or of waterfalls.  The more specific your search term is, the more accurate the results are likely to be.  When I searched for “waterfall” or for “dancer”, the AI seemed to get many or most of my photos featuring those themes, and only occasionally did it include photos that did not feature those themes.  When my search terms were broader, like “clouds” or “mountains”, the results were less accurate.  Aesthetic searches, say for the color “blue” or the effect of “motion” resulted in mostly accurate selections of images featuring these concepts.  While there are a few false matches, and likely quite a few more errors of omission of images that should have matched, this technology is quite useful in its current state.
  2. Best Photos Selection: This one is more of a work in process.  You can select any of your online galleries and ask the AI to select what it “thinks” the best photos are.  You can move a slider to increase or decrease how selective this tool is.  As a default, it shows you its picks for the top half of your photos, and then you can refine the selectivity to include more or fewer photos.  I tried this advanced technology using several of my recent photo galleries.  In most cases, it included my two or three favorite images in its initial selection of the top half of all the photos, but dropped them from its cut as I increased the selectivity.  In one gallery, for example, an image that was recently selected as a favorite by the editors of “National Geographic” was dropped by Adobe’s AI in the first cut of 10% of the images.  That image was quite artsy and abstract, and it’s not reasonable to expect that a machine could choose it as special.  Yet in another of my galleries, the AI included an image that recently won a major local competition in its final cut of just 1% of the images.  That image is a more traditional landscape that could reasonably be evaluated by a machine as a “good” photograph.

The bottom line here is that the applications of advanced technology to the art of photography are improving at an astonishing rate.  While neither of Adobe’s AI tools is as good as a human artist at selecting images by their features or their quality, both tools are off to an impressive start and one of them (Intelligent Photo Search) is already very usable.  I would not be surprised if, in a year or two, this technology advances to the point where machines can be making decisions about photography along with humans.  Both human and AI evaluations will have their strengths and weaknesses, and I can see them coexisting for the foreseeable future.  I recommend we all, as photographers, get steeped in this advanced technology and prepare for a future in which man and machine will both play a role in sophisticated evaluation of images.

The Berlin Chapter [Encore Publication]: Updates on my ongoing Human/Machine Dance Project

Last summer I began a passion project in collaboration with choreographer, dancer, and Fulbright Scholar Carly Lave with the goal of exploring how the human body moves and how we humans will be transformed by increasing immersion into advanced technologies, including virtual reality, robotics, and interconnectivity.  I was delighted when one of my images from this project was recognized by my being named one of three Emerging Pros in Digital Photo Pro Magazine’s biannual awards.  The image was the overall winner in this international competition’s “Fashion & Beauty” category.

In an earlier post I shared a few favorite images from the California-based photo shoots that Carly and I conducted last summer.  In today’s post I’ll share a few new images from our recent photo shoots conducted in Berlin, Germany, where Carly is spending the year as a Fulbright Scholar.

Der Temporaum in Berlin: Flug

“Der Temporaum in Berlin: Flug”.  Carly takes flight while exploring a virtual world. The very real world she inhabits here is a shared workspace for artists in a Soviet-era neighborhood of the former East Berlin.  To capture the fast action of Carly’s leap, I used a fast prime lens nearly wide open so as to achieve a fast shutter speed while shooting at a relatively low ISO.


Der Temporaum in Berlin: Tanzen

“Der Temporaum in Berlin: Tanzen”.  Carly dances within a shared workspace for artists in a Soviet-era neighborhood of the former East Berlin.  To create the soft, intimate feel of this portrait, I used a prime portrait lens (85mm) at a wide aperture (f/2.0) to allow the lovely light streaming through the window to illuminate Carly and to throw the background into soft focus.  Composition is very important to the success of intimate portraits, so I was careful to frame Carly’s body within the lines of the window casement and using the soft white curtains to provide a pleasing and non-distracting background.


Tempelhofer Feld I

“Tempelhofer Feld I”.  The virtual and physical worlds collide on a defunct runway at the pre-WWII airport of Tempelhofer, now a recreational space in the south of Berlin.  Working on location in outdoor settings can be tricky and success may be dependent on weather conditions and other factors.  Carly and I conducted this shoot during a gathering storm, making for a dramatic sky that complemented our theme and the industrial setting very nicely.  The accompanying challenges we experienced were very high winds, shifting light, and very little time to shoot before the sky opened up in a barrage of pelting rain and hail.  Fortunately we were able to “get our shot” before getting soaked to the bone.  I framed this image to give prominence not only to Carly but also to the old airfield’s runway and to the stormy sky.

Der Temporaum in Berlin: Schwarz und Weiß

“Der Temporaum in Berlin: Schwarz und Weiß”.  While I liked the way this image looked in color, my visual concept of the scene called for high-contrast black-and-white to give it an antique graphic-arts feel that seemed to suit the historically drab East Berlin setting.  During post-processing I converted the image to monochrome and increased the contrast, adjusting the tone and color curves until I achieved just the effect I was seeking.

Der Temporaum in Berlin: Virtuell

“Der Temporaum in Berlin: Virtuell”.  Carly explores a virtual world. The very real world she inhabits here is a shared workspace for artists in a Soviet-era neighborhood of the former East Berlin.  Using a fast prime lens at a very wide aperture setting, I intentionally limited the depth-of-field to such an extreme that Carly’s hands as well as the background were thrown into soft focus.  I like the effect this has on leading the viewer’s eye from the outstretched arms to Carly’s head and upper body, then around to the bleak industrial background.  The view thereby experiences some of the sense of exploration in the space where Carly is feeling her way.

Tempelhofer Feld II

“Tempelhofer Feld II”.  This image was made in a similar fashion to the previous one at the same location, except that here I gained a different perspective by backing further away from Carly as well as crouching down to the ground.  The resulting effect is one of precariousness rather than one of steadfastness in the earlier image.

I hope this behind-the-scenes peek at my ongoing passion project will help inspire your own creative process.  It’s important to be personally and deeply invested in a project before you begin.  Select your partner(s) carefully and plan thoroughly.  Then the process becomes joyful and exhilarating as you begin to bring your concept to life!

Have you carried out a photography project?  Please share your key learnings–positive and otherwise–here!

Want to read more posts about what to photography while traveling or near home?  Find them all here: Posts about What to Shoot.


A “Fixer” for the Rest of Us [Encore Publication]: How you can leverage local resources to shoot like a pro

How do professional travel photographers on assignment create those amazing, make-your-jaw-drop images?  You know, the photos we see when browsing the pages of a major travel magazine or website?  There are several advantages the pros have, including technique honed over decades of practice, state-of-the-art equipment (with prices to match), and the ability to spend a lot of time at the same location, returning again and again until the time of day, lighting, weather conditions, and subject matter are perfectly aligned for a great shot.  But one advantage available to the pros can be borrowed, at least in part, by the rest of us who love travel photography, too.  That is the use of a “fixer,” a local expert who knows the region, the language, the culture, and the way to get things done, and whose expertise helps the travel photographer get those incredible shots.

While we were visiting a carpet weaving collective in Goreme, Turkey, our group’s trip leader introduced me to this worker who was enjoying a cup of Turkish coffee during her break.  Buy this photo

If you are traveling on a group trip run by a good travel company, you may already may have a fixer working to make your experience (including your photographic experience) as rewarding as possible.  The operator will likely have chosen an itinerary that will get you off the beaten path and into the settings where unusual and powerful images can be made.  They will have arranged your accommodations and transportation well in advance of your departure.  The company should have planned some activities and excursions that will allow you to interact with local people and see how they truly live.  And best of all, they have provided you with a local expert, often called a trip leader or program director, who knows the lay of the land, speaks the local language(s), and can facilitate your getting the kinds of shots you want.  This is of paramount importance when you want to have lots of interaction within a culture very different from your own, which I believe is the best part of traveling as a photographer.

For example, I made the above portrait after being introduced to the young worker at a carpet weaving collective by our trip leader in Turkey.  He translated so that she and I could get to know each other a little bit first, and then asked her if I could make her portrait.  It is certainly possible (I’ve done this countless times) to ask for yourself by using sign language, pointing to your camera, and smiling a lot, but having a local person with you can be a great help.

Sometimes, knowing where to go to seek out authentic cultural interactions works magic.  I captured this shot of our host family during a home-hosted lunch on an estancia (ranch) in Patagonia.

Our hosts, Chango and his extended family, were happy to pose for a portrait after we enjoyed their hospitality on their Patagonian ranch.  A local guide and good travel company can help arrange these kinds of authentic interactions.  Buy this photo


Visiting a rural elementary school in Tanzania afforded us the chance to meet kids in the classroom.  This type of experience would be hard to arrange while traveling independently, but a good group leader or guide can facilitate meaningful interactions with local people.  Buy this photo

When the trip is scheduled specifically to attend a special event, it is especially vital to have a good leader who is adept at working with local professionals to plan all the details.  For example, it was quite a major logistical feat to get a large group of scientists and photographers into place to study and view a total solar eclipse in a part of the world as remote and forbidding as Svalbard.  Our trip leader partnered with an astrophysicist who is a world authority on eclipses, beginning years in advance of the solar event, to ensure we had the best chance possible of clear weather conditions and the right vantage point from which to study and photograph the eclipse.  This is the sort of value that an expert fixer brings when you book a trip with one of the top companies.

Our eclipse expert and one of his students set up their gear on the morning of the total solar eclipse in Svalbard.  Buy this photo

To be sure, there are some compromises required for group travel, and having access to a shared program director is not the same as having a dedicated personal fixer to arrange your photo shoots for you.  I like to travel independently in places with developed infrastructure and where I can readily bridge the cultural or language gaps myself.  That said, I also love to travel in small groups run by excellent travel companies, in large part because their planning, coupled with the knowledge of the local trip leader, helps me make those memorable images.

Want to read other posts about planning your travel photography?  Find them all here: http://www.to-travel-hopefully.com/category/travel/plan/

Have you had a situation where you got your shot thanks to the knowledge of a local expert?  How do you arrange your travel when you’re visiting remote parts of the world or when you want to have lots of interaction within a culture very different from your own?  I’d love to hear your thoughts and experiences!  Please respond via the comment box.