Under the Milky Way Tonight: How to make great images including our home galaxy

Not too long ago, making images of the Milky Way was not practical for most photo enthusiasts.  Only astronomers and a handful of professional astrophotographers had the expensive equipment required to capture sufficient light from the cluster of quite dim stars that we refer to as the Galactic Core in the night sky.  Shooting with a very long exposure didn’t do the trick for the Milky Way, because leaving the camera’s shutter open for more than about 15-30 seconds would blur each stars image due to rotation of the Earth.  These blurs, called star trails, could make for striking images with the stars appearing to streak in circles across the sky, but the subtle beauty of the Milky Way would be lost with these long exposures.

But in the last five years or so, camera sensors have become much more sensitive to light, and now it is possible–indeed quite easy–for photo enthusiasts to photograph our home galaxy without expensive specialized equipment.

Here’s how:

You will need a camera with a sensor that can gather a lot of light and with a shutter that can be kept open for a long time.  These requirements limit the range of suitable cameras to full-frame DSLRs and advanced interchangeable lens mirrorless cameras.  You will also need a fairly fast wide-angle lens: I recommend a zoom or prime (fixed focal length) lens with a focal length of 14-16mm on a full-frame camera, and a maximum aperture of f/4 or faster.  For astrophotography I most often use the Nikon 16-35mm f/4 lens.  It’s got great image quality and is well built, and of course it is wide enough and fast enough for the purposes of capturing the Milky Way.

You will also need a heavy, solid tripod.  I’ve been successful using a lighter weight tripod for Milky Way shots while traveling, but a good professional tripod is better.  I use the SLIK 615-315 with a ball head.

Finally, you’ll want to have a remote shutter release, either a hardwired cable release or a wireless remote release.  This is to trigger the camera without touching it, so as to avoid blurring the image from the vibration of your touch.

Once you have the right equipment, it’s fairly straightforward to photograph the Milky Way.  Choose a dark sky area, far away from the light pollution of any cities or other sources of stray nighttime light.  Shoot toward the Galactic Core where the stars of the Milky Way appear brightest and most colorful.  To plan for where the GC will be on any given date and time and at any given location, I use a smartphone app called PhotoPills: PhotoPills in App Store.  Try to include foreground and/or middle-ground subjects to add interest to your composition.  The image below, made at Yosemite National Park, is appealing because the Milky Way is seen rising above the iconic peak known as Half Dome.

The Milky Way is seen arched through the sky above Half Dome and other landforms in Yosemite Valley.  Careful composition adds drama to your Milky Way images by including Earth-based subjects as well as the sky.  Buy this photo on my website

With your fast wide-angle lens on your full-frame camera, all mounted on your stable tripod, you are ready to shoot.  Remove any filters on the lens, set your camera on full manual mode, select a fast ISO (I usually start at about 3200 and sometimes have to go even higher) and a wide aperture (f/4 or wider), and choose a shutter speed of 20-25 seconds (shorter if your lens is longer than about 18mm).  You can use the 500 Rule, which states that shutter speed should be approximately 500 divided by the focal length of the lens; for example, for a 16mm lens you can use a shutter speed of not longer than about 31 seconds.  Turn off your autofocus on your lens or camera, as it will not work in so dark a setting; instead, manually set your focus to a point near infinity where the stars appear sharp in your viewfinder (or better yet, on your live-view screen).  I like to tape my lens to this setting before it gets dark, so I know the focus won’t change while I’m out in the field in the dark.  It’s also a good idea to turn off your camera’s long-exposure noise reduction feature, if it has one, as this wastes time in the field and it’s equally effective to reduce the noise in Lightroom during post-processing.  Of course, you want to be sure you are shooting RAW files.

Go ahead and shoot a lot of frames, experimenting with different ISO settings and compositions.  It is often a good idea to get a very long exposure, sometimes several minutes long, so that your foreground subjects will be properly exposed.  The frames with the foreground well exposed can later be combined in Photoshop with the ones in which the night sky is properly exposed.

This image was made from several frames: one long exposure for the lake, trees, and mountain in the foreground and middle-ground, and several different 25-second exposures that each captured a different meteor during the peak of the Perseid Meteor Shower.  The resulting image shows all of these objects quite prominently, along with the Milky Way.

You may want to combine several different images to see all the features of the night sky and the terrestrial objects clearly. Buy this photo on my website


With practice, you’ll find that capturing the Milky Way is within your reach, so long as you have suitable equipment and the patience required to compile enough images that a few will turn out to be successful.  I believe it’s well worth the effort because a good Milky Way shot is so subtle, colorful, and strikingly beautiful.  Good shooting!

Have you created a Milky Way image that you love?  What were the key components to your success?  What were the challenges you faced?  Please share your thoughts and experiences here.


If You Can’t Be with The Camera You Love: How to make the best of it when you don’t have ideal kit with you

There’s an old adage that goes, “The best camera is the one you have with you.”  That is never more true than for travel photography.  As travelers, we have to compromise regarding what gear we pack for a whole trip, and then we have to compromise again with respect to what equipment we can pack on a particular day’s outing during the trip.  If a flight is involved, we’re often obligated to leave much of our gear at home so as to avoid having to check our precious photography equipment.  If a good deal of hiking, biking, or travel via public transportation is required, we may have to leave bulky or heavy items in the hotel room for the day.

Fortunately, it’s never been easier to ensure we always have at least some backup solution to keep shooting even when a key camera, lens, filter, or tripod has to be left behind.  The smartphone that nearly everyone carries with them at all times likely has a pretty darn good camera attached to it.  My Apple iPhone 6s, for example, comes with a 12 MP camera, incorporating a decent if small sensor and a tolerable quality and moderately fast (f/2.2) lens.  Even the smaller “selfie” camera has a 5 MP sensor.

No one will confuse the images made using this camera phone with those made using my professional DSLR camera and collection of lenses, but in a pinch I can get acceptable quality shots with just the phone’s camera.  The trick is understanding how to use your smartphone’s camera, or your small point-and-shoot camera, in the right way to capture the images, and then to post-process the images in such a way as to overcome the compromises built into the camera.

Just yesterday I found myself on a family day trip to the annual Scottish Highland Gathering and Games without my professional camera gear.  I made the best of things and shot all day with just my camera’s phone.  I’m fairly pleased with the resulting images, even though of course they would have been better had I had access to my regular camera and a few choice lenses and accessories.  Here are a few of my images along with some tips on how to get the best out of a not-so-great camera.

First of all, learn how to control your phone’s camera manually so that you can choose what part of the image you want to be in focus and what part of the image you want to drive the exposure.  Nearly all modern phone’s cameras allow you to touch the screen to select where on the image you want to set the focus and exposure.  In this photo of a Scottish traditional music performance, I set the focus point on the fiddler to ensure sharp focus on the musicians.  Then I adjusted the exposure by moving the vertical slider upward, in order to add some brightness to the image and avoid underexposing the backlit performers.

Touch your smartphone camera’s screen to select the focus point, and then move the exposure slider up or down to adjust the exposure separately from the focus point.  Buy this photo on my website

Better yet, take full manual control over your phone’s camera by installing an app.  There are good free and inexpensive apps for both iOS and Android.  The one I use for iOS is called “Manual” and is available on the Apple App Store: Manual app.  With such an app installed on your camera, you can specify manually exactly what settings you want to use for the focus point, aperture, shutter speed, ISO, flash, etc.  This level of control was essential for a shot like the one below.  The tossin’ of the caber, a “heavy athletics” event in which the contestants throw a 75-pound tree trunk as far as possible, requires a fast shutter speed in order to freeze the rapid action.

Using the “Manual” app I was able to focus on the athlete and choose a fast shutter speed to freeze the rapidly moving caber.   Buy this photo on my website

To capture this action shot of an indoor sheepdog trial, I had to set a fast shutter speed and increase the camera sensor’s sensitivity (ISO) to accommodate the quick action and the low-light setting.  Again, the Manual app allowed for this flexibility.  I also cropped the image during post-processing because the phone’s camera does not have a long enough focal length lens to zoom in closely on the subject.

Both manual selection of the ISO and shutter speed and cropping during post-processing are required to get a decent shot of action like this sheepdog trial.  Buy this photo on my website

To capture this image of a girl teaching young children how to dance around the maypole, I had to use all the elements we’ve been discussing here.  I used manual settings to choose a focus and exposure that were correct for this subject, forced the camera’s flash to fire to try to even out the harsh shadows across the girl’s face, and employed cropping and lighting adjustments during post-processing to achieve a pleasing composition.

Bringing it all together: To make this image of the maypole celebration, I manually selected the focus, exposure, and flash, and then cropped and adjusted exposure during post-processing.  Buy this photo on my website

Next time you can’t or just don’t have the best equipment with you, use the tips we’ve covered here to make the best of a challenging situation.

When did you have to make do with less than ideal gear for a shoot?  How did you make the best of it?  Do you have tips or tricks you can add?  Please contribute your thoughts using the comment box at the end of this post.

I See a Red Door and I Want to Paint It Black: When a black-and-white image is better than color, and how to convert to B&W

Back in the day, a photographer had to choose in advance whether to shoot with color film or black-and-white film.  Conversions from color to B&W were cumbersome and expensive, and conversions from B&W to color were essentially impossible.  During the film era, I typically shot exclusively using color transparency film while traveling, and reserved B&W photography for particularly artistic shoots near home.

Thankfully, in today’s digital world, we no longer have to commit ourselves in advance to monochrome vs. color images.  It’s now a simple procedure to convert our color images to B&W during post-processing.  And that’s a great blessing, because there are plenty of times when a black-and-white photo is better than a color photo.

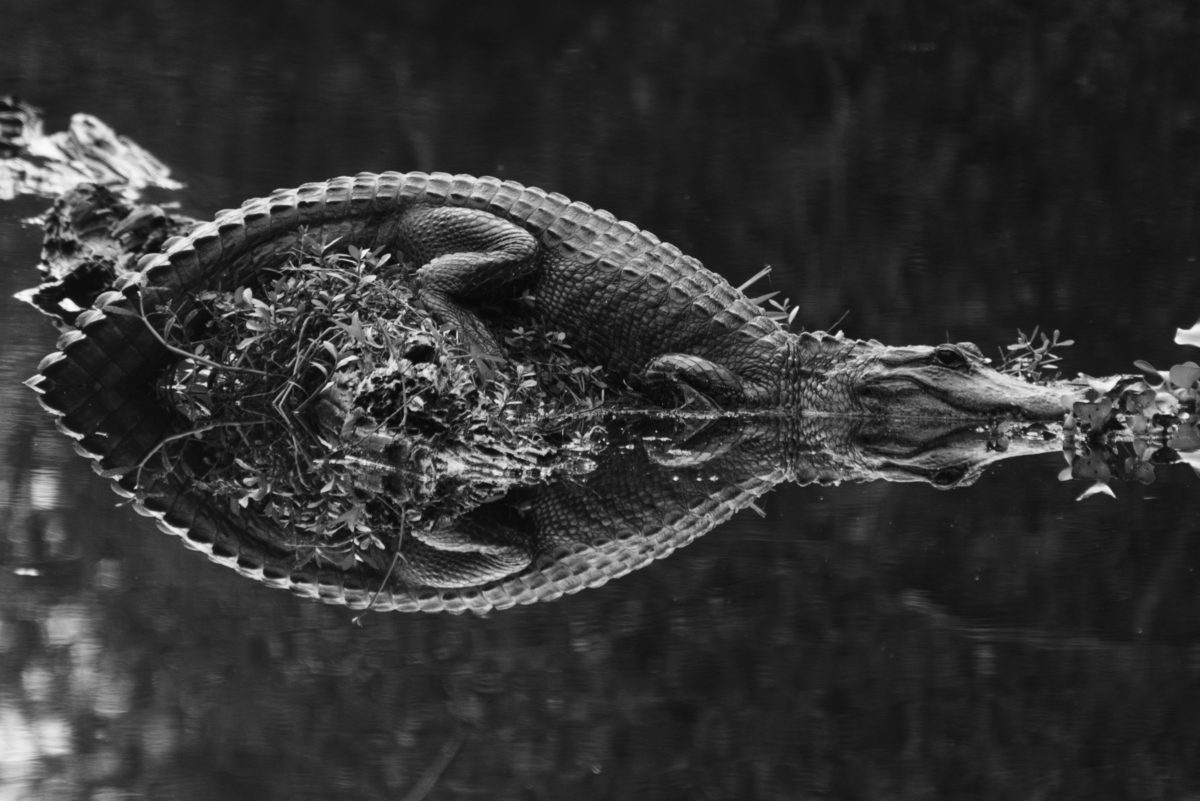
Consider the image of the alligator at the start of this post.  One of my favorite photos, this one works just fine in color, too.  But the real power of the image is revealed in B&W through the striking textures of the alligator’s skin as seen above the water and as reflected off the water’s surface.  The background above the water fades to a deep, nearly true, black, with the background of the water itself rendered slightly less darkly and showing some nice ripples of motion.  Black-and-white photography is especially powerful when there are contrasts of pattern, texture, and background as in this image.  Buy this photo on my website

When else might we want to render an image in B&W?

Portraits made in monochrome have a timeless look that evokes the earlier years of photography, and this rendering can also bring out the true nature of the subject.  There’s a lovely look to the skin tones and hair when displayed in B&W, and there are fewer distracting elements from the color of clothing or background objects.

This portrait takes on a vintage, timeless look when shown in B&W.  Our eye can focus on the model’s face and hair without the distractions of the colors in her sweater or the building.  There’s almost a street photography kind of documentary quality to this image in monochrome that is lost when viewed in color.  Buy this photo on my website

Color can be distracting in an image where we want to emphasize the essence of a person or place.  In this portrait I made recently for a couple who are fellow musicians and friends of mine, we had beautiful “golden hour” light to work with, and the background and clothing worked well in color.  But converted to B&W, this image really places the emphasis on the couple without the distractions of the color cast in the reflections off the eyeglasses or of the mixed lighting in the background.

In this portrait, black-and-white presentation places the viewer’s attention squarely on the the couple and their instruments, without distractions from the multiple colors of the clothing and background components.  (Client photo not available for purchase.)

When you’re shooting under “mixed lighting”, which means there are multiple light sources with different color temperatures (i.e., some light sources are warmer and others are cooler), converting the image to B&W can be a real problem solver.  Consider the image below, made in Bruges at night.  The light from the street lamps was warmer than the light coming from the spotlights on various buildings, and there was also a bright moon that night, so when seen in color the photo would look less appealing due to the contrasting of the color temperatures in the different parts of the image.  But viewed in B&W, it brings out the grandeur of the old buildings and the beauty of the reflections in the waters of the canal, without the distractions of the color casts.

This image of Bruges at night, when processed in B&W, removes the contrasting color temperatures of the multiple different light sources and allows the viewer to enjoy the stately old buildings with consistent tone and texture.  Buy this photo on my website

Now that we’ve covered a few of the many situations in which a black-and-white image is preferable over a color image, let’s look at how to convert from color to B&W.  There are many ways to perform this conversion, but I recommend it be done using the Color Adjustments settings in the Develop module of Adobe Lightroom.  Here’s how:

Click on the “B&W” tab above the individual color channel sliders, and then adjust the mix of how the colors are blended by increasing or decreasing each color’s slider to see how the black-and-white image looks.  I find that I often have to readjust the contrast slider at this point to get the image looking its best in black-and-white.


For more on using Lightroom to post-process your images, check out my previous post: Previous post on using Lightroom to post-process images.

I do not recommend using your camera’s built-in black-and-white mode, as you will then lose the color information in the image file.  I also do not suggest using the settings some cameras have to make a copy of the image in B&W, because in most cases the camera’s built-in software will not do a very good job of rendering the image in monochrome.  For the best results, either use Lightroom or a dedicated black-and-white conversion application such as Silver Efex Pro 2 from Nik Software, which is available as a plug-in for Lightroom or Photoshop.

What do you love about a black-and-white image?  When do you convert an image to B&W rather than share it in color?  Any tips or tricks for how to make great B&W photos?  Please share your thoughts in the comment box!


Happiness Quite Unshared: You’re back from your trip and you’ve got your photos looking great; now what?

Sometimes you just get that feeling.  You know as soon as you depress the shutter button that you’ve just captured an incredible travel image.  Over the course of your trip, you will hopefully amass quite a few of these images that you will be eager to share with friends and family.  After the often laborious effort to cull your images and post-process the chosen few, it’s time to share these best photos with the world.

In olden times (pre-digital), there were fewer choices about how to share one’s travel photos.  Many of us shot with color transparency (slide) film, sent all the rolls off to a lab for processing, picked out the top slides by hand, and stored them in a slide tray or carousel for future viewing.  In the excitement just after a trip, we would likely invite a bunch of friends over, get them slightly inebriated, and subject them to a slide show using a projector and portable screen.  This almost literally captive audience would feign enjoyment over, or perhaps even genuinely enjoy, viewing the large projected images and hearing our stories about the recent adventure.  Then the guests would leave, and the slide trays would go back on a bookshelf to sit for months or years before anyone would look again.

In this brave new digital era, we have many more and better options for sharing our best travel photos.  This being the Internet, I’ll offer up a Top Ten list of favorite ways to get my travel images in front of key audiences (Number 7 will amaze you!):

  1. Social Media: While most social media platforms, including Facebook, Twitter, and Instagram, are image-intensive, it turns out that they aren’t particularly good at sharing fine art photography.  That said, these are important and obvious outlets for getting our favorite travel photos out to our friends promptly.  Some even post while traveling, but I do not recommend this approach unless you are completely certain your home is secure while you’re away.  Because these platforms encourage sharing, using them will allow your friends to pass them along to their friends, too.
  2. Online Photography Sites: Specialized photography platforms, such as SmugMug, Flickr, PhotoShelter, and 500px, are tailor-made for sharing (and even selling) your best images.  I use SmugMug to power my own professional photography website, but I also spend quite a bit of time browsing friends’ and even strangers’ photo galleries on the other platforms I mention here.
  3. The New Home Slideshow: Who needs the clunky white folding screens and finicky slide projectors of yesteryear?  Today most folks have a bright, high-definition display right in their living rooms, and it’s called a TV.  Photos on a PC or tablet can easily be shared on a smart TV via WiFi or specialized connecting cables.
  4. Your Phone: Today’s smart phones, whether iOS or Android, have easy ways to sync photos from your PC or tablet to the phone.  Once on your phone, your photos are ready to show to anyone from your mom to a random stranger on a train.  Not the biggest screen in the world, but it’s always with you and can store thousands of high resolution photos.
  5. Send them the files: It’s sometimes desirable to send some of your original image files to a few trusted friends.  Among the numerous methods for doing so are good ol’ trusty email (though attachment sizes are usually limited), Dropbox, and the download capability found in certain photography sites such as SmugMug.
  6. Albums and Books: Yes, the photo album is still alive and well, and it’s never been easier to create one.  Or you can go the extra mile and publish your own custom photography book.  Many photo sharing sites allow you to create your own albums and books featuring your images.
  7. Prints: The demise of the hardcopy print has been greatly exaggerated.  There’s something special and timeless about the look and feel of a well-printed photograph on real paper.  Do it yourself on a good home printer with high quality paper and ink, or send it to a professional lab, but a framed print on your wall or gifted to a friend to put up on their wall is a lovely way to share your very best images.
  8. Cards: Greeting cards, birthday cards, holiday cards–these days it’s easy to customize them with your own images and send them to friends and family.
  9. Calendars: Every year, I create a calendar with a photo from each month of the year just ended, and send copies to a few family members.  I also proudly display this calendar in my home and office.  What could be better than knowing you and your friends are viewing your photos every day of the year?
  10. Keepsakes: Novelty gifts from pencil holders to jigsaw puzzles, to clothing items can be easily and inexpensively made using your favorite photos.  We even have a cat food bowl sporting the likeness of our kitty.  My younger daughter enjoys specialty socks, so I’m looking into ways of putting some of our images onto hosiery.  Get creative!

Whatever methods you use to share your images with friends and family, I would encourage you to consider watermarking your photos.  A watermark is a pattern or image placed across a portion of the photograph to identify it as the work of a particular photographer.  While watermarks can be distracting to the viewer, they can be made quite discreet and they offer some protection against your image being stolen and passed off or even sold as the work of others.  Many photo editing software packages and photo sharing sites offer the capability of attaching watermarks to your photos.

How do you share your travel images?  Got a great idea for sharing that you’d like to add to the discussion?  Please leave a comment in the box at the end of this post.


A “Fixer” for the Rest of Us: How to leverage local resources to shoot like a pro

How do professional travel photographers on assignment create those amazing, make-your-jaw-drop images?  You know, the photos we see when browsing the pages of a major travel magazine or website?  There are several advantages the pros have, including technique honed over decades of practice, state-of-the-art equipment (with prices to match), and the ability to spend a lot of time at the same location, returning again and again until the time of day, lighting, weather conditions, and subject matter are perfectly aligned for a great shot.  But one advantage available to the pros can be borrowed, at least in part, by the rest of us who love travel photography, too.  That is the use of a “fixer,” a local expert who knows the region, the language, the culture, and the way to get things done, and whose expertise helps the travel photographer get those incredible shots.

While we were visiting a carpet weaving collective in Goreme, Turkey, our group’s trip leader introduced me to this worker who was enjoying a cup of Turkish coffee during her break.  Buy this photo on my website

If you are traveling on a group trip run by a good travel company, you may already may have a fixer working to make your experience (including your photographic experience) as rewarding as possible.  The operator will likely have chosen an itinerary that will get you off the beaten path and into the settings where unusual and powerful images can be made.  They will have arranged your accommodations and transportation well in advance of your departure.  The company should have planned some activities and excursions that will allow you to interact with local people and see how they truly live.  And best of all, they have provided you with a local expert, often called a trip leader or program director, who knows the lay of the land, speaks the local language(s), and can facilitate your getting the kinds of shots you want.  This is of paramount importance when you want to have lots of interaction within a culture very different from your own, which I believe is the best part of traveling as a photographer.

For example, I made the above portrait after being introduced to the young worker at a carpet weaving collective by our trip leader in Turkey.  He translated so that she and I could get to know each other a little bit first, and then asked her if I could make her portrait.  It is certainly possible (I’ve done this countless times) to ask for yourself by using sign language, pointing to your camera, and smiling a lot, but having a local person with you can be a great help.

Sometimes, knowing where to go to seek out authentic cultural interactions works magic.  I captured this shot of our host family during a home-hosted lunch on an estancia (ranch) in Patagonia.

Our hosts, Chango and his extended family, were happy to pose for a portrait after we enjoyed their hospitality on their Patagonian ranch.  A local guide and good travel company can help arrange these kinds of authentic interactions.  Buy this photo on my website


Visiting a rural elementary school in Tanzania afforded us the chance to meet kids in the classroom.  This type of experience would be hard to arrange while traveling independently, but a good group leader or guide can facilitate meaningful interactions with local people.  Buy this photo on my website

When the trip is scheduled specifically to attend a special event, it is especially vital to have a good leader who is adept at working with local professionals to plan all the details.  For example, it was quite a major logistical feat to get a large group of scientists and photographers into place to study and view a total solar eclipse in a part of the world as remote and forbidding as Svalbard.  Our trip leader partnered with an astrophysicist who is a world authority on eclipses, beginning years in advance of the solar event, to ensure we had the best chance possible of clear weather conditions and the right vantage point from which to study and photograph the eclipse.  This is the sort of value that an expert fixer brings when you book a trip with one of the top companies.

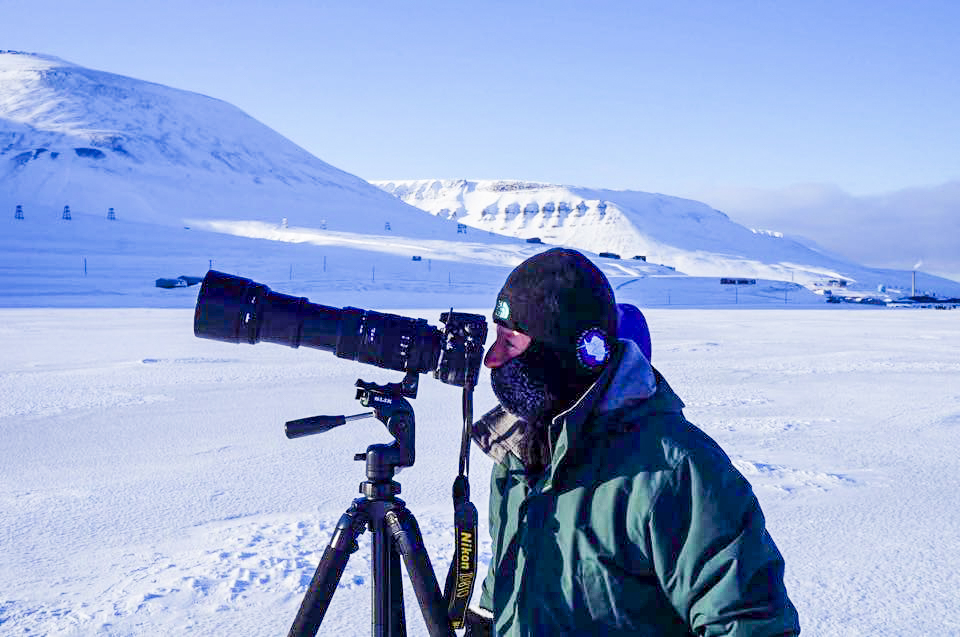
Our eclipse expert and one of his students set up their gear on the morning of the total solar eclipse in Svalbard.  Buy this photo on my website

To be sure, there are some compromises required for group travel, and having access to a shared program director is not the same as having a dedicated personal fixer to arrange your photo shoots for you.  I like to travel independently in places with developed infrastructure and where I can readily bridge the cultural or language gaps myself.  That said, I also love to travel in small groups run by excellent travel companies, in large part because their planning, coupled with the knowledge of the local trip leader, helps me make those memorable images.

Have you had a situation where you got your shot thanks to the knowledge of a local expert?  How do you arrange your travel when you’re visiting remote parts of the world or when you want to have lots of interaction within a culture very different from your own?  I’d love to hear your thoughts and experiences!  Please respond via the comment box.

Focus on Cuba: It’s changing rapidly, so go now!

Cuba is a remarkable destination for travel photographers!  This small island has all the iconic images we expect–beautiful but crumbling art deco buildings, American cars from the late 1950s, unspoiled Caribbean beaches–but there are so many more opportunities to connect with and photograph a culture and a nation that is undergoing very rapid change.

Lovers embrace on Havana’s Malecon at sunset.  Buy this photo on my website

European and Latin American travelers already know about Cuba’s charms and have been coming here for decades.  But to many Americans, Cuba has felt off-limits, a destination forbidden by our government.  I’m going to steer clear of the political issues in this post, but suffice it to say that the Obama administration’s recent relaxing of Cuba travel restrictions now makes this unique island nation a travel destination within the reach of most Americans.  I do not recommend trying to circumvent the licensing requirements.  This can lead to lots of trouble for the unlicensed American traveler later down the road: hefty fines, lots of questions to be answered, and restrictions on one’s future travel possibilities.  Instead, go with one of the many travel companies who operate People-to-People Cultural Exchanges.  These are legal trips licensed by the US government for the purposes of the people from the US and Cuba getting to know each other.  These trips do require that most of the traveler’s time be spent interacting with Cuban people of all walks of life, but isn’t that what we travel photographers seek, anyway?

We spent a delightful 1.5 weeks on one of these cultural exchange programs run by Grand Circle Foundation.  They offer a variety of different Cuban itineraries, and we would have preferred one of the longer ones, but schedule limitations required us to take the shorter trip.  This itinerary brought us to the capital Havana and to the rural Viñales Valley, the center of tobacco production and ecotourism on the island.  Here are some highlights from this travel photographer’s perspective.


Our small group was invited to attend a rehearsal by Opera de la Calle.  Held in a decrepit art deco building in downtown Havana, the spirited performance combined song, dance, and performance art.  Buy this photo on my website


Getting to know some of the locals while visiting the exuberant art installation by Jose Fuster known as Fusterlandia.  Buy this photo on my website

We left Havana’s vibrant urban vibe for a three-day excursion to the rural Viñales Valley.  Exploring this famed tobacco-producing region from our base at an eco-tourism village within a sustainable agricultural collective, we enjoyed hiking through terrain unlike any we’d seen elsewhere, taking in views of local wildlife and flowers along the way.

The picturesque Viñales Valley is noted for its mogotes, dramatic hilly outcroppings.  Buy this photo on my website


Tobacco farmer Benito enjoying the fruit of his labor.  Buy this photo on my website

Cuba’s national bird, the brightly colored Tocororo.  Buy this photo on my website

The warm and engaging proprietor of Maria’s Cafe surveys her domain.  Buy this photo on my website

During a Viñales Valley elementary school visit, we met the staff and great  kids in the classrooms!  Three classes for different ages shared one old church building.  Buy this photo on my website

We got to know a friendly and enterprising rural family during a home-hosted dinner.  This is their typical family transportation.  Buy this photo on my website

Back in Havana, we strolled through the city’s Old Town.  Buy this photo on my website

A special performance of Santeria singing and dance.  Santeria combines Roman Catholicism with African religions to form a uniquely Cuban hybrid.  Buy this photo on my website

This selection of photos barely scratches the surface of all the wonderful, unique photographic opportunities awaiting you in Cuba now.  Go soon, though, because for better or for worse, this nation is transitioning quickly into a very different future.

As I write this post, the first commercial flight from the US to Cuba in over 50 years has just taken off from Florida: NY Times on US flights to Cuba.  For many Cubans, the dawn of this new era will mean a partial easing of a great deal of economic hardship suffered under the US embargo.  I’m eager to visit again in a few years to meet more Cuban people and observe how their lives have changed in the interim.  But if you prefer to visit–and photograph–tiny colorful sidewalk cafes rather than Starbucks, authentic cultural interactions rather than slickly produced touristic shows, and wide open vistas rather than lavish resort developments, then now is the time to book your trip to Cuba!

Have you been to Cuba?  What surprised you there?  What were some of your favorite photographic subjects?  If you haven’t been yet, what images do you associate with this island nation?  Please share your thoughts in the comment box at the end of this post.

The Things We Carry: Basic Gear for Travel Photography, Part II

Let’s pick up the gear discussion where we left off on the recent post.  Last time, we covered cameras and lenses.  Now we’ll talk about flashes, tripods, accessories, bags, and other essential kit.

Flash Units

Your camera most likely has a built-in flash, and in many cases that can be good enough to provide some fill-in lighting for backlit subjects or even to serve as a main light in very dark situations.  But for more flexible control over how much light you want, the quality of that light, and where that light comes from and goes to, you will likely want to have a separate flash unit.  I use the Nikon SB-910, which is powerful and flexible enough for most settings.  It has been discontinued and replaced by the Nikon SB-5000, but the older model is often still available.

Whatever flash you use, it is best to attach a diffuser of some sort to soften the otherwise very harsh light of the flash.  I also keep my camera set to lower the flash output by 1 stop, and I only override this setting occasionally.  Flash is often best when used sparingly.

Tripods

For most travel situations, you’ll want a lightweight tripod that folds up to a nice portable size but still offers enough stability for most uses.  There are times, though, when I need to bring along my heavy and bulky professional tripod.  Whatever tripod you choose, be sure to fit it with a good quality head (ball heads provide a lot of flexibility and ease of use for travelers) and remember to take along the plate that attaches the tripod to your camera, if required.

My go-to lightweight travel tripod is the Manfrotto Be Free.  It folds up to an incredibly small size yet affords a surprising amount of stability.  The included ball head works well but is difficult to adjust for sensitivity.  This tripod is designed to fit into a special pouch in my favorite travel photography backpack, also made by Manfrotto.

The SLIK 615-315 is a great tripod for use close to home or on trips where you will have constant vehicle support.  It’s very solid, supports a tremendous amount of weight, and can be adjusted for nearly any shooting situation.  I recommend you fit it with a good ball head for maximum flexibility.

A monopod can be a real problem solver when you need more stability than handholding or resting your camera on a vehicle or table will afford, but you can’t carry or use a full tripod.  I use the Manfrotto 681B model.

Accessories

We photographers love our toys!  While it is easy to get carried away and purchase every cool accessory that comes along, I will try to limit the recommendations here to a handful of truly essential items.  And don’t forget the little things like lens cleaning cloths, a blower brush for dust, and of course extra batteries and chargers for your camera and flash.

Three kinds of filters are essential gear for most photographers.  I’ll cover each type below.  Note that you must use a filter that is the correct size to attach to your lens.

It’s a good idea to keep a UV filter attached to your lenses at all times, as this helps protect the front element of the lens from scratches.  Use a good quality filter, though, as the poorer ones can affect image quality.  I would recommend removing the UV filter when shooting with certain other combinations of filters, as the edges of the image can be cut off (vignetting) with too thick a stack of filters on the end of the lens.  I’ve had good luck with Hoya UV filters.

The second must-have type of filter is the circular polarizer.  A polarizing filter can reduce glaring reflections and can darken skies and enhance natural colors.  This little gadget is almost a secret weapon for making images that really pop.  Again, I like the Hoya products, which are thin, well made, and perform as they should.

The final essential filter is the neutral density filter.  These reduce the amount of light that reaches the camera’s sensor, so you can use slower shutter speeds to blur motion, or so you can use a wider aperture to get a shallow depth-of-field, even in bright sunlight.

Another essential is a good remote release for your camera.  I know plenty of photographers who still use the good old trusty wired (or cable) releases.  I like to be able to move away from the camera when shooting remotely, so I favor a wireless release such as the RFN-4s Wireless Remote Shutter Release.

Smartphones

Most of us would never consider leaving home without our phone, and there are additional good reasons to carry yours with you when you are photographing at home or around the globe.  First, the cameras in today’s better phones are now good enough to make quite good images.  I’ve been very impressed with the quality of the main camera, and even the selfie camera, on my Apple iPhone 6S.  But your phone is also an essential photography tool because there are some very good apps to help you plan, shoot, and share your images.  There are too many to list here, but I’ll plan a future post to share some of my favorites.

Bags

Aside from cameras and lenses, no other category of gear gets photographers arguing quite so heatedly as bags.  For a travel photographer, your bag must be highly protective and durable yet lightweight, fit your gear well but with the flexibility to change out kit as needed, and preferably not advertise that you have expensive camera equipment inside.  The choice of what bag to use is a very personal one, but I’m still going to recommend my three favorites.

For those times when you need to bring most or all of your gear on a trip, I like the Tamrac 5586 Expedition 6x Backpack.  It carries a lot of gear snugly and flexibly, and it doesn’t look like a camera bag so it’s less likely to invite the wrong kind of attention.  It will almost always be accepted as carryon on flights, but it is a bit bulky and heavy for all-day, everyday use while traveling.  I’ll often use this bag to get all my gear to my first destination, then pack a day bag for just the gear I’ll need for each day of the trip.

My current favorite bag for day use for nearly any shooting situation near home or while traveling is the Manfrotto MB MA-BP-TRV Advanced Travel Backpack.  It can fit a reasonable amount of gear while leaving room for non-photography items like a jacket or a water bottle (yes, even photographers occasionally have to drink or stay warm).  It disguises your gear pretty well, has good rain protection, and even sports a special sleeve for carrying the Manfrotto Be-Free Travel Tripod.

For carrying just a few pieces of gear around town or close to home or hotel, a shoulder bag can work well.  This is the best setup for quickly accessing your gear while shooting, but it can be tiring to carry the weight across one side of your body if you have a lot of trekking to do.

Software

For post-processing my images, I use both Adobe Lightroom and Adobe Photoshop Elements.  I can do 90% of my processing using just Lightroom, but occasionally I do need the added power of Photoshop.  While I still use the perpetual license software versions, by now most photographers have gone over to the monthly licensing structure that Adobe calls the Creative Cloud.

What gear can’t you live without?  Have you discovered any little gadgets that improve your images or make life easier for photographers?  Please share your thoughts in the comment box.  I’d love to get your ideas!

When You Get Back Home: An Introduction to the Essentials of Post-processing

You may want to share some of your favorite images with friends and family right out of the camera while you’re still traveling, and as long as you’re not sharing so broadly that potential thieves may be alerted to your absence from home, that’s a fine thing to do.  To enable immediate and easy sharing, you can choose the setting available on many cameras to shoot both RAW and JPG files; the JPG images will often look pretty decent for sharing when they come straight from the camera, and you still have your much more detailed image data saved in the RAW files.

But when you get home from your trip, it’s worth making the effort to catalog and post-process the RAW files of your favorite images so that they will look their very best and so you will be organized for finding them in the future.  I’ll cover how to organize your catalog of images in a later post, but for now let’s take a look at the essentials of post-processing.

There are many software applications available to perform these tasks, but I strongly encourage you to check out Adobe Lightroom.  I use this tool, and nearly all professional and enthusiast photographers I know also use it.  You can license it along with other Adobe software on a pay-per-month basis as part of Adobe’s Creative Cloud, but it can also be purchased with a perpetual license (i.e., you purchase the software once and can use it forever), which is how I acquired it.

Once you have Lightroom installed on your PC, it’s easy to import your images from your camera’s memory card or from your PC’s hard drive and to organize your catalog of images using the software’s Library module.  When your images are in your Lightroom catalog, the software allows you to perform all post-processing you desire using its Develop module.  After shooting the image, my second-favorite part of the digital photography process is enhancing the the image in the Develop module.  The software package even gets its name, Lightroom, as the new digital equivalent of the work we older photographers formerly had to do in the darkroom, such as dodging, burning, and cropping our film negatives to get the images looking their best.

As an example of how a little post-processing can dramatically enhance an image, let’s take a look at a night shot I made of Copenhagen’s Christiansborg Palace, the seat of the Danish Parliament.  Here’s the “Before” picture:


Lightroom’s Develop module

The beauty of Lightroom’s method is that it doesn’t actually change your original image files as you edit them.  Instead Lightroom saves a roadmap of the various edits you make and stores this list of adjustments along with a pointer to the original file.  This is called “non-destructive editing”, and it allows you to edit your images to your heart’s content without overwriting or changing the originals at all.  You can go back as many times as you want later to revisit your edits and change them again and again.

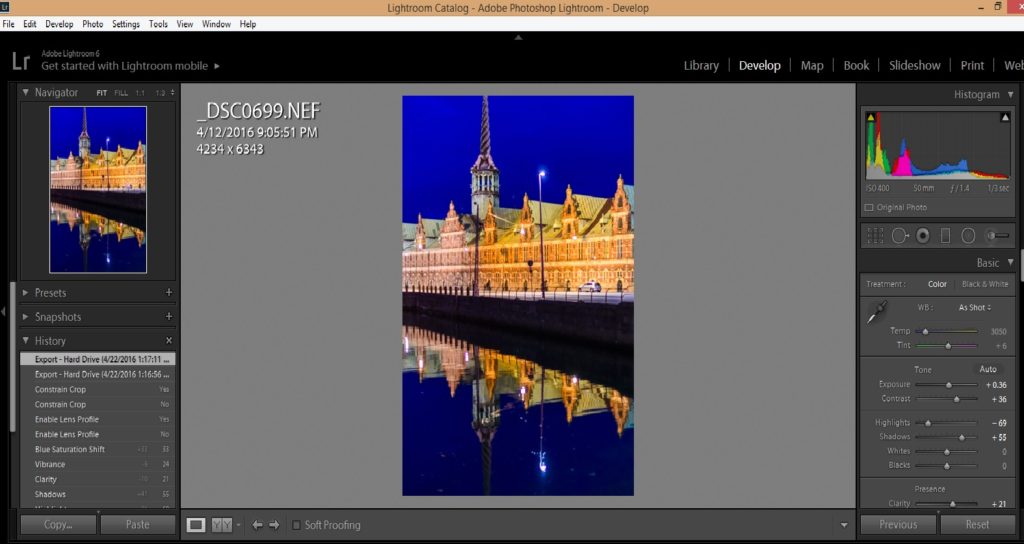
Let’s look at this process in more detail.  Here is the basic Lightroom Develop module screen:

lightroom develop module

The left bar shows a thumbnail of the image you’re working on and a list of the most recent edits you have made.  The central part of the screen shows a larger version of your image and this can be zoomed in and out to work on details or the whole image.  The right bar has a histogram (a graph showing how many pixels in the image are at each brightness level from totally black to totally white) at the top, then a toolbar from which you can choose some of the editing tools quickly, and then a large area with sliders (only some of which are shown in this screenshot) that you move left or right to adjust various elements of your image.  The editing tools in Lightroom are comprehensive enough that I find I very rarely need to import an image into Adobe Photoshop to make really sophisticated edits; nearly all of the time, I can perform all of my post-processing using only Lightroom.

Some photographers spend a lot of time making major enhancements to their images, but I like to try to adjust my camera’s settings precisely enough that the image is made in the camera the way I envisioned it when shooting, so that I need to make only minor adjustments in post-processing.  While the exact steps of post-processing will be different for every image, here is my basic workflow (note that for the most part, I work from the top to the bottom of the adjustment tools found in the right bar):

  1. Adjust the white balance as needed.  Remember my advice to always shoot in RAW mode.  One of the advantages of RAW files is that you can adjust the white balance in post-processing, regardless of what your camera’s white balance controls were set for while you were shooting the image.  In JPG files you have much less control over the white balance after the fact.  Just choose a different preset white balance type (such as Daylight, Shade, or Flash) from Lightroom’s menu, or create a custom white balance yourself.
  2. Adjust the exposure as needed.  Use the histogram and the image preview pane to lighten or darken the whole image until it looks best.
  3. Adjust the contrast as needed.  Increasing contrast gives more separation between the darkest and lightest portions of the image, while decreasing contrast does the opposite.  I find that most images require the contrast to be increased slightly to moderately.
  4. Adjust the highlights and shadows as needed.  Highlights are the brighter parts of the image, and I find that often these need to be reduced in brightness to regain some detail that may have been lost in the camera.  Shadows are the darker parts of the image, and often these need to be made brighter to bring out lost shadow detail.  After the highlights and shadows have been adjusted, you may need to adjust the whites and blacks (very brightest and very darkest points in your image) if there are extremes of contrast present.  Most of the time I do not need to change the white and black points.
  5. Adjust the clarity as needed.  The clarity slider changes the contrast of the middle tones (neither the darker nor the lighter parts) of the image.  Usually images need a subtle increase in clarity to bring out the details in the texture.  Don’t overuse this tool or the image can become unnatural looking.
  6. Adjust the vibrance and/or saturation as needed.  Both of these sliders will change the concentration of the colors in your image, but vibrance tries to avoid changing the color of skin tones so images with people will often look more natural after increasing the vibrance than after increasing saturation.  Occasionally you might need to make adjustments to both vibrance and saturation, but usually I find a subtle increase in vibrance is sufficient.  Again, don’t overuse these tools or your image will start to look exaggerated and surreal (unless you’re going for those effects).
  7. Adjust the concentration of individual colors as needed.  Each color channel has its own slider to increase or decrease its saturation.  I don’t use these sliders often, but occasionally you may want to increase or decrease the saturation of just a single color.  For example, when shooting a landscape with sky or water, you may want to increase the blue saturation to bring out those parts of the image.
  8. If you want to work on your image in black-and-white, the color channels area is the tool I use to do the conversion from color to monochrome.  Click on the “B&W” tab above the individual color channel sliders, and then adjust the mix of how the colors are blended by increasing or decreasing each color’s slider to see how the black-and-white image looks.  I find that I often have to readjust the contrast slider at this point to get the image looking its best in black-and-white.
  9. There is some sharpening already applied to your image file by default, but if it looks too soft in the important areas, you can dial in some additional sharpening.
  10. When the image you’re editing was shot at a high ISO (sensitivity) and/or a very long shutter speed, there will likely be some noise in the image.  This can be managed somewhat in Lightroom’s noise reduction tool.
  11. Under basic lens corrections I will usually select all three of the check box items.  Lightroom knows how most camera and lens combinations work and can eliminate many of the optical glitches that would otherwise show up in the image.  Under manual lens corrections, I may need to rotate the image if the horizon wasn’t level when it was shot.
  12. All of the above adjustments affect the entire image.  After completing these adjustments, it’s time to make any selective adjustments that affect only a selected part of the image.  These selective adjustment tools can be found in the toolbar just below the histogram.
  13. Of these selective adjustment tools, the most generally useful is the cropping tool, which of course allows you to remove unwanted portions of the image on the sides, top, or bottom.  It’s always best to try to compose the image correctly in the camera, but cropping is often still needed in post-processing.
  14. The spot removal, filters, and adjustment brush are more complicated selective adjustment tools that can easily be subjects of additional posts in their own right.

These steps usually won’t all be needed for any one image.  If you have several images that were shot under similar conditions, you can select them all in the Library module and turn on Auto Sync, which then allows you to make the adjustments only once and apply them to all the selected images.  Another big time saver is creating your own presets, which are saved routines that you can call at the click of a button to automate tasks that would otherwise have taken multiple steps.  Unlike Photoshop, Lightroom was designed by Adobe specifically for photographers to use, so it is set up in such a way as to make life much easier for us to organize, edit, and share our images.

Here is the “After” version of our sample image of Copenhagen by night.  You can see how a few simple edits during post-processing can really make an image pop.

Buy this photo on my website

I hope you’ve found this very basic introduction to the essentials of post-processing to be helpful.  Now it’s your turn.  What are your go-to techniques in editing your images?  Do you have tips and tricks that you’ve found make your life easier after you return from a trip?  Please share your thoughts in the comment box at the end of this post.


The Things We Carry: Basic Gear for Travel Photography, Part I

In today’s post, we’ll cover cameras and lenses.  I’ll post again soon with Part II, which will discuss flash units, tripods, accessories, bags, and other essential gear.

One of the biggest challenges we face as travel photographers is what gear to carry with us.  On the one hand, we have to be ready for anything.  It’s quite possible we will have to shoot landscapes, wildlife, portraits, architecture, indoor performances, and night scenes, often all on the same day.  On the other hand, there’s a practical limit to how much we can carry without being turned away by airline personnel or damaging our bodies.  And who really wants to travel with 75 pounds of photo kit?

Here is my basic setup for travel.  Note that my gear is suitable for a professional or enthusiast photographer on a not-unlimited budget (my wife keeps me from getting carried away).  There are less expensive alternatives for most of the gear I carry, and those on unlimited budgets can spend much, much more than this.  I will adjust what I bring depending on the specifics of the trip.  For a safari in East Africa, that 500mm lens is essential, but I wouldn’t want to lug it on a hiking trip in Ireland.  On a trip to view a total solar eclipse, I’ll need that rock solid but very heavy professional tripod, but on most trips my lightweight travel tripod is good enough, thank you.  But the following list of items comprises the core of my basic travel gear.

Cameras

There is no one-size-fits-all when it comes to your choice of camera.  These days, even a simple point-and-shoot camera or a smartphone camera is capable of making very good images.  But if you’re willing to carry a bit more weight and to learn how to use it before you take it on your first trip, a mirrorless interchangeable lens camera or a digital single-lens reflex (DSLR) camera will give you much more flexibility.  I use a DSLR, but more and more of my photographer friends are switching over to mirrorless cameras.  It’s really a matter of personal choice, and if you’re not planning to carry a lot of specialized (and heavy) lenses with you, the smaller size and lighter weight of a mirrorless camera may make up for the loss of certain features.  For very photo-intensive trips where it would be impossible to replace a lost or broken camera, such as an African safari, I will pack two DSLR camera bodies, but often I take a chance and bring just one.  Whatever camera you take on your trip, make sure you know how to use all its features and have tested it thoroughly before you leave, and if you’ve been using it for a while, have it cleaned in advance of your departure.  Note that while I am a Nikon shooter, comparable gear is available from Canon for DSLR afficianadoes.  In the high-end mirrorless arena, Sony’s Alpha a7R II is favored by many professionals and enthusiasts.

My go-to camera is the Nikon D810.  This is a professional model and not for beginners, but it really does do it all.  The resolution is extraordinary, it performs superbly in very low-light situations, the autofocus is fast and flexible, it’s continuous burst shooting speed is good enough, and I love the feel of the camera in my hands and the control it offers over all settings quickly.  I’ve put this baby through hell and high water, but it always comes through for me.

Lenses

For beginning users of interchangeable lens cameras, or for seasoned photographers who need to travel light, a small and lightweight “walkaround lens” may be all that you need to bring for a day’s shooting.  Mine is the Nikon 24-85mm f/3.5-4.5 lens.  It’s a good value for a well-built if not quite professional grade lens, and while not particularly fast, it does offer vibration reduction which allows you to shoot at slower shutter speeds while controlling for camera shake.  I recommend this lens for users of cameras with full-frame sensors who want a small, light, and fairly durable lens for those situations when you want to be ready for most anything.

It’s a good idea to have a wide-angle zoom lens for landscapes, architecture, and other situations where you need to include a lot of area in the frame or want a more uncluttered or exaggerated perspective.  I use the Nikon 16-35mm f/4 lens for this purpose.  It’s got great image quality and is well built, but it is rather heavy and bulky.

A telephoto zoom lens is a must-have for most travel photographers, as it allows you to shoot many wildlife subjects as well as emphasize details in all subjects you encounter.  A longer lens also can be used to provide a compressed perspective that makes far-away subjects appear to be closer to foreground subjects; this perspective can be very powerful in landscape images.  My primary tele zoom is the Nikon 70-300mm f/4.5-5.6 VR lens.  While this lens is built on aging technology and doesn’t always feel as solid as more professional lenses, it is relatively small and lightweight, fairly inexpensive, and provides a very effective vibration reduction function.  This lens has been a staple in my bag for many years, during which time I’ve used it to capture some of my favorite images.


You may never need a super-telephoto lens.  They tend to be expensive, bulky, and heavy, and on many trips you won’t need it.  But for those trips when you expect to encounter lots of wildlife or want to capture astronomical events like an eclipse or transit of a planet, a very long lens is essential.  Mine is the Sigma 150-500mm f/5-6.3 lens.  It’s more economical than a Nikon or Canon super-tele, and it produces reasonably sharp images even when used at its widest aperture.  You can spend much more on this type of big glass if you want or need to, but I’ve found this lens works quite well for me.

So far, we’ve talked about zoom lenses.  It’s also a good idea to carry a few prime (fixed focal length) lenses.  These tend to be faster, higher quality, and less expensive than zoom lenses in the same category.  The downside, of course, is that you have to “zoom with your feet,” that is, find a vantage point that works to compose your image without benefit of changing the lens’ focal length.

If you pack only one prime lens, it most likely will be a “normal” lens, that is one with a focal length of about 50mm for a full-frame camera or about 35mm for a crop-sensor camera.  I carry the Nikon 50mm f/1.4G lens.  This is the one I use in very low-light situations or to get a really shallow depth-of-field.

I think my current favorite lens of all is my Nikon 85mm f/1.8G lens.  This is a classic portrait lens and provides a flattering perspective and great image quality when your subject is a human being.  I use it for nearly all of my portrait work these days.  But this lens also shines for nature and action photography where you don’t need a really long focal length.  It renders really lovely “bokeh”, or the soft quality of the out-of-focus parts of the image.

A wide angle prime lens can be useful for landscapes, architecture and interiors, and astrophotography, among other purposes.  I like the Nikon 24mm f/1.8.


Stay tuned for Part II of our gear discussion, to be posted soon on this same Bat Channel.

What’s your go-to camera and which are your indispensable lenses?  Add your thoughts to the comment box at the end of this post!

Amazing Landscapes: How to Make Images that Capture the Spirit of the Place

I love landscape photography.  To create a really successful landscape image, several elements have to converge: the lighting must have a pleasing quality, objects in the foreground and/or middle ground should be intriguing, leading lines should take the viewer on a journey through the image, and (usually) the sky must be dramatic and compelling.  I shoot a lot more mediocre landscapes than great ones, but when all the stars align (sometimes literally, during astrophotography shoots) and all those compositional elements are in place, the results can be amazing.

Let’s take a look at some of my favorite landscape images and talk about how they were made.

Buy this photo on my website

While traveling in Svalbard to view the total solar eclipse of March 2015, my wife and I booked a safari via snowmobile to search for polar bears.  We covered 80 miles by snowmobile, much of that after dark.  The temperature averaged -5 degrees, with wind chill about 25 below zero Fahrenheit.  We rode out to an area now used as a campground, where an early settler and his wife lived a century ago.  This was glorious, otherworldly scenery encompassing ice fields, mountains, and the icy Barents Sea.  Svalbard is located so far north (closer to the North Pole than to mainland Norway) that the sunsets last for hours, so I set up my gear at the edge of the Barents Sea, composed the frame so that the eye is led out to the horizon by the slabs of ice and the range of mountains, and waited for the best light.  A polarizing filter added some drama to the sky.  A very long exposure was not necessary because there was no point to trying in blur the frozen water.  I shot several frames before the light became too dim and the temperature too bitter to continue.  This shot was the keeper!

Buy this photo on my website

This landscape was shot during a recent trip through Turkey and is a good example of how sometimes we photographers just get lucky.  On arriving in the Cappadocian village of Üçhisar, we were thrilled to learn our hotel room was inside an ancient cave dwelling.  We awoke at 5:30 AM the next morning to the sight out our cave-hotel’s window of hundreds of hot air balloons launching above the “fairy chimneys” that dominate the Cappadocian landscape.  I got (mostly) dressed and rushed out onto our balcony, set up the camera on the lightweight travel tripod I carried on the trip, put on a wide-angle zoom lens, and started shooting as the sun rose.  I bracketed the exposure but because the light was perfect in this one shot, I did not end up combining multiple exposures into an HDR (high dynamic range) image.  Instead, this shot, one of the first of the morning’s session, was the clear choice.

Buy this photo on my website

Chile’s Torres del Paine National Park is catnip for landscape photographers.  There are so many glorious subjects here that you can go crazy trying to photograph everything.  But Patagonian weather is notoriously changeable, and group travel doesn’t always afford photographers the chance to shoot at the right place at the right time of day with the right weather.  Fortunately, on our second night at the lodge on Lago Gray, I could see all the conditions were lining up for an epic image.  I skipped most of an excellent dinner so that I could set up my gear on the deck: camera with wide-angle lens, polarizing filter, steady tripod, and remote release.  I framed the image with a nice balance between sky, mountains, glaciers, lake, and foreground foliage.  And I started shooting.  I bracketed the exposure with 7-shot bursts, each one stop apart.  Later, in postprocessing, I combined a few of the shots from one burst into an HDR (high dynamic range) image using Lightroom’s photomerge feature.

Buy this photo on my website

Closer to home, Yosemite is another photographer’s dream location.  While hiking to Dog Lake in Yosemite’s Tuolumne Meadows area, a freak hailstorm hit.  Suddenly the sky was hurling hailstones in biblical style and the formerly placid surface of the lake turned black with the force of the pelting ice.  What’s a photographer to do?  Start shooting, of course!  A tripod was impractical under these conditions, so I used a relatively fast shutter speed and shot handheld.  I took a series of bracketed exposures and combined them later using Lightroom into an HDR (high dynamic range) image.  For me, this image works because of the tension between the peaceful foreground of tree trunk and reeds, contrasted with the ominous sky and turbulent water.  The fallen tree and edge of the grasses provide nice leading lines from the peaceful to the violent portions of the frame.

Buy this photo on my website

Another California landscape, this image was shot in the gorgeous Point Lobos reserve on California’s Central Coast.  As sunset neared, I set up camera and tripod right on the beach, shooting down onto the rocks and Pacific Ocean.  I used a neutral density filter to allow a very long exposure so that the water would blur.  I also attached a polarizing filter in an attempt to darken the sky and add drama to the image, but having two filters on the wide-angle lens did lead to some vignetting (the blocking of light at the edges of the photo), which I had to crop out in postprocessing.  This image was made from a single exposure with only minor adjustments to bring out the shadow details and saturate the colors.

Buy this photo on my website

This year’s Perseid Meteor Shower was more active than we’ve seen in many years.  At the peak night of the shower, I headed out to a spot where a break in the trees allows a view over Crystal Springs Reservoir and the Santa Cruz Mountains.  We waited until about 2 AM so that the meteor activity was at a peak and the lights of the nearby towns were no longer bright.  Shooting with a wide-angle lens and a heavy professional tripod, I framed the image to include a pleasing foreground with trees, reservoir, and mountains, with most of the frame covering the dark sky.  I used a star finder app to shoot toward the galactic core of the Milky Way.  I set the camera to make 25-second exposures at f/4 and ISO 1600.  At this focal length, exposures longer than 25 seconds will cause the stars to appear blurry due to the motion of the earth.  And then I just kept shooting, one exposure after another, for nearly two hours.  Four meteors passed through the part of the sky in my image area during this time, and I combined the images that included them into one merged image using a software application called StarStaX.  While I like this image a lot, it could have been improved by finding a darker sky area (the lights from a nearby city caused the orange glow at the top of the mountains) and by bringing out the Milky Way a bit more prominently.  Now I know what to do during next year’s Perseid Shower!

A good wide-angle zoom lens is a must for landscape photography.  Many of the images featured in this post were shot with my Nikon 16-35mm f/4 lens.  It’s got great image quality and is well built, and I find it’s a great alternative (except perhaps for astrophotography where the extra speed is required) to the popular but very expensive Nikon 14-24mm f/2.8.

Now I’d love to hear from you!  What are your favorite landscape images, and why?  To what lengths have you gone to capture landscape photos?  Please share your thoughts in the comment box at the end of this post.

Beyond the Auto Mode: Take control of your images by learning to manually set exposure, focus, and more

Travel photography is so exciting and satisfying in part because it requires us to capture every kind of image in all kinds of shooting environments.  You could be heading out to shoot landscapes when suddenly a rare sighting of an animal transforms your activity into a wildlife shoot.  Or you may be on the road for your next destination when you stumble upon a colorful local festival, and now you’re shooting portraits of the revelers.  This rich diversity of subjects also creates one of the biggest challenges for travel photographers: how to be prepared for anything that comes our way.  For beginning photographers there is some comfort in using the Auto mode that nearly every camera offers.  After all, we’re more likely to get an acceptable shot this way, when the subject turns quickly from fast action to landscapes to the low light of evening, or to an indoor performance.  But in most cases, your camera’s Auto mode, which attempts to make its best guesses as to what settings to use given existing conditions, will yield only acceptable photos and not the striking and memorable images we’re after.

There is a better way.  Take control of your images by learning how to manually set your exposure, focus, and other aspects of your photo.  All advanced point-and-shoot cameras and all mirrorless and DSLR cameras allow you to set most functions manually.  Even some basic point-and-shoot models have a way to go manual, but often this will involve options buried deep in a menu somewhere.  And there are apps available for both iOS and Android smart phones that allow you to take manual control over your phone’s camera.  I use an iPhone 6S, and I’ve found the “Manual” app to work very nicely for providing control over the phone’s camera setting for exposure, focus, and flash.  You can find it for less than $2 on the Apple App Store: https://itunes.apple.com/us/app/manual-custom-exposure-camera/id917146276?mt=8.  Even without using an app, most smart phone cameras do allow you to override the automatic settings by clicking on the part of the image you want to be in focus and used for the exposure setting; usually you can also set the exposure based on a different area of the image from the area that you want to be in focus.  But the dedicated apps will give you greater control, as they allow you to choose the shutter speed, aperture, and ISO for each shot.

For this image of a whirling dervish in Goreme, Turkey, I wanted to blur the dancer so as to give a sense of the continual turning motion in the ceremony, so I used my camera’s shutter-priority exposure mode and selected a slower shutter speed.  Buy this photo on my website

The key to successfully using your camera’s manual settings is to learn how they work and to practice at home, long before you actually take a trip.  Like anything else, selecting the settings we want on a camera takes practice.  In this digital era, it’s easier to learn because you can see the results of each setting immediately on your camera’s screen.  So dig out that camera user guide, or find it online, or search for a good tutorial.  But do learn how to adjust the key settings manually.

The first manual setting every photographer should learn is how to turn off your camera’s flash.  This sounds very basic, but I’m always amazed to see so many flashes going off in inappropriate places: museums that don’t allow flash photography, cultural performances, sports stadiums where the subject is thousands of feet away from the camera (the flash will only provide acceptable lighting for a few dozen feet, at most), and even the shy octopus exhibit at our local aquarium.  Believe me, you do not want to flash the octopus.  So learn how to turn your flash off, and be sure you actually do turn it off when you’re in a venue where flash is inappropriate or won’t help your image be better exposed.  Remember that glass reflects light, so you don’t want your flash on when shooting through windows of a vehicle or the glass windows of animal enclosures at zoos or aquariums.

Next, learn how to set your camera’s exposure manually.  The light meters built into today’s cameras are very smart, but they are also easily fooled by tricky lighting conditions.  The most common problem is backlighting.  If your subject is lit from behind, as many outdoor subjects are, your camera’s auto mode will likely expose for the brighter background and will leave your main subject underexposed.  You can adjust for this is several ways.  It may be good enough to just use your camera’s exposure compensation button to dial in, say, one extra stop of exposure.  Use your camera’s LCD screen and (if it has one) the histogram, to see how the subject is exposed with varying levels of compensation.  In some cases, you can use fill flash to fix backlighting problems.  To do so, manually turn on your camera’s flash, or attach a separate flash unit, and choose the setting for “fill flash” or “balanced TTL” (through the lens) flash mode.  Again, check exposure using your camera’s screen and histogram.  I find I usually get good results in tricky lighting conditions by using my camera’s spot metering mode, which tells the camera’s meter to use only the very center (or whatever area I select) of the image when choosing the exposure.

Other than allowing you to properly expose your main subject, manually setting the exposure also gives you control over what combination of shutter speed (how long the exposure lasts), aperture (how wide the lens is open), and ISO (how sensitive the camera is to light) you want for each shot.  If you’re shooting fast moving action like sports or wildlife, you will likely want to choose a fast shutter speed to freeze the motion (unless you want a blur effect as an artistic choice).  If you’re photographing a waterfall or sky and want to get some nice blurring of the water and/or clouds, you will probably want to choose a slower shutter speed.  Many times you want only certain parts of the image to be in focus.  A wide aperture (low F-stop number such as f/1.8) will give you a shallow depth-of-field, allowing only one part of the image to be in focus and blurring the other parts.  Conversely, a narrow aperture (high F-stop number such as f/16) will allow all parts of the photo to be in focus.  The final element determining exposure is the sensitivity of the camera’s sensor, measured by an ISO number.  Select a higher ISO (such as 1600 or above) only when you really need the extra sensitivity for very low-light subjects when a longer shutter speed or wider aperture is not suitable.  When you use very high ISO settings, the image will tend to have a lot of noise.  Today’s cameras are getting better at limiting noise at high ISO settings, and there are ways to reduce some of the effects of the noise using post-processing software, so my approach is to use as high an ISO as is required after considering the range of available shutter speeds and apertures.

To capture these professional beach volleyball players in sharp focus and to freeze the moment, I selected single-focus-point focus mode and chose the exact spot in the viewfinder where the players would be positioned, and also used my camera’s shutter-priority exposure mode to select a very fast shutter speed.  Buy this photo on my website

The other major type of manual setting that you need to know how to use is focus.  Most cameras today do a pretty good job of choosing the right part of the image to focus on, but they often need some help from the photographer.  From simple smart phone cameras through professional DSLRs, the autofocus function almost always lets the photographer select what part of the image they want to be in focus.  If you keep your camera in fully autofocus mode and don’t help by selecting where your main subject is, it may very well guess incorrectly and put another part of the image as the center of focus.  So, learn how to select the focus point even while letting your camera’s autofocus mechanism actually choose the focus distance.  Sometimes a camera’s autofocus capability may not work for the conditions under which you’re shooting, and in these cases you need to turn off autofocus completely, and focus in manual mode.  Some instances when this is necessary are when shooting in very low light conditions, or when shooting in poor contrast environments (for example, your subject’s texture looks a lot like that of its background, or you’re shooting into the bright sun).  In these cases, turn off the autofocus function and adjust focus manually until the subject looks sharp.

It’s still fine to walk around during your travels with your camera set in fully Auto mode, just in case something very unexpected comes up.  But do know how to set the main functions manually so you’ll get the best possible images in the 95% of the shooting situations when you do have time to set up first.

Do you have tips and tricks you can share on manually adjusting the camera’s settings to get great shots?  How about a time you kept the camera on Auto mode and got disappointing results?  Please share your thoughts using the comment box at the end of this post.

Photography as a Bridge to Local Culture

I’ve heard certain travelers grumble that photography inhibits deep cultural learning and interaction when we visit new places.  Our cameras, this line of reasoning goes, isolate us from the local people we’re trying to get to know.  The lens, they believe, acts as a distancing device to turn locals into subjects and travelers into tourists.

I disagree emphatically!  Your camera is a great tool for meeting local people and learning about culture, immersing yourself even more deeply in the spirit of the place and the lives of the people who live there.  But only if you use it in the right way.  Allow me to explain.

While the local customs and even the laws governing whom it is acceptable to photograph, and when or where it is okay to make an image of them, do vary from place to place, there are a few common-sense guidelines that will help us travelers engage in a friendly, curious manner instead of upsetting people and causing social discord.  Here are a few key guidelines to keep in mind.

    • The Golden Rule: If it’s not okay in your home country, it’s probably not okay in other parts of the world.  Would you appreciate a stranger running up to you on your front lawn and shoving a lens in your face?  I’m guessing, no.  So please don’t behave in that way toward people in other places.
    • Make a portrait, don’t take a portrait: Get to know your subject first as a person, even if just for a brief exchange.  While there are occasionally situations where the moment or the expression will be lost by approaching your subject before shooting, I find that most of the time I make better images as well as have more meaningful interactions, when I say hello and ask the person first.

USA

I chatted for a while with these samba dancers as they were celebrating just after San Francisco’s Carnaval parade.  Getting to know them first made it easy to ask permission for a portrait. Buy this photo on my website

    • Approach children with sensitivity: Kids can be amazing photographic subjects!  They are often uninhibited in front of the camera and they portray cultural practices and lifestyle in a relatable, endearing way.  But it’s especially important to understand when it’s okay to make a portrait with them.  While traveling in South Africa, I saw first-hand what can happen when travelers misunderstand social norms.  A fellow traveler in my group saw a young boy playing near where we were waiting for a border crossing.  She shouted excitedly, “Soooo cute!,” and rushed up to the child, camera extended toward his face, to take his picture.  In an instant the boy’s father ran over, irate, and yelled at me (he mistakenly thought I was the fellow traveler’s father), “How would you like it if we came to your country and started taking pictures of your children?”  A few minutes later I explained privately to the offending traveler why her actions caused a negative reaction.  She had no idea this behavior wasn’t okay.  When in doubt, refer to the Golden Rule, above.

Kashgar, China

We visited the old town in Kashgar just before the Chinese government began demolishing the homes there and relocating the mostly ethnic Uighur people.  It was and remains a complicated social situation, but I was fortunate to be able to make this memorable portrait of a young Uighur girl in traditional clothing sitting in front of her soon-to-be-destroyed family house.  I approached her mother first to make sure it was okay to photograph the girl.  Her expression of pride mixed with apprehension is what I feel makes this image strong.  Buy this photo on my website

    • Getting to know you: It may seem difficult to talk with a stranger from a very different culture who likely speaks a very different language from our own.  For us introverts, it seems like even more of a challenge.  But I’ve learned a few tricks and tips that make it much easier to get to know a person before photographing them.  Learn a few words of the local language.  Just saying “hello” or “good day” can be a great icebreaker.  It’s a fairly universal gesture to point to your camera and extend your arm gently toward your hopeful subject to inquire, “Is it okay if I take your picture?”  Just as happens in our home countries, a subject may say no, but most of the time people are happy to be photographed if you are polite, respectful, and try to interact with them first.  A trip leader, guide, or local friend can often be a great help by introducing you to the person you’d like to photograph.

Turkey

At the start of our trip through Turkey, I asked our trip leader to introduce me to people we felt would be good portrait subjects.  With his help I was able to overcome the language and cultural difference and capture this striking portrait of an employee at a carpet weaving cooperative.  Buy this photo on my website

    • How close is too close?: In most situations it is fine to make an image that includes a large group of people, none of whom will be too prominent in the photo.  For close-up images, though, in which an individual person or small group of people will be the obvious subject, it is best to ask first.
    • Money matters: When there is a commercial transaction between you and your subject, it often paves the way to ask to make their portrait.  I’ve had good experiences photographing local street vendors, musicians, artisans, and shopkeepers after purchasing their wares or tipping them for their services.  And of course it is usually fine to photograph singers, dancers, and musicians in a performance you have paid to attend, as long as local rules about photography are obeyed (sometimes you will have to pay extra for a license to photograph, and frequently flash is not permitted).  But it can become a slippery slope when people begin to expect to be paid just for having travelers photograph them.  In Peru we had many people, including young children, dress in traditional costumes and approach us to pose in photos for money.  In an Argentinian mountain village we were even asked to pay to photograph a gentleman’s Saint Bernard dogs.  In these situations, you’ll have to exercise your best judgment.
    • When can you shoot first and ask questions later?: It’s rare, but on occasion you will encounter situations when the “decisive moment” will be lost if you ask for permission to shoot.  This is another judgment call.  Just like when shooting street photography at home, I consider several factors when deciding whether to make an image of a stranger in a different part of the world.  When I do see an amazing expression, gesture, or moment and decide to capture it before getting to know the subject, I will usually approach them and show them the image on the camera’s display, attempting to query whether it’s okay.  A smile and an easygoing, open gesture can help when approaching.  If the response is clearly negative, I delete the image on the spot and in front of the subject. Again, see the Golden Rule, above, and keep in mind that courtesy and respect make all the difference.

Cuba

This was one of those situations when I shot first and asked questions later.  The proprietor of Maria’s Cafe in an eco-village in Cuba’s rural Vinales Valley was standing on a balcony above the cafe surveying the activity below.  I loved the way her contemplative expression and relaxed gesture were framed by the saturated Caribbean colors of the doorway, so I made this image right from our table.  Later, when Maria came down to talk with customers, I showed her the photo and she was pleased with it.  Buy this photo on my website

Beyond these general guidelines, there are local variations.  Do get to know the customs that prevail in the countries and regions you plan to visit.  For example, in some cultures it is acceptable to stand very close to others when conversing, while in other cultures the social boundaries are much more pronounced.  Sometimes it is fine to approach a child directly, but in other cases the first contact should be made with the parent or teacher.  There’s quite a bit of local variation in the amount of small-talk people engage in before getting down to business.  Knowing the local customs not only helps you make better portraits of the people you meet, but will also encourage deeper interactions and mutual respect.

In my experience, the camera is a wonderful bridge that enhances, rather than detracts from, making meaningful cultural connections with people while traveling.  Just try to do it the right way!

Do you have a good story to share about your experiences, positive or otherwise, in photographing people you met during your travels?  What’s your approach to making portraits while abroad?  How has photography enhanced your cultural interactions?  Please post your thoughts in the comment box.

Focus on Chile and Argentina: Rugged mountain landscapes and distinctive cultural experiences

Our wonderful 3.5-week adventure took us from Santiago, where we visited our older daughter, to fabled Easter Island, sophisticated Buenos Aires, the mystical island of Chiloe, and then through much of Southern Patagonia.  For much of this itinerary we were traveling with a local leader and a small group of fellow travelers on a trip operated by Overseas Adventure Travel (OAT).  The knowledge of our local trip leader coupled with the small group size allowed us to travel to largely untouristed areas and to engage in authentic cultural interactions that would not have been easy to set up on our own and would have been impractical to include on larger group trips.  Such a format offers amazing opportunities for photographers, as it provides access to an array of experiences beyond the “postcard-type” shots.  From home-hosted meals to wildlife encounters to hiking across glaciers and on the slopes of a volcano, this trip packed a lot of memorable moments–and images–into just a few weeks’ time.

Easter Island is a small and extremely remote island, accessible via daily flights from Santiago.  It is, of course, famed for the monolithic human figures carved by the Rapa Nui people centuries ago, called moai, that are scattered across the island.  But there is a lot more to Easter Island than the moai, including a distinctive Polynesian culture and a wealth of natural beauty.

When photographing iconic sites like this grouping of moai on Easter Island, look for a different perspective.  Here, I have framed the image from an unusual vantage point, shooting with a telephoto lens to compress the moai so that they appear closer together and more imposing than they would if framed from directly in front.   Buy this photo on my website

From Easter Island we traveled to Argentina’s capital city of Buenos Aires.  This city has a high-energy feel, offers a huge array of food specialties, and is graced with stately European style avenues and architecture.


Buenos Aires’ colorful and historic barrio (neighborhood) of La Boca is the birthplace of the tango.  To give a sense of the dance’s motion, I shot with a slightly slower shutter speed.  The rich colors of La Boca can be brought out in post-processing with subtle adjustments to the vibrance and/or saturation tools in image editing software such as Lightroom.  Buy this photo on my website

A stay in the Alpine style village of San Carlos de Bariloche included fascinating interactions with Hans, who as a German boy growing up in Bariloche uncovered his father’s Nazi past and wrote several scholarly books about Nazis living in Argentina; and with Christina, a Mapuche Indian grandmother, civil rights activist, and jewelry maker.  We then crossed overland toward the border with Chile, stopping en route for a home-hosted lunch of grilled lamb and for some horseback ridingon a family estancia (ranch).

Chango, the family patriarch, saddles up the horses for a ranch ride.  An environmental portrait includes not only the person who is the subject of the portrait, but also enough of the surroundings to give a deeper sense of who the person is.  A classic portrait lens would also work nicely for a shot like this one, but to emphasize the relationship between man and horse, and to give some separation between the subject and the background, I chose a longer telephoto lens.  Buy this photo on my website


An otherworldly sight: a lenticular cloud forms on the summit of Osorno Volcano as we were hiking on the slopes.  To capture high-contrast scenes like this one, it often helps to underexpose by about one stop to preserve the detail in the highlights.  Then the shadow detail can be brought back later during post-processing. Buy this photo on my website

The same Osorno Volcano viewed from Vicente Perez Rosales National Park.  To blur the water, I placed the camera on a steady tripod and used a longer shutter speed.  Attaching a neutral density filter to the lens can help by reducing the amount of light reaching the camera’s sensor, thus allowing a longer shutter speed even in bright daylight. Buy this photo on my website

A ferry crossing from mainland Chile brought us to the island of Chiloe for an overnight stay.  Chiloe exudes a strong sense of its mystical past and is characterized by colorful houses rising on stilts out of the water.

Characteristic brightly colored Chilote houses built on stilts.  Choose a vantage point from which the houses can be framed in a pleasing manner, shoot with a wide angle lens to include more of the houses, and add a bit of vibrance in post-processing to bring out the saturated colors. Buy this photo on my website

The island of Chiloe includes a fascinating bird preserve reachable by small boat.  Here is a penguin couple out strolling in their formal wear.  To stabilize the camera and long telephoto lens while shooting from a heavily rocking small boat, use a fast shutter speed (choosing a higher ISO can help), turn on vibration reduction if your lens or camera offers it, and release the shutter at the instant when the boat reaches the top of its cycle of rocking.  It’s helpful to use a monopod if you have one (I didn’t) and to shoot a continuous burst of images so that you are more likely to get a good sharp one. Buy this photo on my website

After traveling south all the way to the Strait of Magellan (the farthest south I have ever stood, with Antarctica the only land mass below it), we continued northwest until we reached Torres del Paine National Park, any photographer’s dream destination.  The photographic possibilities here are endless, with rugged mountains meeting brilliant blue glaciers and clear lakes.  We had the opportunity to view this breathtaking beauty from various hikes and by boat.

Blue ice on Lago Grey’s glacier imitates the mountain peaks soaring behind.  I used a polarizing filter on the lens to bring out the intense blues in the glacier and sky, but had to be careful not to remove too much of the reflection in the water of the lake. Buy this photo on my website

Alpenglow lights the peaks behind Lago Grey and its glacier.  To make this image, I had to forego much of a really good dinner by shooting through the mealtime out on the deck of our lodge.  With the camera on a steady tripod, I shot a series of images using different exposures, a process known as bracketing.  Later, these shots can be blended together using the high dynamic range (HDR) tools in software such as Lightroom or Photoshop. Buy this photo on my website

Heading out of Torres del Paine through the heart of Patagonia, our adventure was not yet over.  We still had another national park (Los Glacieres) to visit on the Argentinian side before returning to Buenos Aires for our farewell dinner and our flights back home.

Patagonian Paradise.  Don’t forget to include yourself and your traveling companions in some of your images.  This one, made as we headed out of Torres del Paine National Park, made a great holiday card. Buy this photo on my website

Have you visited Patagonia, the capital cities of Argentina and Chile, Easter Island, or Chiloe Island?  What did you find most memorable?  Please add your suggestions for places to visit or subjects to shoot.  Just enter your thoughts in the comment box.

A Warm Welcome from “To Travel Hopefully”

Welcome, fellow traveler!  I’m delighted to have you stop by and visit “To Travel Hopefully”.  This forum is dedicated to travel photography, but it will be unlike any space you may have visited before.  Most travel photography sites either showcase images from the author’s own travels or provide lots of technical details about how to shoot certain subjects.  “To Travel Hopefully” takes a broader perspective.  I’ll certainly be sharing plenty of images I made while traveling in more than 100 countries around the world, and there will be some posts about photographic gear and techniques, because these topics are relevant to creating powerful images when you travel.  But I’ll also share a lot of other content aimed at helping readers capture great images while traveling, and equally important, I’ll emphasize how photography can be a wonderful means for us all to travel with greater cultural awareness, interact more deeply with the people we meet on our journeys, and share what we experienced during our travels with more power.

Do you ever wonder how professional travel photographers capture those amazing images that go so far beyond the postcard-type shots to really inform and move the viewer?  Would you like to be able to make those powerful images yourself?  It’s possible, and not as hard as you might think!  While professionals on assignment may have access to equipment costing more than a luxury car, local “fixers” who can arrange the types of shoots they’re seeking, and the weeks or months required to get the right events during the right light at the right time of day, there are ways that the rest of us can gain similar kinds of advantages to make remarkable images, too.  We’re going to focus on how to get shots like the pros do, even without having the time, budget, and local connections they have.

Lilac breasted roller, on safari in Serengeti National Park, Tanzania

Travel has been a big part of my life nearly since I was born.  My family moved to England when I was one year old, and after the year we spent in the UK we continued to travel frequently and broadly throughout the world.  By the time I was six years old I had my first camera, a Kodak Instamatic, in my hands to try to capture what I saw on our travels.  As I became increasingly serious about photography, several camera upgrades followed, but I remained passionate about capturing the best images I could and using them to share the experiences acquired during our trips.

It was during my middle school years that I first started to understand the power that sharing images can have in shaping people’s understanding of diverse cultures.  On returning from a summer spent living in Brazil, I asked my history teacher if he’d be willing to devote a period one day for me to present a slide show of images from that trip.  He did me one up and invited all his history classes to come to an hour-long assembly.  As I showed the photos and explained what we were looking at, fellow students became more and more curious and started asking questions.  How did practitioners of Candomble meet to perform rituals in secret when they weren’t allowed to meet openly?  Why were Brazilians reluctant to relocate to their new capital city of Brasilia?  How could government sanctioned torture continue once word had gotten out to journalists?  What had started as an easy way to dodge an hour of history class had become a powerful learning experience, and I felt proud to have been able to share what I had experienced in those three months in Brazil with some of my peers back home.  That feeling still keeps me excited, as the adventure has continued through regular travels with my wife and two daughters.  When I travel I still want to learn as much as I can about the people, the landscapes, the wildlife, and the history of each destination; make images that are compelling and different; and come home ready to share what I learned with others.  With today’s new mobile apps for planning, digital photography for capturing, and social networks for sharing–the job is easier than it was when I was a kid, but the passion remains the same.  When my family travels, we try to seek out the most authentic experiences, even when they are not always pleasant or uplifting, and to have meaningful local cultural interactions rather than sanitizing the travel through staying in luxurious tourist-style hotels.  By the same token, I believe the images made while traveling and shared afterward should reflect the full experience, pleasant and otherwise, so that they have the power to teach and to move people.  We’ll focus quite a bit on advocacy in this space.

Cuba

Benito, a tobacco farmer in Cuba’s Vinales Valley, enjoys the fruits of his labor

Where did I get the name for this site?  When I arrived as a freshman at Harvard, my dorm had a sign hanging in the entryway that declared, “To travel hopefully is a better thing than to arrive.”  I was fascinated, because that quote expressed the very sentiment I felt when I traveled, camera in hand: namely that the journey itself was the good stuff, and that travel was not something to get over with.  I looked up the quote.  It’s from an essay by Robert Louis Stevenson, and I’m quite sure the Harvard administration put it up in my dorm as a metaphor for hopeful academic and overall life journeys rather than as a literal statement about physical traveling, but it has stuck with me all these years.

Please join me as we explore the world through learning to capture great travel images.  The same techniques, gear, and philosophy that allows us to make amazing photos in remote destinations around the world apply equally well to documenting everyday life close to home, so I will focus on shooting the familiar as well as the exotic.  We’ll dive into how to shoot memorable images in specific destinations as well as how to plan, post-process, and share those images.

Throughout our journey, I’m very eager to learn your thoughts.  What got you hooked on travel photography?  What have been your most memorable moments while traveling, and your favorite images associated with those adventures?  How have images you’ve seen shaped your outlook, and how have your images impacted other people’s?  What topics would you like me to address here?  I encourage you to share your thoughts and provide feedback using the comment box at the end of each post.  Let’s make this a dynamic and interactive forum.

I’m excited to embark on this journey with you!

Alpenglow on the glaciers and peaks of Lago Gray, Torres del Paine National Park, Chile