Focus on SAFEhouse Resident Artist Workshop [Encore Publication]: Documenting three very different and exciting new dance pieces

Recently I had the privilege of shooting both the tech rehearsal and first performances of three new dance pieces by very different, wonderfully talented, resident artists at San Francisco’s SAFEhouse for the Performing Arts.  SAFEhouse is a unique program that incubates emerging artists by giving them studio space, expert guidance, and public performances so they can grow and develop new work.  I thoroughly enjoyed getting to know each of the resident artists and having the opportunity to experience and document their pieces.

Each artist and work created a very different emotional affect, so I worked hard to shape my images according to how the performances made me feel.  As photographers we have the capability, like a painter or poet or dancer, to create our art in accordance with our emotions.  This is a point that is too easily forgotten when we’re out in the field shooting.  Today’s post shares a few of my favorite images of the tech rehearsal and performance for each of the artists, along with some brief discussion of how the images were made.

Dancer mia simonovic rehearses her highly improvisational new piece, “residue1”.  I loved her brave and fluid expression through motion of the feelings and sensations that were passing through her in the moment.  This work requires not only real-time improvisation but also the courage to be completely vulnerable on stage.  To capture the spirit of her piece, I made a series of images (one of which is shown here) of mia dancing with her own shadow.  I felt this image would be expressed most authentically in black-and-white, so I made the conversion to monochrome during post-processing.  Buy this photo

Seeking another method to capture the elusive and transient spirit of mia’s piece in a still image, I decided to try a series of images using a slower ISO and shutter speed to create some motion blur.  To enhance this effect, during post-processing I increased the contrast and vibrance until the visual impact came close to matching the emotional impact I felt during her piece.  Buy this photo

The next artist was Arina Hunter.  Her piece, “Dyspnea,” was unusual in that, instead of using a prerecorded sound score, she accompanied her motion entirely with sounds made by her own body.  Because these vocalizations and body percussion sounds were very soft compared to amplified music, I was able to make only a few images during her performance so as not to disturb the audience members.  Fortunately, I was able to capture many nice images during Arina’s tech rehearsal.  This one nicely captures her lovely expressive hand motions and facial gestures.  Buy this photo

Arina’s piece was very physical and covered a wide range of moves, poses, and expressions.  Here I captured her floor work by getting lying down on the floor of the stage myself so that I was shooting at the same level as her face.  Buy this photo

The final piece was presented by Maligrad Contemporary Dance Company, directed and choreographed by Molly Fletcher Lynch-Seaver.  This powerful performance spoke to me of violence and our complicity in standing by while it happens.  I wanted to capture this scene the way I felt it, which was like a gang rumble out of the movie “West Side Story,” so I shot straight into the action, allowing the brick walls and girders to frame the image, and converted to black-and-white during post-processing.  Buy this photo

This image was made near the end of Maligrad’s tech rehearsal.  When composing an image in which there’s a lot going on, I find it helps to think like a painter, specifically asking myself, “what elements do I want in the image vs. not in the image, and how do I want to arrange them?”  Buy this photo

During Arina’s live performance, I was only able to capture a handful of images due to the quiet sound score.  This was a favorite, as it reflects her expressive gestures in face, hands, and body.  Buy this photo

Because mia’s piece is so improvisational, it unfolded very differently in the live performance than in the tech rehearsal.  Knowing this in advance, and also knowing I could not move around during the performance like I could during the rehearsal, I just let myself be moved by her work, capturing the moments that spoke most strongly to me.  This image was made by shooting straight on but has a nice, soft visual appeal that matches her contemplative motion.  Buy this photo

This image, made during Maligrad’s live performance, is another example of the choices we photographers must make when framing a scene that includes multiple elements at different distances to the camera.  I chose to emphasize the dancer in the foreground by using a very narrow depth-of-field (low F-stop number), because I felt the story here was her pain at observing the warlike behavior of the background dancers.  Buy this photo

The final performance of the new works by these three artists-in-residence was Feb. 9, but if you live in the S.F. Bay Area you can follow their work and also look for other upcoming events at SAFEhouse for the Performing Arts.  I hope you’ve enjoyed my images and that I was able to provide a sense of how to shape our images to match the emotional feelings evoked by a performance.

How do you transform your emotions into images?  Please share your thoughts here.

Want to read more posts about what to shoot while traveling or near home?  Find them all here: Posts on What to Shoot.

Every Day I Write the Book [Encore Publication]: Even in the digital world, there’s a place for a hardcover photo book from your trip

In the brave new digital world, we have a lot of ways to share our travel photos after (and sometimes even before) we return from the trip: social media, on-screen slideshows, video montages, and of course the enduringly popular paper print.  Even with all of these very immediate sharing options, one of my favorite formats for preserving my travel images is the hardcopy photo book, and today there are more choices than ever before regarding how to create these wonderful keepsakes.

Our living room bookshelf and coffee table are home to more than a dozen photo books, each one showcasing the images and preserving the often fleeting memories of the details of a major trip we’ve taken.  Here’s why I love this method of sharing travel photography and how to create your own photo books.

img_3497

The leather cover of a photo book showcasing our recent travels in Turkey.

Why create a photo book?  Over time, new digital formats replace existing ones, and the very old ones become obsolete.  Within about 20 years, it is quite likely that none of our present formats of storing data will still be readable.  The printed page has much more staying power.  It is estimated that photos printed on high quality paper using high quality inks, and stored away from direct sunlight, can last for 100 years.  I’m a big fan of framed prints, as well, but a photo book is more cost-effective and space-efficient as a means to preserve many more photos than we could easily hang on our walls.  And because photo books can include customized captions to accompany the included images, they’re a great reference source for refreshing our memories about what we saw, when, and where.  Finally, photo books look great and are fun conversation-starters to tell the story of our travels when friends and family come to visit.

How do you create a photo book?  There are a number of methods, but unless you are a scrapbooker or handy with bookbinding, all of them involve sending your specifications and images to a vendor that will print the book, bind it, and mail it to you.  Some software packages, including Lightroom, have built-in modules for creating photo books.  And most photo sharing websites, including SmugMug (a fabulous site used by many professionals including me), Snapfish, Shutterfly, and Apple Photos, allow you to create and purchase photo books from your images.  These services vary in features, price, and quality, so shop carefully.  Most of my past photo books were created using Snapfish, but I am transitioning to using Lightroom’s and SmugMug’s services instead.  I will report on the results in a future post.

img_3493

Good book-creation software should allow you to choose from a wide range of formats on each page to display one or several photos plus text.

The basic process works similarly for any of these services.  You specify the book size, cover material, paper quality, printing quality, and other basic parameters for your book.  Then, you fill the pages of the book with your photos, specifying the layout you want for each page.  You can add captions for individual images or series of images, and you may be able to add various special effects.  At the end of the process, you place your order for the book to be printed and mailed to you.  Using the service offered by Blurb, which is available via SmugMug and Lightroom, you can self-publish a large or small print run of books and make them available for sale on Amazon or directly on your own website.

lightroom-book-module
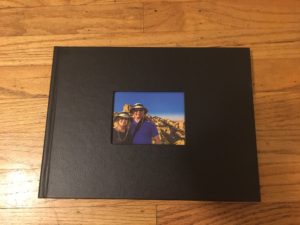
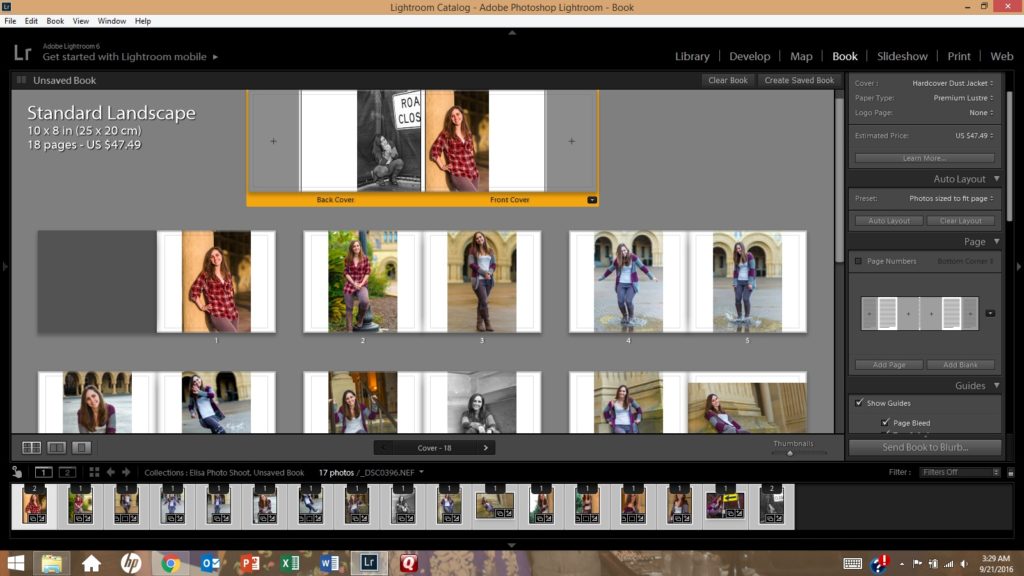
The process of creating a photo book using Lightroom’s Book module (shown here) is fairly straightforward.  It’s even more intuitive using an online service such as Snapfish or Shutterfly.

When you receive your photo book a few days after placing your order, you’ll have a keepsake suitable for sharing with visitors and for preserving your own precious travel memories.

img_3494

A two-page spread in our Turkey photo book showcases several images of the incredible rock formations in the Cappadocia region.

Have you created photo books from your travel images?  Which service did you use and how was your experience?  Please share your thoughts here.

Interested in reading more posts about sharing your travel images?  Click here to see them all: http://www.to-travel-hopefully.com/category/travel/share/.

The Great American Eclipse [Encore Publication]: How I captured the recent total solar eclipse

I am fortunate to have had the opportunity to observe and photograph four total solar eclipses all around the world.   A few weeks ago, I drove with my family to Salem, Oregon to photograph the Great American Eclipse on August 21, 2017.  I delivered a lecture on eclipse photography before an audience of about 400 eclipse chasers and scientists, and I was also interviewed by the New York Times.  But most important, I was able to capture some amazing images of the big event!  In today’s post, I share a few of those images and discuss how they were made.

For tips about how to make close-up portraits of the sun during an eclipse, check out this post: Post on Eclipse Photography.  My best advice is to use a very sturdy tripod, turn off vibration reduction or image stabilization on your longest telephoto lens, manually focus before the start of the eclipse (and use a piece of tape to hold your lens’ focus ring in place), use ISO 400 and f/11, and bracket your exposures to ensure you’ll have some that are well exposed.  Of course, you will need to use a proper solar filter over the front end of your lens for the entire eclipse except during the brief period of totality.  Buy this photo

As totality approaches, the sun becomes much less bright and your exposure will change dramatically.  You may have to boost your ISO setting and/or open your aperture to capture these last partial stages before totality.  Buy this photo

It’s important to know exactly when totality will begin.  Set a timer to be sure you don’t miss it.  I like to remove the solar filters from all my lenses about 1 minute before the start of totality.  Then I am ready and waiting for the diamond ring effect to signal the beginning of totality, and I’m ready to shoot and capture this beautiful moment.  Just be sure you don’t look directly at the sun through your lens after removing your filter until the diamond ring effect has taken place, or you could damage your eyes or your camera’s sensor.  Buy this photo

It is especially important to bracket exposures during totality, because the range of brightness values between the bright inner corona and the dim outer corona is too great for any camera’s sensor to capture in one image.  By shooting a series of several different exposures, you can combine them during post-processing using HDR (high dynamic range) software, allowing for all the subtle beauty of the corona to be captured.  This favorite image of totality shows colorful prominences, ethereal streamers, and the rarely seen “earthshine effect” whereby the surface detail of the moon is lit entirely by sunlight reflecting off the earth.  Buy this photo

The second diamond ring effect occurs moments after the end of totality.  This HDR image combines seven of my bracketed exposures, yielding an image of breathtaking beauty.  Buy this photo

Get creative about displaying your images after you get home.  This montage was made from 15 of my favorite images to show the progression of the eclipse from partial stages through the diamond ring effect, into totality, and back again.  Buy this photo

I used a second camera with a wide-angle lens mounted on a tripod and controlled by an intervalometer (timer) to shoot a bracketed set of exposures every 30 seconds during the whole eclipse.  In post-processing, I combined the images into a time lapse montage showing the movement of the sun across the sky in different stages of the eclipse.  Note that I am standing in the foreground operating my other camera, the LCD screen on which clearly shows a closeup image of the sun during totality.  Buy this photo

Did you observe and/or photograph the Great American Eclipse of 2017?  Please share your experiences here.

Want to read other posts about photographic techniques?  Find them all here: Posts on Techniques.


The Things We Carry [Encore Publication]: Basic Gear for Travel Photography, Part II

Kyle Adler photographer travel photography

Let’s pick up the gear discussion where we left off on the recent post.  Last time, we covered cameras and lenses.  Now we’ll talk about flashes, tripods, accessories, bags, and other essential kit.

Flash Units

Your camera most likely has a built-in flash, and in many cases that can be good enough to provide some fill-in lighting for backlit subjects or even to serve as a main light in very dark situations.  But for more flexible control over how much light you want, the quality of that light, and where that light comes from and goes to, you will likely want to have a separate flash unit.  I use the Nikon SB-910, which is powerful and flexible enough for most settings.  It has been discontinued and replaced by the Nikon SB-5000, but the older model is often still available.

Whatever flash you use, it is best to attach a diffuser of some sort to soften the otherwise very harsh light of the flash.  I also keep my camera set to lower the flash output by 1 stop, and I only override this setting occasionally.  Flash is often best when used sparingly.

Tripods

For most travel situations, you’ll want a lightweight tripod that folds up to a nice portable size but still offers enough stability for most uses.  There are times, though, when I need to bring along my heavy and bulky professional tripod.  Whatever tripod you choose, be sure to fit it with a good quality head (ball heads provide a lot of flexibility and ease of use for travelers) and remember to take along the plate that attaches the tripod to your camera, if required.

My go-to lightweight travel tripod is the Manfrotto Be Free.  It folds up to an incredibly small size yet affords a surprising amount of stability.  The included ball head works well but is difficult to adjust for sensitivity.  This tripod is designed to fit into a special pouch in my favorite travel photography backpack, also made by Manfrotto.

The SLIK 615-315 is a great tripod for use close to home or on trips where you will have constant vehicle support.  It’s very solid, supports a tremendous amount of weight, and can be adjusted for nearly any shooting situation.  I recommend you fit it with a good ball head for maximum flexibility.

A monopod can be a real problem solver when you need more stability than handholding or resting your camera on a vehicle or table will afford, but you can’t carry or use a full tripod.  I use the Manfrotto 681B model.

Accessories

We photographers love our toys!  While it is easy to get carried away and purchase every cool accessory that comes along, I will try to limit the recommendations here to a handful of truly essential items.  And don’t forget the little things like lens cleaning cloths, a blower brush for dust, and of course extra batteries and chargers for your camera and flash.

Three kinds of filters are essential gear for most photographers.  I’ll cover each type below.  Note that you must use a filter that is the correct size to attach to your lens.

It’s a good idea to keep a UV filter attached to your lenses at all times, as this helps protect the front element of the lens from scratches.  Use a good quality filter, though, as the poorer ones can affect image quality.  I would recommend removing the UV filter when shooting with certain other combinations of filters, as the edges of the image can be cut off (vignetting) with too thick a stack of filters on the end of the lens.  I’ve had good luck with Hoya UV filters.

The second must-have type of filter is the circular polarizer.  A polarizing filter can reduce glaring reflections and can darken skies and enhance natural colors.  This little gadget is almost a secret weapon for making images that really pop.  Again, I like the Hoya products, which are thin, well made, and perform as they should.

The final essential filter is the neutral density filter.  These reduce the amount of light that reaches the camera’s sensor, so you can use slower shutter speeds to blur motion, or so you can use a wider aperture to get a shallow depth-of-field, even in bright sunlight.

Another essential is a good remote release for your camera.  I know plenty of photographers who still use the good old trusty wired (or cable) releases.  I like to be able to move away from the camera when shooting remotely, so I favor a wireless release such as the RFN-4s Wireless Remote Shutter Release.

Smartphones

Most of us would never consider leaving home without our phone, and there are additional good reasons to carry yours with you when you are photographing at home or around the globe.  First, the cameras in today’s better phones are now good enough to make quite good images.  I’ve been very impressed with the quality of the main camera, and even the selfie camera, on my Apple iPhone 6S.  But your phone is also an essential photography tool because there are some very good apps to help you plan, shoot, and share your images.  There are too many to list here, but I’ll plan a future post to share some of my favorites.

Bags

Aside from cameras and lenses, no other category of gear gets photographers arguing quite so heatedly as bags.  For a travel photographer, your bag must be highly protective and durable yet lightweight, fit your gear well but with the flexibility to change out kit as needed, and preferably not advertise that you have expensive camera equipment inside.  The choice of what bag to use is a very personal one, but I’m still going to recommend my three favorites.

For those times when you need to bring most or all of your gear on a trip, I like the Tamrac 5586 Expedition 6x Backpack.  It carries a lot of gear snugly and flexibly, and it doesn’t look like a camera bag so it’s less likely to invite the wrong kind of attention.  It will almost always be accepted as carryon on flights, but it is a bit bulky and heavy for all-day, everyday use while traveling.  I’ll often use this bag to get all my gear to my first destination, then pack a day bag for just the gear I’ll need for each day of the trip.

My current favorite bag for day use for nearly any shooting situation near home or while traveling is the Manfrotto MB MA-BP-TRV Advanced Travel Backpack.  It can fit a reasonable amount of gear while leaving room for non-photography items like a jacket or a water bottle (yes, even photographers occasionally have to drink or stay warm).  It disguises your gear pretty well, has good rain protection, and even sports a special sleeve for carrying the Manfrotto Be-Free Travel Tripod.

For carrying just a few pieces of gear around town or close to home or hotel, a shoulder bag can work well.  This is the best setup for quickly accessing your gear while shooting, but it can be tiring to carry the weight across one side of your body if you have a lot of trekking to do.

Software

For post-processing my images, I use both Adobe Lightroom and Adobe Photoshop Elements.  I can do 90% of my processing using just Lightroom, but occasionally I do need the added power of Photoshop.  While I still use the perpetual license software versions, by now most photographers have gone over to the monthly licensing structure that Adobe calls the Creative Cloud.

What gear can’t you live without?  Have you discovered any little gadgets that improve your images or make life easier for photographers?  Please share your thoughts in the comment box.  I’d love to get your ideas!

Want to read more posts about photographic gear?  Find them all here: Posts on Gear.

The Things We Carry [Encore Publication]: Basic Gear for Travel Photography, Part I

In today’s post, we’ll cover cameras and lenses.  I’ll post again soon with Part II, which will discuss flash units, tripods, accessories, bags, and other essential gear.

One of the biggest challenges we face as travel photographers is what gear to carry with us.  On the one hand, we have to be ready for anything.  It’s quite possible we will have to shoot landscapes, wildlife, portraits, architecture, indoor performances, and night scenes, often all on the same day.  On the other hand, there’s a practical limit to how much we can carry without being turned away by airline personnel or damaging our bodies.  And who really wants to travel with 75 pounds of photo kit?

Here is my basic setup for travel.  Note that my gear is suitable for a professional or enthusiast photographer on a not-unlimited budget (my wife keeps me from getting carried away).  There are less expensive alternatives for most of the gear I carry, and those on unlimited budgets can spend much, much more than this.  I will adjust what I bring depending on the specifics of the trip.  For a safari in East Africa, that 500mm lens is essential, but I wouldn’t want to lug it on a hiking trip in Ireland.  On a trip to view a total solar eclipse, I’ll need that rock solid but very heavy professional tripod, but on most trips my lightweight travel tripod is good enough, thank you.  But the following list of items comprises the core of my basic travel gear.

Cameras

There is no one-size-fits-all when it comes to your choice of camera.  These days, even a simple point-and-shoot camera or a smartphone camera is capable of making very good images.  But if you’re willing to carry a bit more weight and to learn how to use it before you take it on your first trip, a mirrorless interchangeable lens camera or a digital single-lens reflex (DSLR) camera will give you much more flexibility.  I use a DSLR, but more and more of my photographer friends are switching over to mirrorless cameras.  It’s really a matter of personal choice, and if you’re not planning to carry a lot of specialized (and heavy) lenses with you, the smaller size and lighter weight of a mirrorless camera may make up for the loss of certain features.  For very photo-intensive trips where it would be impossible to replace a lost or broken camera, such as an African safari, I will pack two DSLR camera bodies, but often I take a chance and bring just one.  Whatever camera you take on your trip, make sure you know how to use all its features and have tested it thoroughly before you leave, and if you’ve been using it for a while, have it cleaned in advance of your departure.  Note that while I am a Nikon shooter, comparable gear is available from Canon for DSLR afficianadoes.  In the high-end mirrorless arena, Sony’s Alpha a7R II is favored by many professionals and enthusiasts.

My go-to camera is the Nikon D810.  This is a professional model and not for beginners, but it really does do it all.  The resolution is extraordinary, it performs superbly in very low-light situations, the autofocus is fast and flexible, it’s continuous burst shooting speed is good enough, and I love the feel of the camera in my hands and the control it offers over all settings quickly.  I’ve put this baby through hell and high water, but it always comes through for me.

Lenses

For beginning users of interchangeable lens cameras, or for seasoned photographers who need to travel light, a small and lightweight “walkaround lens” may be all that you need to bring for a day’s shooting.  Mine is the Nikon 24-85mm f/3.5-4.5 lens.  It’s a good value for a well-built if not quite professional grade lens, and while not particularly fast, it does offer vibration reduction which allows you to shoot at slower shutter speeds while controlling for camera shake.  I recommend this lens for users of cameras with full-frame sensors who want a small, light, and fairly durable lens for those situations when you want to be ready for most anything.

It’s a good idea to have a wide-angle zoom lens for landscapes, architecture, and other situations where you need to include a lot of area in the frame or want a more uncluttered or exaggerated perspective.  I use the Nikon 16-35mm f/4 lens for this purpose.  It’s got great image quality and is well built, but it is rather heavy and bulky.

A telephoto zoom lens is a must-have for most travel photographers, as it allows you to shoot many wildlife subjects as well as emphasize details in all subjects you encounter.  A longer lens also can be used to provide a compressed perspective that makes far-away subjects appear to be closer to foreground subjects; this perspective can be very powerful in landscape images.  My primary tele zoom is the Nikon 70-300mm f/4.5-5.6 VR lens.  While this lens is built on aging technology and doesn’t always feel as solid as more professional lenses, it is relatively small and lightweight, fairly inexpensive, and provides a very effective vibration reduction function.  This lens has been a staple in my bag for many years, during which time I’ve used it to capture some of my favorite images.


You may never need a super-telephoto lens.  They tend to be expensive, bulky, and heavy, and on many trips you won’t need it.  But for those trips when you expect to encounter lots of wildlife or want to capture astronomical events like an eclipse or transit of a planet, a very long lens is essential.  Mine is the Sigma 150-500mm f/5-6.3 lens.  It’s more economical than a Nikon or Canon super-tele, and it produces reasonably sharp images even when used at its widest aperture.  You can spend much more on this type of big glass if you want or need to, but I’ve found this lens works quite well for me.

So far, we’ve talked about zoom lenses.  It’s also a good idea to carry a few prime (fixed focal length) lenses.  These tend to be faster, higher quality, and less expensive than zoom lenses in the same category.  The downside, of course, is that you have to “zoom with your feet,” that is, find a vantage point that works to compose your image without benefit of changing the lens’ focal length.

If you pack only one prime lens, it most likely will be a “normal” lens, that is one with a focal length of about 50mm for a full-frame camera or about 35mm for a crop-sensor camera.  I carry the Nikon 50mm f/1.4G lens.  This is the one I use in very low-light situations or to get a really shallow depth-of-field.

I think my current favorite lens of all is my Nikon 85mm f/1.8G lens.  This is a classic portrait lens and provides a flattering perspective and great image quality when your subject is a human being.  I use it for nearly all of my portrait work these days.  But this lens also shines for nature and action photography where you don’t need a really long focal length.  It renders really lovely “bokeh”, or the soft quality of the out-of-focus parts of the image.

A wide angle prime lens can be useful for landscapes, architecture and interiors, and astrophotography, among other purposes.  I like the Nikon 24mm f/1.8.


Stay tuned for Part II of our gear discussion, to be posted soon on this same Bat Channel.

What’s your go-to camera and which are your indispensable lenses?  Add your thoughts to the comment box at the end of this post!

Want to read more posts about photographic gear?  Find them all here: Posts on Gear.

Join Me on a Photography Tour of India: Capture unique images of cultural celebrations, wild tigers, glorious monuments, and people from all walks of life

Dear Readers,

From Jan. 24 through Feb. 8, 2018, join our small group of photography enthusiasts and experience India with all your senses. India is a dream destination for travel photographers: a vivid tapestry of colors, cultures, and chaos. We’ve planned this unique itinerary to provide ample opportunities to capture unforgettable images that you won’t find in travel brochures and on postcards. Included are visits to two of the most colorful and exciting of India’s exotic annual cultural celebrations, the Republic Day Parade and the Desert Festival (similar to the Pushkar Camel Festival but with far fewer tourists and photographers). We also search for wildlife in a national park hosting among the world’s highest density of wild tigers, visit India’s iconic forts and monuments, and seek authentic interactions with a diverse range of local people.

Our extraordinary photographic journey will take us through Delhi’s colorful bazaars and to its annual Republic Day Parade, to the incomparable Taj Mahal in Agra, on to the annual Desert Festival with its rich tableau of dancing and cultural activities, and then on safari to seek the royal Bengal tigers of Bandhavgarh National Park, among other memorable destinations. Throughout this journey, we will be interacting with fascinating local people from all walks of life, whom we will get the opportunity to meet and to photograph.

Award-winning professional travel photographer Kyle Adler will be shooting alongside tour participants and will provide personalized in-the-field instruction. During our optional informal workshops, we’ll review our recent images, plan our shot list for upcoming locations, and cover techniques to make the best images possible. Topics will be tailored to the group’s interests and may cover any aspects of travel photography from shot planning to capture technique, and on to post-processing and image sharing. Unlike most photography tours, we will place a special emphasis on learning to use the camera as a bridge to enhanced understanding of the land and people we visit. Photographers of any level will see their images improve, and non-photographer friends and family are also most welcome to join this tour. You can make memorable images using whatever camera gear you wish to bring; it is not necessary to invest in specialized gear.

See the detailed itinerary, hotel list, pricing, and other information here: KYLE ADLER- COLORS OF INDIA PHOTOGRAPHY TOUR

Please let me know if you have questions or are interested in learning more about the trip. Mary and I hope that you can join us for this rare opportunity to experience the people, cultures, landscapes, and wildlife of India on a one-of-a-kind adventure tailored to photographers like you!


Sports Roundup [Encore Publication]: How to get amazing shots at sporting events

Whether we’re traveling afar or close to home, sporting events make for exciting photography.  The thrill of victory and the agony of defeat (credit: ABC’s Wide World of Sports), the heroic effort, and the little moments of humor and repose amidst the adrenaline rush of competition: all of these elements can be captured in images of athletic events.

While every sport has its own rhythm and rules, there are certain techniques that apply across a wide range of sports photography situations.  Let’s take a look at a few situations and discuss how to get the best images given the inherent challenges.  Note that these photos were all made during outdoor sporting events; there are special challenges with many indoor sports, such as basketball or hockey, because the action remains just as fast but there is less light to work with, and the artificial lighting can impart an unnatural color cast.  But that’s a topic for a different post.

Whatever the sport, I like to shoot from different perspectives, from wide to very close.  The wider views show the environment as well as the athletes, so these make good establishing shots.  But often the most compelling and dramatic sports images are the tight compositions, because they portray the athletes in a very personal and relatable way.

Below are two shots of the same rowing crew during the same race at a high school regatta.  The first image was composed from slightly farther away and with a less extreme focal length (300mm), so the resulting composition is more environmental.  It shows not only all the rowers and the coxswain in the shell, but also the width of the river and the surrounding scenery.  This shot establishes the setting and gives the big picture.
Environmental shot of a crew racing at a rowing regatta.  Buy this photo

Now here’s the same crew, but captured from a closer vantage point and using a longer focal length lens (750mm).  This perspective isolates the athletes from the background and shows their expressions and postures.  There’s certainly more drama here, at the expense of some insight into the environment.

A tighter shot of the same crew in the same race.  Buy this photo

There are exceptions, such as when you choose to blur the motion to give a sense of the athlete’s grace, but as rule you want to use a fast shutter speed to freeze the action in sports photography.  Very often that means shooting at 1/1000 of a second or even faster.  Choose the Shutter Priority mode on your camera to gain control over the shutter speed, and be sure to select a high enough ISO setting to allow the shutter speed you require.  If your camera has different auto-focus settings, you may find it helpful to choose a single-point focus setting if you know where the action will be, or a dynamic focus setting if the location of the action changes very quickly.  For this image of a professional beach volleyball tournament, I chose single-point auto-focus so I could select the exact spot where the players would be jumping.  I also find the best way to capture a great image in fast-moving sports (as with wildlife photography) is to set the camera to continuous or burst mode and continue to shoot rapidly through the action.  That way, you’ll have several different images to choose from, and with luck at least one will have caught that “decisive moment.”

A fast shutter speed and single-point auto-focus allow the fast action of a beach volleyball competition to be captured precisely.  Buy this photo

My favorite sports images portray the human element in a very personal way.  This photo from a Spartan Race (an extreme athletic event that combines long-distance running with a supersized obstacle course) captures the strength and the struggle of the athlete as he nears the end of a long race through the 100-degree California desert.  Keys to success in making this image were shooting from a vantage point low to the ground, using a medium-length prime telephoto lens with a large aperture to soften the background, and waiting for just the right moment.

An endurance athlete completes an obstacle near the end of a Spartan Race.  Buy this photo

The fun of shooting a sporting event doesn’t end when the competition is over.  Be sure to capture the dramatic and often humorous moments during award ceremonies and downtime during and after the action.

These athletes have finished their Spartan Race and strike a humorous pose at the finish line.  Buy this photo

Want to see more posts on what to shoot at home and while traveling?  See them all here: http://www.to-travel-hopefully.com/category/travel/shoot/

What sports do you enjoy shooting?  Do you have tips on how to get great sports images?  Please leave a comment in the box after this post.


Focus on Sacramento Spartan Race [Encore Publication]: Covering a Spartan Race can be an endurance event

Some events are just plain fun to shoot from beginning to end.  One of my favorite types of sporting events to cover is the Spartan Race.  Basically a combination of long-distance running with a supersized obstacle course, a Spartan Race is an extreme athletic event that attracts thousands of athletes from elite to weekend warrior.  I enjoy shooting these races because they offer so many exciting elements: color, drama, showmanship, grit, stamina, and humor.  Adding to the photographic fun quotient are the glorious natural surroundings, the photogenic and extraordinarily fit athletes, and the wide range of athletic rigors required of them.

In this post I’ll present some of my images from this past weekend’s Super Spartan Race held near Sacramento, California.  I will also share some tips on how to capture the best of a big and sprawling event like this one.

The Spartan Race organization recognizes and welcomes professional and enthusiast photographers more readily than do many US sporting authorities.  For any large sporting event, I apply several weeks in advance for a media (or press) pass so that I can bring in all my gear, shoot in all areas including those off-limits to spectators, gain free or reduced-price entrance and parking, and access VIP areas.  I’ve found the Spartan Race organizers to be quite helpful and understanding of what working photographers do.

img_3701
Yours truly with media badge.  This pass is important for the professional, as it allows access to otherwise off-limits areas and lets athletes and officials know you’re a working photographer.

One point to keep in mind when covering an endurance event spread out over long distances is that as a photographer, you will experience some portion of the rigors the athletes face.  The Super Spartan Race traverses a course about 8 miles long over steep and often muddy hills, interspersed with a couple of dozen obstacles of different types.  While I don’t typically try to cover all of the obstacles, it’s important to get a reasonable sample of the different challenges, so I do usually hike quite a few miles during the course of the day.  Photographers with a media pass have access to the whole course, but there are no special roads or ramps to get us there.  We have to trek up and down the same hills, through the same mud, and over the same terrain as the athletes do.  So come prepared for a bit of a workout!

The starting line is a good place to set the stage for your photo essay.  There is usually a DJ and music to get the athletes pumped up for the race.  Everyone is fresh, clean, and excited at this early stage.  Buy this photo

In addition to portraits and close-ups of individual athletes, it’s important to capture some establishing shots to set the context of the race.  I like to get some images of large contingents of athletes running over the hills.  I shoot from a distance, but often use a telephoto lens to compress the perspective and emphasize the massive scale of these races.  Buy this photo

When shooting individual athletes on the obstacles, use a fast shutter speed to freeze the action and a relatively small aperture to blur the background.  Buy this photo

Portraits of athletes don’t have to be in the cliche pose of standing, legs apart, on the ground flexing their biceps.  Athletes are happy to pose in the midst of whatever they’re doing when they see a photographer nearby.  Buy this photo

After finishing the course, athletes gather in the festival area.  This is a great place to make portraits.  The athletes are exhausted and muddy but in a celebratory mood.  Buy this photo

Spartan athletes in the festival area display strength as well as excitement for having completed the race.  Buy this photo

The finish line itself is a dramatic vantage point.  In this particular race, athletes must jump over a line of fire to finish the course.  I shot from a low perspective to emphasize the height of the jump, and used a fast shutter speed and small aperture to freeze the moment and isolate the athlete from the background.  Buy this photo

This image works so well because the shooting angle looking upward from below emphasizes the athlete’s power, and because the timing captured her expression at just the perfect moment.  I shot many frames to increase the likelihood of capturing the right moment, and, once again, I chose a fast shutter speed to freeze the motion along with a small aperture to blur the background.  Buy this photo

The shower area at the end of the race was taken over by hordes of kids who used the hoses for water play.  Humorous moments like this one lend a playful element to the day’s portfolio of images.  Buy this photo

An iconic Spartan Race image.  I captured the strenuous activity of carrying buckets filled with sand by shooting from a distance with a telephoto lens.  This technique compresses the perspective to include more athletes in the frame while still showing the strain on their faces.  Buy this photo

I like to seek out the athletes who have something special to say.  This racer stopped for a moment so I could make a portrait.  His flag makes a nice counterpoint to the rolling hills and featureless sky in the background.  Buy this photo

Although Spartan Race athletes are fierce competitors, they also make an effort to support one another and cheer their fellow racers on.  I enjoy capturing these interactions because these moments often tell a strong story visually.  Buy this photo

What are your favorite sporting events to shoot?  Do you have tips you can share for making great images of athletes?

Want to read more posts about what to shoot while traveling?  Find them all here: Posts on What to Shoot.


Cards, Calendars, and Keepsakes: Oh, My!: Ways to share your images beyond social media and prints

With the holidays fast approaching, now is a great time to think about creative ways to share your favorite images as gifts for family and friends or perhaps to enhance your own home.  Most commonly we share images via social media and, for more special occasions, as prints.  Review this classic post for a list of 10 ideas for sharing your images: Post on Image-Sharing Ideas.   

In today’s post, I discuss three of these methods that are particularly festive and well-suited to the holiday season: cards, calendars, and keepsakes.

5x7folded
A  likeness of one of the earliest holiday cards my wife and I created.  The original version was in black-and-white and had a humorous caption at the bottom.  This version was made more recently using a modern digital process.

Cards: For the entire 31 years we’ve been together, my wife and I have sent our families and friends custom-made holiday cards.  We created our first card in 1986, the year we started dating.  The process was extremely complicated back then.  We had to take the photograph using a film camera, send the film to a lab for processing, wait for the prints to be mailed back to us, select the image we wanted to use, cut the print down to the right size, tape it onto a printed template we had to design ourselves using a primitive word processor, and photocopy it onto card stock at a graphics store.  It was strictly a black-and-white affair because color copying was very expensive in that era.  Even for black-and-white cards, the cost was quite high.

Today, the process is vastly simpler and less expensive, and the quality very high.  There are countless companies that will take your photo files and caption information, blend them with a design you choose from their library of sometimes up to hundreds of choices, and create an attractive customized card for a range of occasions.  Shop around carefully before selecting one, because price, quality, and flexibility vary tremendously.  My current favorite is Snapfish.  Even though I no longer use Snapfish to host my image galleries, I continue to create and order photo cards from this site because it offers a good range of card designs, reasonably high printing quality, and affordable pricing.  There are often very deep discounts available at Snapfish and other photo sharing sites.  Try using a search engine to find discount or coupon codes.  I rarely pay more than 60% of the listed price.

When creating a card on any platform, there are a few basic steps to follow.  First, you choose the card design from a library of choices.  There may be only a few designs for some types of occasions, but for the winter holidays there are usually dozens to choose from.  Then you upload your images if they’re not already on the site, and select where you want them to go in the card template.  Next, you add captions to customize the card.  You may be able to include a return address on the envelopes shipped with the cards.  Be sure to review your card carefully before ordering.  The final step is to place your order by specifying the quantity (per-unit prices usually drop when ordering larger quantities), shipping address, and payment information.

Calendars: Photo calendars make great holiday gifts because they are personal, functional, and seasonal (the weeks before the start of the new year is typically when your loved ones will be looking for a calendar).  Every year I create a calendar with images that present the past year in review.  I send it to several family members and keep one for my own home and one for my office.  As with cards, calendars can be ordered from a wide variety of companies with differing levels of quality and cost, so shop around.

Creating a calendar is similar to making a card.  You choose a size and design, upload your images, and lay them out on the calendar template.  Some sites allow you to further customize your calendar by including special dates such as birthdays, anniversaries, and other events important to your family or friends.  The better companies let you include a photo to represent each special date during the year, and will save these dates for creating new calendars in future years.  The ordering process for calendars is similar to that for cards: review the calendar and then place the order.  Again, you may be able to find discount or coupon codes that will substantially lower your cost.

Keepsakes: These days, it seems that images can be reproduced on nearly any type of item you can imagine.  This variety translates into a high likelihood of finding something for everyone on your gift list.  I use SmugMug, the platform that powers my online professional photography business, for nearly all of the keepsakes I order as gifts, and my clients also have been happy with their purchases of these items.  There’s a wide array of keepsake items to choose from, each customized with your image(s), including coffee mugs, coasters, smartphone cases, playing cards, desk organizers, and stickers.

To make a keepsake, simply upload your photo(s) if they’re not already on the site, select the type of item you want to order, ensure the image is cropped and/or sized appropriately for the item, and go through the checkout procedure.

This holiday season, get creative.  Share your images on holiday cards, calendars, and a range of keepsakes.  It’s never been as easy or inexpensive to make these items as it is right now, so have fun and experiment.

What are your favorite ways to share you images during the holiday season?  Please add a comment with your ideas.

Want to read more posts about sharing your images?  Find them all here: Posts on Sharing.

Black-and-White to the Rescue [Encore Publication]: Converting a noisy or strangely colored image to monochrome can save the day

In a recent post (Post on Circus Automatic), I shared several practical tips for shooting fast-moving indoor performances, using a circus performance as an example.  While I was happy with many of my images from that evening’s shoot, I discussed how the single-colored LED lights now used at many indoor performances can impart an unnatural color cast to photos that can be hard to correct in post-processing.  In today’s post, I show how converting these images to black-and-white can overcome some of the limitations of shooting under these adverse lighting conditions, with the added bonus that the noise imparted to the images (from having to shoot at a very high ISO setting) can also be less noticeable in black-and-white conversions.

First, a little background explanation on why these LED lights are so troublesome for the photographer to work with.  When we refer to the resolution, or number of pixels, in our camera’s sensor, that number is actually the total count of three different kinds of pixels, each kind sensitive to only one of the three primary colors (red, blue, and green).  Without going into the nitty-gritty technical details, suffice it to say that in most camera sensors, about 50% of the pixels record only green data, about 25% only red data, and about 25% only blue data.  My camera (the Nikon D810) is said to have a resolution of 36.3 megapixels (MP), but if my subject is lit by a single-colored red LED, in reality only about 9 MP of resolution is recorded.  The other two color channels will essentially contain no data.  This is bad for several reasons, most notably because the image will be cast unnaturally toward the red color channel and because its effective resolution will be low.

There’s very little we can do in post-processing to recover from the loss of resolution during capture, but we can adjust the color temperature to try to correct a little bit of the strange color cast.  Converting the image to black-and-white, though, can restore the image to a more natural appearance by masking the color cast.  This can be aided by using Lightroom’s contrast and color control sliders to adjust the balance of the black-and-white version until it appears closest to a normal tone.

Consider the following two versions of the same shot.  The first version is in color, and even after adjusting the color temperature and contrast, there is still a distracting red color cast.  There is also some noise apparent in the image as a result of the high ISO setting required to freeze the acrobats’ motion.

The color version of this image appears unnatural even after adjusting color temperature, due to the lighting which consisted of a red-colored LED array.

Now, take a look at the black-and-white version of the same image.  Creating this version required careful attention to the balance of each color and contrast setting to make the final image.  The good news: the monochrome image appears much more natural to the eye than does the color version.  The skin tones seem less artificial, and the curtain in the background does not distract as much.  Furthermore, there is less noise apparent in the black-and-white version.
The same shot appears more natural and less noisy when converted to a black-and-white photo.  Buy this photo

This next shot appears much more acceptable in its color version.  During a live performance, the lighting often changes drastically from one moment to the next, and in this image the LED lights didn’t impart as harsh a red cast as in the previous image.  Furthermore, the aerialist was dressed entirely in red and was working with red ropes, so what red color cast was present does not appear as unnatural.

This image is highly effective when presented in full color.  Buy this photo

While I like this image for its dramatic power and strikingly vibrant red colors, let’s take a look at a black-and-white conversion for comparison.  The monochrome version lacks the visceral impact of the strident red color, but it benefits from a more natural tone, a quasi-documentary look and feel, and a nice clean black background.  In this case, the black-and-white conversion doesn’t so much rescue the image as change the kind of feeling it elicits.  I like both versions.
The black-and-white version is cleaner and evokes a very different set of emotions than does the color version.  Buy this photo

When you are forced to shoot under very difficult lighting conditions, try converting to black-and-white during post-processing.  It just might rescue some of your images and can evoke a very different feel in other images.

For a refresher on the black-and-white conversion process and when you may want to use it, read this post: Post on B&W Conversion.

During post-processing, have you been able to rescue or improve images shot under challenging lighting conditions?  Did you convert to black-and-white, or use different techniques?  Please share your experiences here.

Purple Mountain’s Majesty [Encore Publication]: Including mountains in your images

Whether we’re traveling halfway around the world or just a few miles from home, we travel photographers get excited about including mountains in our images.  Mountainous landscapes can provide so many of the most basic elements we look for in a great photograph: beautiful light, compelling composition, exquisite textures, and an authentic sense of place.  In this post we will cover some of the fundamental techniques for capturing great images of mountains.

As with most kinds of photography, it all begins with beautiful light.  Whenever possible, try to shoot mountain landscapes near sunrise or sunset, or when something interesting is happening with the weather conditions.  The quality of light tends to be best during these times.  You’re more likely to capture lovely colors on the peaks and in the sky, and the image is more apt to give a sense of depth and drama than during the middle hours of the day.

Shooting from the deck at our lodge in Torres del Paine National Park in Chile, I had to miss most of an excellent dinner to capture Lago Grey with its mountains and glaciers during the “golden hour” just before sunset.  The lovely interplay of colors and textures, from the sky to the peaks and to the icebergs and water, made the resulting image worth the effort.  Buy this photo

When shooting mountain landscapes, it is usually a good idea to bracket your exposure.  With the camera fixed on a sturdy tripod, compose your scene and then shoot a series of images, each with a slightly different exposure.  Many cameras have settings to automate the process of bracketing.  The two main benefits of exposure bracketing are raising the odds you’ll have a perfectly exposed image and allowing you to create a high dynamic range (HDR) image from several different exposures.  See this post for a refresher on how to use exposure bracketing: Post on Exposure Bracketing.

This HDR image of Yosemite National Park’s peaks reflected in the Merced River was created from a series of different exposures made using bracketing.  The camera was mounted on a tripod and I made a series of seven shots, each one exposed 2/3 of a stop brighter than the previous one.  Buy this photo

I’m often asked how to make mountain images that really “pop”.  Why are some photographs of mountain landscapes so dynamic and compelling, with intriguing contrast between the peaks and the sky?  Of course, there are many elements that go into the making of an excellent image, but there is a “secret sauce” that can dramatically improve many mountain images: the polarizing filter.  Properly using a circular polarizing filter on your lens can emphasize the contrasting parts of the rock, snow, and/or ice on the mountains and can also add drama to the clouds and sky.  Every image shown in this post was made with a polarizer.  Be sure to adjust the filter by turning its outer ring until you see the effect you want to achieve.  Usually this involves rotating the filter’s ring until you see the maximum polarizing effect possible and then dialing it back a little (or a lot) until you achieve a balance between added drama and a natural look.  Experience helps here.  Check out this post on the use of filters, including polarizers: Post on Filters.

This image of a rare lenticular cloud forming on the summit of Osorno Volcano in Argentinian Patagonia was made using a polarizing filter to bring out the cloud formation and darken the sky.  Buy this photo

Mountain colors can be glorious, but also consider converting some mountain images to black-and-white during post-processing.  Rendering in black-and-white can emphasize the textures on the crags and peaks of a mountain and can also lend drama to the foreground and sky.  Shots captured with a polarizing filter will usually result in more intriguing monochrome images.  When converting to black-and-white during post-processing, be sure to play around with the contrast and individual color channel sliders until you achieve the result you want.  For more info on black-and-white photography, check out this post: Post on Black and White Photography.

This shot of a rock dome in Yosemite’s Tuolumne Meadows area is striking when rendered in black-and-white.  Buy this photo

Sometimes when we’re traveling we don’t have the option of returning to a gorgeous mountain location when the lighting is perfect.  Don’t let the flat lighting of a bright mid-day sun stop you from shooting the local peaks.  Great images can be made at any time of day.  Just make sure to follow the main techniques outlined in this post: compose well, use a polarizing filter, and bracket your exposure.

Patagonian peaks captured on our way out of Torres del Paine National Park.  Because we didn’t have the option of returning at the golden hour, I made this image in the harsh mid-day sun.  With careful attention to composition and the use of a polarizing filter and exposure bracketing, I was able to make a favorite image in spite of the less than perfect lighting conditions.  Buy this photo

What are your go-to methods when shooting mountain scenery?  What are your favorite mountain locations?  Please share your thoughts in the comment box here.

Want to see more posts about photographic techniques?  Find them all here: Posts on Techniques.

Penny Wise and Pound Foolish [Encore Publication]: How saving $20 on an off-brand accessory cost me $750

Like most photographers, I try to economize on the purchase of the less sexy items in my bag.  I’d rather spend my limited Gear Acquisition Syndrome cash on a new camera body or a long-coveted lens than on those little, boring, but necessary accessories like memory cards or batteries.  So when I recently needed to buy a new flash extension cord, I found an off-brand model that cost a whopping $20 less than the equivalent-seeming Nikon model.  Little did I realize that this decision to purchase a Vello Off-Camera TTL Flash Cord for $22 vs. splurging for the comparable Nikon product (priced at about twice that amount) would, less than six months later, end up costing me about $750 in repairs and lost use of my camera.  Here, as a cautionary tale for fellow photographers, is the story of what happened.

For the first few months, everything seemed fine.  What a value I thought I’d found.  I even published a post in this very forum about how great a value the Vello flash cable was (I have since added a disclaimer to that post).  Then, with no warning at all, during a professional photo shoot for a local theater company, it happened.  I tried to remove the flash cord mount from my camera’s hot shoe and it wouldn’t budge.  Thinking it was just a bit misaligned, I pushed harder, but still it wouldn’t move.  I didn’t want to force it, so I relented for the moment and made it through the rest of the shoot with a useless and distracting flash cord dangling by the side of my camera the whole time.  Upon getting home that night, I researched the problem and realized that many people had had the same problem with the Vello cable.  Apparently, this accessory is made with cheap materials, and the mechanism that actuates the metal locking pin to hold the cable onto the camera’s hot shoe is made from plastic vs. metal.  This plastic part is subject to sudden breakage, which results in the locking pin being permanently stuck in place and the accessory being stuck on the camera with no ability to remove it.  There was no alternative other than sending in the camera to a Nikon authorized repair center to have the flash cord disassembled and removed from the camera.

Over a month later, I just got back my repaired camera.  The repairs and shipping cost just over $300.  But I also lost a month’s use of one of my Nikon D810 camera bodies, and the rental price for that use is about $450.  That makes a total of about $750 that I lost over my zeal to save $20 on a poorly made off-brand accessory.  We tend to look only at the direct purchase price when deciding which accessory to buy, but the lesson I learned through this painful experience is that we need to consider the full cost a failure could impart, including such potential damages as a disabled or destroyed camera or lens, a missed priceless shot or a bungled shoot for an important client, lost use of our other gear, and even personal injury (imagine if a heavy light stand falls on a model or if a failed light housing delivers an electric shock).

Lesson learned!  From now on I will only consider purchasing an off-brand item after ascertaining it poses no significant risk of causing other problems.  I will not be penny wise and pound foolish.

Do you have a story to share about the higher than expected cost of some piece of gear?  Please leave a comment at the end of this post.

Want to read more posts about gear?  Find them all here: Posts on Gear.

Focus on Cuba [Rewritten for new policies]: Go to Cuba now while you still can

Cuba is a remarkable destination for travel photographers!  This small island has all the iconic images we expect–beautiful but crumbling art deco buildings, American cars from the late 1950s, unspoiled Caribbean beaches–but there are so many more opportunities to connect with and photograph a culture and a nation that is undergoing very rapid change.

Lovers embrace on Havana’s Malecon at sunset.  Buy this photo

European and Latin American travelers already know about Cuba’s charms and have been coming here for decades.  But to many Americans, Cuba has felt off-limits, a destination forbidden by our government.  I’m going to steer clear of the political issues in this post, but it must be noted that President Trump’s recent orders to tighten Cuba travel restrictions previously relaxed under the Obama administration will make it more difficult once again to visit.  The recent changes do not outlaw all travel to Cuba, but most Americans will need to visit under an official “People-to-People Cultural Exchange” program.  The operators of these programs may have to revise their itineraries due to new prohibitions against travel to any facilities owned by the Cuban military, and the prices of these programs may rise as regularly scheduled commercial flights to the island could revert to more expensive charter flights.  But it is still quite straightforward, and 100% legal, for US residents to visit Cuba under one of these People-to-People programs.

I do not recommend trying to circumvent the licensing requirements.  This can lead to lots of trouble for the unlicensed American traveler later down the road: hefty fines, lots of questions to be answered, and restrictions on one’s future travel possibilities.  Instead, go with one of the many travel companies who operate People-to-People Cultural Exchanges.  These are legal trips licensed by the US government for the purposes of the people from the US and Cuba getting to know each other.  These trips do require that most of the traveler’s time be spent interacting with Cuban people of all walks of life, but isn’t that what we travel photographers seek, anyway?

We spent a delightful 1.5 weeks on one of these cultural exchange programs run by Grand Circle Foundation.  They offer a variety of different Cuban itineraries, and we would have preferred one of the longer ones, but schedule limitations required us to take the shorter trip.  This itinerary brought us to the capital Havana and to the rural Viñales Valley, the center of tobacco production and ecotourism on the island.  Here are some highlights from this travel photographer’s perspective.


Our small group was invited to attend a rehearsal by Opera de la Calle.  Held in a decrepit art deco building in downtown Havana, the spirited performance combined song, dance, and performance art.  Buy this photo


Getting to know some of the locals while visiting the exuberant art installation by Jose Fuster known as Fusterlandia.  Buy this photo

We left Havana’s vibrant urban vibe for a three-day excursion to the rural Viñales Valley.  Exploring this famed tobacco-producing region from our base at an eco-tourism village within a sustainable agricultural collective, we enjoyed hiking through terrain unlike any we’d seen elsewhere, taking in views of local wildlife and flowers along the way.

The picturesque Viñales Valley is noted for its mogotes, dramatic hilly outcroppings.  Buy this photo


Tobacco farmer Benito enjoying the fruit of his labor.  Buy this photo

Cuba’s national bird, the brightly colored Tocororo.  Buy this photo

The warm and engaging proprietor of Maria’s Cafe surveys her domain.  Buy this photo

During a Viñales Valley elementary school visit, we met the staff and great  kids in the classrooms!  Three classes for different ages shared one old church building.  Buy this photo

We got to know a friendly and enterprising rural family during a home-hosted dinner.  This is their typical family transportation.  Buy this photo

Back in Havana, we strolled through the city’s Old Town.  Buy this photo

A special performance of Santeria singing and dance.  Santeria combines Roman Catholicism with African religions to form a uniquely Cuban hybrid.  Buy this photo

This selection of photos barely scratches the surface of all the wonderful, unique photographic opportunities awaiting you in Cuba now.  Go soon, though, because for better or for worse, this nation is transitioning quickly into a very different future.

Nearly a year ago, the first commercial flight from the US to Cuba in over 50 years had just taken off from Florida: NY Times on US flights to Cuba.  For many Cubans, this seemed like the dawn of a new era that would mean a partial easing of a great deal of economic hardship suffered under the US embargo.  Instead, we are seeing a regression of US/Cuban relations to a situation more like the Cold War era policy.  It’s anybody’s guess as to how this situation will evolve over the coming years.  On the one hand, it’s possible a new US or Cuban administration could open up relations considerably, leading to huge continuing changes in Cuban society.  On the other hand, we could see further tightening on travel to Cuba, making it very difficult for Americans to visit at all.  I’m eager to visit again in a few years to meet more Cuban people and observe how their lives have changed in the interim.  But if you prefer to visit–and photograph–tiny colorful sidewalk cafes rather than Starbucks, authentic cultural interactions rather than slickly produced touristic shows, and wide open vistas rather than lavish resort developments, then now is the time to book your trip to Cuba!  Depending on the political environment, now could even be your last chance to visit for some years.

Have you been to Cuba?  What surprised you there?  What were some of your favorite photographic subjects?  If you haven’t been yet, what images do you associate with this island nation?  Please share your thoughts in the comment box at the end of this post.

Revealing Portraits [Encore Publication]: Inspirational women of India are struggling to empower themselves and others

Travel photography is about more than simply recording what we see and do during our trips.  It is more important even than creating art from our experiences while traveling.  I believe travel photography also has an important role to play in documenting and communicating to broad audiences the present situation facing underrepresented, repressed, and abused communities, and advocating for change to improve on the present situation.

Today’s post illustrates this point.  In a series of four portraits made during my recent travels in the north of India, I document several of the serious struggles faced by the girls and women of India–abuse of street children, poverty and lack of education, forced early marriage, and acid attacks–and show how these brave young women are working to empower themselves and others like them to end these abuses.

First, we meet a 17-year-old girl from the slums of New Delhi.  Let’s call her Sheela (the NGO supporting her work has requested that I not use her real time in order to protect her identity).  Sheela is the principal organizer of 10,000 street kids from similar slums across the sprawling city.  She helped start a newspaper, called Balaknama, to give a voice to the street kids and expose their stories of child labor exploitation, police harassment, and physical abuse.  Through her efforts and those of other kids from the streets, the editors who advise them, and the NGO that funds them, Balaknama has helped improve the lives of the poorest and most vulnerable residents of Delhi.  My portrait of Sheela is set in Balaknama’s offices and shows her calm and inspiring strength.  Lit by available light only, this image was made with a fast prime portrait lens, shot from a low angle so as not to condescend to the subject, and using a wide aperture to soften the background.  The feeling this image evokes is one of quiet power and a strong drive to expose and right the wrongs of her society.

Sheela, a 17-year-old resident of Delhi’s slums, organizes 10,000 street kids and reports for a newspaper run by and for the street children of the city.  Buy this photo

Next, we meet a girl who was born into poverty in Delhi and was forced at an early age to beg to earn money for her family.  Let’s call her Anika.  School was not an option for her.  However, Anika found a way to earn more and to avoid begging by selling bead necklaces on the streets of the city.  The portrait shows the contrast of her daily life: hopeful yet exhausted, bright yet uneducated, strong yet vulnerable.  This portrait was made using natural light with just a touch of fill flash to accentuate the saturated colors of her outfit and her wares.  The emphasis was placed on Anika by use of the fill flash, by exposing for her face, and by blowing out the overexposed background.

Anika is one of Delhi’s poorer residents.  Unable to attend school, she sells beaded jewelry to make a few rupees for her family.  Buy this photo

In a small village in rural Rajasthan, we met Parma at her modest house.  Forced to marry at the age of 11, Parma had four daughters at an early age.  She is fiercely committed to ensuring her daughters receive a good education so that they will have more options than she had.  Parma made the brave decision to become one of the first women to join a cooperative formed to allow women of the village to learn to make handicrafts in order to earn money for their families.  She and her husband faced considerable scorn from neighbors and relatives over her decision to earn her own income, but now many other village women have seen the success of this program and have also joined.  Parma is proud to have learned to sign her name and read a few words, thanks to her older daughters’ having taught her.  My portrait shows Parma in her kitchen with her third daughter preparing tea in the background and a neighbor child just in front of her.  The image radiates beauty, dignity, strength, and resolve.  In this environmental portrait, I wanted to portray Parma in relation to her home, her family, and her community, so I placed her in the center, exposing and focusing on her face, and allowing her daughter to be clearly identifiable yet slightly out of focus.

Parma, a child bride, vowed to educate her four daughters and works in a women’s cooperative to earn extra money to fulfill her promise.  Buy this photo

Finally, we meet Rupa at Sheroe’s Cafe in Agra.  Sheroes’ is a project founded by and for the women of India who are survivors of acid attacks. We were so inspired by meeting Rupa and learning about her story and her road to physical and emotional recovery after her brutal attack at the age of 15 by her stepmother.  Through this project, Rupa has gained the confidence and independence to leave home, meet other survivors and activists, build a business as a clothing designer, seek legal justice against her attacker, and access the surgical care required to reconstruct her face. The courage and resilience shown by Rupa and the other women we met at the cafe moved us to want to help their cause to educate people and improve the treatment of India’s women.  My portrait of Rupa is powerful because it doesn’t shy away from her scars but allows her courage, resilience, and beauty to shine through.  I got in close to Rupa using an 85-mm prime portrait lens and composed a head-and-shoulders image from eye level.  I exposed for her face and blouse, which she designed herself, bringing out the vibrant saturated colors.  A shallow depth-of-field ensured that Rupa’s face would be emphasized while the background would be soft.

Rupa was brutally attacked with acid by a relative when she was just 15 years old.  Rather than hide at home her whole life, she was empowered by the Stop Acid Attacks organization to live independently, fight for justice, and advocate to end acid attacks across India and Southeast Asia.  Buy this photo

I hope this series of portraits of four brave young women in India will inspire you, as their subjects inspired me, to advocate for improving women’s rights in this part of the world.  And more broadly, I hope you’ll recognize the power that travel photography has to give voice to the unheard and to fight for social change in the places where we travel.

Have you made the opportunity to advocate for change through your images?  Please share your story here!

Want to read more posts about what to shoot while traveling?  Find them all here: Posts on What to Shoot.


Focus on Bethlehem AD: Our neighboring town hosts perhaps the largest nativity scene reenactment in the US

Even professional travel photographers can’t travel all the time.  I’m always on the lookout for great opportunities to shoot local attractions during those stretches when I’m home.  There’s a fun annual event in nearby Redwood City, California called Bethlehem AD that puts on perhaps the nation’s largest re-imagining of the nativity scene.  Replete with Roman centurions, townspeople, craftsmen, dancers, bakers, camels, alpacas, and of course the holy family, some wise men, and a heavenly host of angels, this lavish staging of the nativity is a photographic treat.

Because the event is held only in the evening and there is very little lighting available on location, photographers must provide their own lighting.  I used an off-camera speedlight that I handheld off to the side of the camera and connected to my camera’s TTL metering system using a flash cable.  I’ve shot with Nikon’s own brand of flash cable in the past, but this new off-brand model worked better and cost a fraction of the price [NOTE: I retract my support for this off-brand flash cable.  It failed and caused considerable damage to my camera.  I strongly recommend you order the genuine Nikon brand flash cord, instead.]:


I shot in Manual mode at 1/60 second for flash synchronization and at f/5 or f/8.  I chose ISO settings from 800 up to 3200 depending on the subject.  Buy this photo

To freeze the motion of these dancers, I used TTL flash (off-camera, connected via a 3-foot flash cord) and a shutter speed of 1/60 second.  Buy this photo

As with any sort of portrait photography, the best results are obtained by getting to know your subjects first, getting in close, and spending enough time that they become accustomed to the presence of the camera.  Using this method, you can obtain natural-looking portraits.  Buy this photo

All of these images were made using my go-to portrait lens, the Nikon 85mm f/1.8.  Buy this photo

Beautiful portrait lighting can be shaped using an off-camera speedlight such as the Nikon SB-910.  I made this portrait by holding the speedlight, with diffuser attached, a couple of feet to the left of the camera and bouncing the light off a nearby wall.  The resulting light is soft and warm with no harsh shadows.  Buy this photo

The final tableau, of course, is the actual manger scene.  Because we arrived at closing time, this scene was packed with performers and spectators.  I used the 85mm lens’ magnification power to isolate the holy family and a few onlookers from the rest of the scene.  I handheld the flash unit above the camera and aimed it directly toward the holy family.  A high ISO setting of 3200 also helped concentrate the ambient light at the scene.  Buy this photo

What are your favorite winter holiday events?  Please share your experiences shooting around the holidays.

Want to read other posts about shooting ideas while traveling or close to home?  Find them all here: Posts on What to Shoot.

Happiness Quite Unshared [Encore Publication]: You’re back home from your trip and you’ve got your images looking great: Now what?

With the holidays approaching, I thought readers of To Travel Hopefully might enjoy seeing an encore of this early, pre-launch post with ideas about how to share your favorite images with friends and family.

Sometimes you just get that feeling.  You know as soon as you depress the shutter button that you’ve just captured an incredible travel image.  Over the course of your trip, you will hopefully amass quite a few of these images that you will be eager to share with friends and family.  After the often laborious effort to cull your images and post-process the chosen few, it’s time to share these best photos with the world.

In olden times (pre-digital), there were fewer choices about how to share one’s travel photos.  Many of us shot with color transparency (slide) film, sent all the rolls off to a lab for processing, picked out the top slides by hand, and stored them in a slide tray or carousel for future viewing.  In the excitement just after a trip, we would likely invite a bunch of friends over, get them slightly inebriated, and subject them to a slide show using a projector and portable screen.  This almost literally captive audience would feign enjoyment over, or perhaps even genuinely enjoy, viewing the large projected images and hearing our stories about the recent adventure.  Then the guests would leave, and the slide trays would go back on a bookshelf to sit for months or years before anyone would look again.

In this brave new digital era, we have many more and better options for sharing our best travel photos.  This being the Internet, I’ll offer up a Top Ten list of favorite ways to get my travel images in front of key audiences (Number 7 will amaze you!):

  1. Social Media: While most social media platforms, including Facebook, Twitter, and Instagram, are image-intensive, it turns out that they aren’t particularly good at sharing fine art photography.  That said, these are important and obvious outlets for getting our favorite travel photos out to our friends promptly.  Some even post while traveling, but I do not recommend this approach unless you are completely certain your home is secure while you’re away.  Because these platforms encourage sharing, using them will allow your friends to pass them along to their friends, too.
  2. Online Photography Sites: Specialized photography platforms, such as SmugMug, Flickr, PhotoShelter, and 500px, are tailor-made for sharing (and even selling) your best images.  I use SmugMug to power my own professional photography website, but I also spend quite a bit of time browsing friends’ and even strangers’ photo galleries on the other platforms I mention here.
  3. The New Home Slideshow: Who needs the clunky white folding screens and finicky slide projectors of yesteryear?  Today most folks have a bright, high-definition display right in their living rooms, and it’s called a TV.  Photos on a PC or tablet can easily be shared on a smart TV via WiFi or specialized connecting cables.
  4. Your Phone: Today’s smart phones, whether iOS or Android, have easy ways to sync photos from your PC or tablet to the phone.  Once on your phone, your photos are ready to show to anyone from your mom to a random stranger on a train.  Not the biggest screen in the world, but it’s always with you and can store thousands of high resolution photos.
  5. Send them the files: It’s sometimes desirable to send some of your original image files to a few trusted friends.  Among the numerous methods for doing so are good ol’ trusty email (though attachment sizes are usually limited), Dropbox, and the download capability found in certain photography sites such as SmugMug.
  6. Albums and Books: Yes, the photo album is still alive and well, and it’s never been easier to create one.  Or you can go the extra mile and publish your own custom photography book.  Many photo sharing sites allow you to create your own albums and books featuring your images.
  7. Prints: The demise of the hardcopy print has been greatly exaggerated.  There’s something special and timeless about the look and feel of a well-printed photograph on real paper.  Do it yourself on a good home printer with high quality paper and ink, or send it to a professional lab, but a framed print on your wall or gifted to a friend to put up on their wall is a lovely way to share your very best images.
  8. Cards: Greeting cards, birthday cards, holiday cards–these days it’s easy to customize them with your own images and send them to friends and family.
  9. Calendars: Every year, I create a calendar with a photo from each month of the year just ended, and send copies to a few family members.  I also proudly display this calendar in my home and office.  What could be better than knowing you and your friends are viewing your photos every day of the year?
  10. Keepsakes: Novelty gifts from pencil holders to jigsaw puzzles, to clothing items can be easily and inexpensively made using your favorite photos.  We even have a cat food bowl sporting the likeness of our kitty.  My younger daughter enjoys specialty socks, so I’m looking into ways of putting some of our images onto hosiery.  Get creative!

Whatever methods you use to share your images with friends and family, I would encourage you to consider watermarking your photos.  A watermark is a pattern or image placed across a portion of the photograph to identify it as the work of a particular photographer.  While watermarks can be distracting to the viewer, they can be made quite discreet and they offer some protection against your image being stolen and passed off or even sold as the work of others.  Many photo editing software packages and photo sharing sites offer the capability of attaching watermarks to your photos.

How do you share your travel images?  Got a great idea for sharing that you’d like to add to the discussion?  Please leave a comment in the box at the end of this post.

Revisiting Your Old Friends [Encore Publication]: Take a fresh look at your older images with new postprocessing

In today’s digital photography world, images are made as much in post-processing as they are in the camera.  We only get one chance at creating the image in the camera: the choices we make to compose the image, focus, expose, and fire the shutter at just the right moment are behind us the instant the shutter is released.  But the choices we make after the fact, using image processing software such as Adobe Lightroom, can be revisited as many times as we wish.  Because Lightroom is a non-destructive editor, meaning it keeps the original image file intact and just records the editing choices we make in its catalog, we can return to the image again and again, making slightly or entirely different choices.

When I return from a trip, I try to select the best raw image files and apply some post-processing within a few days.  That’s so I don’t agonize endlessly about creative choices, which would severely increase the turnaround time for sharing the images with the world.  But increasingly I find it is a good practice to return with a fresh eye to images I made some time ago, applying some different post-processing choices to render the image differently.

There are three scenarios under which I often revisit my older images:

      • The images are very old and were shot using film in the pre-digitial era.  In this scenario, scan the transparency (slide), negative, or print and then apply post-processing to the digital scan.

lr-00559_s_r13akqwcgmq0559

Here’s the original scan of a 35mm color slide (transparency) shot during a 1991 trek in Nepal’s Anapurna region.  The image is grainy and the background behind the girls’ heads is distracting.  I decided to clean it up a bit using Lightroom.

NepalWith just a few minutes of tweaking using Lightroom, I was able to crop the image for more dramatic impact, render a true black background, reduce the grainy noise in the shadow areas, and enhance the saturation of the colors.  Buy this photo

    • The images were shot digitally but were made before I started routinely using image-processing software such as Lightroom.  In these cases, I like to apply post-processing to see what artistic options I may have missed in the earlier digital years.

This old Scandinavian stave church was shot as a color image in 2005.  It is so high-contrast that it appears nearly monochromatic on the display screen.  It’s a striking image, but looking at it today I wondered how much more effective it would be as a true black-and-white photo, so I decided to revisit the image using Lightroom.

Here’s the same digital image file, but converted to black-and-white using Lightroom’s color channel processing module.  I boosted the contrast even further and then adjusted each color’s saturation in the black-and-white mix to achieve the exquisite texture of the snow on the ancient building’s roof.  Buy this photo

  • The images are more recent, but I want to make some new creative choices.  Here the idea is to render the image in a different way to achieve a different end result.  For example, an image I initially processed in color may turn out to make a lovely black-and-white photo.  Or perhaps I crop a crowd scene to emphasize just one or a few of the people within it.  The choices are nearly limitless.

Reviewing my favorite images from a recent trip to New Orleans, I saw this shot of a characteristic French Quarter balcony and realized it would be even more powerful if certain colors were more saturated.

A brief session in Lightroom’s Develop module was all it took to boost the saturation of the blue and red channels and to adjust the shadow and black point tonalities.  The resulting image more closely reproduces the emotional experience I recall when viewing this scene live.  Buy this photo

Take a look at some of your older images.  Which ones would you like to revisit and give a fresh new look?  Do you regularly return to work on your library of existing images?  Please share your thoughts here.

Want to read more posts about post-processing your images?  Find them all here: Posts on Post-Processing.

Under the Milky Way Tonight [Encore Publication]: How to make great images including our home galaxy

Not too long ago, making images of the Milky Way was not practical for most photo enthusiasts.  Only astronomers and a handful of professional astrophotographers had the expensive equipment required to capture sufficient light from the cluster of quite dim stars that we refer to as the Galactic Core in the night sky.  Shooting with a very long exposure didn’t do the trick for the Milky Way, because leaving the camera’s shutter open for more than about 15-30 seconds would blur each star’s image due to rotation of the Earth.  These blurs, called star trails, could make for striking images with the stars appearing to streak in circles across the sky, but the subtle beauty of the Milky Way would be lost with these long exposures.

But in the last five years or so, camera sensors have become much more sensitive to light, and now it is possible–indeed quite easy–for photo enthusiasts to photograph our home galaxy without expensive specialized equipment.

Here’s how:

You will need a camera with a sensor that can gather a lot of light and with a shutter that can be kept open for a long time.  These requirements limit the range of suitable cameras to full-frame DSLRs and advanced interchangeable lens mirrorless cameras.  You will also need a fairly fast wide-angle lens: I recommend a zoom or prime (fixed focal length) lens with a focal length of 14-16mm on a full-frame camera, and a maximum aperture of f/4 or faster.  For astrophotography I most often use the Nikon 16-35mm f/4 lens.  It’s got great image quality and is well built, and of course it is wide enough and fast enough for the purposes of capturing the Milky Way.

You will also need a heavy, solid tripod.  I’ve been successful using a lighter weight tripod for Milky Way shots while traveling, but a good professional tripod is better.  I use the SLIK 615-315 with a ball head.

Finally, you’ll want to have a remote shutter release, either a hardwired cable release or a wireless remote release.  This is to trigger the camera without touching it, so as to avoid blurring the image from the vibration of your touch.

Once you have the right equipment, it’s fairly straightforward to photograph the Milky Way.  Choose a dark sky area, far away from the light pollution of any cities or other sources of stray nighttime light.  Shoot toward the Galactic Core where the stars of the Milky Way appear brightest and most colorful.  To plan for where the GC will be on any given date and time and at any given location, I use a smartphone app called PhotoPills: PhotoPills in App Store.  Try to include foreground and/or middle-ground subjects to add interest to your composition.  The image below, made at Yosemite National Park, is appealing because the Milky Way is seen rising above the iconic peak known as Half Dome.

The Milky Way is seen arched through the sky above Half Dome and other landforms in Yosemite Valley.  Careful composition adds drama to your Milky Way images by including Earth-based subjects as well as the sky.  Buy this photo on my website

With your fast wide-angle lens on your full-frame camera, all mounted on your stable tripod, you are ready to shoot.  Remove any filters on the lens, set your camera on full manual mode, select a fast ISO (I usually start at about 3200 and sometimes have to go even higher) and a wide aperture (f/4 or wider), and choose a shutter speed of 20-25 seconds (shorter if your lens is longer than about 18mm).  You can use the 500 Rule, which states that shutter speed should be approximately 500 divided by the focal length of the lens; for example, for a 16mm lens you can use a shutter speed of not longer than about 31 seconds.  Turn off your autofocus on your lens or camera, as it will not work in so dark a setting; instead, manually set your focus to a point near infinity where the stars appear sharp in your viewfinder (or better yet, on your live-view screen).  I like to tape my lens to this setting before it gets dark, so I know the focus won’t change while I’m out in the field in the dark.  It’s also a good idea to turn off your camera’s long-exposure noise reduction feature, if it has one, as this wastes time in the field and it’s equally effective to reduce the noise in Lightroom during post-processing.  Of course, you want to be sure you are shooting RAW files.

Go ahead and shoot a lot of frames, experimenting with different ISO settings and compositions.  It is often a good idea to get a very long exposure, sometimes several minutes long, so that your foreground subjects will be properly exposed.  The frames with the foreground well exposed can later be combined in Photoshop with the ones in which the night sky is properly exposed.

This image was made from several frames: one long exposure for the lake, trees, and mountain in the foreground and middle-ground, and several different 25-second exposures that each captured a different meteor during the peak of the Perseid Meteor Shower.  The resulting image shows all of these objects quite prominently, along with the Milky Way.

You may want to combine several different images to see all the features of the night sky and the terrestrial objects clearly. Buy this photo on my website

With practice, you’ll find that capturing the Milky Way is within your reach, so long as you have suitable equipment and the patience required to compile enough images that a few will turn out to be successful.  I believe it’s well worth the effort because a good Milky Way shot is so subtle, colorful, and strikingly beautiful.  Good shooting!

Have you created a Milky Way image that you love?  What were the key components to your success?  What were the challenges you faced?  Please share your thoughts and experiences here.

Want to read more posts about photographic techniques?  Find them all here: Posts on Techniques.

Photographic Blasphemy [Encore Publication]: Why you don’t need a tripod for most travel photography

Warning: The following assertion will sound heretical to many photography enthusiasts.  Stop reading now if you can’t handle the truth :-).

I’m going to say it.  You don’t need to carry a tripod for most travel photography situations.  There, I’ve said it.

This is blasphemy to many photographers.  After all, for the past 15 years or so, the badge of a “serious” photographer has been this three-legged object we stick between our camera and the ground.  Most scenic overlooks and other landscape photography-friendly locations have been positively flooded by a veritable sea of tripods in recent years.  I’ve seen viewpoints so clogged by tripods that photographers and even (heaven forbid) non-photographers are forced to elbow their way through just to get a place to stand to watch the sunrise, sunset, or other pretty happening.  For years, I have carried at least a lightweight tripod, and occasionally a heavy-duty professional tripod, with me to nearly every shoot, which for me is usually about two per day.  It’s become an ingrained behavior, a knee-jerk reaction, for most photographers.  But why, exactly?

During my recent travels in India, I made many wonderful images in all genres of photography.  I used a lot of gear to do so.  One item I didn’t use: a tripod.  Buy this photo

There are times when a tripod is necessary.  In very low-light situations, such as true nighttime scenes, most astrophotography, and some indoor shoots, it is essential to mount the camera on a sturdy tripod.  When a very long shutter speed is required for a specific effect, such as blurring water in a waterfall or shooting a dancer using rear-curtain sync flash, then you really do need a tripod.  We can even include shoots where several images will be combined using software to make a high dynamic range (HDR) or panoramic image in the category where a tripod is helpful (though, I would argue, not really essential anymore, given how good software has become at stitching overlapping images together).

But so many other times, a tripod is not only not an asset but actually becomes a liability.  Travel photographers must be very mindful of the size and weight of the gear we carry on our adventures.  Every item we bring has to be considered in terms of its value: will the space it takes up in our limited carry-on baggage allotment and its weight on our back every step of our trip be worthwhile in terms of its usefulness in making the best possible images?  A tripod, even a lightweight travel tripod, is a relatively large and heavy piece of gear.  There are other items we need to leave at home in order to make room for a tripod.

I recently returned from a 2.5-week journey through the north of India.  I brought as much gear as I could reasonably fit in carry-on for the international and internal Indian flights.  It weighed a lot, and I had to lug much of the gear I brought on the trip each day on my back through 115-degree heat, sometimes up steep hills to the top of ancient forts.  At the end of the trip, I contemplated my usage of each item I carried.  Both DSLR camera bodies, every lens (even the massive 500mm super-telephoto which I required to make great images of far-off tigers), the speedlights, both battery chargers, and all remote releases, cables, filters, cleaning supplies, etc. were used at some point during the trip.  The one item I never once needed: you guessed it, the tripod!

True, India is a very densely populated country where most sites do not allow tripods or, if they are allowed, the crowds are too thick to deploy them.  And there was ample bright sunlight at most of our locations to handhold the camera.

But I would argue that a tripod is simply not needed for many travel photography situations in general.  These days, a camera’s sensor is so fast and noise-free, and the camera’s resolution so high, that camera shake for most landscape photography settings is a much smaller risk than motion of the subject itself.  My Nikon D810 has a resolution of nearly 37 MB, so if a single tree branch or sometimes even a single leaf moves, I can see it in the image.  A tripod is no more going to stop a leaf from moving than could the ancient viking king Canute stop the tide from coming in (a story frequently misused in modern times, by the way).

From now on, when I pack for a day’s shoot or a month-long journey, I’m going to seriously consider whether I’ll need a tripod and will pack one (or two) only when I can reasonably expect to need it.

What about you?  Do you always carry a tripod, or do you consider its appropriateness before you travel?  If you always carry it, do you always need it?  Would you bring some other piece of gear along if you didn’t have to make space for the tripod?  Please share your thoughts on this controversial topic here!

Want to read more posts about photographic gear?  Find them all here: Posts on Gear.

Focus on Ireland [Encore Publication]: The Emerald Isle offers unique landscapes and culture

We’re recently returned from a two-week adventure in Ireland and Scotland.  Our itinerary sandwiched a week of hiking in the glorious southwestern regions of Ireland (Counties Kerry and Cork) in between brief stays in the major cities of Dublin and Edinburgh.  The photographic opportunities in these regions are remarkable, with lovely landscapes, historic architecture, and a generous friendly culture evident everywhere.  I provide an overview in the form of a photo essay in today’s post, and upcoming posts will feature more details on specific places or types of subjects from the trip.

The Irish pub remains a central focus of life on the Emerald Isle.  In cities and tiny rural villages, the pubs are places for people to come together and catch up with old friends, make new friends, listen to live traditional music, and of course drink a pint or two.  This image was made in Dublin’s famed O’Donoghue’s Pub, where in the 1960s bands such as the Dubliners sparked the Irish folk music revival.
To make portraits in pubs, where the lighting is dim and the use of flash is out of the question, use a fast lens and a high ISO setting.  You need a shutter speed of at least 1/80 of a second to get a reasonably sharp image of musicians at work.  Buy this photo

It may come as a surprise (or not) to learn that Ireland’s most popular attraction is the Guinness Storehouse tour in Dublin.  Here my wife pulls a perfect pint of the “black stuff,” which we then enjoyed in the Gravity Bar atop the storehouse with views overlooking all of Dublin.

Another low-light shot, this image was made with ambient light only, using a fast lens and relatively high ISO.  Remember to capture some shots of your traveling companions.  Buy this photo

I highly recommend a visit to the very remote Gougane Barra peninsula.  There’s only one hotel, which offers outstanding food and views over a tiny island with a picturesque church and the ruins of a Sixth Century monastery.  A photographer’s paradise!

St. Finbarr’s Church stands on a tiny island on the Gougane Barra Peninsula.  To make this image, I shot in the early morning when the quality of light was compelling, got down low to include the rushes in the lake, and used a polarizing filter to bring out the textures in the water and sky.  Buy this photo

Don’t put away your gear when the sun sets!  On a rare clear night in rural Ireland, the photography is stunning.  Here’s an image of the Milky Way sprawling above the ruins of St. Finbarr’s Abbey, a Sixth Century monastery.

To capture the Milky Way, use a sturdy tripod and a relatively fast lens with a high ISO setting.  In most cases, a shutter speed of 20-25 seconds is best, but here I used a somewhat shorter exposure to avoid having the cross appear washed out in the site’s artificial light.  Buy this photo

We then hiked a portion of the long-distance Sheep’s Head Way.  You’ll rarely encounter completely clear skies while walking in Ireland, but the changeable conditions can create opportunities for glorious landscapes.  This lovely image was made just as the rain let up and the sun poked out, generating a vivid rainbow that spanned over the green fields and ancient walls.

Here I used my go-to landscape lens, the Nikon 16-35mm f/4 lens, fitted with a good circular polarizing filter.  I adjusted the angle of the polarizer carefully to enhance the sky without weakening the refraction of the rainbow.  I got down low to the ground to include the leading line from the old wall.  Other compositional elements include the sheep in the field and the dramatic clouds in the sky.  Buy this photo

At the end of the Sheep’s Head Way sits the lovely Bantry House, owned by the family since 1750.  Climb the hill behind the house to capture the house and its gardens with the harbor behind.  Buy this photo

On our way to the start of our next day’s hike in Killarney National Park, we stopped at a viewpoint called Priest’s Leap for this lovely view.  I’ve said it before and I’ll say it again: remember to include yourself and your travel companions in some of your images.  Set up the camera and either mount it on a tripod or show another person how to release the shutter.  For more on how to make images including yourself, read this post: Post on Including Yourself

This image at Priest’s Leap was made using a normal lens with polarizing filter, stopped down to maximize depth-of-field.  Buy this photo

Ireland is filled with forests that exude a sense of mystery and magic.  Look for the little things as you walk: a flower or shamrock, a moss-covered tree, a tiny stream.  All that rain has the happy side-effect of making Ireland the greenest place I’ve ever seen.

Slow down and seek out the little natural details around you, like this moss-covered tree in Killarney National Park.  Buy this photo

The legendary Gap of Dunloe outside of Killarney stretches for eight miles through mountains and valleys, along streams and by ancient farmhouses.  It can be traversed by horse-drawn carriages called “jaunting cars,” but the intrepid photographer will want to hike it instead.

The Gap of Dunloe offers compelling photographic subjects like this stream flowing in a valley surrounded by mountains.  A good wide-angle lens with a polarizing filter brings out the color and texture in such a landscape, even on a “soft day” like this one.  Buy this photo

We spent every evening in Ireland visiting a pub or two.  These pubs differ in character, but all reflect the generous and friendly local culture, and many offer live music.

At a pub in Killarney, I was chatting with this fiddler during a break between sets, and made this portrait using natural light with a fast portrait lens, a wide aperture, and a high ISO.  Buy this photo

My essential portrait lens:

We were fortunate to stay two nights in Killarney at the wonderful Lake Hotel.  The hotel grounds include the ruins of an ancient castle situated on a lake with mountains behind.  During breakfast on our second morning, I noticed the cloud cover had lifted but there was still mist hanging on the side of the hills around the lake.  I ran up to our room, grabbed my thirty pounds of camera gear, and rushed outside to capture the ruins with the mist enshrouding the lake and mountains.

There was no time to set up a tripod as the warming sun was burning away the magical mist on the lake, so I shot this image handheld.  Buy this photo

Our final day’s hike was the beautiful Wild Atlantic Way from Ventry to Dunquin.  The lovely views of the Atlantic are punctuated with green fields dotted with odd “beehive huts,” some dating back to the Neolithic Period.
To make this landscape incorporating ancient stone beehive huts and walls, I shot down across the fields to the sea, being sure to keep the horizon level.  Buy this photo

The picturesque Blasket Islands were home to a community of Irish-speaking farmer-fishermen until they were forced to evacuate in 1953.  This is one of Ireland’s most gorgeous stretches of coastline, captured here using a wide-angle lens with polarizer.  Rotate the filter until the sky is dark and dramatic.  Buy this photo

After Ireland, we spent a few days in Edinburgh, Scotland.  This image was shot along the Royal Mile.

Be on the lookout for unusual perspectives.  This image juxtaposes the different colors and textures of  the statue in the foreground with the cathedral in the background.  Buy this photo

Dining is an essential part of any trip, and Edinburgh offers many opportunities to savor the new Scottish cuisine.  This lovely smoked salmon plate (with accompanying wee dram of whisky) was captured at the Tower Restaurant atop the Scottish National Museum.

For more about how to shoot food images, read this post: Post on Food Photography.      Buy this photo

I hope this post inspires you to visit Ireland and Scotland.  Look for posts over the next few days with more details about the trip and images.

If you’d like to read more posts about photographic destinations, you can find them all here: http://www.to-travel-hopefully.com/category/destinations/

Have you visited Ireland?  What did you find most memorable?  Any tips on photographing this enchanted place?  Please share your thoughts in the comment box after this post.

Getting Oriented [Encore Publication]: Shooting vertically as well as horizontally expands your artistic vision

Who says a portrait image has to be shot in portrait orientation, or that a landscape photo must be shot using landscape orientation?  Rules are meant to be broken, and they call it “artistic license” for a reason.  I would estimate that a third of my people images are shot in landscape (horizontal) orientation, and that a third of my landscape images are shot in portrait (vertical) orientation.  It’s always a good idea to shoot at least a few frames in both orientations so you can decide later which ones work best for your artistic vision.  Let’s take a look at a few examples.

Laura is one of my all-time favorite models (she also creates all her own costumes and does her own hair and makeup), and she looks great framed in any orientation, but I think her remarkable inventiveness is shown to good advantage in this composition using landscape orientation.  Buy this photo

It’s a cliché that people pictures should be composed vertically, so that we can fill the whole frame with the model’s head or full body.  A lot of the time this portrait orientation works well.  But there are some good reasons to shoot people images using landscape orientation as well as portrait orientation.

First, sometimes the model’s pose or the environmental elements around the model favor a horizontal image.  When traveling, I like to shoot environmental portraits that show us more than just the person by including elements of his or her home, livelihood, or lifestyle.

Second, we need to think about how the image will be used.  If I’m shooting publicity photos for musicians, for example, I know they need horizontal images at least as often as vertical images, so as to meet the requirements for the venues and promoters with whom they work.  Magazines and billboards often require landscape orientation, as well.  Even more prosaic uses of our photos, such as Facebook or LinkedIn cover photos, must be oriented horizontally.

Third, some portraits just cry out artistically to be framed in landscape orientation.  The image of the model Laura, above, for example, just works better to my eye in horizontal format, because the negative space behind her leads the viewer’s eye to admire her remarkably creative style, and leaving the lower part of her body and her dress out of the image allows us to focus on her expressive face.

By the same token, there are some good reasons to shoot landscape images in portrait orientation.

First, there could be some limitations to the left or right of the frame that, when shot horizontally, could distract from the power of the image we want to create.  Think about a coastal landscape with a glorious sunset sky and delightful foreground elements such as rocks with water flowing around them, but to the left of our vantage point there’s an unattractive pile of litter.  Frame the image in portrait orientation and avoid the problem.

Second, there are publication media where portrait orientation is required.  Knowing where the image is likely to be published will dictate the orientation in which we shoot.  A card or trifold brochure, for example, will likely require a vertical shot.

Third, again, consider your creative vision.  This night landscape of the Milky Way over Yosemite National Park’s Half Dome also worked beautifully in the more traditional landscape orientation, but here I shot the same scene using portrait orientation to frame the granite mountains with a circle of trees and to create a leading line using the Milky Way’s galactic core to bring the viewer’s eye around the valley’s landforms and the night sky.

This night shot of the Milky Way over Yosemite Valley works especially well in portrait orientation because the pine trees create a frame around the leading line of the galactic core.  Buy this photo

Whenever possible, remember to mix it up and shoot with the non-standard orientation for at least a few frames.  You may find your best shots–and the most marketable ones for placement in certain forums–are the ones you make using the unconventional orientation.

Do you have a favorite image that you shot using the opposite orientation from the expected one?  Please share your experiences here.

Want to learn some more photographic techniques?  Here’s a list of all my posts dealing with the technical aspects of travel photography: http://www.to-travel-hopefully.com/category/techniques/


Celebration Time, Come On [Encore Publication]: How to shoot festivals, street fairs, and other celebrations

As a professional travel photographer, I have to be prepared at any given time to shoot in nearly every genre of photography.  Landscapes, urban scenes, street photography, night and astrophotography, sports, wildlife, and portraiture are all stock-in-trade, and I love them all!  But when I’m asked what my favorite photographic genre is, I reply that I love portraying living culture the most of all.  Making images of people celebrating their culture, especially when those images convey a sense of place, is my top objective when I shoot, whether I’m halfway around the world or near home.

Culture can be expressed in small everyday elements of dress, gesture, and environment.  But celebrations such as festivals, street fairs, religious observances, arts, and sports show us culture writ large.  It is these outpourings of color, sounds, motion, and ritual that show us how people are different and yet similar all around the world.  And of all the celebrations I shoot regularly, my favorite of all is the annual Carnaval San Francisco.  So in today’s post, we’ll explore how to shoot striking images of cultural celebrations, using Carnaval SF as an example.

This year’s Carnaval was held this past Sunday.  But I was privileged to be “embedded” with several of the comparsas, or Carnaval groups, during the months leading up to the big parade day.  This allowed me the opportunity to get to know the leaders and dancers in these groups, making very special images of the preparations for Carnaval.  While I won’t be including any of those behind-the-scenes images in today’s post, the images of the parade day itself did benefit from my having had the chance to get to know the members of these groups over the months leading up to the day.  We’ll include some discussion of this observation in the post.

I’d like to start with an observation on gear.  I see a lot of fellow photographers shooting at events like Carnaval with way too much gear.  When I say too much gear, I mean more gear than is good for them or for the participants and observers of the festival.  Several photographers had two or three DSLR bodies mounted with enormous zoom lenses and attached to large strobes with huge diffusers.  Some used monopods and a few even tried to set up tripods for this rapidly moving and crowded event.  I brought a single DSLR with two light and fast prime lenses (a 50mm “normal” lens, and an 85mm portrait lens).  That’s it.  I never mounted a zoom lens during the whole day of shooting and I never used any artificial light.  And of course I went handheld the whole day; there’s really no safe or practical way to use a tripod at a crowded and mobile event.  All 2500 images I made that day used just that compact kit, and I’m very happy with the results.

It’s a good idea to arrive well before the scheduled start time.  Often, the best images of the day will be the ones you make during the preparations rather than during the event itself.  For this image of a leader of the Viva la Diva group, who I knew well from working with them over the last few months, I got in close with an 85mm portrait lens and allowed her elaborate headdress to fill the entire frame.  Buy this photo

Try to include some of the elements surrounding the people in the celebration.  A portrait that shows a person or people within their surroundings is called an “environmental portrait,” and often these tell us more about the person and the culture than do close-ups.  Buy this photo

Seek out the key people in a celebration, such as the King of Carnaval shown here.  He has such an amazing presence that all I had to do was find the right vantage point and shoot away.  I always look for uncluttered backgrounds when making portraits, so the background doesn’t distract much from the image.  Buy this photo

Kids make wonderful subjects during celebrations, especially during those moments when they forget the camera is there and are completely uninhibited.  Buy this photo

Try to choose backgrounds that complement your subject without competing with it.  I asked this samba dancer to pose by a street mural whose bright blues complemented her own costume.  Buy this photo

Group portraits can be challenging.  It’s difficult during the chaos of a celebration to get everyone’s eyes on the camera.  Try to find a vantage point that flatters everyone in the image (for full-body portraits, it’s often best to shoot from the level of the middle of the body, not from head level), choose an uncluttered and undistracting background, and select an aperture that gives just enough depth-of-field to keep all the people in focus while softening the background.  Buy this photo

To make close-up portraits during the actual celebration (in this case, a parade), it is not necessary to use a long telephoto lens.  Shooting with a long lens means you’re “taking” the portrait, not “making” the portrait.  You simply can’t interact with your subject while shooting from far away.  I prefer to use a prime normal or portrait lens so that I can interact with my subject and make an image where his personality shines through.  It helped here that I knew the members of this group from our interactions over the last few months.  Buy this photo

Another reason to use a fast prime lens is that you can choose a very wide aperture (here, F/2.0 using an F/1.4 lens) to get tack-sharp focus on the subject’s face while softening the background and sometimes other parts of the body.  Here I wanted to emphasize the pointing gesture by having the fingers so close as to be out of focus, while the dancer’s face and body are in sharp focus.  Buy this photo

For images that really pop, use a large aperture (small F-stop number) to soften the background and separate the subject from the other people and objects around him.  Buy this photo

During the chaos and cacophony of an urban celebration, it’s nice to find those quiet moments, too.  While most festival dances are joyous and boisterous, this Latin American folkloric dance is quiet and mournful.  I wanted the portrait to reflect that mood, so I shot from the side as if walking next to the dancer and caught the quiet gesture of holding the white handkerchief.  Again, a large aperture was used to blur the background and emphasize the subject.  Buy this photo

I look for scenes where participants are just being themselves.  These girls were having a blast, marching and chatting with each other, but they also were interacting with the crowd.  I got down nearly to the ground so as to shoot from their level and framed the image so as to emphasize the color and pattern of their costumes.  Buy this photo

Most images of parades are shot from straight ahead looking backward onto the subjects.  You’ll observe in this post that most of my images are not made from that perspective, but occasionally it does work to frame a great scene, such as this delightful image of a salsa dancing couple.  Buy this photo

It can be challenging to include a whole parade contingent in one shot.  Here I was able to frame the whole group in formation, including some of the lovely San Francisco houses on the steep hill behind, by running ahead to the truck in front of the dancers and getting as much distance as I could between me and them.  I shot with an 85mm lens and selected a small aperture (large F-number) so as to keep all of the dancers and the background in focus.  Buy this photo

With bold and colorful costumes, some subjects cry out for a big striking close-up.  When this dancer stopped to interact with me, I got in close with a portrait lens and captured him full-frame.  Buy this photo

Don’t shy away from using non-standard aspect ratios.  To include the whole Muito Quente contingent, I moved back from the dancers and captured the whole width of the street, then in post-processing I cropped to keep the full width but remove the unwanted foreground and background portions.  Buy this photo

Again, it is helpful to know the participants in advance of the performance.  I had been working with the Muito Quente group for several months before the parade, which made it more natural to interact with each of the dancers and make the best images possible.  Buy this photo

Always shoot in RAW mode for maximum flexibility.  A few words about post-processing: Using Lightroom, I make small adjustments to the color and contrast curves so as to emphasize the subject.  A little boost to the vibrance (but not so much as to make the image appear unnatural) and a touch of post-crop vignetting can really make the image pop.  Buy this photo

Sometimes it’s okay to break the usual rules of composition.  A portrait is not supposed to be cropped at the joints, such as at the knee, but here it works because the dancer’s ornate flowing dress gives a sense of motion and fluidity in the bottom of the frame.  Buy this photo

Even in a fast-moving parade, find the opportunities to have your subject stop for a moment and interact with you.  The resulting images will convey much more personality that way, even if the personage is fully masked.  Buy this photo

We’ll close with this moment of sheer Carnaval magic.  It’s such a wonderful feeling when all the elements come together to make a memorable image.  This portrait uses most of the techniques we’ve discussed in today’s post–careful composition, bright vibrant colors, a perfect moment, sharp subject with soft background–and conveys a strong sense of personality, culture, and place.  And that is what Carnaval, and cultural celebrations in general, are all about!  Buy this photo

What are your favorite cultural celebrations?  How do you make images that capture their essence?  Please share your thoughts here.

Want to read more posts about what to shoot while traveling or close to home?  Find them all here: Posts on What to Shoot.

Focus on Cuba [Rewritten for new policies]: Go to Cuba now while you still can

Cuba is a remarkable destination for travel photographers!  This small island has all the iconic images we expect–beautiful but crumbling art deco buildings, American cars from the late 1950s, unspoiled Caribbean beaches–but there are so many more opportunities to connect with and photograph a culture and a nation that is undergoing very rapid change.

Lovers embrace on Havana’s Malecon at sunset.  Buy this photo

European and Latin American travelers already know about Cuba’s charms and have been coming here for decades.  But to many Americans, Cuba has felt off-limits, a destination forbidden by our government.  I’m going to steer clear of the political issues in this post, but it must be noted that President Trump’s recent orders to tighten Cuba travel restrictions previously relaxed under the Obama administration will make it more difficult once again to visit.  The recent changes do not outlaw all travel to Cuba, but most Americans will need to visit under an official “People-to-People Cultural Exchange” program.  The operators of these programs may have to revise their itineraries due to new prohibitions against travel to any facilities owned by the Cuban military, and the prices of these programs may rise as regularly scheduled commercial flights to the island could revert to more expensive charter flights.  But it is still quite straightforward, and 100% legal, for US residents to visit Cuba under one of these People-to-People programs.

I do not recommend trying to circumvent the licensing requirements.  This can lead to lots of trouble for the unlicensed American traveler later down the road: hefty fines, lots of questions to be answered, and restrictions on one’s future travel possibilities.  Instead, go with one of the many travel companies who operate People-to-People Cultural Exchanges.  These are legal trips licensed by the US government for the purposes of the people from the US and Cuba getting to know each other.  These trips do require that most of the traveler’s time be spent interacting with Cuban people of all walks of life, but isn’t that what we travel photographers seek, anyway?

We spent a delightful 1.5 weeks on one of these cultural exchange programs run by Grand Circle Foundation.  They offer a variety of different Cuban itineraries, and we would have preferred one of the longer ones, but schedule limitations required us to take the shorter trip.  This itinerary brought us to the capital Havana and to the rural Viñales Valley, the center of tobacco production and ecotourism on the island.  Here are some highlights from this travel photographer’s perspective.


Our small group was invited to attend a rehearsal by Opera de la Calle.  Held in a decrepit art deco building in downtown Havana, the spirited performance combined song, dance, and performance art.  Buy this photo


Getting to know some of the locals while visiting the exuberant art installation by Jose Fuster known as Fusterlandia.  Buy this photo

We left Havana’s vibrant urban vibe for a three-day excursion to the rural Viñales Valley.  Exploring this famed tobacco-producing region from our base at an eco-tourism village within a sustainable agricultural collective, we enjoyed hiking through terrain unlike any we’d seen elsewhere, taking in views of local wildlife and flowers along the way.

The picturesque Viñales Valley is noted for its mogotes, dramatic hilly outcroppings.  Buy this photo


Tobacco farmer Benito enjoying the fruit of his labor.  Buy this photo

Cuba’s national bird, the brightly colored Tocororo.  Buy this photo

The warm and engaging proprietor of Maria’s Cafe surveys her domain.  Buy this photo

During a Viñales Valley elementary school visit, we met the staff and great  kids in the classrooms!  Three classes for different ages shared one old church building.  Buy this photo

We got to know a friendly and enterprising rural family during a home-hosted dinner.  This is their typical family transportation.  Buy this photo

Back in Havana, we strolled through the city’s Old Town.  Buy this photo

A special performance of Santeria singing and dance.  Santeria combines Roman Catholicism with African religions to form a uniquely Cuban hybrid.  Buy this photo

This selection of photos barely scratches the surface of all the wonderful, unique photographic opportunities awaiting you in Cuba now.  Go soon, though, because for better or for worse, this nation is transitioning quickly into a very different future.

Nearly a year ago, the first commercial flight from the US to Cuba in over 50 years had just taken off from Florida: NY Times on US flights to Cuba.  For many Cubans, this seemed like the dawn of a new era that would mean a partial easing of a great deal of economic hardship suffered under the US embargo.  Instead, we are seeing a regression of US/Cuban relations to a situation more like the Cold War era policy.  It’s anybody’s guess as to how this situation will evolve over the coming years.  On the one hand, it’s possible a new US or Cuban administration could open up relations considerably, leading to huge continuing changes in Cuban society.  On the other hand, we could see further tightening on travel to Cuba, making it very difficult for Americans to visit at all.  I’m eager to visit again in a few years to meet more Cuban people and observe how their lives have changed in the interim.  But if you prefer to visit–and photograph–tiny colorful sidewalk cafes rather than Starbucks, authentic cultural interactions rather than slickly produced touristic shows, and wide open vistas rather than lavish resort developments, then now is the time to book your trip to Cuba!  Depending on the political environment, now could even be your last chance to visit for some years.

Have you been to Cuba?  What surprised you there?  What were some of your favorite photographic subjects?  If you haven’t been yet, what images do you associate with this island nation?  Please share your thoughts in the comment box at the end of this post.

More Hassles Coming for Travel Photographers? [Encore Publication]: The airline electronics ban and its likely impact on travel photographers

A polar bear prowls the arrivals hall at Svalbard Airport.  What new horrors will await travel photographers in these troubled times?

The life of a travel photographer is inherently complicated because the cost, fragility, weight, and size of the photography gear we need is incompatible with the rigors of global travel.  I’ve written several times before about strategies for selecting and packing gear so as to take along just what we need and maximize our chances of keeping it safe during our travels.  But the times, they are a-changin’.  The US and UK governments recently instituted regulations banning all electronic devices larger than a smartphone from carry-on luggage on flights originating from 10 Middle Eastern and Northern African countries.  Before long, these restrictions could be extended to flights to and from other countries.  Camera gear is likely to be explicitly or implicitly categorized as electronic devices, so quite soon we may find ourselves obligated to check all of our gear in the hold of the plane whenever we travel.  In today’s post, I will share some thoughts on how travel photographers could handle such a challenge.

Laptops are already problematic for air travel.  They must be inspected separately from other carry-on items, leading to delays at airport security areas.  Their batteries can, in rare situations, catch fire.  And of course their use is always banned during portions of every flight.  They are expensive, breakable, and highly coveted by thieves.  And the data contained on our laptops must be very carefully protected.  For these and other reasons, I already try not to take my laptop with me on most trips.  There are image backup strategies, which I’ll cover later in this post, that do not require use of a laptop.  I don’t tend to do much captioning, post-processing, or sharing of my images during the trip, preferring instead to take care of these tasks upon returning home.  On certain trips, especially when I am leading photography tours or workshops, I do need to take the laptop to get my job done, but I would recommend not bringing along a PC unless it’s really needed.  In the future, as regulations may spread requiring that laptops be placed in checked baggage, I see no good alternative other than purchasing a hard-sided and well padded case such as a Pelican brand case to hold the PC.

Regrettably, it seems likely that most modern camera gear will be considered “electronic devices” for the purposes of these sorts of airline restrictions.  Today nearly every camera, lens, and even many accessories contain embedded electronics, so they will almost certainly be included under these types of bans.  While until now I have always managed to carry on all of my gear on every trip, I see the winds shifting and in the near future I expect to need to be able to securely pack all of my gear as checked baggage.  Obviously, a hard-sided and well padded, customizable case will be required for this purpose.  I don’t yet own such a case, but many of my photographer friends swear by cases made by Pelican.  Here’s one I am considering purchasing soon to hold most of my gear when I travel.  It is affordable, very durable, offers a good deal of physical protection, is lockable, and also rolls on solid wheels that can support a lot of weight.  I will need to do more homework to determine whether this particular size of case will adequately fit all my gear.  Note that I generally do not recommend products I haven’t personally used, but this item is representative of the category of hard-sided cases we travel photographers will need to consider purchasing.

When checking camera gear, it is imperative that we remember to carry with us into the cabin of the airplane all of our memory cards that have images on them.  I’m only being semi-facetious when I say I’d rather part with my prescription medications than with my brand new images during a long international flight.  But regardless of what new regulations may soon be issued about what items we can carry onto our flights, it is essential to set and follow a good backup plan for our images when we travel.  Gear can be lost or stolen, memory cards corrupted, and so on.  Images we make during a trip *always* must be backed up so that there are at least two files in physically separate locations for each image.  Many photographers use a laptop for their image backups while traveling, but for reasons I’ve already mentioned, I prefer not to bring a laptop unless it’s absolutely required.  Instead, I make the time every night during a trip to copy that day’s images to a second memory card, which I store separately from the ones in my camera bag.  I do this in-camera because my camera bodies have dual memory card slots, but if your camera has only one slot you can backup to a portable hard drive or another memory card using a card reader.  Some cameras have WiFi and/or Bluetooth capabilities, which can facilitate backups to a separate device such as a smartphone or even to the cloud, though network connectivity in many parts of the world is rudimentary at best.  A backup strategy that I use when the images are extremely important is to shoot simultaneously to both of my camera’s memory cards, so that the instant the image is shot it is recorded as two separate files.  I will then store one memory card separately from my camera gear.  Again, this approach will only work if your camera has dual card slots.  A final word of advice: bring enough memory cards so that you won’t have to reformat any of them during the trip.

It’s already a hassle traveling the world with a lot of camera gear.  Most likely, the hassle factor will increase soon as a result of the turmoil in our modern world.  I’m not looking forward to these changes, but I do expect they will happen soon, so I am rethinking my packing and traveling procedures to be prepared.  Hopefully, some of the thoughts I’ve shared in this post will help others get prepared, as well.

What gear and procedures do you use to travel safely with all your gear?  How do you see your approach changing as new airline regulations are enacted?  Please share your thoughts here.

Want to read more posts about gear?  Find them all here: Posts on Gear.

Prime Time [Encore Publication]: Why a prime lens is often better than a zoom

Most photographers make most of their images using a zoom lens.  Aside from smartphone cameras, which typically feature a fixed focal-length lens, nearly every camera today comes with a zoom lens attached.  Most point-and-shoot and compact cameras do not have interchangeable lenses, so the zoom lens that comes with the camera is the only choice, while most mirrorless and DSLR cameras have interchangeable lenses.  That means these more advanced cameras offer the choice of using a broad range of different lenses, including both zoom and prime (fixed focal-length) lenses.  While many photographers own one or several prime lenses, from my observation the vast majority shoot nearly all of their images using one of their zoom lenses instead.  In today’s post, I make the case for using prime lenses in many, or even most, shooting situations.

This portrait of a Delhi girl outside India’s largest mosque is lovely and effective, but because I didn’t have time to change lenses and was forced to use my slower walkaround zoom lens, the depth-of-field is quite deep, making for a somewhat distracting background.  Buy this photo

Zoom lenses have one clear advantage over prime lenses: they offer a range of focal lengths, which helps the photographer compose the image without having to walk closer to or farther away from the subject.  But even here I would argue that in most cases it aids creativity to “zoom with the feet,” or walk around to compose the best shot.  Even when this isn’t possible, a high-resolution digital image can easily be cropped in post-processing to achieve the composition the photographer had in mind.

But prime lenses have many advantages over zoom lenses.  First, they are nearly always sharper and generally higher quality than zooms, because they don’t require extra internal glass elements to enable the zooming.  While zoom lenses have improved in optical quality over recent years, it remains the case that prime lenses offer a quality advantage.  Second, prime lenses are typically smaller and lighter than zooms.  This is a blessing especially to travel photographers.  Third, primes are less expensive than zooms of similar optical and build quality.  That means you can buy two or three different prime lenses for the price of one zoom lens covering a similar range of focal lengths.  And fourth, primes are usually faster (i.e., offer a wider maximum aperture size) than zooms.  This last point is a big advantage for many types of shooting, because a wide aperture (small F-number) lets in more light, allowing use of faster shutter speeds and lower ISO settings in low-light conditions.  This is a real boon for nighttime and astro-photography.  A wide aperture also results in shallow depth-of-field, which emphasizes the main subject by softening the focus of the background.  The best lenses offer a pleasing “bokeh”, or pleasant blurring of the out-of-focus elements of the image.  This effect makes for extremely effective portraits as well as wildlife images, but is also useful for other types of photography.


This portrait, made with my current favorite lens, an 85mm f/1.8 portrait lens, offers very sharp focus on the subject’s face and pleasing bokeh, or soft blurring of the out-of-focus background.  It would not have been possible to make this portrait using a zoom lens because the maximum aperture would be too small to achieve the soft background effect.  Buy this photo

I shoot a lot of performing arts events (dance, music, theater), which typically take place indoors where the light is very dim and frequently feature fast-moving action requiring a fast shutter speed.  Using a prime lens allows me to shoot at an action-freezing shutter speed without having to use extremely high ISO settings that introduce noise into the images.  And again, the pleasantly blurred backgrounds help set off the very sharp main subject for a striking overall effect.

I captured this image of a samba dancer at a dress rehearsal under very low-light conditions.  Using my 85mm f/1.8 prime portrait lens, I was able to freeze the motion using a fast shutter speed, keep the ISO at a reasonable level to avoid noise, and render a nice soft background.  Buy this photo

I would estimate that most enthusiast and professional photographers shoot about 80% of their images using zoom lenses.  My own usage pattern is the opposite, that is, I shoot about 80% of my images using prime lenses.  For some purposes, a zoom lens is still required, but it’s surprising how often we can achieve better results using a prime.  Prime lenses are smaller, lighter, less expensive, higher quality, and faster than zoom lenses.  I encourage you to dig out your prime lenses if you have a few, or borrow, rent, or buy one or two (remember, they are much less expensive than comparable zoom lenses) and try shooting with them exclusively, or at least much of the time, for a week or two.  Compare your images made with the primes vs. the ones made with zooms and come to your own conclusions.  If you’re like me, you’ll find that a prime lens is the right tool for most photographic jobs.

Here are my three favorite prime lenses, a “normal” lens, a medium telephoto or “portrait” lens, and a wide-angle lens:

If you pack only one prime lens, it most likely will be a “normal” lens, that is one with a focal length of about 50mm for a full-frame camera or about 35mm for a crop-sensor camera.  I carry the Nikon 50mm f/1.4G lens.  This is the one I use in very low-light situations or to get a really shallow depth-of-field.

I think my current favorite lens of all (including primes and zooms) is my Nikon 85mm f/1.8G lens.  This is a classic portrait lens and provides a flattering perspective and great image quality when your subject is a human being.  I use it for nearly all of my portrait work these days.  But this lens also shines for nature and action photography where you don’t need a really long focal length.  It renders really lovely “bokeh”, or the soft quality of the out-of-focus parts of the image.

A wide-angle prime lens can be useful for landscapes, architecture and interiors, and astro-photography, among other purposes.  I like the Nikon 24mm f/1.8.

What are your preferences regarding use of prime vs. zoom lenses, and why?  Please share your experiences in the comments box.

Want to read other posts about gear?  Find them all here: Posts on Gear.