Baggage Claim: A photographer’s guide to how to pack for a trip

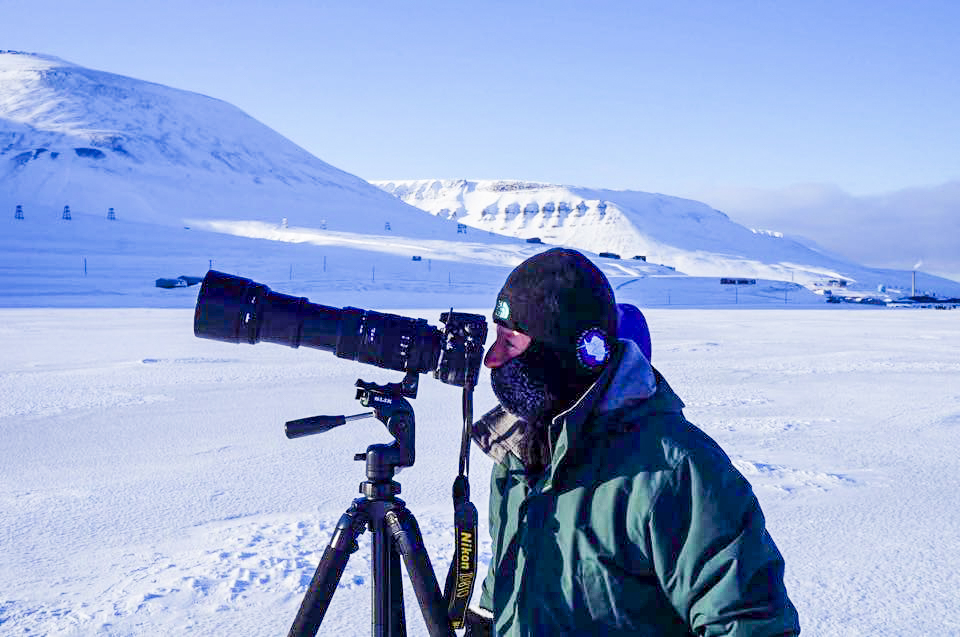
 Special trips often require specialized gear.  To photograph the total solar eclipse in Svalbard in 2015, I had to pack a heavy professional tripod, 500mm super-telephoto lens, a remote release capable of functioning in extreme cold, and a custom-made solar filter.  Thankfully, most trips are easier to pack for.  Buy this photo

Packing is never the most fun part of a trip, and the special challenges we travel photographers face can be particularly vexing.  But with a few guidelines and some common sense, we can easily bring along just what photo gear we’re likely to need and still be able to make room for some socks and underwear.  Here is my very opinionated guide to how to pack for any length and type of trip.

    1. What type of trip are you taking?
      • If it’s a driving trip directly from your home, you can bring all the gear your heart desires.  Just be sure not to leave valuables in plain sight in the car when you step away for more than a moment (thieves love camera gear), and make sure you have a shoulder bag or backpack to carry just what you need for car-free excursions.
      • If you’re flying (unless you have your own private jet, in which case you also need to make room for me on your next trip), you’re going to have to reduce the gear you carry to just the essentials.  It is possible to customize the foam insert in a hard-sided case to hold your photography gear, and then you can check this bag in the hold of the aircraft, but this requires some effort to prepare the case for your specific gear and then you will likely find the case quite heavy to lug around for the land portion of your trip.  And woe to you if your bag is misrouted, lost, or stolen.  I recommend packing a carry-on item that meets your carrier’s size requirements and filling it with just the most essential gear you’ll need on your trip.  More on that topic in a moment.
      •  For most purposes, a backpack is a good packing solution.  There are many styles available for photo gear, but my favorites are these two:
        1.  For those times when you need to bring most or all of your gear on a trip, I like the Tamrac 5586 Expedition 6x Backpack.  It carries a lot of gear snugly and flexibly, and it doesn’t look like a camera bag so it’s less likely to invite the wrong kind of attention.  It is almost always accepted as carry-on, but it is a bit bulky and heavy for all-day, everyday use while traveling.  I’ll often use this bag to get all my gear to my first destination, then pack a day bag for just the gear I’ll need for each day of the trip.
        2. My current favorite bag for day use for nearly any shooting situation near home or while traveling is the Manfrotto MB MA-BP-TRV Advanced Travel Backpack.  It can fit a reasonable amount of gear while leaving room for non-photography items like a jacket or a water bottle (yes, even photographers occasionally have to drink or stay warm).  It disguises your gear pretty well, has good rain protection, and even sports a special sleeve for carrying the Manfrotto Be-Free Travel Tripod.
    2. What types of shooting will you be doing on the trip?
      • Will wildlife or astrophotography be involved?  If so, you’re going to have to strain your back, anger the airline staff, and enlist your travel partner to help, because there’s really no substitute for a long and heavy super-telephoto lens in this situation.  When I’m on safari or chasing a solar eclipse, I pack my massive 500mm lens into the larger of my two backpacks and accept my fate.  You’ll realize it was worth the effort when you get home and are able to share your amazing photos of a leopard in a tree or the sun’s corona on full display during a total solar eclipse.
      • For most other types of trips, you won’t need to pack a really long lens.  My general rule is to pack a range of zoom lenses that covers from fairly wide (about 16mm) through fairly long (about 300mm), including a couple of fast prime lenses for when the light is low and/or the very best optical quality is required.
    3. How much redundancy do you need on the trip?
      • Always bring a backup battery (or several) and a backup battery charger.  Murphy’s Rule as applied to travel photography guarantees that batteries will die just as you frame the shot of a lifetime.  Bring at least one extra.  And chargers are left in hotel rooms or in tented camps on the Serengeti with some regularity, and they tend to get fried when plugged into unusual power grids, so bring an extra one with you.
      • Don’t forget the little things.  Pack several power adapters of the type used in the countries where you’ll be traveling.  These get lost easily and can be hard to replace while traveling.  Bring twice as many memory cards as you think you’ll require; it’s easy to fill them up when you get to shooting a mountain gorilla or carnaval dancers.  If you plan to back up to a laptop or external hard drive, bring extra connecting cables.  While traveling, I back up to a second type of memory card using my camera’s second card slot, so I bring quite a few memory cards of both types with me.
      • Lenses are heavy and expensive, but they sometimes stop working, so if you’re on a particularly important trip you may want to bring several lenses in overlapping focal lengths.  That is, you could bring a wide-angle zoom lens and a wide-angle prime lens, plus a walkaround zoom lens and a “normal” prime lens (about 50mm for a full size sensor or about 35mm for a crop sensor), plus a telephoto zoom lens and a telephoto prime lens or two telephoto zooms with overlapping ranges.
      • If it’s a once-in-a-lifetime chance to build your portfolio with very special and irreplaceable images, I recommend bringing a backup camera in addition to your primary camera.  For a recent safari trip in East Africa, I brought two DSLR bodies as well as quite a few lenses so that I’d have a backup solution to any single point of failure.  The more exotic your destination, the more likely that dust, wind, salt, extreme heat or cold, and heavy shocks or drops will damage your gear, so for those amazing one-of-a-kind trips I suggest biting the bullet and carrying backups for any gear that could fail.
    4. What accessories do you need to accompany the rest of your gear?
      • Attach a UV filter to each of your lenses before you leave and keep it on to protect the front element of the lens throughout your trip.
      • Carry a polarizing filter and a range of neutral density filters in the correct diameters to fit at least your wide-angle lens and your walkaround lens.
      • For more on filters, read this post: Post on Filters
      • A flash unit is helpful to have on most trips, unless you’re sure there will be ample natural light or you’re willing to use your camera’s built-in flash.
      • A good lightweight travel tripod with a head and mounting plate that suit your needs is essential gear on many trips.
      • Don’t forget any special-purpose gear that you need for just this type of trip.  When I travel to see a solar eclipse, for example, I need to be sure I bring my solar filter that attaches to my super-telephoto lens.  I also need to bring my heavy-duty professional tripod instead of the lightweight one I typically carry on trips.
    5. How will you be shooting from day to day during the trip?
      • If you’ll have constant vehicle support or won’t be going far from your hotel, you may be able to make do with just the bag you brought on the plane.  Or you can bring along a small shoulder bag to carry just a few items for the day’s shoot.
      • Most of my trips involve considerable hiking and public transportation from day to day, so I either carry everything in my smaller backpack or bring it along in checked baggage during the flight.  Then I can transfer just the gear I need for each day’s shoot into the smaller pack, which makes life easier when hiking 10 or so miles per day.

For a safari you will need a long lens to capture small or distant wildlife.  I recommend bringing a beanbag for camera support instead of a tripod, as the latter cannot be used in a safari vehicle.  Be sure to bring an extra camera and lenses, and carry more batteries and memory cards than you think you’ll need.  Buy this photo

Of course, if you use a mirrorless camera with only a couple of compact lenses or an advanced point-and-shoot camera, you do not have to worry about many of these items, but still be sure to review the list above to ensure you bring all required accessories.

With an overall strategy tailored to your itinerary and shooting style, and careful attention to execution to ensure you don’t forget anything, it’s really not that difficult to pack just what gear you’ll need in a way that will allow you to enjoy your trip when you’re not shooting.  After all, travel is about gaining experiences, and not all of those experiences can or should be photographed.  Pack for your photography, but also for your overall travel enjoyment.

What are your hacks for packing your photo gear for a trip?  Please share your tips and tricks in the comments box here.

Photography as a Bridge to Local Culture [Encore Publication]: Your camera is a great tool for meeting local people and learning about culture

I’ve heard certain travelers grumble that photography inhibits deep cultural learning and interaction when we visit new places.  Our cameras, this line of reasoning goes, isolate us from the local people we’re trying to get to know.  The lens, they believe, acts as a distancing device to turn locals into subjects and travelers into tourists.

I disagree emphatically!  Your camera is a great tool for meeting local people and learning about culture, immersing yourself even more deeply in the spirit of the place and the lives of the people who live there.  But only if you use it in the right way.  Allow me to explain.

While the local customs and even the laws governing whom it is acceptable to photograph, and when or where it is okay to make an image of them, do vary from place to place, there are a few common-sense guidelines that will help us travelers engage in a friendly, curious manner instead of upsetting people and causing social discord.  Here are a few key guidelines to keep in mind.

    • The Golden Rule: If it’s not okay in your home country, it’s probably not okay in other parts of the world.  Would you appreciate a stranger running up to you on your front lawn and shoving a lens in your face?  I’m guessing, no.  So please don’t behave in that way toward people in other places.
    • Make a portrait, don’t take a portrait: Get to know your subject first as a person, even if just for a brief exchange.  While there are occasionally situations where the moment or the expression will be lost by approaching your subject before shooting, I find that most of the time I make better images as well as have more meaningful interactions, when I say hello and ask the person first.

USA

I chatted for a while with these samba dancers as they were celebrating just after San Francisco’s Carnaval parade.  Getting to know them first made it easy to ask permission for a portrait. Buy this photo

    • Approach children with sensitivity: Kids can be amazing photographic subjects!  They are often uninhibited in front of the camera and they portray cultural practices and lifestyle in a relatable, endearing way.  But it’s especially important to understand when it’s okay to make a portrait with them.  While traveling in South Africa, I saw first-hand what can happen when travelers misunderstand social norms.  A fellow traveler in my group saw a young boy playing near where we were waiting for a border crossing.  She shouted excitedly, “Soooo cute!,” and rushed up to the child, camera extended toward his face, to take his picture.  In an instant the boy’s father ran over, irate, and yelled at me (he mistakenly thought I was the fellow traveler’s father), “How would you like it if we came to your country and started taking pictures of your children?”  A few minutes later I explained privately to the offending traveler why her actions caused a negative reaction.  She had no idea this behavior wasn’t okay.  When in doubt, refer to the Golden Rule, above.

Kashgar, China

We visited the old town in Kashgar just before the Chinese government began demolishing the homes there and relocating the mostly ethnic Uighur people.  It was and remains a complicated social situation, but I was fortunate to be able to make this memorable portrait of a young Uighur girl in traditional clothing sitting in front of her soon-to-be-destroyed family house.  I approached her mother first to make sure it was okay to photograph the girl.  Her expression of pride mixed with apprehension is what I feel makes this image strong.  Buy this photo

    • Getting to know you: It may seem difficult to talk with a stranger from a very different culture who likely speaks a very different language from our own.  For us introverts, it seems like even more of a challenge.  But I’ve learned a few tricks and tips that make it much easier to get to know a person before photographing them.  Learn a few words of the local language.  Just saying “hello” or “good day” can be a great icebreaker.  It’s a fairly universal gesture to point to your camera and extend your arm gently toward your hopeful subject to inquire, “Is it okay if I take your picture?”  Just as happens in our home countries, a subject may say no, but most of the time people are happy to be photographed if you are polite, respectful, and try to interact with them first.  A trip leader, guide, or local friend can often be a great help by introducing you to the person you’d like to photograph.

Turkey

At the start of our trip through Turkey, I asked our trip leader to introduce me to people we felt would be good portrait subjects.  With his help I was able to overcome the language and cultural difference and capture this striking portrait of an employee at a carpet weaving cooperative.  Buy this photo

    • How close is too close?: In most situations it is fine to make an image that includes a large group of people, none of whom will be too prominent in the photo.  For close-up images, though, in which an individual person or small group of people will be the obvious subject, it is best to ask first.
    • Money matters: When there is a commercial transaction between you and your subject, it often paves the way to ask to make their portrait.  I’ve had good experiences photographing local street vendors, musicians, artisans, and shopkeepers after purchasing their wares or tipping them for their services.  And of course it is usually fine to photograph singers, dancers, and musicians in a performance you have paid to attend, as long as local rules about photography are obeyed (sometimes you will have to pay extra for a license to photograph, and frequently flash is not permitted).  But it can become a slippery slope when people begin to expect to be paid just for having travelers photograph them.  In Peru we had many people, including young children, dress in traditional costumes and approach us to pose in photos for money.  In an Argentinian mountain village we were even asked to pay to photograph a gentleman’s Saint Bernard dogs.  In these situations, you’ll have to exercise your best judgment.
    • When can you shoot first and ask questions later?: It’s rare, but on occasion you will encounter situations when the “decisive moment” will be lost if you ask for permission to shoot.  This is another judgment call.  Just like when shooting street photography at home, I consider several factors when deciding whether to make an image of a stranger in a different part of the world.  When I do see an amazing expression, gesture, or moment and decide to capture it before getting to know the subject, I will usually approach them and show them the image on the camera’s display, attempting to query whether it’s okay.  A smile and an easygoing, open gesture can help when approaching.  If the response is clearly negative, I delete the image on the spot and in front of the subject. Again, see the Golden Rule, above, and keep in mind that courtesy and respect make all the difference.

Cuba

This was one of those situations when I shot first and asked questions later.  The proprietor of Maria’s Cafe in an eco-village in Cuba’s rural Vinales Valley was standing on a balcony above the cafe surveying the activity below.  I loved the way her contemplative expression and relaxed gesture were framed by the saturated Caribbean colors of the doorway, so I made this image right from our table.  Later, when Maria came down to talk with customers, I showed her the photo and she was pleased with it.  Buy this photo

Beyond these general guidelines, there are local variations.  Do get to know the customs that prevail in the countries and regions you plan to visit.  For example, in some cultures it is acceptable to stand very close to others when conversing, while in other cultures the social boundaries are much more pronounced.  Sometimes it is fine to approach a child directly, but in other cases the first contact should be made with the parent or teacher.  There’s quite a bit of local variation in the amount of small-talk people engage in before getting down to business.  Knowing the local customs not only helps you make better portraits of the people you meet, but will also encourage deeper interactions and mutual respect.

In my experience, the camera is a wonderful bridge that enhances, rather than detracts from, making meaningful cultural connections with people while traveling.  Just try to do it the right way!

Want to read other posts about what to shoot during your travels?  Find them all here: http://www.to-travel-hopefully.com/category/travel/shoot/

Do you have a good story to share about your experiences, positive or otherwise, in photographing people you met during your travels?  What’s your approach to making portraits while abroad?  How has photography enhanced your cultural interactions?  Please post your thoughts in the comment box.

Top Tips for Great Travel Images [Encore Publication]: These five simple “hacks” will result in more professional images

Festivals and street fairs can be challenging to shoot due to backgrounds cluttered with people, buildings, and cars.  To make this portrait of grandmother and granddaughter at Carnaval San Francisco, I got down low so that most of the background was covered by the cloth of the costume, and I used a wide aperture to throw the hectic street scene into soft focus.  Buy this photo

The web is positively overflowing with “life hacks,” simple tips and tricks to save us all time and effort and to achieve better results.  Some lists are better than others, but it is in the spirit of these lists that I bring you this compilation of five simple travel photography hacks.  These techniques are not difficult and do not require expensive gear.  They work equally well for your photography whether traveling or at home.  And I promise that if you follow them, your images will improve.  The pros do these things almost automatically; to them, it’s hygiene, like tooth brushing.  If you read no other post about photography, read this one.

  1. Avoid cluttered backgrounds: So often the travel images of a professional stand out from those of amateurs simply because they took careful notice of what was in the background while composing the shot.  Try to frame your subject against a clean backdrop such as a dark-colored wall or the sky.  If there’s no way to avoid including some clutter in the background, at least use a wide aperture (low F-stop number) to throw the background into soft focus.
  2. Watch your horizon: Frequently, we’re so intent on composing the main subject within our viewfinder that we forget to check whether the camera is level before firing the shutter.  An uneven horizon can give the impression of vertigo, like the subject is going to fall out of the frame.  Some cameras have a virtual horizon function to show you whether the horizontal and vertical axes are level, but whether you use it or not, be sure to check visually that the edge of the image looks correct.
  3. Achieve sharp focus: The one characteristic of an image that even the most inexperienced viewer can identify immediately, and one that’s almost impossible to fix in post-processing, is poor focus.  Today’s cameras are so easy to use that we often overlook this most basic element.  The camera can’t know for sure what subject you intend to have in focus; it can only make its best guess.  So take the extra fraction of a second while composing your image to move the camera’s focus point onto the main subject.  Or use a small aperture (high F-stop number) to provide a wide depth of field so that essentially everything is in focus.
  4. Choose the correct exposure: Another very basic element of any photograph, exposure can only be correctly chosen by the photographer, not by the camera.  Your camera’s Auto mode can be fooled very easily by many tricky situations, most commonly by backlighting of the subject.  It’s fine to use the camera’s guess as a starting point, but nearly every camera (including smartphone cameras) have a way to manually override this guess, so learn how to do this and add in about a stop or so of extra exposure if your subject is backlit, more if the backlighting is severe.
  5. Turn off the darned flash: Nearly every camera has a mode where it fires the flash automatically if it determines the extra light is needed.  This is rarely a good thing.  Far better to turn off the auto flash setting and make your own decision about when to use the flash.  Otherwise, your low-light images could end up with an eerie, unnatural color cast or your far-away subject could be underexposed (a flash typically lights an object only a few feet away from the camera, so why fire the flash when you’re photographing an object hundreds of yards or even miles away?).  Worse, if you are shooting through glass or another reflective surface, your flash reflects off the surface, ruining your whole image.  Worse still, your flash may blind everyone else near you in a very dim setting, damage sensitive artwork, or scare or anger nearby wildlife.  I’ve seen countless visitors ejected from museums, zoos and aquariums, and other wonderful destinations because they hadn’t figured out how to override their camera’s auto flash setting.  Just turn off the darned flash, and use it manually when appropriate.

Learn these simple techniques and follow them whenever you shoot, and you’ll start making images that stand out from the crowd.  Remember, you, and not the technology inside your camera, are the creative force behind your images.

While this image of a yurt in the remote mountainous region between China and Tajikistan succeeds in spite of (or perhaps because of) the off-kilter horizon, it serves as a good reminder to check the horizons at the edge of our photos.  Buy this photo

What are your favorite tips and tricks to ensure you make the best images possible?  Please share here!

Want to read more posts about photographic techniques?  Find them all here: Posts on Techniques.

Focus on Edinburgh [Encore Publication]: Ancient and modern, Scotland’s capital city offers great architecture, museums, and more

At the end of our two-week hiking adventure in Ireland, we added a stop in Edinburgh for a family visit.  Ancient and modern at the same time, Scotland’s capital offers a wide range of experiences for the traveler, and a wide array of subjects for the travel photographer.  From architecture to museums, castles to palaces, glorious views and creative contemporary cuisine, this city has become a world-class destination.  Here is a brief photo essay capturing some of our experiences there.

The main attraction, dominating the city from its high central vantage point, is the ancient Edinburgh Castle.  It’s an easy walk from the center of town up the hill to tour the castle.  On the way up, a variety of interesting views of the castle unfold.  Try different lenses and compositions to take advantage of the many moods of this place.

Edinburgh Castle towers above the city center and offers a variety of different perspectives for the photographer.  Here I’ve shot from halfway up the hill using a telephoto lens and polarizing filter to isolate this one portion of the edifice and to enhance the stonework and the sky.  Buy this photo

Edinburgh’s Royal Mile stretches from the Castle down to the Palace at Holyrood House.  It’s easy to see this street as a shopping mall jammed with tourists, but it would be a shame to overlook the stately old architecture and the little closes (alleyways) off the main street.

To make this image along the Royal Mile, I chose an unusual perspective and used a medium telephoto lens to align the different colors, textures, and angles of the statue with the cathedral.  Buy this photo

Edinburgh is changing.  During several visits over the decades, I’ve heard many a bagpiper playing in the center of the city, but this is the first time I’ve met a female piper.  She was happy to pose for a portrait.  Buy this photo

Brightly painted façades lend a splash of color to the old stone architecture in this lovely neighborhood.  Buy this photo

Scottish food has also evolved a great deal in recent years, with several restaurants serving contemporary takes on traditional Scottish dishes.  Nowhere is the ambiance nicer than at the Witchery by the Castle, along the Royal Mile.

To capture the lovely interior of the Witchery, I used a fast normal lens and a high ISO setting.  This scene was lit entirely by candlelight and a few sconce lights in the ceiling.  Buy this photo

Revisiting Edinburgh Castle on our second day, I wanted to shoot it from a different perspective at a different time of day.  During post-processing I decided that a black-and-white rendering of the image would highlight the austere tone of the castle.  Buy this photo

Edinburgh has a proud literary tradition, from Burns to Scott to Stevenson.  The city’s literature museum, while small, is worth a visit.

I couldn’t resist capturing this display sign in the Writers’ Museum highlighting the Stevenson quote that graces the name of this website.  For more on the importance of this quote to the development of my passion for travel and photography, please see this page: About To Travel Hopefully.

At the other end of the Royal Mile from the Castle lies the Palace of Holyroodhouse.  This is the Queen’s official residence when she’s in Scotland, and its tour is first-rate.  While photography is not allowed inside the lovely palace, it is okay to photograph the stately and much older abbey adjacent to the palace.

Again here, I tried to seek out an unusual perspective in this shot of the abbey at Holyroodhouse.  I shot upward with a wide-angle lens, using spot metering to expose for the stonework and a small aperture to provide broader depth-of-field.  Buy this photo

I made this portrait of our daughter with two of her friends from university by stepping back and framing them using a medium portrait lens.  I chose a medium aperture to ensure sharp focus on the subjects while also keeping the façade of the abbey reasonably sharp.  Buy this photo

Behind Holyroodhouse is a hill towering above the city.  A short but fairly strenuous hike leads to Arthur’s Seat at the summit.  From the summit there are glorious views over the whole of the Edinburgh area.  This image of the Palace at Holyroodhouse was shot from partway up the hill.

A view of Holyroodhouse from partway up the hike to Arthur’s Seat.  A polarizer helped bring out the drama in the sky and the saturated green of the lawns.  Buy this photo

On our final evening in Edinburgh, we dined on exquisite contemporary Scottish cuisine at the Tower Restaurant.  Sitting atop the Scottish National Museum, this spot has marvelous views over the city to the castle.  The view shown in this image was just as marvelous.

To photograph the beautifully plated trio of smoked Scottish salmon accompanied by a glass of old single malt whisky, I shot from above using a touch of off-camera flash to balance the ambient light of the restaurant.  I used a diffuser on the flash and bounced the flash off the wall to soften its light.  To learn more about food photography, check out this post: Post on Food Photography     Buy this photo

Scottish traditional music is alive and well and performed almost every night at Sandy Bell’s Pub.  This portrait was made using my favorite portrait lens set to a wide aperture, with a high ISO setting on the camera.  The shallow depth of field throws the whistle player into soft focus, so the emphasis in the image is placed on the fiddler.  Buy this photo

Have you visited Edinburgh?  What are your favorite spots there?  What experiences should a photographer be sure to seek out?  Please leave your comments here.

Want to read more posts about travel photography destinations?  Find them all here: Posts on Destinations.

I See a Red Door and I Want to Paint It Black [Encore Publication]: When a black-and-white image is better than color, and how to convert to B&W

Back in the day, a photographer had to choose in advance whether to shoot with color film or black-and-white film.  Conversions from color to B&W were cumbersome and expensive, and conversions from B&W to color were essentially impossible.  During the film era, I typically shot exclusively using color transparency film while traveling, and reserved B&W photography for particularly artistic shoots near home.

Thankfully, in today’s digital world, we no longer have to commit ourselves in advance to monochrome vs. color images.  It’s now a simple procedure to convert our color images to B&W during post-processing.  And that’s a great blessing, because there are plenty of times when a black-and-white photo is better than a color photo.

Consider the image of the alligator at the start of this post.  One of my favorite photos, this one works just fine in color, too.  But the real power of the image is revealed in B&W through the striking textures of the alligator’s skin as seen above the water and as reflected off the water’s surface.  The background above the water fades to a deep, nearly true, black, with the background of the water itself rendered slightly less darkly and showing some nice ripples of motion.  Black-and-white photography is especially powerful when there are contrasts of pattern, texture, and background as in this image.  Buy this photo

When else might we want to render an image in B&W?

Portraits made in monochrome have a timeless look that evokes the earlier years of photography, and this rendering can also bring out the true nature of the subject.  There’s a lovely look to the skin tones and hair when displayed in B&W, and there are fewer distracting elements from the color of clothing or background objects.

This portrait takes on a vintage, timeless look when shown in B&W.  Our eye can focus on the model’s face and hair without the distractions of the colors in her sweater or the building.  There’s almost a street photography kind of documentary quality to this image in monochrome that is lost when viewed in color.  Buy this photo

Color can be distracting in an image where we want to emphasize the essence of a person or place.  In this portrait I made recently for a couple who are fellow musicians and friends of mine, we had beautiful “golden hour” light to work with, and the background and clothing worked well in color.  But converted to B&W, this image really places the emphasis on the couple without the distractions of the color cast in the reflections off the eyeglasses or of the mixed lighting in the background.

In this portrait, black-and-white presentation places the viewer’s attention squarely on the the couple and their instruments, without distractions from the multiple colors of the clothing and background components.  (Client photo not available for purchase.)

When you’re shooting under “mixed lighting”, which means there are multiple light sources with different color temperatures (i.e., some light sources are warmer and others are cooler), converting the image to B&W can be a real problem solver.  Consider the image below, made in Bruges at night.  The light from the street lamps was warmer than the light coming from the spotlights on various buildings, and there was also a bright moon that night, so when seen in color the photo would look less appealing due to the contrasting of the color temperatures in the different parts of the image.  But viewed in B&W, it brings out the grandeur of the old buildings and the beauty of the reflections in the waters of the canal, without the distractions of the color casts.

This image of Bruges at night, when processed in B&W, removes the contrasting color temperatures of the multiple different light sources and allows the viewer to enjoy the stately old buildings with consistent tone and texture.  Buy this photo

Now that we’ve covered a few of the many situations in which a black-and-white image is preferable over a color image, let’s look at how to convert from color to B&W.  There are many ways to perform this conversion, but I recommend it be done using the Color Adjustments settings in the Develop module of Adobe Lightroom.  Here’s how:

Click on the “B&W” tab above the individual color channel sliders, and then adjust the mix of how the colors are blended by increasing or decreasing each color’s slider to see how the black-and-white image looks.  I find that I often have to readjust the contrast slider at this point to get the image looking its best in black-and-white.

For more on using Lightroom to post-process your images, check out my previous post: Previous post on using Lightroom to post-process images.

I do not recommend using your camera’s built-in black-and-white mode, as you will then lose the color information in the image file.  I also do not suggest using the settings some cameras have to make a copy of the image in B&W, because in most cases the camera’s built-in software will not do a very good job of rendering the image in monochrome.  For the best results, either use Lightroom or a dedicated black-and-white conversion application such as Silver Efex Pro 2 from Nik Software, which is available as a plug-in for Lightroom or Photoshop.

Want to read other posts about travel photography techniques?  Find them all here: http://www.to-travel-hopefully.com/category/techniques/

What do you love about a black-and-white image?  When do you convert an image to B&W rather than share it in color?  Any tips or tricks for how to make great B&W photos?  Please share your thoughts in the comment box!


“To Travel Hopefully” News Flash!: I am honored to be a winner of the Peninsula Photography Contest

Dear Readers,

I’m proud to report that one of my images was selected as a winner in the Peninsula Photography Contest. It will be exhibited at the Palo Alto Art Center from May 19 through June 17, and will also be featured in several publications and websites.

The winning image, submitted in the Travel Photography category, is a favorite from my recent travels in Myanmar.  It’s part of a series that depicts the difficult plight of the children of the “Bamboo Village”, an informal housing settlement outside of the capital city of Yangon (Rangoon), where 10 years after the disastrous typhoon struck Myanmar many of the displaced are still living in squalid conditions with little government support.

To me, travel photography is about more than just creating art: it’s also a means to connect with local people, capture a strong sense of place, and advocate for social change and justice.  As readers of To Travel Hopefully, you’ve seen me return to these themes again and again.  So I’m especially honored to have this particular image featured in the Peninsula Photography Contest’s winners gallery, and pleased to have this opportunity to share the image and the story behind it more broadly.

The winning image: “A fascinating visit to an informal housing settlement inhabited by people displaced by the devastating 2008 typhoon. A decade later they are still living in squalid conditions in bamboo huts with no running water. Here, children are filling containers with water from the lake and carrying 40 kg (88 pounds) of water, often more than their body weight, several miles to their families’ homes.”

If you live in or near the San Francisco Bay Area, please come to the show at the Palo Alto Art Center between May 19 and June 17.  Thank you for your ongoing support!

Rock Solid [Encore Publication]: Why you should always have a tripod with you

Tripods have had their ups and down, so to speak.  When photography was in its infancy, the wet plates used to make the images were very slow, so extremely long exposures were required and the cameras were big and bulky, so use of a big, heavy wooden tripod was essential.  It’s all the more remarkable when looking at the incomparable work of Ansel Adams to realize that in order to make these images he had to hike miles up steep mountain trails with a heavy view camera, several big and fragile plates, and an enormous tree trunk of a tripod.  As cameras became smaller and film faster, tripods went out of style except for certain low-light situations for professionals.  Now, more and more enthusiast photographers are recognizing the value of a sturdy tripod for capturing the best possible quality images of landscapes, buildings, and of course night scenes.  In some iconic travel spots, it’s hard to find space to shoot amidst the ocean of tripods.

Sure, they’re heavy and bulky, particularly when we’re hiking or walking for long stretches.  But a good solid tripod is essential for so many types of shots that I now carry one with me at nearly all times.

An example of a technique requiring a tripod even in bright light is high dynamic range (HDR) photography.  To make an HDR image, you shoot a series of photos of the exact same scene in rapid succession, varying the exposure by a little bit between each frame, and then use special software during post-processing to bring out all brightness levels in the image, from the dark shadows to the brilliant highlights.  But if the camera moves at all between the shots, it becomes harder to stitch the shots together into a beautiful HDR image.  I’ve been known to handhold some HDR shots, but I strongly recommend shooting them using a tripod.  Of course, you’ll also want a tripod for low-light and nighttime photography, and they’re very useful for landscape images where the high resolution of your camera’s sensor is called upon to render extremely fine detail throughout the scene.  And let’s not forget that to include yourself in a scene, use of a tripod makes life a lot easier.

Although I was shooting in bright sunlight, I needed a tripod to make this HDR image of Yosemite Valley peaks reflected in the Merced River.  If the camera moves at all between frames, it is harder to combine them into the final photo.  Buy this photo

For most travel situations, you’ll want a lightweight tripod that folds up to a portable size but still offers enough stability for most uses.  There are times, though, when I need to bring along my heavy and bulky professional tripod.  Whatever tripod you choose, be sure to fit it with a good quality head–ball heads provide a lot of flexibility and ease of use for travelers–and remember to take along the plate that attaches the tripod to your camera, if required.

My go-to lightweight travel tripod is the Manfrotto Be Free.  It folds up to an incredibly small size yet affords a surprising amount of stability.  The included ball head works well but is difficult to adjust for sensitivity.  This tripod is designed to fit into a specially designed pouch in my favorite travel photography backpack, also made by Manfrotto.

The SLIK 615-315 is a great tripod for use close to home or on trips where you will have constant vehicle support.  It’s very solid, supports a tremendous amount of weight, and can be adjusted for nearly any shooting situation.  I recommend you fit it with a good ball head for maximum flexibility.

A monopod can be a real problem solver when you need more stability than handholding or resting your camera on a vehicle or table will afford, but you can’t carry or use a full tripod.  I use the Manfrotto 681B model.

To be sure, if you know 100 photographers, you’ll hear 110 different opinions about tripods and the heads and plates that go with them.  The products listed above are my recommendations only, but I’ve had good experiences using them.  For those with a lot more money to spend, tripods and heads made by Really Right Stuff are much beloved by professional and well-heeled enthusiast photographers.

What combination of tripod, head, and plate do you use, and why?  Please share your recommendations here.  Tripods are one piece of gear with which we’re constantly experimenting, so bring it on!

Want to read more posts about photography gear?  Find them all here: Posts on Gear


“Building” Your Portfolio [Encore Publication]: Architecture gives local flavor and makes a great subject for your photography

Travel photography is exciting in large part because it encompasses all types of subjects.  In a single day while traveling, we may have the opportunity to shoot landscapes of the scenery around us, portraits of the people we meet, wildlife images of the fauna in the region, night images after the sun goes down, and photos of the local architecture.  I’ve already covered how to shoot most of these subjects in previous posts.  Today we’ll focus on how to make compelling images of architecture, which includes both the exteriors and interiors of the buildings we encounter.

For architectural photography, it is essential to carry a good wide-angle lens.  While I’m a big fan of prime (fixed focal-length) lenses, architecture is one subject where a zoom lens comes in very handy.  That’s because it can be difficult to change our vantage point when shooting large buildings in crowded urban environments.  And when photographing buildings, the widest end of the zoom range should be quite wide, indeed.  I recommend a lens that can zoom out to 16mm (for full-frame cameras) or even wider.  The lens doesn’t have to be particularly fast, because buildings do not tend to move quickly and we can use a tripod to steady the camera for longer exposure times, but it must be of very high optical quality for architecture photography.  Cheaper wide-angle lenses are prone to several kinds of distortion that can lend an unprofessional appearance to photos of buildings.  I recommend ponying up for a good professional quality wide-angle zoom lens with a range of somewhere around 16-35mm, or even a fast 14-24mm lens if you have the budget for it.

I use the Nikon 16-35mm f/4 lens for architecture shoots.  It’s got great image quality and is very solid and well built, but at f/4 it is not super fast, and it is rather heavy and bulky.

When shooting the exterior of a building with a wide-angle lens, we need to make an effort not to distort the lines of the building or its surroundings.  A wide-angle lens, especially when pointed upward, has the tendency to exaggerate features so that parallel lines appear to be divergent.  If you have the option of moving to a higher vantage point so you can shoot parallel to the ground instead of upward at the subject, this distortion can be greatly reduced.  But for those frequent situations when you have no choice but to look up at a building from the street level, try to zoom out so that the entire subject can be included in the frame without pointing the lens too far upward.  This image of a stately old building in Buenos Aires was made with the camera pointed nearly parallel to the ground so that even though a very wide focal length was required to fit the building in the frame, there is relatively little distortion of the perspective.
When using a wide-angle lens from street level, try to keep the camera pointed parallel to the ground to avoid severe distortion of the building’s lines.  Buy this photo

In contrast, the next image was shot from a vantage point at the same elevation as the subject, the world’s northernmost church.  I climbed a snowy hill in front of Svalbard’s chapel to attain the same height as the center of the building, so that I could hold the camera exactly level to the ground and still include equal amounts of the church above and below the center of the image.  This minimized the distortion and resulted in a more natural rendering of this fascinating building.

To make this photo of Svalbard’s church, I chose a vantage point at the same elevation as the midpoint of the building, minimizing distortion.  Buy this photo

I like to seek interesting colors and recurring patterns in architecture.  The miners’ houses in Svalbard made an intriguing subject because they were lined up in an even line of identical structures, but they varied in color.  To make the image more compelling, I moved across the street and shot with a moderate telephoto lens (65mm) to compress the scene and make the houses appear closer together.  I based the exposure on the light reflected from the paint on the houses, so that the snow in front of and behind the buildings was nearly blown out.  In post-processing I increased the vibrance slightly to bring out the bold colors in this scene.

Look for architectural scenes featuring interesting patterns and colors, such as this view of miners’ cottages in Svalbard surrounded by snow.  Buy this photo

Sometimes the most effective images of architecture hone in on the details rather than including the whole of the building.  I’m always on the lookout for a characteristic or unusual feature of the buildings around me. In New Orleans’s French Quarter, I framed this shot of a lovely wrought iron balcony using a long telephoto lens so that only this one feature of the building was included.

Zoom in on just the most characteristic or compelling features of a building to make an arresting image of the details rather than the whole building.  Buy this photo

Shooting interiors of buildings poses some of the same challenges as shooting their exteriors.  In particular, since a wide-angle lens is most often required and is frequently pointed upward, it is important to look at the edges of the viewfinder to try to minimize distortion of the building’s lines.  To make this wide-angle image of the inside of a grand mosque in Istanbul, I kept the camera level using a tripod and the camera’s virtual horizon function.  There was still a good deal of distortion around the edges of the upper part of the scene, but I was able to control this to some degree by adjusting the images perspective using Lightroom software during post-processing.

This image of the interior of a mosque in Istanbul shows some distortion, but I was able to keep it under control by shooting level to the floor and adjusting the vertical lines using post-processing software.  Buy this photo

Do you have tips for shooting the interiors and exteriors of buildings?  Please share them here.

Want to read more posts about how to capture amazing images while traveling?  Find them all here: Posts on What to Shoot.

Luck Favors the Prepared [Encore Publication]: Tools for planning your shot

It was Louis Pasteur who said, “Fortune favors the prepared mind.”  We usually hear the quote paraphrased as, “Luck favors the prepared.”  For travel photographers, there is often a great deal of luck involved in capturing a truly great image, but there are some very useful tools that we can use to help us plan to be in the right place at the right time with the right gear.  Let’s look at just a few of my favorites.

I’ll start with a quick review of the most obvious resources.  I would never plan an hour-long photo shoot, let alone a month-long trip to a far-flung travel destination, without doing some research.  What are the must-see locations, and what dates and times of day are perfect for each one?  What are the events or activities that most authentically represent the locations I am visiting?  Is there a livestock market, a street festival, or a religious celebration taking place while I’m in the region?  How can I build an itinerary that best incorporates all of these locations?  Great resources for this type of research include guidebooks (online and hardcopy), online review sites such as Trip Advisor and Yelp, mapping and navigation apps (Google Maps is still my all-around favorite, but several others have their own advantages), and local weather sites.  I like to build my itinerary by customizing an online map to show all of the locations I’d like to visit, then creating a routing that links the locations in the proper order.  If travel by air, rail, bus, or boat is involved, I research those schedules and fares to determine the best way to get from one place to the next.  Airline consolidation sites such as Orbitz can be quite helpful for finding the best flights at the best prices.  If the itinerary has been pre-planned by a travel company, then I will still do most of this background research to better understand the locations we’ll be visiting.

Once I know where I’ll be going and what events I plan to shoot, I develop a shot list.  Some photographers craft very detailed and specific shot lists, but I like to keep it quite flexible and informal, often simply jotting down my ideas in the calendar event on my phone that is associated with each planned shoot.  After all, if I adhere too closely to a shot list, I will just end up with the same images that hundreds or thousands of other visitors have captured after doing the same research.  Serendipity and the artist’s eye have their place in travel photography, too.  The research phase can also inform me as to what clothing, gear, and other essentials I should bring to each location.

Now I’d like to introduce three smartphone apps that I consider indispensable for travel photography.  First, there’s Photo Pills, an app that incorporates several essential tools into one package.  I use Photo Pills for planning shots where I need to know how to get all the elements, including location, date, and time of day, to come together.  For example, during the Perseid Meteor Shower, I wanted to find a dark sky location with a nice foreground and a view toward the galactic core of our Milky Way.  This way, I could capture images including the meteor shower, the Milky Way, and the pretty landscape in the foreground.  I had a location in mind, a beautiful spot where there isn’t too much light pollution and with a gorgeous view over a reservoir and the Santa Cruz Mountains.  The Planner tool in Photo Pills allowed me to visualize the foreground as viewed by my phone’s camera, superimposed against the Milky Way as it would appear on different days and times of day.  I planned the shot for a certain time on each of several consecutive days, confirmed that the Milky Way would be rising in the desired direction and that the nearly full moon would have already set, and then waited for clear weather.  The first night of the meteor shower was cloudy, but the second night was the charm, and I was able to capture this striking image.
Using the Photo Pills app on my smartphone, I was able to plan in advance for a location, date, and time that would maximize the chances of capturing the Perseid Meteor Shower and Milky Way over the lovely Crystal Springs Reservoir.  Buy this photo

Here’s a screenshot of the Planner tool in Photo Pills that I used to prepare for this shoot.

img_3452

The Photo Pills app has a number of tools to help plan and execute your shots.

Another useful app for planning the best locations, dates, and times for your shoots is TPE (The Photographer’s Ephemeris).  I find this tool to be especially helpful for visualizing the path of the sun and moon across the field of view for any location I select.  This app is very powerful, and I have only scratched the surface of what it can do to predict and prepare for photo opportunities.

img_3453

The Photographer’s Ephemeris (TPE) is a powerful tool for planning any outdoor photo shoots.

A final app I will mention here is called Easy Release.  Sometimes (read this post for details about model releases), we need a model release when a person or several people are clearly identifiable in a photo.  I know some photographers who carry hardcopy model releases with them wherever they travel, but I find this to be cumbersome and impractical when on the road shooting.  Instead, I use Easy Release on my phone, so I’m always ready to quickly prepare a release for a new friend to sign when they appear in my images.  Even though the app has the ability to translate the text of the release into several languages, there are situations in which it isn’t reasonable to try to explain to a local person what’s in the release and why it’s required.  Furthermore, I consider it to be exploitative if the person can’t reasonably be expected to understand what’s in the document or why they should be signing it.  But there are times when having immediate access to a model release that can be prepared, signed, and stored right on my phone is a big advantage.

img_3454

Easy Release is a convenient tool for creating, signing, sharing, and storing model releases when a person is clearly identifiable in photos.

With proper planning using readily available resources and various apps including the ones I’ve presented here, we can be better prepared to maximize our chances of capturing memorable images.  Happy shooting, and remember that luck favors the prepared!

Do you have a favorite tool you use to plan for your photo adventures?  How have you used this tool to get your shot?  Please share your experiences here.

Want to read more posts about tools for planning your travel photography?  Find them all here: Posts on Planning.

New Year’s Resolutions [Encore Publication]: My opinionated list of the top 5 promises all travel photographers should make and keep

Personally, I’m not a big fan of new year’s resolutions.  Common sense dictates that if we really want to make change in our lives, we should resolve to take specific steps toward that change every day.  Promises we make on December 31 each year will most likely be broken by January 15.  That’s certainly what I’ve observed over many years on the running trails and gyms where I’ve run or worked out daily.  A huge surge in attendance begins on January 1 and dissipates within about two weeks.

So I waited a couple of weeks to share my thoughts on what we travel photographers should resolve to do differently.  Since these aren’t technically “new year’s resolutions,” it’s my hope that these practices will stick.

  1. Book that once-in-a-lifetime trip now:
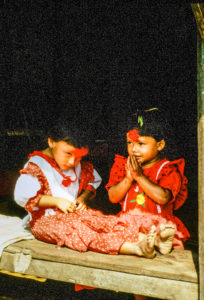
    Visit that exotic destination you’ve always wanted to see!  Buy this photo
    That travel photography “bucket list” needs to be emptied before you kick the proverbial bucket.  I know too many people who always found excuses to put off taking the trips they most desired, until it became too late for them.  The kids are too young, my job is too demanding right now, I can’t afford the cost.  I’ve made these excuses, too.  But the one thing we can’t live a full life without and can’t ever lose once we’ve attained it is experience.  Every trip I’ve taken helped me grow as a person and as a photographer, and also helped me grow closer to my family and other travel companions.  So book that trip today and go this year.  You won’t regret it.
  2. Just get out there and shoot:
    USAThere are countless exciting subjects for your photography within a few miles of your home.  Buy this photo
    Even professional travel photographers can’t be on a lengthy shoot in an exotic part of the globe all the time.  So, book those once (or a few times) in a lifetime trips as soon as feasible, but in the meantime find some wonderful local attractions where you can hone your craft by making compelling images.  I love to shoot little-known local cultural events such as street fairs and performances of dance, theater, and music.  It’s also a great pleasure to find scenic spots near home where we can make some striking landscape images that haven’t been shot thousands of times before.  Remember, you’re the local expert near your home, so seek out frequent opportunities to shoot in your own community.
  3.  Learn to use your camera as a tool to bridge the gap between your culture and the culture of the land you’re visiting:
    CubaPhotography can bring us closer to the people we meet on our journeys.  Buy this photo
    Instead of letting your photography separate you from the people you’ve come to learn from, resolve to turn your image-making into an opportunity to meet more people and get to know them more deeply.  Check out my pillar post on how to do this: Post on Photography as a Cultural Bridging Tool.
  4. Approach wildlife with respect:
    The more we learn about and respect the fauna we encounter during our travels, the healthier they will emerge from the experience (and the better our images will turn out).  Buy this photo
    A photo safari is a life-changing experience and should be on every travel photographer’s list.  But just as our cameras can be used either to alienate local people or to bond with them, so can photographing animals be used to harm them or to respect and help preserve them.  Read this post for more detailed tips (Post on Wildlife Photography), but in the meantime I will summarize by emphasizing the importance of prioritizing the animal’s welfare ahead of our desire to get an amazing shot of it.  Getting too close to wildlife will stress the animal and could even cause it to become lunch (or cause a predator to starve by losing its meal).  The more we get to know a species’ behavior before encountering it in the wild, the better our images will be and the healthier the animal will emerge from the encounter.
  5. Continually improve technique:
    I strive to hone my technique with every shoot.  Buy this photo
    There are more important elements in photography than technique, but a mastery of technique does help us make the images we want, so I always work to improve mine.  If you haven’t already gained the confidence to shoot in manual mode, start learning now.  Remember that while cameras have become very smart, they aren’t artists and they can’t know what the photographer is trying to achieve, so learn to take control of your camera’s settings today.  Here’s a short post listing five key techniques that will help your images stand out: Post on Top Five photography “hacks”.

So, resolve to take that trip of a lifetime, shoot locally while you’re waiting for it, learn to use your camera as a tool to interact beneficially with the people and the wildlife you meet during your travels, and work to hone your technique.  I’ll be doing the same!  Happy trails in 2017.

What do you resolve to do in 2017?  Please share your thoughts here.

Total Eclipse of the Heart [Encore Publication]: Techniques for photographing solar eclipses

Dear Readers:

With the Great American Eclipse coming up in just a couple of weeks (it’s on August 21, 2017), I am republishing this popular post on how to shoot a total solar eclipse.  If you have not yet booked your trip to a spot along the path of totality, now is the time to do it!

Kyle

Prof. Jay Pasachoff and his student set up scientific gear for observing the total solar eclipse in Svalbard in 2015.  Buy this photo

If there’s a more thrilling experience anywhere on our planet than observing a total solar eclipse, I’ve not yet found it.  The experience of observing the moon slowly move in front of the sun, obscuring our view of the sun one nibble at a time until day turns into night, the temperature drops, the stars come out in the middle of the day, and the delicate corona of the sun is exposed, is like nothing else we earthlings can feel.  An eclipse is a singular event, each a bit different from any other that has ever occurred, and an exclusive event that often can be observed only from a narrow swatch of land and in very remote corners of the planet.  I’ve stood in the umbra (shadow) of the moon during three total solar eclipses thus far in my life: first in Virginia Beach in the USA when I was 7 years old, then in the mountains above Anji in China in 2009, and most recently in 2015 in Svalbard well above the Arctic Circle.  I plan to be in Salem, Oregon in the USA on August 21, 2017 when the next total solar eclipse occurs.  These events are truly life-changing, and once you’ve experienced an eclipse you will want to seek out others.

Photographing an eclipse takes all of the normal challenges of travel photography and throws a few special ones into the mix.  To start with, an eclipse can take place anywhere on the planet, and often the best location from which to view one is very remote with little or no travel infrastructure.  The eclipse I experienced in 2015 in Longyearbyen, high in the Arctic on the island of Svalbard, was a transformative event, but the extreme cold coupled with the lack of infrastructure made getting there and photographing the eclipse a special challenge.  And of course, during an eclipse the already challenging conditions are stressed even further due to the tremendous crush of visitors who rush in from all over the world to try to view the solar event.

I recommend you travel with an expert in managing the complicated logistics required to stage a successful eclipse trip.  I always go with A Classic Tours Collection (https://aclassictour.com/solar-eclipse-tours/).  Run by travel logistics guru Mark Sood and with scientific consulting from Professor Jay Pasachoff, a world expert in eclipses and the human being who has stood in the shadow of the moon more times than any other, this company has delivered an unprecedented track record of successful eclipse trips since 1980.

Special challenges in photographing a total solar eclipse, like this one in Svalbard in 2015, include remoteness, lack of infrastructure, extreme conditions, the risk of poor weather, and the need for specialized photographic gear.  Go with an expert or risk missing the action.  Buy this photo

Assuming you are able to get all the right gear to the best possible location to observe the eclipse, and then the weather cooperates, the actual technique required to capture remarkable images of this phenomenal event is fairly straightforward.  Here’s what you need to do:

Gather the right gear.  You will need at least one (and I prefer to have two) DSLR or mirrorless ILC camera bodies with a long telephoto lens or two.  I use a Nikon D810 with a Sigma 150-500mm super-telephoto zoom lens.  For each lens you will need a specialized solar filter to block 99.999% of the sun’s light to enable you to shoot the sun safely during the partial stages of the eclipse.  The solar filter blocks much more of the sun’s light than a standard photographer’s neutral density filter, so don’t try to find this item at your local camera shop.  Instead, you will need to order it from a specialized astronomy company such as Thousand Oaks Optical (http://www.thousandoaksoptical.com/solar.html).  Be sure to order a black polymer threaded camera filter in the proper diameter for your specific lens.  Without a properly fitted solar filter on each lens you plan to shoot with, it is not safe for your eyes or for your camera’s sensor to attempt to photograph a solar eclipse.  You will also need a heavy-duty professional tripod with a good ball head and mounting plate to hold your camera and lens steady during the eclipse.  Also be sure to pack a remote shutter release with extra batteries (if required), the tripod collar that came with your lens (if included), a mini flashlight for checking your camera’s settings, extra memory cards, and extra batteries and chargers for your camera.

Super-telephoto zoom lens with tripod mounting collar.  Don’t forget to order a solar filter to fit your lens(es).


Heavy-duty professional tripod.


Remote shutter release.

Test your gear.  Before the trip, test your full setup at home by shooting the sun with your solar filter on the lens, and by shooting the full moon without the solar filter.  These two scenarios will allow you to test your gear in conditions similar to the partial stages of the eclipse and to totality, respectively.

Prepare your gear the evening before the eclipse.  Charge all batteries, format all memory cards, make all camera and lens settings (per my instructions below), and check all your equipment.  Remove the UV filter you ordinarily keep on your lens(es), because they will interfere with the solar filter you will use during the partial stages.  On eclipse day, have in your pocket your flashlight, extra camera batteries, extra remote batteries, and extra memory cards.  It will be dark during totality and you will be excited, so best to have everything well planned in advance and within easy reach on eclipse day.

Configure your camera’s and lenses’ settings in advance of the eclipse.  Shoot in RAW mode (or RAW + JPEG mode if you must have JPEG versions of  your images) using the highest quality setting available on your camera.  I recommend using an ISO setting of 400, and be sure to turn your camera’s Auto ISO setting off.  The exposure changes constantly throughout the eclipse, so I do not recommend manual exposure mode; instead, choose aperture priority mode with the aperture set at f/11.  You may want to choose highlight-weighted metering if your camera has this option; otherwise, select center-weighted metering.  Choose single-frame shooting mode.  I recommend using exposure bracketing to shoot bursts of about 7 frames, each 1 stop (or even 1.3 stops) different from the previous one, so as to capture more of the huge dynamic range in a solar eclipse; this is especially important to do during totality.  Turn off vibration reduction (also referred to as image stabilization), as your camera will be on a sturdy tripod throughout the eclipse.  Set your focus mode to manual, because autofocus will not work during or near totality.  Tape your lens’s focus ring to infinity to be sure it won’t move during the eclipse.  Take a deep breath.  You’re almost ready for the eclipse.

Set everything up at the eclipse viewing site.  Place your camera on the heavy-duty tripod and install your remote control.  Remove your regular UV filter and attach your special solar filter.  As the first contact between sun and moon occurs, start to shoot.  Remember to shoot in bursts of 7 (whatever number of exposure levels you have selected) if you have turned on exposure bracketing.  Due to the rotation of the earth, you will have to recenter the sun in your viewfinder periodically (unless you are shooting through a telescope with an equatorial mount).

This image shows the early partial stages of the Svalbard total solar eclipse.  Shoot periodically during all the partial stages, and remember to reposition your shooting angle so the sun remains in the center of your field of view.  Buy this photo

Remove your solar filter only during the period of totality.  When the diamond ring effect signals the start of totality, and the world around you is suddenly plunged into darkness, quickly take off your lens’s solar filter.  You won’t need it during totality.  The brightness of the sun during totality is similar to that of the full moon, so viewing and photographing the sun during totality will not be dangerous.  This is the most exciting time, and it will last for only about 1-4 minutes, so enjoy the spectacle of the sun’s corona revealed!  Remember to spend some of the time just looking and not shooting.  This is an experience you will want to remember not only through your camera!

For the brief but exhilarating period of totality, remove your solar filter.  This image captures the diamond ring effect that ushers in the period of totality.  The sun’s delicate corona can be seen around the edge of the photosphere.  Buy this photo

Put your solar filter back on after totality.  The partial stages that follow the period of totality, just like the partial stages that came before totality, are not safe to view or photograph without the special solar filter.  Keep shooting those later partial stages because you will want a complete record of the eclipse to show a compelling narrative and to create montages of the images.

Shoot some landscapes and people images, too.  Don’t forget to use a second camera–either a second DSLR or mirrorless ILC body you brought for the occasion or your smartphone’s camera–for landscape and people shots during the eclipse.  You don’t want all of your images to be close-up portraits of the sun and moon only.  You will need a solar filter on the second camera, too, if you plan to include the sun itself in these shots.

Remember to shoot some images, with a second camera, of yourself and your travel companions during the eclipse.  Here’s a shot of my family standing in the umbra during totality at the China eclipse of 2009.  Buy this photo

Return all settings to normal after the eclipse.  You will have made quite a few special adjustments in order to capture the eclipse properly.  Don’t forget to restore your usual settings after the eclipse has ended.

Get creative with your eclipse images once you return home.  There are many ways to compile and share your images to give the world a sense of the thrill you experienced while in the shadow of the moon.

Once home from the eclipse trip, get creative about how to share your experience.  Here I have put together a montage of some of my favorite images from each stage of the Svalbard eclipse.  Using Photoshop, I created a composite image showing the sequence of stages from partial to total and back again.  Buy this photo

This image is a composite of three bracketed exposures combined using High Dynamic Range (HDR) software.  Without HDR techniques, it is impossible to capture in a single image the huge variation in brightness between the sun’s inner corona and outer corona during totality. Buy this photo 

Have you experienced a total solar eclipse?  Photographed one?  Please share your tips and tricks.

Want to read more posts about photographic techniques?  Find them all here: Posts on Techniques.

Wildlife and Safari Gear [Encore Publication]: Basic equipment to capture wildlife while traveling or close to home

Wildlife photography is one of the most exciting and rewarding pursuits I know, but it is also very challenging.  Whether on safari in far-flung wilderness regions around the world or in a park or zoo near home, capturing great images of the local fauna requires plenty of patience, a little bit of luck, and some specialized gear.  This post outlines the basic equipment needed for wildlife photography.

Sometimes we get lucky.  This alligator was seeking what little sunshine was available on an overcast winter’s day on the bayou in Louisiana.  He stayed sufficiently still that I was able to capture this image by handholding a medium telephoto lens from our airboat.  Buy this photo

Occasionally, a critter may scamper, fly, or swim right up to where the photographer happens to be standing, but in the vast majority of cases, if we want to capture a really moving and uninhibited portrait of an animal, we need a long telephoto lens.  Working with “big glass” not only fills more of the frame with the main subject, but it has the added benefit of allowing the photographer to shoot from a vantage point far enough away from the animal so as not to frighten it.  It’s also very important when photographing wildlife that we make every effort to keep the wildlife wild, and using a long lens keeps us at a sufficient distance that the creatures we’re observing are less likely to become accustomed to the sight, sound, and smell of humans.

I like to carry both a medium telephoto and a long telephoto when shooting wildlife, so as to be prepared for a variety of situations.  My medium lens of choice is the Nikon 70-300mm f/4.5-5.6 VR lens.  While this lens is built on aging technology and doesn’t always feel as solid as more professional lenses, it is relatively small and lightweight, fairly inexpensive, and provides a very effective vibration reduction function.  This lens has been a staple in my bag for many years, during which time I’ve used it to capture some of my favorite images.

My go-to long lens for wildlife photography is the Sigma 150-500mm f/5-6.3 lens.  It’s more economical than a Nikon or Canon super-tele, and it produces reasonably sharp images even when used at its widest aperture.  You can spend much more on this type of big glass if you want or need to, but I’ve found this lens works quite well for me.

Lilac breasted roller captured with a 500mm lens in Tanzania’s Kilimanjaro region.  Buy this photo

When shooting far-off and often rapidly moving animal subjects with big glass, it is important to have a good means of stabilizing the camera.  Depending on the shooting situation, I use either a lightweight tripod or a beanbag support.

A lightweight travel tripod is perfect for those situations when you have plenty of space and plenty of time in one place.  I like the Manfrotto Be Free travel tripod.  It folds up to an incredibly small size yet affords a surprising amount of stability.  The included ball head works well but is difficult to adjust for sensitivity.  This tripod is designed to fit into a special pouch in my favorite travel photography backpack, also made by Manfrotto.

For situations when you will be on the move much of the time, such as on game drives using safari vehicles, a beanbag support is extremely useful, as you cannot fit a tripod in a safari vehicle and a monopod is awkward.  The bag can be emptied for convenient travel and then filled with “beans” (usually synthetic) upon arrival.   It is placed on top of the safari vehicle while shooting, with the camera and long lens resting on the beanbag.  While the beanbag that I use is no longer available, this one is well reviewed by photographers and represents a good value.

A sleepy leopard yawns in a tree above the Endless Plains of Serengeti National Park.  This image was captured using a 500mm lens resting on a beanbag support placed on the roof of our safari vehicle.  Buy this photo

With a couple of good telephoto lenses, including one long one, and a couple of good options for stabilizing them, you will be armed with the right basic tools for bringing home truly memorable images of the wildlife you encounter on your travels.  Happy hunting!

What are your favorite wildlife subjects and locations, and what gear do you use to capture them?  Please share your experiences here.

Want to read more posts about photographic gear?  Find them all here: Posts on Gear.

Amazing Landscapes [Encore Publication]: How to make images that capture the spirit of the place

I love landscape photography.  To create a really successful landscape image, several elements have to converge: the lighting must have a pleasing quality, objects in the foreground and/or middle ground should be intriguing, leading lines should take the viewer on a journey through the image, and (usually) the sky must be dramatic and compelling.  I shoot a lot more mediocre landscapes than great ones, but when all the stars align (sometimes literally, during astrophotography shoots) and all those compositional elements are in place, the results can be amazing.

Let’s take a look at some of my favorite landscape images and talk about how they were made.
Buy this photo

While traveling in Svalbard to view the total solar eclipse of March 2015, my wife and I booked a safari via snowmobile to search for polar bears.  We covered 80 miles by snowmobile, much of that after dark.  The temperature averaged -5 degrees, with wind chill about 25 below zero Fahrenheit.  We rode out to an area now used as a campground, where an early settler and his wife lived a century ago.  This was glorious, otherworldly scenery encompassing ice fields, mountains, and the icy Barents Sea.  Svalbard is located so far north (closer to the North Pole than to mainland Norway) that the sunsets last for hours, so I set up my gear at the edge of the Barents Sea, composed the frame so that the eye is led out to the horizon by the slabs of ice and the range of mountains, and waited for the best light.  A polarizing filter added some drama to the sky.  A very long exposure was not necessary because there was no point to trying in blur the frozen water.  I shot several frames before the light became too dim and the temperature too bitter to continue.  This shot was the keeper!

Buy this photo

This landscape was shot during a recent trip through Turkey and is a good example of how sometimes we photographers just get lucky.  On arriving in the Cappadocian village of Üçhisar, we were thrilled to learn our hotel room was inside an ancient cave dwelling.  We awoke at 5:30 AM the next morning to the sight out our cave-hotel’s window of hundreds of hot air balloons launching above the “fairy chimneys” that dominate the Cappadocian landscape.  I got (mostly) dressed and rushed out onto our balcony, set up the camera on the lightweight travel tripod I carried on the trip, put on a wide-angle zoom lens, and started shooting as the sun rose.  I bracketed the exposure but because the light was perfect in this one shot, I did not end up combining multiple exposures into an HDR (high dynamic range) image.  Instead, this shot, one of the first of the morning’s session, was the clear choice.

Buy this photo

Chile’s Torres del Paine National Park is catnip for landscape photographers.  There are so many glorious subjects here that you can go crazy trying to photograph everything.  But Patagonian weather is notoriously changeable, and group travel doesn’t always afford photographers the chance to shoot at the right place at the right time of day with the right weather.  Fortunately, on our second night at the lodge on Lago Gray, I could see all the conditions were lining up for an epic image.  I skipped most of an excellent dinner so that I could set up my gear on the deck: camera with wide-angle lens, polarizing filter, steady tripod, and remote release.  I framed the image with a nice balance between sky, mountains, glaciers, lake, and foreground foliage.  And I started shooting.  I bracketed the exposure with 7-shot bursts, each one stop apart.  Later, in postprocessing, I combined a few of the shots from one burst into an HDR (high dynamic range) image using Lightroom’s photomerge feature.

Buy this photo

Closer to home, Yosemite is another photographer’s dream location.  While hiking to Dog Lake in Yosemite’s Tuolumne Meadows area, a freak hailstorm hit.  Suddenly the sky was hurling hailstones in biblical style and the formerly placid surface of the lake turned black with the force of the pelting ice.  What’s a photographer to do?  Start shooting, of course!  A tripod was impractical under these conditions, so I used a relatively fast shutter speed and shot handheld.  I took a series of bracketed exposures and combined them later using Lightroom into an HDR (high dynamic range) image.  For me, this image works because of the tension between the peaceful foreground of tree trunk and reeds, contrasted with the ominous sky and turbulent water.  The fallen tree and edge of the grasses provide nice leading lines from the peaceful to the violent portions of the frame.

Buy this photo

Another California landscape, this image was shot in the gorgeous Point Lobos reserve on California’s Central Coast.  As sunset neared, I set up camera and tripod right on the beach, shooting down onto the rocks and Pacific Ocean.  I used a neutral density filter to allow a very long exposure so that the water would blur.  I also attached a polarizing filter in an attempt to darken the sky and add drama to the image, but having two filters on the wide-angle lens did lead to some vignetting (the blocking of light at the edges of the photo), which I had to crop out in postprocessing.  This image was made from a single exposure with only minor adjustments to bring out the shadow details and saturate the colors.

Buy this photo

This year’s Perseid Meteor Shower was more active than we’ve seen in many years.  At the peak night of the shower, I headed out to a spot where a break in the trees allows a view over Crystal Springs Reservoir and the Santa Cruz Mountains.  We waited until about 2 AM so that the meteor activity was at a peak and the lights of the nearby towns were no longer bright.  Shooting with a wide-angle lens and a heavy professional tripod, I framed the image to include a pleasing foreground with trees, reservoir, and mountains, with most of the frame covering the dark sky.  I used a star finder app to shoot toward the galactic core of the Milky Way.  I set the camera to make 25-second exposures at f/4 and ISO 1600.  At this focal length, exposures longer than 25 seconds will cause the stars to appear blurry due to the motion of the earth.  And then I just kept shooting, one exposure after another, for nearly two hours.  Four meteors passed through the part of the sky in my image area during this time, and I combined the images that included them into one merged image using a software application called StarStaX.  While I like this image a lot, it could have been improved by finding a darker sky area (the lights from a nearby city caused the orange glow at the top of the mountains) and by bringing out the Milky Way a bit more prominently.  Now I know what to do during next year’s Perseid Shower!

A good wide-angle zoom lens is a must for landscape photography.  Many of the images featured in this post were shot with my Nikon 16-35mm f/4 lens.  It’s got great image quality and is well built, and I find it’s a great alternative (except perhaps for astrophotography where the extra speed is required) to the popular but very expensive Nikon 14-24mm f/2.8.

Want to see more articles on how to shoot travel images?  Find them all here: http://www.to-travel-hopefully.com/category/travel/shoot/

Now I’d love to hear from you!  What are your favorite landscape images, and why?  To what lengths have you gone to capture landscape photos?  Please share your thoughts in the comment box at the end of this post.

2017: A Photographic Retrospective

My first year as a full-time professional photographer has flown by. In addition to major travels to India, London, Oregon (to cover the total solar eclipse), Vietnam, and Cambodia, I also had the opportunity to shoot more than 150 local SF Bay Area festivals, street fairs, performances, sporting events, and breaking news stories.


Travel photography is my primary specialty: I lead photography tours in destinations around the world and place my own images in magazines, newspapers, and travel websites. While not traveling, I freelance for local newspapers and shoot for private clients including musicians, dancers, and theater companies.


My photography website has logged nearly 2 million page views, and I also publish a daily travel photography blog. I was honored to have been named a winner of the prestigious international competition Travel Photographer of the Year and a finalist for National Geographic’s Travel Photography competition. In Salem, Oregon for the eclipse, I delivered a lecture to an audience of 400 eclipse chasers and was interviewed by the New York Times.


It’s been a thrilling transitional year, and I’m very excited to continue my artistic and business growth in 2018. Thank you so much for your ongoing support.


Please enjoy this small sampler of some of my favorite images from the past year!  2017 Year in Review


The Camera Eats First [Encore Publication]: How to make delicious images of local food specialties

A big part of the joy of travel is learning about the local food and drink.  For the travel photographer, local culinary specialties represent a cornucopia of image possibilities.  In this post, we’ll look at some food images and discuss a few tips and tricks to make delectable photos of the victuals we meet while traveling.  Warning: Do not read this post while hungry.

When photographing plated food, it’s best to get in close.  Shoot straight down or at a slightly oblique angle, and always check your background to ensure it is as uncluttered as possible.  Be aware of your focal point and depth of field (how much of the image is in focus) so that the most important part(s) of your image are sharp.

For this photo of a cheese plate in Burgundy, France, I got in close to the subject and chose a small aperture to ensure all the different cheeses were sharply in focus.  Buy this photo

Don’t forget that  specialty drinks are also a big part of local culture.  For example, in Argentina the deep love of mate (pronounced MAH-tay), a local infusion, becomes almost a religious practice.  This image of the mate service engages all the senses with its bright colors, contrasting textures, and suggestion of the smell and taste of the drink. To capture a sense of the Argentinian obsession with mate, I shot this image of the serving of the drink with all its components.  I wanted to include some of the environment around the mate tray as well.  The scene was lit with natural light, which further saturated the bright colors.

Argentina’s national obsession, mate.  Buy this photo

Always be on the lookout for local dishes that are unusual or exotic to our own sensibilities.  This image of the local Peruvian specialty cuy, or guinea pig, has sold well on American and European stock photography sites because the main ingredient is so unfamiliar to our palettes.  I love the saturated colors and the humor inherent in the guinea pigs holding peppers in their mouths.  The ocher wall makes a lovely background to offset the colors of the dish.  To capture this image of Peruvian cuy served during a home-hosted lunch, I got in close as the hostess held up her dish, ensuring that the ocher wall behind was all that was visible in the background.  I chose a wide aperture to slightly blur one of the guinea pigs and the wall.  I used natural lighting with just a kiss of off-camera flash to accentuate the highlights.

 Cuy (guinea pig) is a Peruvian delicacy.  Buy this photo

Sometimes it is the ingredients rather than the final dish that are most interesting.  While on a shore excursion on the Greek island of Rhodes, my family saw these beautiful octopuses hanging to dry in the sun.  After photographing them, we ordered a plate of grilled octopus.  We very nearly missed the sailing of our ship, as the taverna’s cook took her time to grill the dish, but it was absolutely worth it!

Obviously, natural light was the way to go with this image.  I wanted to get in close, but not too tight, so that the lovely Rhodes scenery would be partly visible behind the drying octopus.  I used a medium-wide aperture to slightly soften the background.  Buy this photo

What’s even better than food images?  Portraits of local people making or serving the food!  Here’s a shot of a server holding up a tray of Istanbul’s best baklava.  The background is a bit cluttered, but I like this image for its blending of the beautiful dessert tray with the pride of the man serving it.

Often a street vendor, cook, or restaurant server will be reluctant to have their portrait made but will be happy to pose with their wares.  For this portrait of an Istanbul baklava server, I chose a wide-angle lens and got in very close to the food tray to emphasize the baklava while including the server in the composition.  Just natural light and balanced fill flash were used as lighting.  Buy this photo

Street markets are a wonderful source of travel images.  They tend to be bright, colorful, exotic, and characteristic of the location.  Be aware that some vendors will expect you to buy something if you want to photograph their wares.

I like the contrasting colors in this shot of Istanbul’s ancient Spice Market.  Buy this photo

Nearly every culture around the world has its own version of barbecue, and in my broad and diverse travel experience, it’s all good.  Here’s a photo of whole branzino (Mediterranean sea bass) fish being grilled topside by the captain of our small wooden sailing ship on the Turquoise Coast of Turkey.  It was nearly completely dark, so I lit this image using light from the burning coals and a touch of flash.  A relatively high ISO was required to balance the low natural light with the need for a small enough aperture to keep the whole subject in focus.

Whole fish on the grill aboard a gulet yacht in Turkey.  Buy this photo

Sometimes a local cuisine is all about diversity, such as the Dutch-Indonesian specialty rijsttafel (rice table).  Some presentations of rijsttafel in Amsterdam involve over a hundred different tiny plates, each containing a different food preparation.  To capture this tapestry of tastes, I stood on the bench and shot obliquely onto the table top, including as much of the spread as I could.

Indonesian rijsttafel served in Amsterdam.  Note that in restaurants at night we have little or no control over the artificial lighting, which can sometimes lead to an unnatural color cast on the food.  Shoot in RAW format so you can adjust the color balance during post-processing when you get home.  Buy this photo

I grew up in New England, and after traveling to more than 100 countries around the world I can say with authority that few meals can beat a good old-fashioned New England clambake with lobster.  To capture this iconic image, I shot up close and directly toward the lobster, using a normal lens with a medium aperture.  This allowed most of the meal to be sharply focused, but with some falloff in sharpness toward the edges in order to emphasize the Maine event.  The contrasting colors between lobster, clams, and corn make for a pleasing composition.

A lobster clambake in Maine showcases the contrasting colors and textures of this delicious meal.  Buy this photo

As a parting shot, I’ll leave you with this image of French haute cuisine.  The gloriously prepared and plated fish course at Paul Bocuse’s three-Michelin-starred restaurant made a fun subject because it is whimsical and artistic at the same time.  The available lighting was soft and subdued for artificial light, so no flash was needed.  I shot some closer compositions of just the plate, but preferred this one with some of the table setting included.

Bon appétit!  Buy this photo

What are your favorite food photos?  Do you have tips on how to make food images really pop?  Please share your comments.

Want to read more posts about what to shoot while traveling or at home?  Find them all here: Posts on What to Shoot.

Focus on New Orleans [Encore Publication]: This iconic US city pulsates with jazz, creole, and historic beauty

Some places are magnets that draw us back again and again.  I’ve made at least a dozen visits to New Orleans and each time, I find something new.  It’s an iconic US city that also defies easy categorization.  Home to unique and cutting-edge forms of music, cuisine, and culture, it is also steeped in a grand historic past that evokes France, Spain, Africa, and the Deep South of the US.  Quite simply, there is no other place like New Orleans, and nowhere else do travel photographers find more charismatic subjects.  Here are a few of my favorite images from a recent visit to NOLA, along with a few words about what they depict and how they were made.

Aside from Paris, I can’t think of any other city that has influenced the cocktail more than New Orleans.  Here I captured my older daughter enjoying a classic NOLA libation during dinner on our first night in the Big Easy.  I used only natural light and selected a large aperture to soften the background.  Laissez les bons temps rouler!  Buy this photo

It’s boozy, vomit-filled, sophomoric, touristy, overpriced, and downright awful, but Bourbon Street is a part of the landscape and is worth a quick walk-by.  At night, its neon assault can almost seem romantic.  This shot was handheld using a high ISO setting and a small aperture for greater depth of field.  Buy this photo

The lovely Spanish colonial architecture of the French Quarter cries out to be photographed.  I made this shot of a wrought iron balcony using a telephoto lens and enhanced the color vibrancy during post-processing.  Buy this photo

It’s the tiny cheap eateries as much as the temples of haute gastronomy that keep New Orleans at the top of the list of cities for dining.  Be sure to grab some po’ boys, beignets, or muffulettas at these humbler places, and bring your camera to catch some of the action.  This image of workers in a po’ boy shop was shot from the hip, street photography style, using a high ISO to allow for a quick shutter speed.  Buy this photo

New Orleans is rightly famous for its jazz, which seems to seep through every crack in the pavement of the city and can be heard in places humble or elevated.  None is better than the iconic Preservation Hall.  As with many performance venues, this hall allows photography without flash, but it is always better to ask permission first and to be discrete during shows.  Use a fast lens and high ISO setting to allow a fast shutter speed.  Buy this photo

A short trip outside of the city quickly reminds you that New Orleans is a part of the American Deep South.  This image was shot from an airboat plying the bayous of Jean Lafitte National Historic Preserve.  I metered the exposure on the lush vegetation lining the waterway so as to avoid overexposure from the bright reflections.  Buy this photo

I captured this image of an alligator seeking the sun on an overcast winter’s day by framing tightly around the gator and its reflection.  In post-processing, I cropped to emphasize the symmetry of reptile and reflection and converted the image to black-and-white, while increasing its contrast a bit.  Buy this photo

I’m a big fan of food photography, especially when the plate is as strikingly beautiful as this one served at Brigtsen’s Restaurant.  I framed the shot tightly with a fast prime lens and a wide aperture to reduce the depth of field.  Buy this photo

Wherever we travel, we should make images that bring out a sense of place.  This image of my daughters strolling in the Garden District works because it captures the iconic symbols of this neighborhood–the stately mansions and live oak trees–while being a bit playful and framed in an unexpected way.  And as I’ve said many times, remember to capture your travel companions in some of your shots.  Buy this photo

Have you visited New Orleans with a camera in hand?  Please share your experiences.  Where do you like to visit and what do you like to shoot?

Want to read more posts about travel photography destinations?  Find them all here: Posts on Destinations.

Sweet Release [Encore Publication]: What is a model release and when do you need one?

We photographers are passionate about many aspects of our trade.  We love the artistic expression, that feeling of capturing a special moment that otherwise would be lost to time, even the gear we use to make images.  But one aspect of the trade that few of us–professionals and amateurs alike–enjoy thinking about is the legal side of making and selling images.  And one legal element about which we need to be knowledgeable is the model release.  Unless you never plan to make any images in which any person is recognizable, you should learn what a model release is and when you may need to use one.

First, a disclaimer: I am not an attorney and the advice I provide in this post is not intended to replace consultation with a competent lawyer.  What I provide here is just some practical advice I’ve acquired over the years, in which course I’ve made plenty of mistakes.  And you should also be aware that laws governing when you can photograph a person and how that image can be used vary from country to country and even among states or provinces within some countries.  With these points made, let’s explore the basic concept of a model release and when you may need one.

In the simplest terms, a model release is a legal agreement between a photographer and any person who will be recognizable in images made by the photographer.  It spells out the conditions under which the image can be published and often specifies the compensation to which the model is entitled.  In the US, a valid model release must be signed and dated by the photographer, the model, and a witness.  If the model is a minor child, a parent or legal guardian also must sign.  This agreement protects the photographer against being sued for defaming or cheating the model, but equally it protects the model from being taken advantage of.


When I work with a professional model, like Laura here, I always obtain a signed release before the photo shoot.  This practice ensures she will be properly compensated and protected against inappropriate uses of her likeness, while I and any publisher will be protected against defamation claims by the model.  Having the release means I have more flexibility as to how the image can be used later.  Buy this photo

So, when do you need a model release?  Here are some situations (not an exhaustive list) in which you should have one:

  • A person can be recognized in your image.  Note that personally identifiable information doesn’t derive only from a direct likeness of the person’s face.  He or she could also be recognized from a special feature such as a tattoo or from the context such as a clearly identifiable location.
  • … AND … one or more of the following statements is true:
    • You may wish to sell the image for commercial purposes such as advertising or use in a business’s publicity or promotion.
    • You may wish to enter the image in a competition or contest.  Check the specific competition’s rules; some require a model release whenever a person is clearly identifiable in the photo, while others do not.
    • You may wish to provide the image (even if you’re not compensated) for other people to use in a context you can’t control.  A model release protects you and those who obtain a license to use your image from being sued by the model for using their likeness in a way that they don’t approve.

In contrast, there are plenty of situations in which you don’t need to have a signed model release.  Some of these include:

  • One or many people appear in the image but none is recognizable.  The subjects may be far away from the vantage point or they may all be obscured or facing away from the camera.  As long as they cannot be identified individually, there is no need for a model release.
  • You plan to use the image only for your own portfolio.
  • You plan to use the image only for editorial purposes.  If your photo is published in a newspaper, magazine, or website where the primary purpose is editorial rather than commercial, a release is not required.  Imagine if every reporter had to get a signed release before publishing the likeness of every person appearing in any news outlet.  This would have a chilling effect on journalism, which is a pillar of a free and democratic society.  So in most cases, if your photo will be used for editorial purposes (that is, it will appear in a newspaper or magazine’s news section rather than in an advertising section), then you and the outlet’s publishers don’t need a release.
  • The images can be considered fine art photography.  Photos can be published and sold without express permission from the person appearing in them if the primary purpose is fine art.  In the US, case law upholds artistic expression as a form of First Amendment free speech in most cases.

Kashgar, China
Images with news value, such as this one made of a Uighur girl in Kashgar’s Old Town days before her home was to be demolished by the Chinese government, may be published and sold for editorial purposes with no requirement for a signed model release.  Buy this photo

When you do believe that a model release would be helpful given your intended future use of an image, it is quite a simple task to obtain one.  Some photographers carry printed forms with them so they can ask a subject to sign their release as needed.  I use an app on my smartphone called “Easy Release,” which you can purchase for $9.99 on the iTunes Store: Easy Release app for iPhone.  This app simplifies the process of creating a model release; getting it signed by your model, yourself, and a witness; sending it to others; and storing and managing it for future use.

Because “To Travel Hopefully” primarily treats the subject of travel photography, I want to share my own philosophy when it comes to asking for a model release while traveling.  Even if you understand the laws of the country in which you are shooting, there are potential ethical issues in asking your subject to sign a legal document that he or she probably can’t understand.  You may be able to get the text of the document translated into your subject’s local language, but even then the context of the agreement may not make sense to somebody from a very different culture than our own.  I try to exercise good judgment when it comes to compensating the people I photograph when traveling overseas and to how I use the images later.  You may want to read or reread my pillar post on photography as a bridge to local culture: Post on Travel Portraiture.

Many photographers, models, and publishers misunderstand the conditions under which a model release is or is not required, so there’s a lot of misinformation out there.  Please consider my points here as just a starting point for learning more about this topic.

What are your best practices regarding when and how to use a model release?  Please share your thoughts here.

Want to read more posts about what to shoot while traveling?  Find them all here: Posts on What to Shoot.


More Hassles Coming for Travel Photographers? [Encore Publication]: The airline electronics ban and its likely impact on travel photographers

A polar bear prowls the arrivals hall at Svalbard Airport.  What new horrors will await travel photographers in these troubled times?

The life of a travel photographer is inherently complicated because the cost, fragility, weight, and size of the photography gear we need is incompatible with the rigors of global travel.  I’ve written several times before about strategies for selecting and packing gear so as to take along just what we need and maximize our chances of keeping it safe during our travels.  But the times, they are a-changin’.  The US and UK governments recently instituted regulations banning all electronic devices larger than a smartphone from carry-on luggage on flights originating from 10 Middle Eastern and Northern African countries.  Before long, these restrictions could be extended to flights to and from other countries.  Camera gear is likely to be explicitly or implicitly categorized as electronic devices, so quite soon we may find ourselves obligated to check all of our gear in the hold of the plane whenever we travel.  In today’s post, I will share some thoughts on how travel photographers could handle such a challenge.

Laptops are already problematic for air travel.  They must be inspected separately from other carry-on items, leading to delays at airport security areas.  Their batteries can, in rare situations, catch fire.  And of course their use is always banned during portions of every flight.  They are expensive, breakable, and highly coveted by thieves.  And the data contained on our laptops must be very carefully protected.  For these and other reasons, I already try not to take my laptop with me on most trips.  There are image backup strategies, which I’ll cover later in this post, that do not require use of a laptop.  I don’t tend to do much captioning, post-processing, or sharing of my images during the trip, preferring instead to take care of these tasks upon returning home.  On certain trips, especially when I am leading photography tours or workshops, I do need to take the laptop to get my job done, but I would recommend not bringing along a PC unless it’s really needed.  In the future, as regulations may spread requiring that laptops be placed in checked baggage, I see no good alternative other than purchasing a hard-sided and well padded case such as a Pelican brand case to hold the PC.

Regrettably, it seems likely that most modern camera gear will be considered “electronic devices” for the purposes of these sorts of airline restrictions.  Today nearly every camera, lens, and even many accessories contain embedded electronics, so they will almost certainly be included under these types of bans.  While until now I have always managed to carry on all of my gear on every trip, I see the winds shifting and in the near future I expect to need to be able to securely pack all of my gear as checked baggage.  Obviously, a hard-sided and well padded, customizable case will be required for this purpose.  I don’t yet own such a case, but many of my photographer friends swear by cases made by Pelican.  Here’s one I am considering purchasing soon to hold most of my gear when I travel.  It is affordable, very durable, offers a good deal of physical protection, is lockable, and also rolls on solid wheels that can support a lot of weight.  I will need to do more homework to determine whether this particular size of case will adequately fit all my gear.  Note that I generally do not recommend products I haven’t personally used, but this item is representative of the category of hard-sided cases we travel photographers will need to consider purchasing.

When checking camera gear, it is imperative that we remember to carry with us into the cabin of the airplane all of our memory cards that have images on them.  I’m only being semi-facetious when I say I’d rather part with my prescription medications than with my brand new images during a long international flight.  But regardless of what new regulations may soon be issued about what items we can carry onto our flights, it is essential to set and follow a good backup plan for our images when we travel.  Gear can be lost or stolen, memory cards corrupted, and so on.  Images we make during a trip *always* must be backed up so that there are at least two files in physically separate locations for each image.  Many photographers use a laptop for their image backups while traveling, but for reasons I’ve already mentioned, I prefer not to bring a laptop unless it’s absolutely required.  Instead, I make the time every night during a trip to copy that day’s images to a second memory card, which I store separately from the ones in my camera bag.  I do this in-camera because my camera bodies have dual memory card slots, but if your camera has only one slot you can backup to a portable hard drive or another memory card using a card reader.  Some cameras have WiFi and/or Bluetooth capabilities, which can facilitate backups to a separate device such as a smartphone or even to the cloud, though network connectivity in many parts of the world is rudimentary at best.  A backup strategy that I use when the images are extremely important is to shoot simultaneously to both of my camera’s memory cards, so that the instant the image is shot it is recorded as two separate files.  I will then store one memory card separately from my camera gear.  Again, this approach will only work if your camera has dual card slots.  A final word of advice: bring enough memory cards so that you won’t have to reformat any of them during the trip.

It’s already a hassle traveling the world with a lot of camera gear.  Most likely, the hassle factor will increase soon as a result of the turmoil in our modern world.  I’m not looking forward to these changes, but I do expect they will happen soon, so I am rethinking my packing and traveling procedures to be prepared.  Hopefully, some of the thoughts I’ve shared in this post will help others get prepared, as well.

What gear and procedures do you use to travel safely with all your gear?  How do you see your approach changing as new airline regulations are enacted?  Please share your thoughts here.

Want to read more posts about gear?  Find them all here: Posts on Gear.

Portraits from Irish Pubs [Encore Publication]: Ireland’s trad music scene is a visual as well as an aural treat

The Republic of Ireland has undergone tremendous social and financial changes over the last 20 years.  It’s now indisputably a modern global society with a strong diversified economic engine.  Yet it’s also a happy truth that today, as in days of old, the pub remains at the center of Irish social life.  Far more than a simple watering hole, the local Irish pub, whether in the center of cosmopolitan Dublin or in a tiny coastal fishing village, is a gathering place where stories are shared, traditional music is played, old friends catch up, and new friends are made.  Oh, and a pint or two might just be downed.

Many pubs feature live traditional, or “trad,” music on a nightly basis.  The casual informality of Ireland’s pub scene allows local amateur musicians to sit in with seasoned pros and pass down the songs from old to young.  Members of the “audience” (it’s hard to distinguish between performers and audience when the sessions are so participatory) are invited to step up to the “stage” (usually just a table covered with pints of beer) to sing a song at any time.  This informality allows the travel photographer to get to know these wonderful musicians over a few pints and to make authentic portraits without feeling like we’re intruding.

Today’s post is a simple photo essay featuring portraits I made of musicians and fellow customers at a variety of pubs across Ireland (plus one in Scotland).  I will forgo the usual technical details except to remind you that when shooting portraits in low-light settings where the use of flash is impossible, that a good fast portrait lens should be used along with a high ISO setting.

My current favorite lens of all is my Nikon 85mm f/1.8G lens.  This is a classic portrait lens and provides a flattering perspective and great image quality when your subject is a human being.  I use it for nearly all of my portrait work these days.  But this lens also shines for nature and action photography where you don’t need a really long focal length.  It renders really lovely “bokeh,” or the soft quality of the out-of-focus parts of the image.

This young singer and fiddler who we met at Dublin’s famous O’Donoghue’s Pub was already a seasoned pro.  In this portrait I sought to capture her expressiveness with hand gestures.  Even without hearing her sing, the viewer can tell that she is expert at weaving stories.  Buy this photo

O’Donoghue’s is widely known as the spot where bands such as the Dubliners sparked the Irish folk music revival in the 1960s.  This band carries on the tradition, sharing songs old and new.  With a wide aperture comes shallow depth-of-field, so when photographing several people at one time you may have to choose which part of the image will be in focus.  Here I wanted to place the emphasis on the guitarist, so the other players are in softer focus.  Buy this photo

Another of Dublin’s great spots for trad music is the Cobblestone Pub.  On this night they were holding a very casual session, where all musicians were invited to come and play some tunes together.  The informality gave me a chance to get to know most of the players over the course of the evening and to make portraits without feeling like an intruder.  Again, the shallow depth-of-field required artistic choices about which subject would be in sharp focus and which would be in softer focus.  Buy this photo

In lively Kenmare, we wandered into a pub where a fabulous folksinger was performing many of the Irish songs I remember from childhood in Boston.  I chatted with Pat during his set breaks and bought a couple of his CDs.  He was a great subject for some expressive portraits, too.  Buy this photo

We didn’t have to leave our hotel on our first night in Killarney to hear some wonderful trad music.  This trio played many of our favorite songs right in the hotel’s pub, and they got most of the audience up to sing and dance along.  Buy this photo

Surprisingly, we heard only one rendition of Cockles and Mussels (aka “Sweet Molly Malone”) during our whole stay in Ireland.  This brave soul stood up in front of the crowd to sing that old standard.  Buy this photo

There’s nothing like watching an Irish crowd respond to the playing and singing of “The Wild Rover” to get one’s blood pumping.  Be ready to capture action in the “audience” as well as on the “stage.”  Buy this photo

Our second night in Killarney brought us into the center of town to an old and lively pub.  The table next to ours had four generations of a local family in attendance, each enjoying the musical set in their own way.  The oldest generation was my favorite.  Buy this photo

I got to know this fiddler over the course of the evening in Killarney.  During the break between sets she was kind enough to let me make her portrait.  It can be difficult in these crowded settings to avoid a cluttered background, but using a wide aperture for a shallow depth-of-field can help, as can careful post-processing.  Buy this photo

Elements I look for when making a portrait are faces with character and colorful details.  I found both with this accordion player and his beautiful instrument.  Buy this photo


The tiny fishing hamlet of Dingle has a population of just 1900 people, yet it somehow supports 52 lively pubs.  My kind of town!  Over pints of ale and shots of local whiskey in this colorful old pub, we made new friends from across the street and from as far away as Newfoundland.  This portrait of a musician was made almost entirely with light from the fireplace.  Buy this photo

The Scottish traditional music scene is as vibrant as Ireland’s, as evidenced by this band we heard at Edinburgh’s Sandy Bell’s Pub.  This place was bustling and extremely crowded.  The cluttered background somehow doesn’t detract too much from the power of this portrait.  Buy this photo

Have you traveled in Ireland or Scotland?  Do you have favorite portraits of the generous and friendly people you encountered there?  Please share your thoughts in the comment box.

Want to read more posts about what to shoot while traveling?  Find them all here: Posts on What to Shoot.

2017: A Photographic Retrospective

My first year as a full-time professional photographer has flown by. In addition to major travels to India, London, Oregon (to cover the total solar eclipse), Vietnam, and Cambodia, I also had the opportunity to shoot more than 150 local SF Bay Area festivals, street fairs, performances, sporting events, and breaking news stories.


Travel photography is my primary specialty: I lead photography tours in destinations around the world and place my own images in magazines, newspapers, and travel websites. While not traveling, I freelance for local newspapers and shoot for private clients including musicians, dancers, and theater companies.


My photography website has logged nearly 2 million page views, and I also publish a daily travel photography blog. I was honored to have been named a winner of the prestigious international competition Travel Photographer of the Year and a finalist for National Geographic’s Travel Photography competition. In Salem, Oregon for the eclipse, I delivered a lecture to an audience of 400 eclipse chasers and was interviewed by the New York Times.


It’s been a thrilling transitional year, and I’m very excited to continue my artistic and business growth in 2018. Thank you so much for your ongoing support.


Please enjoy this small sampler of some of my favorite images from the past year!  2017 Year in Review


The Things We Carry [Encore Publication]: Basic Gear for Travel Photography, Part II

Kyle Adler photographer travel photography

Let’s pick up the gear discussion where we left off on the recent post.  Last time, we covered cameras and lenses.  Now we’ll talk about flashes, tripods, accessories, bags, and other essential kit.

Flash Units

Your camera most likely has a built-in flash, and in many cases that can be good enough to provide some fill-in lighting for backlit subjects or even to serve as a main light in very dark situations.  But for more flexible control over how much light you want, the quality of that light, and where that light comes from and goes to, you will likely want to have a separate flash unit.  I use the Nikon SB-910, which is powerful and flexible enough for most settings.  It has been discontinued and replaced by the Nikon SB-5000, but the older model is often still available.

Whatever flash you use, it is best to attach a diffuser of some sort to soften the otherwise very harsh light of the flash.  I also keep my camera set to lower the flash output by 1 stop, and I only override this setting occasionally.  Flash is often best when used sparingly.

Tripods

For most travel situations, you’ll want a lightweight tripod that folds up to a nice portable size but still offers enough stability for most uses.  There are times, though, when I need to bring along my heavy and bulky professional tripod.  Whatever tripod you choose, be sure to fit it with a good quality head (ball heads provide a lot of flexibility and ease of use for travelers) and remember to take along the plate that attaches the tripod to your camera, if required.

My go-to lightweight travel tripod is the Manfrotto Be Free.  It folds up to an incredibly small size yet affords a surprising amount of stability.  The included ball head works well but is difficult to adjust for sensitivity.  This tripod is designed to fit into a special pouch in my favorite travel photography backpack, also made by Manfrotto.

The SLIK 615-315 is a great tripod for use close to home or on trips where you will have constant vehicle support.  It’s very solid, supports a tremendous amount of weight, and can be adjusted for nearly any shooting situation.  I recommend you fit it with a good ball head for maximum flexibility.

A monopod can be a real problem solver when you need more stability than handholding or resting your camera on a vehicle or table will afford, but you can’t carry or use a full tripod.  I use the Manfrotto 681B model.

Accessories

We photographers love our toys!  While it is easy to get carried away and purchase every cool accessory that comes along, I will try to limit the recommendations here to a handful of truly essential items.  And don’t forget the little things like lens cleaning cloths, a blower brush for dust, and of course extra batteries and chargers for your camera and flash.

Three kinds of filters are essential gear for most photographers.  I’ll cover each type below.  Note that you must use a filter that is the correct size to attach to your lens.

It’s a good idea to keep a UV filter attached to your lenses at all times, as this helps protect the front element of the lens from scratches.  Use a good quality filter, though, as the poorer ones can affect image quality.  I would recommend removing the UV filter when shooting with certain other combinations of filters, as the edges of the image can be cut off (vignetting) with too thick a stack of filters on the end of the lens.  I’ve had good luck with Hoya UV filters.

The second must-have type of filter is the circular polarizer.  A polarizing filter can reduce glaring reflections and can darken skies and enhance natural colors.  This little gadget is almost a secret weapon for making images that really pop.  Again, I like the Hoya products, which are thin, well made, and perform as they should.

The final essential filter is the neutral density filter.  These reduce the amount of light that reaches the camera’s sensor, so you can use slower shutter speeds to blur motion, or so you can use a wider aperture to get a shallow depth-of-field, even in bright sunlight.

Another essential is a good remote release for your camera.  I know plenty of photographers who still use the good old trusty wired (or cable) releases.  I like to be able to move away from the camera when shooting remotely, so I favor a wireless release such as the RFN-4s Wireless Remote Shutter Release.

Smartphones

Most of us would never consider leaving home without our phone, and there are additional good reasons to carry yours with you when you are photographing at home or around the globe.  First, the cameras in today’s better phones are now good enough to make quite good images.  I’ve been very impressed with the quality of the main camera, and even the selfie camera, on my Apple iPhone 6S.  But your phone is also an essential photography tool because there are some very good apps to help you plan, shoot, and share your images.  There are too many to list here, but I’ll plan a future post to share some of my favorites.

Bags

Aside from cameras and lenses, no other category of gear gets photographers arguing quite so heatedly as bags.  For a travel photographer, your bag must be highly protective and durable yet lightweight, fit your gear well but with the flexibility to change out kit as needed, and preferably not advertise that you have expensive camera equipment inside.  The choice of what bag to use is a very personal one, but I’m still going to recommend my three favorites.

For those times when you need to bring most or all of your gear on a trip, I like the Tamrac 5586 Expedition 6x Backpack.  It carries a lot of gear snugly and flexibly, and it doesn’t look like a camera bag so it’s less likely to invite the wrong kind of attention.  It will almost always be accepted as carryon on flights, but it is a bit bulky and heavy for all-day, everyday use while traveling.  I’ll often use this bag to get all my gear to my first destination, then pack a day bag for just the gear I’ll need for each day of the trip.

My current favorite bag for day use for nearly any shooting situation near home or while traveling is the Manfrotto MB MA-BP-TRV Advanced Travel Backpack.  It can fit a reasonable amount of gear while leaving room for non-photography items like a jacket or a water bottle (yes, even photographers occasionally have to drink or stay warm).  It disguises your gear pretty well, has good rain protection, and even sports a special sleeve for carrying the Manfrotto Be-Free Travel Tripod.

For carrying just a few pieces of gear around town or close to home or hotel, a shoulder bag can work well.  This is the best setup for quickly accessing your gear while shooting, but it can be tiring to carry the weight across one side of your body if you have a lot of trekking to do.

Software

For post-processing my images, I use both Adobe Lightroom and Adobe Photoshop Elements.  I can do 90% of my processing using just Lightroom, but occasionally I do need the added power of Photoshop.  While I still use the perpetual license software versions, by now most photographers have gone over to the monthly licensing structure that Adobe calls the Creative Cloud.

What gear can’t you live without?  Have you discovered any little gadgets that improve your images or make life easier for photographers?  Please share your thoughts in the comment box.  I’d love to get your ideas!

Want to read more posts about photographic gear?  Find them all here: Posts on Gear.

The Things We Carry [Encore Publication]: Basic Gear for Travel Photography, Part I

In today’s post, we’ll cover cameras and lenses.  I’ll post again soon with Part II, which will discuss flash units, tripods, accessories, bags, and other essential gear.

One of the biggest challenges we face as travel photographers is what gear to carry with us.  On the one hand, we have to be ready for anything.  It’s quite possible we will have to shoot landscapes, wildlife, portraits, architecture, indoor performances, and night scenes, often all on the same day.  On the other hand, there’s a practical limit to how much we can carry without being turned away by airline personnel or damaging our bodies.  And who really wants to travel with 75 pounds of photo kit?

Here is my basic setup for travel.  Note that my gear is suitable for a professional or enthusiast photographer on a not-unlimited budget (my wife keeps me from getting carried away).  There are less expensive alternatives for most of the gear I carry, and those on unlimited budgets can spend much, much more than this.  I will adjust what I bring depending on the specifics of the trip.  For a safari in East Africa, that 500mm lens is essential, but I wouldn’t want to lug it on a hiking trip in Ireland.  On a trip to view a total solar eclipse, I’ll need that rock solid but very heavy professional tripod, but on most trips my lightweight travel tripod is good enough, thank you.  But the following list of items comprises the core of my basic travel gear.

Cameras

There is no one-size-fits-all when it comes to your choice of camera.  These days, even a simple point-and-shoot camera or a smartphone camera is capable of making very good images.  But if you’re willing to carry a bit more weight and to learn how to use it before you take it on your first trip, a mirrorless interchangeable lens camera or a digital single-lens reflex (DSLR) camera will give you much more flexibility.  I use a DSLR, but more and more of my photographer friends are switching over to mirrorless cameras.  It’s really a matter of personal choice, and if you’re not planning to carry a lot of specialized (and heavy) lenses with you, the smaller size and lighter weight of a mirrorless camera may make up for the loss of certain features.  For very photo-intensive trips where it would be impossible to replace a lost or broken camera, such as an African safari, I will pack two DSLR camera bodies, but often I take a chance and bring just one.  Whatever camera you take on your trip, make sure you know how to use all its features and have tested it thoroughly before you leave, and if you’ve been using it for a while, have it cleaned in advance of your departure.  Note that while I am a Nikon shooter, comparable gear is available from Canon for DSLR afficianadoes.  In the high-end mirrorless arena, Sony’s Alpha a7R II is favored by many professionals and enthusiasts.

My go-to camera is the Nikon D810.  This is a professional model and not for beginners, but it really does do it all.  The resolution is extraordinary, it performs superbly in very low-light situations, the autofocus is fast and flexible, it’s continuous burst shooting speed is good enough, and I love the feel of the camera in my hands and the control it offers over all settings quickly.  I’ve put this baby through hell and high water, but it always comes through for me.

Lenses

For beginning users of interchangeable lens cameras, or for seasoned photographers who need to travel light, a small and lightweight “walkaround lens” may be all that you need to bring for a day’s shooting.  Mine is the Nikon 24-85mm f/3.5-4.5 lens.  It’s a good value for a well-built if not quite professional grade lens, and while not particularly fast, it does offer vibration reduction which allows you to shoot at slower shutter speeds while controlling for camera shake.  I recommend this lens for users of cameras with full-frame sensors who want a small, light, and fairly durable lens for those situations when you want to be ready for most anything.

It’s a good idea to have a wide-angle zoom lens for landscapes, architecture, and other situations where you need to include a lot of area in the frame or want a more uncluttered or exaggerated perspective.  I use the Nikon 16-35mm f/4 lens for this purpose.  It’s got great image quality and is well built, but it is rather heavy and bulky.

A telephoto zoom lens is a must-have for most travel photographers, as it allows you to shoot many wildlife subjects as well as emphasize details in all subjects you encounter.  A longer lens also can be used to provide a compressed perspective that makes far-away subjects appear to be closer to foreground subjects; this perspective can be very powerful in landscape images.  My primary tele zoom is the Nikon 70-300mm f/4.5-5.6 VR lens.  While this lens is built on aging technology and doesn’t always feel as solid as more professional lenses, it is relatively small and lightweight, fairly inexpensive, and provides a very effective vibration reduction function.  This lens has been a staple in my bag for many years, during which time I’ve used it to capture some of my favorite images.


You may never need a super-telephoto lens.  They tend to be expensive, bulky, and heavy, and on many trips you won’t need it.  But for those trips when you expect to encounter lots of wildlife or want to capture astronomical events like an eclipse or transit of a planet, a very long lens is essential.  Mine is the Sigma 150-500mm f/5-6.3 lens.  It’s more economical than a Nikon or Canon super-tele, and it produces reasonably sharp images even when used at its widest aperture.  You can spend much more on this type of big glass if you want or need to, but I’ve found this lens works quite well for me.

So far, we’ve talked about zoom lenses.  It’s also a good idea to carry a few prime (fixed focal length) lenses.  These tend to be faster, higher quality, and less expensive than zoom lenses in the same category.  The downside, of course, is that you have to “zoom with your feet,” that is, find a vantage point that works to compose your image without benefit of changing the lens’ focal length.

If you pack only one prime lens, it most likely will be a “normal” lens, that is one with a focal length of about 50mm for a full-frame camera or about 35mm for a crop-sensor camera.  I carry the Nikon 50mm f/1.4G lens.  This is the one I use in very low-light situations or to get a really shallow depth-of-field.

I think my current favorite lens of all is my Nikon 85mm f/1.8G lens.  This is a classic portrait lens and provides a flattering perspective and great image quality when your subject is a human being.  I use it for nearly all of my portrait work these days.  But this lens also shines for nature and action photography where you don’t need a really long focal length.  It renders really lovely “bokeh”, or the soft quality of the out-of-focus parts of the image.

A wide angle prime lens can be useful for landscapes, architecture and interiors, and astrophotography, among other purposes.  I like the Nikon 24mm f/1.8.


Stay tuned for Part II of our gear discussion, to be posted soon on this same Bat Channel.

What’s your go-to camera and which are your indispensable lenses?  Add your thoughts to the comment box at the end of this post!

Want to read more posts about photographic gear?  Find them all here: Posts on Gear.

Sports Roundup [Encore Publication]: How to get amazing shots at sporting events

Whether we’re traveling afar or close to home, sporting events make for exciting photography.  The thrill of victory and the agony of defeat (credit: ABC’s Wide World of Sports), the heroic effort, and the little moments of humor and repose amidst the adrenaline rush of competition: all of these elements can be captured in images of athletic events.

While every sport has its own rhythm and rules, there are certain techniques that apply across a wide range of sports photography situations.  Let’s take a look at a few situations and discuss how to get the best images given the inherent challenges.  Note that these photos were all made during outdoor sporting events; there are special challenges with many indoor sports, such as basketball or hockey, because the action remains just as fast but there is less light to work with, and the artificial lighting can impart an unnatural color cast.  But that’s a topic for a different post.

Whatever the sport, I like to shoot from different perspectives, from wide to very close.  The wider views show the environment as well as the athletes, so these make good establishing shots.  But often the most compelling and dramatic sports images are the tight compositions, because they portray the athletes in a very personal and relatable way.

Below are two shots of the same rowing crew during the same race at a high school regatta.  The first image was composed from slightly farther away and with a less extreme focal length (300mm), so the resulting composition is more environmental.  It shows not only all the rowers and the coxswain in the shell, but also the width of the river and the surrounding scenery.  This shot establishes the setting and gives the big picture.
Environmental shot of a crew racing at a rowing regatta.  Buy this photo

Now here’s the same crew, but captured from a closer vantage point and using a longer focal length lens (750mm).  This perspective isolates the athletes from the background and shows their expressions and postures.  There’s certainly more drama here, at the expense of some insight into the environment.

A tighter shot of the same crew in the same race.  Buy this photo

There are exceptions, such as when you choose to blur the motion to give a sense of the athlete’s grace, but as rule you want to use a fast shutter speed to freeze the action in sports photography.  Very often that means shooting at 1/1000 of a second or even faster.  Choose the Shutter Priority mode on your camera to gain control over the shutter speed, and be sure to select a high enough ISO setting to allow the shutter speed you require.  If your camera has different auto-focus settings, you may find it helpful to choose a single-point focus setting if you know where the action will be, or a dynamic focus setting if the location of the action changes very quickly.  For this image of a professional beach volleyball tournament, I chose single-point auto-focus so I could select the exact spot where the players would be jumping.  I also find the best way to capture a great image in fast-moving sports (as with wildlife photography) is to set the camera to continuous or burst mode and continue to shoot rapidly through the action.  That way, you’ll have several different images to choose from, and with luck at least one will have caught that “decisive moment.”

A fast shutter speed and single-point auto-focus allow the fast action of a beach volleyball competition to be captured precisely.  Buy this photo

My favorite sports images portray the human element in a very personal way.  This photo from a Spartan Race (an extreme athletic event that combines long-distance running with a supersized obstacle course) captures the strength and the struggle of the athlete as he nears the end of a long race through the 100-degree California desert.  Keys to success in making this image were shooting from a vantage point low to the ground, using a medium-length prime telephoto lens with a large aperture to soften the background, and waiting for just the right moment.

An endurance athlete completes an obstacle near the end of a Spartan Race.  Buy this photo

The fun of shooting a sporting event doesn’t end when the competition is over.  Be sure to capture the dramatic and often humorous moments during award ceremonies and downtime during and after the action.

These athletes have finished their Spartan Race and strike a humorous pose at the finish line.  Buy this photo

Want to see more posts on what to shoot at home and while traveling?  See them all here: http://www.to-travel-hopefully.com/category/travel/shoot/

What sports do you enjoy shooting?  Do you have tips on how to get great sports images?  Please leave a comment in the box after this post.


Happiness Quite Unshared [Encore Publication]: You’re back home from your trip and you’ve got your images looking great: Now what?

With the holidays approaching, I thought readers of To Travel Hopefully might enjoy seeing an encore of this early, pre-launch post with ideas about how to share your favorite images with friends and family.

Sometimes you just get that feeling.  You know as soon as you depress the shutter button that you’ve just captured an incredible travel image.  Over the course of your trip, you will hopefully amass quite a few of these images that you will be eager to share with friends and family.  After the often laborious effort to cull your images and post-process the chosen few, it’s time to share these best photos with the world.

In olden times (pre-digital), there were fewer choices about how to share one’s travel photos.  Many of us shot with color transparency (slide) film, sent all the rolls off to a lab for processing, picked out the top slides by hand, and stored them in a slide tray or carousel for future viewing.  In the excitement just after a trip, we would likely invite a bunch of friends over, get them slightly inebriated, and subject them to a slide show using a projector and portable screen.  This almost literally captive audience would feign enjoyment over, or perhaps even genuinely enjoy, viewing the large projected images and hearing our stories about the recent adventure.  Then the guests would leave, and the slide trays would go back on a bookshelf to sit for months or years before anyone would look again.

In this brave new digital era, we have many more and better options for sharing our best travel photos.  This being the Internet, I’ll offer up a Top Ten list of favorite ways to get my travel images in front of key audiences (Number 7 will amaze you!):

  1. Social Media: While most social media platforms, including Facebook, Twitter, and Instagram, are image-intensive, it turns out that they aren’t particularly good at sharing fine art photography.  That said, these are important and obvious outlets for getting our favorite travel photos out to our friends promptly.  Some even post while traveling, but I do not recommend this approach unless you are completely certain your home is secure while you’re away.  Because these platforms encourage sharing, using them will allow your friends to pass them along to their friends, too.
  2. Online Photography Sites: Specialized photography platforms, such as SmugMug, Flickr, PhotoShelter, and 500px, are tailor-made for sharing (and even selling) your best images.  I use SmugMug to power my own professional photography website, but I also spend quite a bit of time browsing friends’ and even strangers’ photo galleries on the other platforms I mention here.
  3. The New Home Slideshow: Who needs the clunky white folding screens and finicky slide projectors of yesteryear?  Today most folks have a bright, high-definition display right in their living rooms, and it’s called a TV.  Photos on a PC or tablet can easily be shared on a smart TV via WiFi or specialized connecting cables.
  4. Your Phone: Today’s smart phones, whether iOS or Android, have easy ways to sync photos from your PC or tablet to the phone.  Once on your phone, your photos are ready to show to anyone from your mom to a random stranger on a train.  Not the biggest screen in the world, but it’s always with you and can store thousands of high resolution photos.
  5. Send them the files: It’s sometimes desirable to send some of your original image files to a few trusted friends.  Among the numerous methods for doing so are good ol’ trusty email (though attachment sizes are usually limited), Dropbox, and the download capability found in certain photography sites such as SmugMug.
  6. Albums and Books: Yes, the photo album is still alive and well, and it’s never been easier to create one.  Or you can go the extra mile and publish your own custom photography book.  Many photo sharing sites allow you to create your own albums and books featuring your images.
  7. Prints: The demise of the hardcopy print has been greatly exaggerated.  There’s something special and timeless about the look and feel of a well-printed photograph on real paper.  Do it yourself on a good home printer with high quality paper and ink, or send it to a professional lab, but a framed print on your wall or gifted to a friend to put up on their wall is a lovely way to share your very best images.
  8. Cards: Greeting cards, birthday cards, holiday cards–these days it’s easy to customize them with your own images and send them to friends and family.
  9. Calendars: Every year, I create a calendar with a photo from each month of the year just ended, and send copies to a few family members.  I also proudly display this calendar in my home and office.  What could be better than knowing you and your friends are viewing your photos every day of the year?
  10. Keepsakes: Novelty gifts from pencil holders to jigsaw puzzles, to clothing items can be easily and inexpensively made using your favorite photos.  We even have a cat food bowl sporting the likeness of our kitty.  My younger daughter enjoys specialty socks, so I’m looking into ways of putting some of our images onto hosiery.  Get creative!

Whatever methods you use to share your images with friends and family, I would encourage you to consider watermarking your photos.  A watermark is a pattern or image placed across a portion of the photograph to identify it as the work of a particular photographer.  While watermarks can be distracting to the viewer, they can be made quite discreet and they offer some protection against your image being stolen and passed off or even sold as the work of others.  Many photo editing software packages and photo sharing sites offer the capability of attaching watermarks to your photos.

How do you share your travel images?  Got a great idea for sharing that you’d like to add to the discussion?  Please leave a comment in the box at the end of this post.


Revisiting Your Old Friends [Encore Publication]: Take a fresh look at your older images with new postprocessing

In today’s digital photography world, images are made as much in post-processing as they are in the camera.  We only get one chance at creating the image in the camera: the choices we make to compose the image, focus, expose, and fire the shutter at just the right moment are behind us the instant the shutter is released.  But the choices we make after the fact, using image processing software such as Adobe Lightroom, can be revisited as many times as we wish.  Because Lightroom is a non-destructive editor, meaning it keeps the original image file intact and just records the editing choices we make in its catalog, we can return to the image again and again, making slightly or entirely different choices.

When I return from a trip, I try to select the best raw image files and apply some post-processing within a few days.  That’s so I don’t agonize endlessly about creative choices, which would severely increase the turnaround time for sharing the images with the world.  But increasingly I find it is a good practice to return with a fresh eye to images I made some time ago, applying some different post-processing choices to render the image differently.

There are three scenarios under which I often revisit my older images:

      • The images are very old and were shot using film in the pre-digitial era.  In this scenario, scan the transparency (slide), negative, or print and then apply post-processing to the digital scan.

lr-00559_s_r13akqwcgmq0559

Here’s the original scan of a 35mm color slide (transparency) shot during a 1991 trek in Nepal’s Anapurna region.  The image is grainy and the background behind the girls’ heads is distracting.  I decided to clean it up a bit using Lightroom.

NepalWith just a few minutes of tweaking using Lightroom, I was able to crop the image for more dramatic impact, render a true black background, reduce the grainy noise in the shadow areas, and enhance the saturation of the colors.  Buy this photo

    • The images were shot digitally but were made before I started routinely using image-processing software such as Lightroom.  In these cases, I like to apply post-processing to see what artistic options I may have missed in the earlier digital years.

This old Scandinavian stave church was shot as a color image in 2005.  It is so high-contrast that it appears nearly monochromatic on the display screen.  It’s a striking image, but looking at it today I wondered how much more effective it would be as a true black-and-white photo, so I decided to revisit the image using Lightroom.

Here’s the same digital image file, but converted to black-and-white using Lightroom’s color channel processing module.  I boosted the contrast even further and then adjusted each color’s saturation in the black-and-white mix to achieve the exquisite texture of the snow on the ancient building’s roof.  Buy this photo

  • The images are more recent, but I want to make some new creative choices.  Here the idea is to render the image in a different way to achieve a different end result.  For example, an image I initially processed in color may turn out to make a lovely black-and-white photo.  Or perhaps I crop a crowd scene to emphasize just one or a few of the people within it.  The choices are nearly limitless.

Reviewing my favorite images from a recent trip to New Orleans, I saw this shot of a characteristic French Quarter balcony and realized it would be even more powerful if certain colors were more saturated.

A brief session in Lightroom’s Develop module was all it took to boost the saturation of the blue and red channels and to adjust the shadow and black point tonalities.  The resulting image more closely reproduces the emotional experience I recall when viewing this scene live.  Buy this photo

Take a look at some of your older images.  Which ones would you like to revisit and give a fresh new look?  Do you regularly return to work on your library of existing images?  Please share your thoughts here.

Want to read more posts about post-processing your images?  Find them all here: Posts on Post-Processing.