Beyond the Auto Mode [Encore Publication]: Take control of your images by learning to manually set exposure, focus, and more

Travel photography is so exciting and satisfying in part because it requires us to capture every kind of image in all kinds of shooting environments.  You could be heading out to shoot landscapes when suddenly a rare sighting of an animal transforms your activity into a wildlife shoot.  Or you may be on the road for your next destination when you stumble upon a colorful local festival, and now you’re shooting portraits of the revelers.  This rich diversity of subjects also creates one of the biggest challenges for travel photographers: how to be prepared for anything that comes our way.  For beginning photographers there is some comfort in using the Auto mode that nearly every camera offers.  After all, we’re more likely to get an acceptable shot this way, when the subject turns quickly from fast action to landscapes to the low light of evening, or to an indoor performance.  But in most cases, your camera’s Auto mode, which attempts to make its best guesses as to what settings to use given existing conditions, will yield only acceptable photos and not the striking and memorable images we’re after.

There is a better way.  Take control of your images by learning how to manually set your exposure, focus, and other aspects of your photo.  All advanced point-and-shoot cameras and all mirrorless and DSLR cameras allow you to set most functions manually.  Even some basic point-and-shoot models have a way to go manual, but often this will involve options buried deep in a menu somewhere.  And there are apps available for both iOS and Android smart phones that allow you to take manual control over your phone’s camera.  I use an iPhone 6S, and I’ve found the “ProCam 4” app to work very nicely for providing control over the phone’s camera setting for exposure, focus, and flash.  You can find it for less than $5 on the Apple App Store: ProCam 4 App.  Even without using an app, most smart phone cameras do allow you to override the automatic settings by clicking on the part of the image you want to be in focus and used for the exposure setting; usually you can also set the exposure based on a different area of the image from the area that you want to be in focus.  But the dedicated apps will give you greater control, as they allow you to choose the shutter speed, aperture (when not fixed), and ISO for each shot.

For this image of a whirling dervish in Goreme, Turkey, I wanted to blur the dancer so as to give a sense of the continual turning motion in the ceremony, so I used my camera’s shutter-priority exposure mode and selected a slower shutter speed.  Buy this photo

The key to successfully using your camera’s manual settings is to learn how they work and to practice at home, long before you actually take a trip.  Like anything else, selecting the settings we want on a camera takes practice.  In this digital era, it’s easier to learn because you can see the results of each setting immediately on your camera’s screen.  So dig out that camera user guide, or find it online, or search for a good tutorial.  But do learn how to adjust the key settings manually.

The first manual setting every photographer should learn is how to turn off your camera’s flash.  This sounds very basic, but I’m always amazed to see so many flashes going off in inappropriate places: museums that don’t allow flash photography, cultural performances, sports stadiums where the subject is thousands of feet away from the camera (the flash will only provide acceptable lighting for a few dozen feet, at most), and even the shy octopus exhibit at our local aquarium.  Believe me, you do not want to flash the octopus.  So learn how to turn your flash off, and be sure you actually do turn it off when you’re in a venue where flash is inappropriate or won’t help your image be better exposed.  Remember that glass reflects light, so you don’t want your flash on when shooting through windows of a vehicle or the glass windows of animal enclosures at zoos or aquariums.

Next, learn how to set your camera’s exposure manually.  The light meters built into today’s cameras are very smart, but they are also easily fooled by tricky lighting conditions.  The most common problem is backlighting.  If your subject is lit from behind, as many outdoor subjects are, your camera’s auto mode will likely expose for the brighter background and will leave your main subject underexposed.  You can adjust for this is several ways.  It may be good enough to just use your camera’s exposure compensation button to dial in, say, one extra stop of exposure.  Use your camera’s LCD screen and (if it has one) the histogram, to see how the subject is exposed with varying levels of compensation.  In some cases (if your main subject is quite close to the camera), you can use fill flash to fix backlighting problems.  To do so, manually turn on your camera’s flash, or attach a separate flash unit, and choose the setting for “fill flash” or “balanced TTL” (through the lens) flash mode.  Again, check exposure using your camera’s screen and histogram.  I find I usually get good results in tricky lighting conditions by using my camera’s spot metering mode, which tells the camera’s meter to use only the very center (or whatever area I select) of the image when choosing the exposure.

Other than allowing you to properly expose your main subject, manually setting the exposure also gives you control over what combination of shutter speed (how long the exposure lasts), aperture (how wide the lens is open), and ISO (how sensitive the camera is to light) you want for each shot.  If you’re shooting fast moving action like sports or wildlife, you will likely want to choose a fast shutter speed to freeze the motion (unless you want a blur effect as an artistic choice).  If you’re photographing a waterfall or sky and want to get some nice blurring of the water and/or clouds, you will probably want to choose a slower shutter speed.  Many times you want only certain parts of the image to be in focus.  A wide aperture (low F-stop number such as f/1.8) will give you a shallow depth-of-field, allowing only one part of the image to be in focus and blurring the other parts.  Conversely, a narrow aperture (high F-stop number such as f/16) will allow all parts of the photo to be in focus.  The final element determining exposure is the sensitivity of the camera’s sensor, measured by an ISO number.  Select a higher ISO (such as 1600 or above) only when you really need the extra sensitivity for very low-light subjects when a longer shutter speed or wider aperture is not suitable.  When you use very high ISO settings, the image will tend to have a lot of noise.  Today’s cameras are getting better at limiting noise at high ISO settings, and there are ways to reduce some of the effects of the noise using post-processing software, so my approach is to use as high an ISO as is required after considering the range of available shutter speeds and apertures.

To capture these professional beach volleyball players in sharp focus and to freeze the moment, I selected single-focus-point focus mode and chose the exact spot in the viewfinder where the players would be positioned, and also used my camera’s shutter-priority exposure mode to select a very fast shutter speed.  Buy this photo

The other major type of manual setting that you need to know how to use is focus.  Most cameras today do a pretty good job of choosing the right part of the image to focus on, but they often need some help from the photographer.  From simple smart phone cameras through professional DSLRs, the autofocus function almost always lets the photographer select what part of the image they want to be in focus.  If you keep your camera in fully autofocus mode and don’t help by selecting where your main subject is, it may very well guess incorrectly and put another part of the image as the center of focus.  So, learn how to select the focus point even while letting your camera’s autofocus mechanism actually choose the focus distance.  Sometimes a camera’s autofocus capability may not work for the conditions under which you’re shooting, and in these cases you need to turn off autofocus completely, and focus in manual mode.  Some instances when this is necessary are when shooting in very low light conditions, or when shooting in poor contrast environments (for example, your subject’s texture looks a lot like that of its background, or you’re shooting into the bright sun).  In these cases, turn off the autofocus function and adjust focus manually until the subject looks sharp.

It’s still fine to walk around during your travels with your camera set in fully Auto mode, just in case something very unexpected comes up.  But do know how to set the main functions manually so you’ll get the best possible images in the 95% of the shooting situations when you do have time to set up first.

Want to read other posts about photographic techniques?  Find them all here: http://www.to-travel-hopefully.com/category/techniques/

Do you have tips and tricks you can share on manually adjusting the camera’s settings to get great shots?  How about a time you kept the camera on Auto mode and got disappointing results?  Please share your thoughts using the comment box at the end of this post.

Camera Pixels App [Encore Publication]: Significant improvements in the new version make this a best-in-class app

Note: It’s been over a year since I first posted  this updated review.  I still find the Camera Pixels app to be a top-performing app in its class, and I still use it regularly to take manual control of my iPhone camera, so thought I’d post the review again now.

I’ve posted repeatedly about the importance of understanding how to take manual control of your camera in order to make images that are properly exposed and focused.  Whether you are using a professional DSLR, an advanced full-frame mirrorless ILC, a compact point-and-shoot, or the camera built into your smart phone, there is no way you will get consistently acceptable results if you leave the camera’s settings to its auto mode.  See this post for an overview: Post on Beyond the Auto Mode.

About three months ago, I posted a review of an early version of an iPhone app called “Camera Pixels”.  In that review, I found the app to be a very promising concept due to its advanced DSLR-like features and intuitive controls, but I couldn’t fully endorse it in the earlier version because I found several bugs and interface quirks.  You can read that earlier review here: Previous review of early version of Camera Pixels app.  Since that review was published, I have had several discussions with the Camera Pixels support team to detail my concerns about the various issues I found.

For the past two days I have been testing a new version of the Camera Pixels app, and I can now recommend it wholeheartedly.  The new release preserves the advanced features and (relatively) simple interface of the earlier version, but it has addressed all of the significant issues I outlined in my review of the previous release.  Specifically:

  • the image flicker in the “viewfinder” area of the screen has been eliminated,
  • the bracketing of exposures now retains the proper requested spacing (unless at a physical limit of a setting),
  • there is a new “Pro View” mode that keeps the manual settings toolbar always on the screen so any manual overrides are immediately apparent, and
  • the controls to separate the exposure point from the focus point are now more intuitive.

Like the “Manual” camera app that I’ve been using for years and the “ProCam 4” app that has been my go-to camera control app for the past several months, the new “Camera Pixels” app allows the manual selection of ISO, shutter speed, exposure compensation, and focus distance (note that the iPhone camera’s lens has a fixed aperture, so F-stop cannot be manually set).  Also like the Manual app and the ProCam 4 app, Camera Pixels allows images to be captured using RAW mode, which has a great many advantages over capture in JPEG format (see this post for more information: Post on RAW Capture).  And all three of these camera apps display a histogram to assist in setting exposure properly.  

In addition, both Camera Pixels and ProCam 4 (but not Manual) offer some very useful advanced camera control capabilities, including the following:

  • Shutter Priority: You can choose an exposure mode in which you select the shutter speed first and the app will set the appropriate ISO.
  • Exposure Bracketing: You can shoot a series of four shots at different exposures to increase the likelihood that one of them will be at the best exposure for the lighting conditions.  The series of shots can also be combined using HDR tools found in Lightroom, Photoshop, and other editing software into a single image with a higher range of tones from very dark to very bright.
  • White Balance: You can adjust white balance in the app, which is often preferable to having to adjust it in your RAW files during post-processing.
  • Virtual Horizon: The display can show you when the horizon is level.
  • Slow Shutter Options: You can select long fixed shutter speeds as well as bulb mode to keep the shutter open for as long as you’d like.
  • RAW+JPEG: You can choose to store the image in both RAW and JPEG formats.

With all this incremental functionality, your little phone’s camera begins to behave a lot like a more advanced standalone camera.  While the iPhone’s camera, with its small sensor and its tiny fixed-aperture non-interchangeable lens, still cannot compare to a professional or enthusiast DSLR or ILC camera, the results using an advanced manual camera control app such as Camera Pixels or ProCam 4 are vastly improved compared to using the phone’s native camera app.  At iTunes App Store pricing of $2.99 for Camera Pixels or $4.99 (temporarily reduced to $1.99) for ProCam 4, either of these apps is a great buy and a serious enhancement to the iPhone’s built-in camera.

There are some significant differences between Camera Pixels and ProCam 4.  ProCam 4 offers advanced image editing capabilities, while Camera Pixels does not.  However, Camera Pixels offers more flexible exposure bracketing options, the ability to separate exposure point from focus point, a better histogram, and more advanced RAW and video shooting options.  And a significant advantage of the new Camera Pixels app over ProCam 4 is its simple and intuitive user interface for setting and resetting the manual camera control features such as exposure compensation, shutter priority, and ISO priority.  In fact, the Camera Pixels app comes the closest I’ve ever found to the user interface of an advanced DSLR or mirrorless camera.

One note to enhance the usability of the Camera Pixels app: As far as I can tell, there is no built-in help content in the app itself, but there is a very useful online user guide available from the app’s developers.  You can find the user guide here: Camera Pixels app user guide.

In summary, the new Camera Pixels app is a great concept that comes closest of any camera control app I’ve found to the look-and-feel of an advanced standalone camera.  With the greatly improved new release, Camera Pixels has become the best option I’ve found for iPhone users wishing to control the phone’s built-in camera like an advanced DSLR or mirrorless standalone camera.  I now fully recommend this app, and I plan to use it as my first choice for advanced control of my iPhone’s camera.

Here’s the link to the Camera Pixels app on the Apple App Store: Camera Pixels app.

What app do you use to control your phone’s camera?  What do you like and dislike about it?  Please share your thoughts here.

Want to read more posts about photography gear?  Find them all here: Posts on Gear.


Prime Time [Encore Publication]: Why a prime lens is often better than a zoom

Most photographers make most of their images using a zoom lens.  Aside from smartphone cameras, which typically feature a fixed focal-length lens, nearly every camera today comes with a zoom lens attached.  Most point-and-shoot and compact cameras do not have interchangeable lenses, so the zoom lens that comes with the camera is the only choice, while most mirrorless and DSLR cameras have interchangeable lenses.  That means these more advanced cameras offer the choice of using a broad range of different lenses, including both zoom and prime (fixed focal-length) lenses.  While many photographers own one or several prime lenses, from my observation the vast majority shoot nearly all of their images using one of their zoom lenses instead.  In today’s post, I make the case for using prime lenses in many, or even most, shooting situations.

This portrait of a Delhi girl outside India’s largest mosque is lovely and effective, but because I didn’t have time to change lenses and was forced to use my slower walkaround zoom lens, the depth-of-field is quite deep, making for a somewhat distracting background.  Buy this photo

Zoom lenses have one clear advantage over prime lenses: they offer a range of focal lengths, which helps the photographer compose the image without having to walk closer to or farther away from the subject.  But even here I would argue that in most cases it aids creativity to “zoom with the feet,” or walk around to compose the best shot.  Even when this isn’t possible, a high-resolution digital image can easily be cropped in post-processing to achieve the composition the photographer had in mind.

But prime lenses have many advantages over zoom lenses.  First, they are nearly always sharper and generally higher quality than zooms, because they don’t require extra internal glass elements to enable the zooming.  While zoom lenses have improved in optical quality over recent years, it remains the case that prime lenses offer a quality advantage.  Second, prime lenses are typically smaller and lighter than zooms.  This is a blessing especially to travel photographers.  Third, primes are less expensive than zooms of similar optical and build quality.  That means you can buy two or three different prime lenses for the price of one zoom lens covering a similar range of focal lengths.  And fourth, primes are usually faster (i.e., offer a wider maximum aperture size) than zooms.  This last point is a big advantage for many types of shooting, because a wide aperture (small F-number) lets in more light, allowing use of faster shutter speeds and lower ISO settings in low-light conditions.  This is a real boon for nighttime and astro-photography.  A wide aperture also results in shallow depth-of-field, which emphasizes the main subject by softening the focus of the background.  The best lenses offer a pleasing “bokeh”, or pleasant blurring of the out-of-focus elements of the image.  This effect makes for extremely effective portraits as well as wildlife images, but is also useful for other types of photography.


This portrait, made with my current favorite lens, an 85mm f/1.8 portrait lens, offers very sharp focus on the subject’s face and pleasing bokeh, or soft blurring of the out-of-focus background.  It would not have been possible to make this portrait using a zoom lens because the maximum aperture would be too small to achieve the soft background effect.  Buy this photo

I shoot a lot of performing arts events (dance, music, theater), which typically take place indoors where the light is very dim and frequently feature fast-moving action requiring a fast shutter speed.  Using a prime lens allows me to shoot at an action-freezing shutter speed without having to use extremely high ISO settings that introduce noise into the images.  And again, the pleasantly blurred backgrounds help set off the very sharp main subject for a striking overall effect.

I captured this image of a samba dancer at a dress rehearsal under very low-light conditions.  Using my 85mm f/1.8 prime portrait lens, I was able to freeze the motion using a fast shutter speed, keep the ISO at a reasonable level to avoid noise, and render a nice soft background.  Buy this photo

I would estimate that most enthusiast and professional photographers shoot about 80% of their images using zoom lenses.  My own usage pattern is the opposite, that is, I shoot about 80% of my images using prime lenses.  For some purposes, a zoom lens is still required, but it’s surprising how often we can achieve better results using a prime.  Prime lenses are smaller, lighter, less expensive, higher quality, and faster than zoom lenses.  I encourage you to dig out your prime lenses if you have a few, or borrow, rent, or buy one or two (remember, they are much less expensive than comparable zoom lenses) and try shooting with them exclusively, or at least much of the time, for a week or two.  Compare your images made with the primes vs. the ones made with zooms and come to your own conclusions.  If you’re like me, you’ll find that a prime lens is the right tool for most photographic jobs.

Here are my three favorite prime lenses, a “normal” lens, a medium telephoto or “portrait” lens, and a wide-angle lens:

If you pack only one prime lens, it most likely will be a “normal” lens, that is one with a focal length of about 50mm for a full-frame camera or about 35mm for a crop-sensor camera.  I carry the Nikon 50mm f/1.4G lens.  This is the one I use in very low-light situations or to get a really shallow depth-of-field.

I think my current favorite lens of all (including primes and zooms) is my Nikon 85mm f/1.8G lens.  This is a classic portrait lens and provides a flattering perspective and great image quality when your subject is a human being.  I use it for nearly all of my portrait work these days.  But this lens also shines for nature and action photography where you don’t need a really long focal length.  It renders really lovely “bokeh”, or the soft quality of the out-of-focus parts of the image.

A wide-angle prime lens can be useful for landscapes, architecture and interiors, and astro-photography, among other purposes.  I like the Nikon 24mm f/1.8.

What are your preferences regarding use of prime vs. zoom lenses, and why?  Please share your experiences in the comments box.

Want to read other posts about gear?  Find them all here: Posts on Gear.


Top Tips for Great Travel Images [Encore Publication]: These five simple “hacks” will result in more professional images

Festivals and street fairs can be challenging to shoot due to backgrounds cluttered with people, buildings, and cars.  To make this portrait of grandmother and granddaughter at Carnaval San Francisco, I got down low so that most of the background was covered by the cloth of the costume, and I used a wide aperture to throw the hectic street scene into soft focus.  Buy this photo

The web is positively overflowing with “life hacks,” simple tips and tricks to save us all time and effort and to achieve better results.  Some lists are better than others, but it is in the spirit of these lists that I bring you this compilation of five simple travel photography hacks.  These techniques are not difficult and do not require expensive gear.  They work equally well for your photography whether traveling or at home.  And I promise that if you follow them, your images will improve.  The pros do these things almost automatically; to them, it’s hygiene, like tooth brushing.  If you read no other post about photography, read this one.

  1. Avoid cluttered backgrounds: So often the travel images of a professional stand out from those of amateurs simply because they took careful notice of what was in the background while composing the shot.  Try to frame your subject against a clean backdrop such as a dark-colored wall or the sky.  If there’s no way to avoid including some clutter in the background, at least use a wide aperture (low F-stop number) to throw the background into soft focus.  I’m always reminding my students–and myself–to pay at least as much attention to composing the background as the main subject.
  2. Watch your horizon: Frequently, we’re so intent on composing the main subject within our viewfinder that we forget to check whether the camera is level before firing the shutter.  An uneven horizon can give the impression of vertigo, like the subject is going to fall out of the frame.  Some cameras have a virtual horizon function to show you whether the horizontal and vertical axes are level, but whether you use it or not, be sure to check visually that the edge of the image looks correct.
  3. Achieve sharp focus: The one characteristic of an image that even the most inexperienced viewer can identify immediately, and one that’s almost impossible to fix in post-processing, is poor focus.  Today’s cameras are so easy to use that we often overlook this most basic element.  The camera can’t know for sure what subject you intend to have in focus; it can only make its best guess.  So take the extra fraction of a second while composing your image to move the camera’s focus point onto the main subject (even smartphone cameras have this capability).  Or use a small aperture (high F-stop number) to provide a wide depth of field so that essentially everything is in focus.
  4. Choose the correct exposure: Another very basic element of any photograph, exposure can only be correctly chosen by the photographer, not by the camera.  Your camera’s Auto mode can be fooled very easily by many tricky situations, most commonly by backlighting of the subject.  It’s fine to use the camera’s guess as a starting point, but nearly every camera (including smartphone cameras) have a way to manually override this guess, so learn how to do this and add in about a stop or two of extra exposure if your subject is backlit, more if the backlighting is severe.
  5. Turn off the darned flash: Nearly every camera has a mode where it fires the flash automatically if it determines the extra light is needed.  This is rarely a good thing.  Far better to turn off the auto flash setting and make your own decision about when to use the flash.  Otherwise, your low-light images could end up with an eerie, unnatural color cast or your far-away subject could be underexposed (a flash typically lights an object only a few feet away from the camera, so why fire the flash when you’re photographing an object hundreds of yards or even miles away?).  Worse, if you are shooting through glass or another reflective surface, your flash reflects off the surface, ruining your whole image.  Worse still, your flash may blind everyone else near you in a very dim setting, damage sensitive artwork, or scare or anger nearby wildlife.  I’ve seen countless visitors ejected from museums, zoos and aquariums, and other wonderful destinations because they hadn’t figured out how to override their camera’s auto flash setting.  Just turn off the darned flash, and use it manually when appropriate.

Learn these simple techniques and follow them whenever you shoot, and you’ll start making images that stand out from the crowd.  Remember, you, and not the technology inside your camera, are the creative force behind your images.

While this image of a yurt in the remote mountainous region between China and Tajikistan succeeds in spite of (or perhaps because of) the off-kilter horizon, it serves as a good reminder to check the horizons at the edge of our photos.  Buy this photo

What are your favorite tips and tricks to ensure you make the best images possible?  Please share here!

Want to read more posts about photographic techniques?  Find them all here: Posts on Techniques.

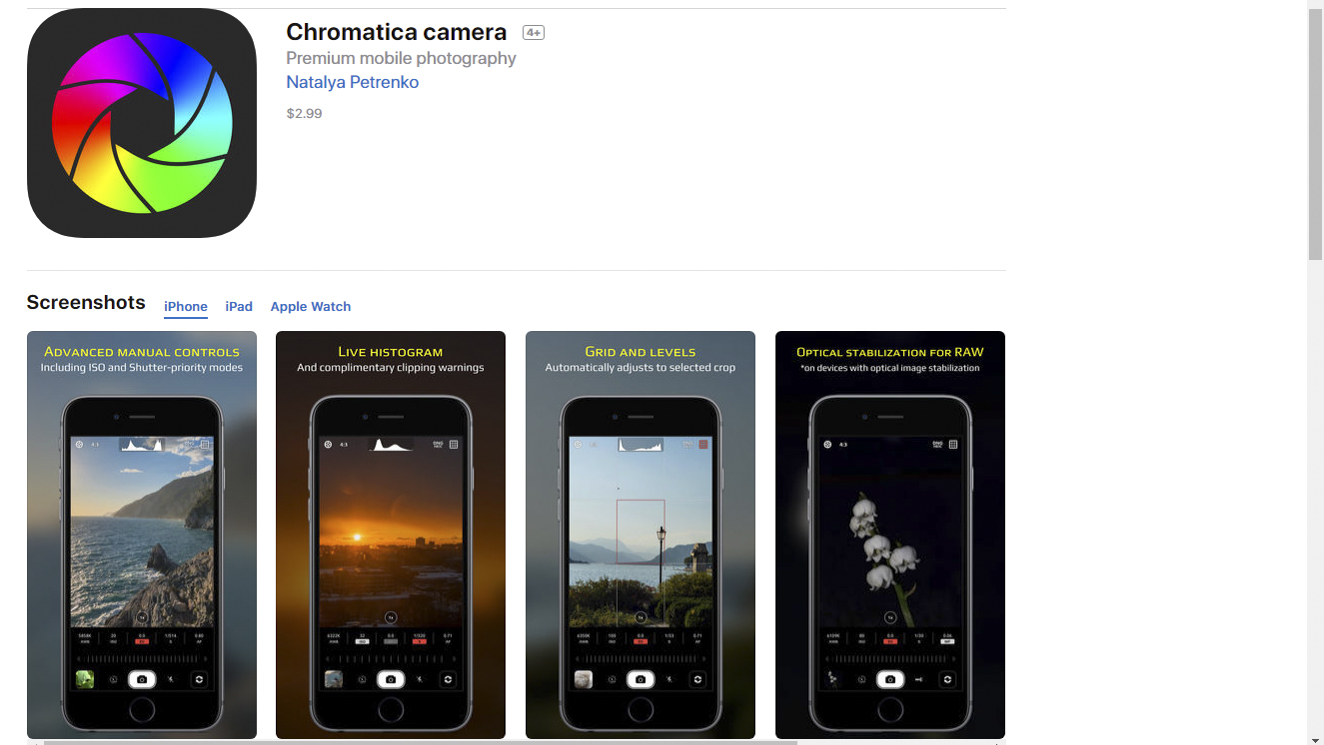
Chromatica App [Encore Publication]: Simple, intuitive, and affordable, this new iPhone camera control app is a winner

LR chromatica screenshot-

I’ve posted repeatedly about the importance of understanding how to take manual control of your camera in order to make images that are properly exposed and focused.  Whether you are using a professional DSLR, an advanced full-frame mirrorless ILC, a compact point-and-shoot, or the camera built into your smart phone, there is no way you will get consistently acceptable results if you leave the camera’s settings to its auto mode.  See this post for an overview: Post on Beyond the Auto Mode.

There are dozens of camera control apps available for the iPhone, and it can be confusing to figure out which one is right for you.  In the past, I’ve reviewed the following apps: Manual (see post on Manual app), ProCam 4 (see post on ProCam 4 app), and Camera Pixels (see post on Camera Pixels app).  In today’s post I offer a first look at a new app, Chromatica, from the same company that developed Camera Pixels.

Chromatica, priced at an appealing $2.99 on the Apple App Store, is aimed for a middle market of photographers who want more manual control than the camera’s native (built-in) app can provide but without the complexity of more enthusiast-level apps, such as Camera Pixels or ProCam 5 (the successor to ProCam 4).  It competes with other mid-level camera control apps such as Manual, though it is priced at $1 less.  My initial testing of the new Chromatica app found it to be a very worthy tool for most users to take control of their iPhone photography without the expense or complexity of the more advanced apps.  Chromatica has a very simple and intuitive interface, offers the ability to shoot in RAW mode for much higher quality images, and provides the basic required functionality to take manual control over your camera.  It doesn’t offer the full suite of bells and whistles found in the more sophisticated apps, but it’s still a powerful tool that makes the iPhone camera act much more like a DSLR or mirrorless camera while providing a clean and simple user interface.

Chromatica’s features include the ability to shoot in either auto or one of several manual modes such as Shutter Priority and ISO Priority.  It’s quite easy to realize which mode you’re in and to return to auto mode when you’re done taking manual control over the camera; the same cannot be said of some other camera control apps I’ve used.  Another essential feature is the ability to separate the exposure and focus points, so that exposure can be set based on one part of the image while focus is set on another part.  There doesn’t seem to be any user manual or in-app help function to explain this feature, so here’s how it works: simply touch the screen with two fingers and you’ll see a circle and a square appear.  Move the circle to the point in the image where you want to set exposure, and move the square to the point where you want to set focus.  Other useful features include an exposure histogram to show you the range of brightness levels in your shot, and exposure clipping to flag the areas of the image that are too bright or too dim.  Chromatica includes full optical stabilization in RAW mode as well as focus peaking to aid in manual focus operations.

What you won’t find in Chromatica, but for most photo-making purposes won’t miss, are advanced image-editing tools (instead, find these in your favorite standalone image editing software such as Lightroom or Photoshop), exposure bracketing, and long-exposure camera control modes.  Other more sophisticated apps do offer these and more features, but at the expense of higher cost and greater complexity.

In short, Chromatica does exactly what it’s designed to do: make it simple and quick to manually control your phone’s camera and make the most of it’s capabilities.  For most casual and enthusiast photographers, this is good enough when using a phone’s camera.  I typically shoot with professional DSLR gear costing many thousands of dollars when I need pro-level results, but I love the convenience and ease of grabbing some quick shots with my phone, and in the future I am likely to use Chromatica to control the phone’s camera when it’s a straightforward capture.  I’ll continue to use Camera Pixels and ProCam 5 when I require more advanced features to control the phone.

Here’s the link to the Chromatica app on the Apple App Store: Chromatica app.

For reference, here are some popular iPhone camera control apps along with their price and brief notes:

  • Native iOS Camera app (Free): Comes built-in with the iPhone.  Does not allow RAW capture, manual control of the camera, or any advanced features, but does allow the separation of focus and exposure points.
  • Camera Pixels Lite (Free): An entry-level version of Camera Pixels that offers basic camera control features but does not allow RAW capture.
  • Manual ($3.99): Another entry-level app that is really starting to show its age.  Offers basic camera control features including RAW capture, but lacks more advanced features and is difficult to use.
  • Chromatica ($2.99): A great value and very easy to use, this app offers camera control features, RAW capture, and a few more advanced features.
  • Camera Pixels ($3.99): A powerful manual control app with a very wide range of features, it remains quite intuitive to use.
  • ProCam 5 ($5.99): A very powerful app with a wide range of camera control features plus more sophisticated functionality typically associated with DSLRs and mirrorless cameras.  Also includes a full suite of image editing tools.  It can be difficult to use.  Note: I’ve only tested the older ProCam 4.
  • Pro Camera ($5.99): A popular higher-end app with a full range of features.  Note: I’ve not yet tested this app.


What app do you use to control your phone’s camera?  What do you like and dislike about it?  Please share your thoughts here.

Want to read more posts about photography gear?  Find them all here: Posts on Gear.


The Sharpest Tack in the Box [Encore Publication]: How to achieve sharp focus in tricky shooting situations

One of the most important elements of an image is focus, and even an untrained viewer can tell immediately when a key part of the image is not in sharp focus.  The stakes are even higher when we consider that poor focus is nearly impossible to correct in post-processing.  Most of us rely on our camera’s autofocus functionality to help us achieve tack-sharp focus while shooting, but as with every other automated system in a camera, even very sophisticated autofocus mechanisms can go awry, especially when we’re faced with tricky shooting situations.  Here’s a quick guide to minimizing focus problems and achieving sharp focus in nearly every shot.

Scenes with low contrast, such as in this image of ice floes on the Barents Sea in Svalbard after sunset, can fool even sophisticated autofocus systems.  Override your camera’s autofocus system and instead shoot manually in these conditions.  Buy this photo

  1. Make sure to select the part of your image that you want to be in sharp focus.  It sounds like a no-brainer, but surprisingly frequently the reason an image’s main subject is not in focus is because the photographer never told the camera’s autofocus system what to focus on.  Remember that as with any assistive technology, a camera’s autofocus system is just a collection of hardware and software designed to make a best guess about what the user wants.  If you leave your camera set to full autofocus mode, it does its best to identify what its software determines is likely to be your intended subject.  A human face, for example, is likely to be what you want to have in sharp focus, so the camera focuses on that.  But often the camera does not guess correctly.  Nearly every camera, including the one in your smartphone, allows you to manually select your desired focus point, often by simply touching the desired part of the image on the screen.  Be sure to check what your camera is doing and correct it by manually selecting the focus point if it guesses wrong.
  2. Recognize that your camera’s autofocus system will likely not work in certain tricky conditions. Most autofocus systems work by looking for areas of the image where the contrast is changing, such as at the outlines of a person or a building.  But in very dim lighting, or when the main subject is badly backlit, or in scenes with very low contrast (think of a stormy sky or the waves of an ocean), the autofocus does not work.  Recognize these deficiencies and be prepared when shooting in these conditions to take manual control.  Every camera has a mechanism to manually select focus, and you need to know how to use that feature.
  3. Choose the autofocus method best suited to your shooting needs.   Most advanced or professional cameras allow you to choose among several different types of autofocus methods.  Often, the first choice is between single-focus mode or continuous-focus mode.  Choose single-focus mode when your subject is relatively stationary and you must have precise focus achieved before releasing the shutter.  For subjects that are moving quickly or where you need to time your shot exactly, even at the expense of not yet having perfect focus, you should choose continuous-focus mode.  Within each of these modes, your camera may offer sub-choices, such as letting you manually choose the exact focus point you want or choosing a range of points from which the camera selects focus based on the motion of the subject.  This is rocket-science technology, but fortunately it is pretty straightforward to choose the desired method once you understand what each one does.  Read your camera’s manual and always practice in the different focus modes before going on any important shoots, especially on a major trip.
  4. Circumvent the whole problem by choosing a wide depth of field.  Sometimes the best artistic choice requires a narrow depth of field so that only the main subject is in sharp focus, and sometimes the light is too dim to choose a narrow aperture, but if you can make the shot work with a wide depth of field (in other words, using a small aperture, represented by a high f-stop number), then you don’t have to worry about focus at all.  In most situations, universal focus from several feet away from your lens through infinity is achieved at apertures of about f/16 or smaller.

Capturing tack-sharp images of fast-moving wildlife like the cheetah requires selection of an autofocus mode capable of dynamically refocusing on the moving subject.  For this shot of a cheetah in Serengeti National Park in Tanzania, there was the added challenge of having low contrast between the animal and the background.  I chose my camera’s continuous-focus mode with predictive focus so the camera would anticipate where the cheetah was moving and focus ahead of the shutter.  Buy this photo

By using these tips, you can achieve tack-sharp focus where you want it in nearly all of your images, whether you’re shooting with a simple point-and-shoot or phone camera, or the most advanced professional camera.  Any camera frequently makes the wrong guess about where the focus point should be, so do not rely blindly on autofocus.  It’s worth investing some time to learn how to configure autofocus appropriately for any shooting situation, and how to turn it off and instead focus manually when required.  Happy shooting!

How do you achieve sharp focus in tricky conditions?  Please share your thoughts in the comment box at the end of this post.

Want to see more articles about techniques?  Find them all here: http://www.to-travel-hopefully.com/category/techniques/.

Chromatica App [Encore Publication]: Simple, intuitive, and affordable, this new iPhone camera control app is a winner

LR chromatica screenshot-

I’ve posted repeatedly about the importance of understanding how to take manual control of your camera in order to make images that are properly exposed and focused.  Whether you are using a professional DSLR, an advanced full-frame mirrorless ILC, a compact point-and-shoot, or the camera built into your smart phone, there is no way you will get consistently acceptable results if you leave the camera’s settings to its auto mode.  See this post for an overview: Post on Beyond the Auto Mode.

There are dozens of camera control apps available for the iPhone, and it can be confusing to figure out which one is right for you.  In the past, I’ve reviewed the following apps: Manual (see post on Manual app), ProCam 4 (see post on ProCam 4 app), and Camera Pixels (see post on Camera Pixels app).  In today’s post I offer a first look at a new app, Chromatica, from the same company that developed Camera Pixels.

Chromatica, priced at an appealing $2.99 on the Apple App Store, is aimed for a middle market of photographers who want more manual control than the camera’s native (built-in) app can provide but without the complexity of more enthusiast-level apps, such as Camera Pixels or ProCam 5 (the successor to ProCam 4).  It competes with other mid-level camera control apps such as Manual, though it is priced at $1 less.  My initial testing of the new Chromatica app found it to be a very worthy tool for most users to take control of their iPhone photography without the expense or complexity of the more advanced apps.  Chromatica has a very simple and intuitive interface, offers the ability to shoot in RAW mode for much higher quality images, and provides the basic required functionality to take manual control over your camera.  It doesn’t offer the full suite of bells and whistles found in the more sophisticated apps, but it’s still a powerful tool that makes the iPhone camera act much more like a DSLR or mirrorless camera while providing a clean and simple user interface.

Chromatica’s features include the ability to shoot in either auto or one of several manual modes such as Shutter Priority and ISO Priority.  It’s quite easy to realize which mode you’re in and to return to auto mode when you’re done taking manual control over the camera; the same cannot be said of some other camera control apps I’ve used.  Another essential feature is the ability to separate the exposure and focus points, so that exposure can be set based on one part of the image while focus is set on another part.  There doesn’t seem to be any user manual or in-app help function to explain this feature, so here’s how it works: simply touch the screen with two fingers and you’ll see a circle and a square appear.  Move the circle to the point in the image where you want to set exposure, and move the square to the point where you want to set focus.  Other useful features include an exposure histogram to show you the range of brightness levels in your shot, and exposure clipping to flag the areas of the image that are too bright or too dim.  Chromatica includes full optical stabilization in RAW mode as well as focus peaking to aid in manual focus operations.

What you won’t find in Chromatica, but for most photo-making purposes won’t miss, are advanced image-editing tools (instead, find these in your favorite standalone image editing software such as Lightroom or Photoshop), exposure bracketing, and long-exposure camera control modes.  Other more sophisticated apps do offer these and more features, but at the expense of higher cost and greater complexity.

In short, Chromatica does exactly what it’s designed to do: make it simple and quick to manually control your phone’s camera and make the most of it’s capabilities.  For most casual and enthusiast photographers, this is good enough when using a phone’s camera.  I typically shoot with professional DSLR gear costing many thousands of dollars when I need pro-level results, but I love the convenience and ease of grabbing some quick shots with my phone, and in the future I am likely to use Chromatica to control the phone’s camera when it’s a straightforward capture.  I’ll continue to use Camera Pixels and ProCam 5 when I require more advanced features to control the phone.

Here’s the link to the Chromatica app on the Apple App Store: Chromatica app.

For reference, here are some popular iPhone camera control apps along with their price and brief notes:

  • Native iOS Camera app (Free): Comes built-in with the iPhone.  Does not allow RAW capture, manual control of the camera, or any advanced features, but does allow the separation of focus and exposure points.
  • Camera Pixels Lite (Free): An entry-level version of Camera Pixels that offers basic camera control features but does not allow RAW capture.
  • Manual ($3.99): Another entry-level app that is really starting to show its age.  Offers basic camera control features including RAW capture, but lacks more advanced features and is difficult to use.
  • Chromatica ($2.99): A great value and very easy to use, this app offers camera control features, RAW capture, and a few more advanced features.
  • Camera Pixels ($3.99): A powerful manual control app with a very wide range of features, it remains quite intuitive to use.
  • ProCam 5 ($5.99): A very powerful app with a wide range of camera control features plus more sophisticated functionality typically associated with DSLRs and mirrorless cameras.  Also includes a full suite of image editing tools.  It can be difficult to use.  Note: I’ve only tested the older ProCam 4.
  • Pro Camera ($5.99): A popular higher-end app with a full range of features.  Note: I’ve not yet tested this app.


What app do you use to control your phone’s camera?  What do you like and dislike about it?  Please share your thoughts here.

Want to read more posts about photography gear?  Find them all here: Posts on Gear.


Focus on Tahiti Dance Fete [Encore Publication]: A case study in shooting under challenging circumstances

The travel photographer must be prepared to shoot under challenging circumstances, because often we have little control over the conditions in the field.  We may plan our travel years in advance to observe and photograph a total solar eclipse, only to wake up on the morning of the eclipse to find the sky is totally overcast.  Or we could make arrangements months ahead to be at a major cultural festival, but learn upon arrival that the area we’re shooting from is hundreds of yards from the action.  These things happen, but the professional photographer still needs to get her shot.  So, what can be done to persevere and increase our odds of getting usable images under adversity?  The answer, of course, depends on the specific circumstances of each shoot, but there are some general tips I can offer.  Today’s post presents a case study based on my recent shoot of the solo dance competition at the Tahiti Fete in San Jose, California.

The dancers made lovely subjects, but the shooting conditions were very challenging.  Read on to learn how to make the best of a difficult situation.  Buy this photo

Upon arrival at the dance competition, I realized immediately that this shoot would be challenging.  It was held in a cramped hotel convention room with a makeshift stage, rows of folding chairs for spectators, insufficient lighting of poor color quality, and a bank of judges blocking most of the view of the stage.  To make matters worse, the room was packed with people, many of whom stood up to cheer on their friends, and the only available seats were near the far end of the room.  An extra challenge was thrown into the mix by the cluttered and unattractive background behind the performers on the stage.

Cluttered backgrounds are a significant obstacle, but good images can still be made in these situations.  Buy this photo

What can be done to mitigate against a cluttered background?  I shot plenty of images of each dancer to increase the likelihood that I could eliminate some of the more distracting background elements while still capturing the excitement, grace, and colors of the dancing.  This image was the best I could capture of this particular dancer, so I committed to it in post-processing.  I cropped the image to avoid the most distracting elements, adjusted the exposure curves, contrast, and sharpness of the background to de-emphasize it, and applied some post-crop vignetting to ensure the dancer would be highlighted.

When using a very high ISO, some noise will result.  This doesn’t have to be a disadvantage.  Buy this photo

The lighting was very dim at this venue.  Because I was shooting from far away, I needed to use a long telephoto lens, which limited me to a small aperture and no possibility of using flash.  Nonetheless, a fast shutter speed was required in order to freeze the fast action of the Polynesian dancing.  This combination (low lighting, small aperture, and fast shutter speed) leaves no option other than a very high ISO setting.  I shot the above image at ISO 6400.  Even with an excellent professional camera sensor, such a high ISO will generate some noise in the image.  Noise can often be reduced to acceptable levels during post-processing.  But for this particular image, I was aiming for a soft, painterly feel.  The visual effect of high contrast, soft colors, and a bit of visual noise here gives the feel of an impressionistic rendering.  For this expressive Tahitian subject, I was very happy to have a Gauguin-esque style shine through in the final image.

 Cut out elements that don’t work.  Buy this photo

To make the above image, I cropped out distracting portions such as the judges’ heads in the foreground and an ugly door and wall in the background.  The resulting aspect ratio is non-standard, but works well for this image.  I desaturated the background and used post-crop vignetting to focus attention on the dancer.


Black-and-white renderings can be more forgiving when color quality is low.  Buy this photo

This image portrays a lovely subject but the lighting was especially poor.  Realizing I couldn’t do much to mitigate the strange color cast resulting from the artificial lights, I converted the image to monochrome, boosted the contrast, and adjusted the color channel mix to render a pleasing and elegant final image.  Check out this post to learn how black-and-white conversion can be used to save the day when color temperatures or image noise are problems: Post on B&W conversion to save strangely colored images.

Bringing it all together: This image works nicely in spite of all the challenges present at the shoot, including foreground obstacles, dim and low quality lighting, a far-away vantage point, and a cluttered background.  Buy this photo

In spite of multiple significant technical issues, I was able to make some striking images of the lovely dancers at this Tahitian festival.  Hopefully, the tips presented here will help when you next are faced with a challenging shoot.  The most important thing is to keep shooting as best you can while in the field.  There are multiple methods you can use in post-processing to mitigate against the shooting challenges and end up with images you will be proud of.

What techniques do you use when faced with difficult shooting conditions?  Please share your thoughts here.

Want to read more posts about photographic techniques?  Find them all here: Posts on Techniques.

Beyond the Auto Mode [Encore Publication]: Take control of your images by learning to manually set exposure, focus, and more

Travel photography is so exciting and satisfying in part because it requires us to capture every kind of image in all kinds of shooting environments.  You could be heading out to shoot landscapes when suddenly a rare sighting of an animal transforms your activity into a wildlife shoot.  Or you may be on the road for your next destination when you stumble upon a colorful local festival, and now you’re shooting portraits of the revelers.  This rich diversity of subjects also creates one of the biggest challenges for travel photographers: how to be prepared for anything that comes our way.  For beginning photographers there is some comfort in using the Auto mode that nearly every camera offers.  After all, we’re more likely to get an acceptable shot this way, when the subject turns quickly from fast action to landscapes to the low light of evening, or to an indoor performance.  But in most cases, your camera’s Auto mode, which attempts to make its best guesses as to what settings to use given existing conditions, will yield only acceptable photos and not the striking and memorable images we’re after.

There is a better way.  Take control of your images by learning how to manually set your exposure, focus, and other aspects of your photo.  All advanced point-and-shoot cameras and all mirrorless and DSLR cameras allow you to set most functions manually.  Even some basic point-and-shoot models have a way to go manual, but often this will involve options buried deep in a menu somewhere.  And there are apps available for both iOS and Android smart phones that allow you to take manual control over your phone’s camera.  I use an iPhone 6S, and I’ve found the “ProCam 4” app to work very nicely for providing control over the phone’s camera setting for exposure, focus, and flash.  You can find it for less than $5 on the Apple App Store: ProCam 4 App.  Even without using an app, most smart phone cameras do allow you to override the automatic settings by clicking on the part of the image you want to be in focus and used for the exposure setting; usually you can also set the exposure based on a different area of the image from the area that you want to be in focus.  But the dedicated apps will give you greater control, as they allow you to choose the shutter speed, aperture (when not fixed), and ISO for each shot.

For this image of a whirling dervish in Goreme, Turkey, I wanted to blur the dancer so as to give a sense of the continual turning motion in the ceremony, so I used my camera’s shutter-priority exposure mode and selected a slower shutter speed.  Buy this photo

The key to successfully using your camera’s manual settings is to learn how they work and to practice at home, long before you actually take a trip.  Like anything else, selecting the settings we want on a camera takes practice.  In this digital era, it’s easier to learn because you can see the results of each setting immediately on your camera’s screen.  So dig out that camera user guide, or find it online, or search for a good tutorial.  But do learn how to adjust the key settings manually.

The first manual setting every photographer should learn is how to turn off your camera’s flash.  This sounds very basic, but I’m always amazed to see so many flashes going off in inappropriate places: museums that don’t allow flash photography, cultural performances, sports stadiums where the subject is thousands of feet away from the camera (the flash will only provide acceptable lighting for a few dozen feet, at most), and even the shy octopus exhibit at our local aquarium.  Believe me, you do not want to flash the octopus.  So learn how to turn your flash off, and be sure you actually do turn it off when you’re in a venue where flash is inappropriate or won’t help your image be better exposed.  Remember that glass reflects light, so you don’t want your flash on when shooting through windows of a vehicle or the glass windows of animal enclosures at zoos or aquariums.

Next, learn how to set your camera’s exposure manually.  The light meters built into today’s cameras are very smart, but they are also easily fooled by tricky lighting conditions.  The most common problem is backlighting.  If your subject is lit from behind, as many outdoor subjects are, your camera’s auto mode will likely expose for the brighter background and will leave your main subject underexposed.  You can adjust for this is several ways.  It may be good enough to just use your camera’s exposure compensation button to dial in, say, one extra stop of exposure.  Use your camera’s LCD screen and (if it has one) the histogram, to see how the subject is exposed with varying levels of compensation.  In some cases (if your main subject is quite close to the camera), you can use fill flash to fix backlighting problems.  To do so, manually turn on your camera’s flash, or attach a separate flash unit, and choose the setting for “fill flash” or “balanced TTL” (through the lens) flash mode.  Again, check exposure using your camera’s screen and histogram.  I find I usually get good results in tricky lighting conditions by using my camera’s spot metering mode, which tells the camera’s meter to use only the very center (or whatever area I select) of the image when choosing the exposure.

Other than allowing you to properly expose your main subject, manually setting the exposure also gives you control over what combination of shutter speed (how long the exposure lasts), aperture (how wide the lens is open), and ISO (how sensitive the camera is to light) you want for each shot.  If you’re shooting fast moving action like sports or wildlife, you will likely want to choose a fast shutter speed to freeze the motion (unless you want a blur effect as an artistic choice).  If you’re photographing a waterfall or sky and want to get some nice blurring of the water and/or clouds, you will probably want to choose a slower shutter speed.  Many times you want only certain parts of the image to be in focus.  A wide aperture (low F-stop number such as f/1.8) will give you a shallow depth-of-field, allowing only one part of the image to be in focus and blurring the other parts.  Conversely, a narrow aperture (high F-stop number such as f/16) will allow all parts of the photo to be in focus.  The final element determining exposure is the sensitivity of the camera’s sensor, measured by an ISO number.  Select a higher ISO (such as 1600 or above) only when you really need the extra sensitivity for very low-light subjects when a longer shutter speed or wider aperture is not suitable.  When you use very high ISO settings, the image will tend to have a lot of noise.  Today’s cameras are getting better at limiting noise at high ISO settings, and there are ways to reduce some of the effects of the noise using post-processing software, so my approach is to use as high an ISO as is required after considering the range of available shutter speeds and apertures.

To capture these professional beach volleyball players in sharp focus and to freeze the moment, I selected single-focus-point focus mode and chose the exact spot in the viewfinder where the players would be positioned, and also used my camera’s shutter-priority exposure mode to select a very fast shutter speed.  Buy this photo

The other major type of manual setting that you need to know how to use is focus.  Most cameras today do a pretty good job of choosing the right part of the image to focus on, but they often need some help from the photographer.  From simple smart phone cameras through professional DSLRs, the autofocus function almost always lets the photographer select what part of the image they want to be in focus.  If you keep your camera in fully autofocus mode and don’t help by selecting where your main subject is, it may very well guess incorrectly and put another part of the image as the center of focus.  So, learn how to select the focus point even while letting your camera’s autofocus mechanism actually choose the focus distance.  Sometimes a camera’s autofocus capability may not work for the conditions under which you’re shooting, and in these cases you need to turn off autofocus completely, and focus in manual mode.  Some instances when this is necessary are when shooting in very low light conditions, or when shooting in poor contrast environments (for example, your subject’s texture looks a lot like that of its background, or you’re shooting into the bright sun).  In these cases, turn off the autofocus function and adjust focus manually until the subject looks sharp.

It’s still fine to walk around during your travels with your camera set in fully Auto mode, just in case something very unexpected comes up.  But do know how to set the main functions manually so you’ll get the best possible images in the 95% of the shooting situations when you do have time to set up first.

Want to read other posts about photographic techniques?  Find them all here: http://www.to-travel-hopefully.com/category/techniques/

Do you have tips and tricks you can share on manually adjusting the camera’s settings to get great shots?  How about a time you kept the camera on Auto mode and got disappointing results?  Please share your thoughts using the comment box at the end of this post.

Chromatica App [Encore Publication]: Simple, intuitive, and affordable, this new iPhone camera control app is a winner

LR chromatica screenshot-

I’ve posted repeatedly about the importance of understanding how to take manual control of your camera in order to make images that are properly exposed and focused.  Whether you are using a professional DSLR, an advanced full-frame mirrorless ILC, a compact point-and-shoot, or the camera built into your smart phone, there is no way you will get consistently acceptable results if you leave the camera’s settings to its auto mode.  See this post for an overview: Post on Beyond the Auto Mode.

There are dozens of camera control apps available for the iPhone, and it can be confusing to figure out which one is right for you.  In the past, I’ve reviewed the following apps: Manual (see post on Manual app), ProCam 4 (see post on ProCam 4 app), and Camera Pixels (see post on Camera Pixels app).  In today’s post I offer a first look at a new app, Chromatica, from the same company that developed Camera Pixels.

Chromatica, priced at an appealing $2.99 on the Apple App Store, is aimed for a middle market of photographers who want more manual control than the camera’s native (built-in) app can provide but without the complexity of more enthusiast-level apps, such as Camera Pixels or ProCam 5 (the successor to ProCam 4).  It competes with other mid-level camera control apps such as Manual, though it is priced at $1 less.  My initial testing of the new Chromatica app found it to be a very worthy tool for most users to take control of their iPhone photography without the expense or complexity of the more advanced apps.  Chromatica has a very simple and intuitive interface, offers the ability to shoot in RAW mode for much higher quality images, and provides the basic required functionality to take manual control over your camera.  It doesn’t offer the full suite of bells and whistles found in the more sophisticated apps, but it’s still a powerful tool that makes the iPhone camera act much more like a DSLR or mirrorless camera while providing a clean and simple user interface.

Chromatica’s features include the ability to shoot in either auto or one of several manual modes such as Shutter Priority and ISO Priority.  It’s quite easy to realize which mode you’re in and to return to auto mode when you’re done taking manual control over the camera; the same cannot be said of some other camera control apps I’ve used.  Another essential feature is the ability to separate the exposure and focus points, so that exposure can be set based on one part of the image while focus is set on another part.  There doesn’t seem to be any user manual or in-app help function to explain this feature, so here’s how it works: simply touch the screen with two fingers and you’ll see a circle and a square appear.  Move the circle to the point in the image where you want to set exposure, and move the square to the point where you want to set focus.  Other useful features include an exposure histogram to show you the range of brightness levels in your shot, and exposure clipping to flag the areas of the image that are too bright or too dim.  Chromatica includes full optical stabilization in RAW mode as well as focus peaking to aid in manual focus operations.

What you won’t find in Chromatica, but for most photo-making purposes won’t miss, are advanced image-editing tools (instead, find these in your favorite standalone image editing software such as Lightroom or Photoshop), exposure bracketing, and long-exposure camera control modes.  Other more sophisticated apps do offer these and more features, but at the expense of higher cost and greater complexity.

In short, Chromatica does exactly what it’s designed to do: make it simple and quick to manually control your phone’s camera and make the most of it’s capabilities.  For most casual and enthusiast photographers, this is good enough when using a phone’s camera.  I typically shoot with professional DSLR gear costing many thousands of dollars when I need pro-level results, but I love the convenience and ease of grabbing some quick shots with my phone, and in the future I am likely to use Chromatica to control the phone’s camera when it’s a straightforward capture.  I’ll continue to use Camera Pixels and ProCam 5 when I require more advanced features to control the phone.

Here’s the link to the Chromatica app on the Apple App Store: Chromatica app.

For reference, here are some popular iPhone camera control apps along with their price and brief notes:

  • Native iOS Camera app (Free): Comes built-in with the iPhone.  Does not allow RAW capture, manual control of the camera, or any advanced features, but does allow the separation of focus and exposure points.
  • Camera Pixels Lite (Free): An entry-level version of Camera Pixels that offers basic camera control features but does not allow RAW capture.
  • Manual ($3.99): Another entry-level app that is really starting to show its age.  Offers basic camera control features including RAW capture, but lacks more advanced features and is difficult to use.
  • Chromatica ($2.99): A great value and very easy to use, this app offers camera control features, RAW capture, and a few more advanced features.
  • Camera Pixels ($3.99): A powerful manual control app with a very wide range of features, it remains quite intuitive to use.
  • ProCam 5 ($5.99): A very powerful app with a wide range of camera control features plus more sophisticated functionality typically associated with DSLRs and mirrorless cameras.  Also includes a full suite of image editing tools.  It can be difficult to use.  Note: I’ve only tested the older ProCam 4.
  • Pro Camera ($5.99): A popular higher-end app with a full range of features.  Note: I’ve not yet tested this app.


What app do you use to control your phone’s camera?  What do you like and dislike about it?  Please share your thoughts here.

Want to read more posts about photography gear?  Find them all here: Posts on Gear.


Chromatica App: Simple, intuitive, and affordable, this new iPhone camera control app is a winner

LR chromatica screenshot-

I’ve posted repeatedly about the importance of understanding how to take manual control of your camera in order to make images that are properly exposed and focused.  Whether you are using a professional DSLR, an advanced full-frame mirrorless ILC, a compact point-and-shoot, or the camera built into your smart phone, there is no way you will get consistently acceptable results if you leave the camera’s settings to its auto mode.  See this post for an overview: Post on Beyond the Auto Mode.

There are dozens of camera control apps available for the iPhone, and it can be confusing to figure out which one is right for you.  In the past, I’ve reviewed the following apps: Manual (see post on Manual app), ProCam 4 (see post on ProCam 4 app), and Camera Pixels (see post on Camera Pixels app).  In today’s post I offer a first look at a new app, Chromatica, from the same company that developed Camera Pixels.

Chromatica, priced at an appealing $2.99 on the Apple App Store, is aimed for a middle market of photographers who want more manual control than the camera’s native (built-in) app can provide but without the complexity of more enthusiast-level apps, such as Camera Pixels or ProCam 5 (the successor to ProCam 4).  It competes with other mid-level camera control apps such as Manual, though it is priced at $1 less.  My initial testing of the new Chromatica app found it to be a very worthy tool for most users to take control of their iPhone photography without the expense or complexity of the more advanced apps.  Chromatica has a very simple and intuitive interface, offers the ability to shoot in RAW mode for much higher quality images, and provides the basic required functionality to take manual control over your camera.  It doesn’t offer the full suite of bells and whistles found in the more sophisticated apps, but it’s still a powerful tool that makes the iPhone camera act much more like a DSLR or mirrorless camera while providing a clean and simple user interface.

Chromatica’s features include the ability to shoot in either auto or one of several manual modes such as Shutter Priority and ISO Priority.  It’s quite easy to realize which mode you’re in and to return to auto mode when you’re done taking manual control over the camera; the same cannot be said of some other camera control apps I’ve used.  Another essential feature is the ability to separate the exposure and focus points, so that exposure can be set based on one part of the image while focus is set on another part.  There doesn’t seem to be any user manual or in-app help function to explain this feature, so here’s how it works: simply touch the screen with two fingers and you’ll see a circle and a square appear.  Move the circle to the point in the image where you want to set exposure, and move the square to the point where you want to set focus.  Other useful features include an exposure histogram to show you the range of brightness levels in your shot, and exposure clipping to flag the areas of the image that are too bright or too dim.  Chromatica includes full optical stabilization in RAW mode as well as focus peaking to aid in manual focus operations.

What you won’t find in Chromatica, but for most photo-making purposes won’t miss, are advanced image-editing tools (instead, find these in your favorite standalone image editing software such as Lightroom or Photoshop), exposure bracketing, and long-exposure camera control modes.  Other more sophisticated apps do offer these and more features, but at the expense of higher cost and greater complexity.

In short, Chromatica does exactly what it’s designed to do: make it simple and quick to manually control your phone’s camera and make the most of it’s capabilities.  For most casual and enthusiast photographers, this is good enough when using a phone’s camera.  I typically shoot with professional DSLR gear costing many thousands of dollars when I need pro-level results, but I love the convenience and ease of grabbing some quick shots with my phone, and in the future I am likely to use Chromatica to control the phone’s camera when it’s a straightforward capture.  I’ll continue to use Camera Pixels and ProCam 5 when I require more advanced features to control the phone.

Here’s the link to the Chromatica app on the Apple App Store: Chromatica app.

For reference, here are some popular iPhone camera control apps along with their price and brief notes:

  • Native iOS Camera app (Free): Comes built-in with the iPhone.  Does not allow RAW capture, manual control of the camera, or any advanced features, but does allow the separation of focus and exposure points.
  • Camera Pixels Lite (Free): An entry-level version of Camera Pixels that offers basic camera control features but does not allow RAW capture.
  • Manual ($3.99): Another entry-level app that is really starting to show its age.  Offers basic camera control features including RAW capture, but lacks more advanced features and is difficult to use.
  • Chromatica ($2.99): A great value and very easy to use, this app offers camera control features, RAW capture, and a few more advanced features.
  • Camera Pixels ($3.99): A powerful manual control app with a very wide range of features, it remains quite intuitive to use.
  • ProCam 5 ($5.99): A very powerful app with a wide range of camera control features plus more sophisticated functionality typically associated with DSLRs and mirrorless cameras.  Also includes a full suite of image editing tools.  It can be difficult to use.  Note: I’ve only tested the older ProCam 4.
  • Pro Camera ($5.99): A popular higher-end app with a full range of features.  Note: I’ve not yet tested this app.


What app do you use to control your phone’s camera?  What do you like and dislike about it?  Please share your thoughts here.

Want to read more posts about photography gear?  Find them all here: Posts on Gear.


Beyond the Auto Mode [Encore Publication]: Take control of your images by learning to manually set exposure, focus, and more

Travel photography is so exciting and satisfying in part because it requires us to capture every kind of image in all kinds of shooting environments.  You could be heading out to shoot landscapes when suddenly a rare sighting of an animal transforms your activity into a wildlife shoot.  Or you may be on the road for your next destination when you stumble upon a colorful local festival, and now you’re shooting portraits of the revelers.  This rich diversity of subjects also creates one of the biggest challenges for travel photographers: how to be prepared for anything that comes our way.  For beginning photographers there is some comfort in using the Auto mode that nearly every camera offers.  After all, we’re more likely to get an acceptable shot this way, when the subject turns quickly from fast action to landscapes to the low light of evening, or to an indoor performance.  But in most cases, your camera’s Auto mode, which attempts to make its best guesses as to what settings to use given existing conditions, will yield only acceptable photos and not the striking and memorable images we’re after.

There is a better way.  Take control of your images by learning how to manually set your exposure, focus, and other aspects of your photo.  All advanced point-and-shoot cameras and all mirrorless and DSLR cameras allow you to set most functions manually.  Even some basic point-and-shoot models have a way to go manual, but often this will involve options buried deep in a menu somewhere.  And there are apps available for both iOS and Android smart phones that allow you to take manual control over your phone’s camera.  I use an iPhone 6S, and I’ve found the “ProCam 4” app to work very nicely for providing control over the phone’s camera setting for exposure, focus, and flash.  You can find it for less than $5 on the Apple App Store: ProCam 4 App.  Even without using an app, most smart phone cameras do allow you to override the automatic settings by clicking on the part of the image you want to be in focus and used for the exposure setting; usually you can also set the exposure based on a different area of the image from the area that you want to be in focus.  But the dedicated apps will give you greater control, as they allow you to choose the shutter speed, aperture (when not fixed), and ISO for each shot.

For this image of a whirling dervish in Goreme, Turkey, I wanted to blur the dancer so as to give a sense of the continual turning motion in the ceremony, so I used my camera’s shutter-priority exposure mode and selected a slower shutter speed.  Buy this photo

The key to successfully using your camera’s manual settings is to learn how they work and to practice at home, long before you actually take a trip.  Like anything else, selecting the settings we want on a camera takes practice.  In this digital era, it’s easier to learn because you can see the results of each setting immediately on your camera’s screen.  So dig out that camera user guide, or find it online, or search for a good tutorial.  But do learn how to adjust the key settings manually.

The first manual setting every photographer should learn is how to turn off your camera’s flash.  This sounds very basic, but I’m always amazed to see so many flashes going off in inappropriate places: museums that don’t allow flash photography, cultural performances, sports stadiums where the subject is thousands of feet away from the camera (the flash will only provide acceptable lighting for a few dozen feet, at most), and even the shy octopus exhibit at our local aquarium.  Believe me, you do not want to flash the octopus.  So learn how to turn your flash off, and be sure you actually do turn it off when you’re in a venue where flash is inappropriate or won’t help your image be better exposed.  Remember that glass reflects light, so you don’t want your flash on when shooting through windows of a vehicle or the glass windows of animal enclosures at zoos or aquariums.

Next, learn how to set your camera’s exposure manually.  The light meters built into today’s cameras are very smart, but they are also easily fooled by tricky lighting conditions.  The most common problem is backlighting.  If your subject is lit from behind, as many outdoor subjects are, your camera’s auto mode will likely expose for the brighter background and will leave your main subject underexposed.  You can adjust for this is several ways.  It may be good enough to just use your camera’s exposure compensation button to dial in, say, one extra stop of exposure.  Use your camera’s LCD screen and (if it has one) the histogram, to see how the subject is exposed with varying levels of compensation.  In some cases (if your main subject is quite close to the camera), you can use fill flash to fix backlighting problems.  To do so, manually turn on your camera’s flash, or attach a separate flash unit, and choose the setting for “fill flash” or “balanced TTL” (through the lens) flash mode.  Again, check exposure using your camera’s screen and histogram.  I find I usually get good results in tricky lighting conditions by using my camera’s spot metering mode, which tells the camera’s meter to use only the very center (or whatever area I select) of the image when choosing the exposure.

Other than allowing you to properly expose your main subject, manually setting the exposure also gives you control over what combination of shutter speed (how long the exposure lasts), aperture (how wide the lens is open), and ISO (how sensitive the camera is to light) you want for each shot.  If you’re shooting fast moving action like sports or wildlife, you will likely want to choose a fast shutter speed to freeze the motion (unless you want a blur effect as an artistic choice).  If you’re photographing a waterfall or sky and want to get some nice blurring of the water and/or clouds, you will probably want to choose a slower shutter speed.  Many times you want only certain parts of the image to be in focus.  A wide aperture (low F-stop number such as f/1.8) will give you a shallow depth-of-field, allowing only one part of the image to be in focus and blurring the other parts.  Conversely, a narrow aperture (high F-stop number such as f/16) will allow all parts of the photo to be in focus.  The final element determining exposure is the sensitivity of the camera’s sensor, measured by an ISO number.  Select a higher ISO (such as 1600 or above) only when you really need the extra sensitivity for very low-light subjects when a longer shutter speed or wider aperture is not suitable.  When you use very high ISO settings, the image will tend to have a lot of noise.  Today’s cameras are getting better at limiting noise at high ISO settings, and there are ways to reduce some of the effects of the noise using post-processing software, so my approach is to use as high an ISO as is required after considering the range of available shutter speeds and apertures.

To capture these professional beach volleyball players in sharp focus and to freeze the moment, I selected single-focus-point focus mode and chose the exact spot in the viewfinder where the players would be positioned, and also used my camera’s shutter-priority exposure mode to select a very fast shutter speed.  Buy this photo

The other major type of manual setting that you need to know how to use is focus.  Most cameras today do a pretty good job of choosing the right part of the image to focus on, but they often need some help from the photographer.  From simple smart phone cameras through professional DSLRs, the autofocus function almost always lets the photographer select what part of the image they want to be in focus.  If you keep your camera in fully autofocus mode and don’t help by selecting where your main subject is, it may very well guess incorrectly and put another part of the image as the center of focus.  So, learn how to select the focus point even while letting your camera’s autofocus mechanism actually choose the focus distance.  Sometimes a camera’s autofocus capability may not work for the conditions under which you’re shooting, and in these cases you need to turn off autofocus completely, and focus in manual mode.  Some instances when this is necessary are when shooting in very low light conditions, or when shooting in poor contrast environments (for example, your subject’s texture looks a lot like that of its background, or you’re shooting into the bright sun).  In these cases, turn off the autofocus function and adjust focus manually until the subject looks sharp.

It’s still fine to walk around during your travels with your camera set in fully Auto mode, just in case something very unexpected comes up.  But do know how to set the main functions manually so you’ll get the best possible images in the 95% of the shooting situations when you do have time to set up first.

Want to read other posts about photographic techniques?  Find them all here: http://www.to-travel-hopefully.com/category/techniques/

Do you have tips and tricks you can share on manually adjusting the camera’s settings to get great shots?  How about a time you kept the camera on Auto mode and got disappointing results?  Please share your thoughts using the comment box at the end of this post.

Focus on Tahiti Dance Fete [Encore Publication]: A case study in shooting under challenging circumstances

The travel photographer must be prepared to shoot under challenging circumstances, because often we have little control over the conditions in the field.  We may plan our travel years in advance to observe and photograph a total solar eclipse, only to wake up on the morning of the eclipse to find the sky is totally overcast.  Or we could make arrangements months ahead to be at a major cultural festival, but learn upon arrival that the area we’re shooting from is hundreds of yards from the action.  These things happen, but the professional photographer still needs to get her shot.  So, what can be done to persevere and increase our odds of getting usable images under adversity?  The answer, of course, depends on the specific circumstances of each shoot, but there are some general tips I can offer.  Today’s post presents a case study based on my recent shoot of the solo dance competition at the Tahiti Fete in San Jose, California.

The dancers made lovely subjects, but the shooting conditions were very challenging.  Read on to learn how to make the best of a difficult situation.  Buy this photo

Upon arrival at the dance competition, I realized immediately that this shoot would be challenging.  It was held in a cramped hotel convention room with a makeshift stage, rows of folding chairs for spectators, insufficient lighting of poor color quality, and a bank of judges blocking most of the view of the stage.  To make matters worse, the room was packed with people, many of whom stood up to cheer on their friends, and the only available seats were near the far end of the room.  An extra challenge was thrown into the mix by the cluttered and unattractive background behind the performers on the stage.

Cluttered backgrounds are a significant obstacle, but good images can still be made in these situations.  Buy this photo

What can be done to mitigate against a cluttered background?  I shot plenty of images of each dancer to increase the likelihood that I could eliminate some of the more distracting background elements while still capturing the excitement, grace, and colors of the dancing.  This image was the best I could capture of this particular dancer, so I committed to it in post-processing.  I cropped the image to avoid the most distracting elements, adjusted the exposure curves, contrast, and sharpness of the background to de-emphasize it, and applied some post-crop vignetting to ensure the dancer would be highlighted.

When using a very high ISO, some noise will result.  This doesn’t have to be a disadvantage.  Buy this photo

The lighting was very dim at this venue.  Because I was shooting from far away, I needed to use a long telephoto lens, which limited me to a small aperture and no possibility of using flash.  Nonetheless, a fast shutter speed was required in order to freeze the fast action of the Polynesian dancing.  This combination (low lighting, small aperture, and fast shutter speed) leaves no option other than a very high ISO setting.  I shot the above image at ISO 6400.  Even with an excellent professional camera sensor, such a high ISO will generate some noise in the image.  Noise can often be reduced to acceptable levels during post-processing.  But for this particular image, I was aiming for a soft, painterly feel.  The visual effect of high contrast, soft colors, and a bit of visual noise here gives the feel of an impressionistic rendering.  For this expressive Tahitian subject, I was very happy to have a Gauguin-esque style shine through in the final image.

 Cut out elements that don’t work.  Buy this photo

To make the above image, I cropped out distracting portions such as the judges’ heads in the foreground and an ugly door and wall in the background.  The resulting aspect ratio is non-standard, but works well for this image.  I desaturated the background and used post-crop vignetting to focus attention on the dancer.


Black-and-white renderings can be more forgiving when color quality is low.  Buy this photo

This image portrays a lovely subject but the lighting was especially poor.  Realizing I couldn’t do much to mitigate the strange color cast resulting from the artificial lights, I converted the image to monochrome, boosted the contrast, and adjusted the color channel mix to render a pleasing and elegant final image.  Check out this post to learn how black-and-white conversion can be used to save the day when color temperatures or image noise are problems: Post on B&W conversion to save strangely colored images.

Bringing it all together: This image works nicely in spite of all the challenges present at the shoot, including foreground obstacles, dim and low quality lighting, a far-away vantage point, and a cluttered background.  Buy this photo

In spite of multiple significant technical issues, I was able to make some striking images of the lovely dancers at this Tahitian festival.  Hopefully, the tips presented here will help when you next are faced with a challenging shoot.  The most important thing is to keep shooting as best you can while in the field.  There are multiple methods you can use in post-processing to mitigate against the shooting challenges and end up with images you will be proud of.

What techniques do you use when faced with difficult shooting conditions?  Please share your thoughts here.

Want to read more posts about photographic techniques?  Find them all here: Posts on Techniques.

Prime Time [Encore Publication]: Why a prime lens is often better than a zoom

Most photographers make most of their images using a zoom lens.  Aside from smartphone cameras, which typically feature a fixed focal-length lens, nearly every camera today comes with a zoom lens attached.  Most point-and-shoot and compact cameras do not have interchangeable lenses, so the zoom lens that comes with the camera is the only choice, while most mirrorless and DSLR cameras have interchangeable lenses.  That means these more advanced cameras offer the choice of using a broad range of different lenses, including both zoom and prime (fixed focal-length) lenses.  While many photographers own one or several prime lenses, from my observation the vast majority shoot nearly all of their images using one of their zoom lenses instead.  In today’s post, I make the case for using prime lenses in many, or even most, shooting situations.

This portrait of a Delhi girl outside India’s largest mosque is lovely and effective, but because I didn’t have time to change lenses and was forced to use my slower walkaround zoom lens, the depth-of-field is quite deep, making for a somewhat distracting background.  Buy this photo

Zoom lenses have one clear advantage over prime lenses: they offer a range of focal lengths, which helps the photographer compose the image without having to walk closer to or farther away from the subject.  But even here I would argue that in most cases it aids creativity to “zoom with the feet,” or walk around to compose the best shot.  Even when this isn’t possible, a high-resolution digital image can easily be cropped in post-processing to achieve the composition the photographer had in mind.

But prime lenses have many advantages over zoom lenses.  First, they are nearly always sharper and generally higher quality than zooms, because they don’t require extra internal glass elements to enable the zooming.  While zoom lenses have improved in optical quality over recent years, it remains the case that prime lenses offer a quality advantage.  Second, prime lenses are typically smaller and lighter than zooms.  This is a blessing especially to travel photographers.  Third, primes are less expensive than zooms of similar optical and build quality.  That means you can buy two or three different prime lenses for the price of one zoom lens covering a similar range of focal lengths.  And fourth, primes are usually faster (i.e., offer a wider maximum aperture size) than zooms.  This last point is a big advantage for many types of shooting, because a wide aperture (small F-number) lets in more light, allowing use of faster shutter speeds and lower ISO settings in low-light conditions.  This is a real boon for nighttime and astro-photography.  A wide aperture also results in shallow depth-of-field, which emphasizes the main subject by softening the focus of the background.  The best lenses offer a pleasing “bokeh”, or pleasant blurring of the out-of-focus elements of the image.  This effect makes for extremely effective portraits as well as wildlife images, but is also useful for other types of photography.


This portrait, made with my current favorite lens, an 85mm f/1.8 portrait lens, offers very sharp focus on the subject’s face and pleasing bokeh, or soft blurring of the out-of-focus background.  It would not have been possible to make this portrait using a zoom lens because the maximum aperture would be too small to achieve the soft background effect.  Buy this photo

I shoot a lot of performing arts events (dance, music, theater), which typically take place indoors where the light is very dim and frequently feature fast-moving action requiring a fast shutter speed.  Using a prime lens allows me to shoot at an action-freezing shutter speed without having to use extremely high ISO settings that introduce noise into the images.  And again, the pleasantly blurred backgrounds help set off the very sharp main subject for a striking overall effect.

I captured this image of a samba dancer at a dress rehearsal under very low-light conditions.  Using my 85mm f/1.8 prime portrait lens, I was able to freeze the motion using a fast shutter speed, keep the ISO at a reasonable level to avoid noise, and render a nice soft background.  Buy this photo

I would estimate that most enthusiast and professional photographers shoot about 80% of their images using zoom lenses.  My own usage pattern is the opposite, that is, I shoot about 80% of my images using prime lenses.  For some purposes, a zoom lens is still required, but it’s surprising how often we can achieve better results using a prime.  Prime lenses are smaller, lighter, less expensive, higher quality, and faster than zoom lenses.  I encourage you to dig out your prime lenses if you have a few, or borrow, rent, or buy one or two (remember, they are much less expensive than comparable zoom lenses) and try shooting with them exclusively, or at least much of the time, for a week or two.  Compare your images made with the primes vs. the ones made with zooms and come to your own conclusions.  If you’re like me, you’ll find that a prime lens is the right tool for most photographic jobs.

Here are my three favorite prime lenses, a “normal” lens, a medium telephoto or “portrait” lens, and a wide-angle lens:

If you pack only one prime lens, it most likely will be a “normal” lens, that is one with a focal length of about 50mm for a full-frame camera or about 35mm for a crop-sensor camera.  I carry the Nikon 50mm f/1.4G lens.  This is the one I use in very low-light situations or to get a really shallow depth-of-field.

I think my current favorite lens of all (including primes and zooms) is my Nikon 85mm f/1.8G lens.  This is a classic portrait lens and provides a flattering perspective and great image quality when your subject is a human being.  I use it for nearly all of my portrait work these days.  But this lens also shines for nature and action photography where you don’t need a really long focal length.  It renders really lovely “bokeh”, or the soft quality of the out-of-focus parts of the image.

A wide-angle prime lens can be useful for landscapes, architecture and interiors, and astro-photography, among other purposes.  I like the Nikon 24mm f/1.8.

What are your preferences regarding use of prime vs. zoom lenses, and why?  Please share your experiences in the comments box.

Want to read other posts about gear?  Find them all here: Posts on Gear.


The Sharpest Tack in the Box [Encore Publication]: How to achieve sharp focus in tricky shooting situations

One of the most important elements of an image is focus, and even an untrained viewer can tell immediately when a key part of the image is not in sharp focus.  The stakes are even higher when we consider that poor focus is nearly impossible to correct in post-processing.  Most of us rely on our camera’s autofocus functionality to help us achieve tack-sharp focus while shooting, but as with every other automated system in a camera, even very sophisticated autofocus mechanisms can go awry, especially when we’re faced with tricky shooting situations.  Here’s a quick guide to minimizing focus problems and achieving sharp focus in nearly every shot.

Scenes with low contrast, such as in this image of ice floes on the Barents Sea in Svalbard after sunset, can fool even sophisticated autofocus systems.  Override your camera’s autofocus system and instead shoot manually in these conditions.  Buy this photo

  1. Make sure to select the part of your image that you want to be in sharp focus.  It sounds like a no-brainer, but surprisingly frequently the reason an image’s main subject is not in focus is because the photographer never told the camera’s autofocus system what to focus on.  Remember that as with any assistive technology, a camera’s autofocus system is just a collection of hardware and software designed to make a best guess about what the user wants.  If you leave your camera set to full autofocus mode, it does its best to identify what its software determines is likely to be your intended subject.  A human face, for example, is likely to be what you want to have in sharp focus, so the camera focuses on that.  But often the camera does not guess correctly.  Nearly every camera, including the one in your smartphone, allows you to manually select your desired focus point, often by simply touching the desired part of the image on the screen.  Be sure to check what your camera is doing and correct it by manually selecting the focus point if it guesses wrong.
  2. Recognize that your camera’s autofocus system will likely not work in certain tricky conditions. Most autofocus systems work by looking for areas of the image where the contrast is changing, such as at the outlines of a person or a building.  But in very dim lighting, or when the main subject is badly backlit, or in scenes with very low contrast (think of a stormy sky or the waves of an ocean), the autofocus does not work.  Recognize these deficiencies and be prepared when shooting in these conditions to take manual control.  Every camera has a mechanism to manually select focus, and you need to know how to use that feature.
  3. Choose the autofocus method best suited to your shooting needs.   Most advanced or professional cameras allow you to choose among several different types of autofocus methods.  Often, the first choice is between single-focus mode or continuous-focus mode.  Choose single-focus mode when your subject is relatively stationary and you must have precise focus achieved before releasing the shutter.  For subjects that are moving quickly or where you need to time your shot exactly, even at the expense of not yet having perfect focus, you should choose continuous-focus mode.  Within each of these modes, your camera may offer sub-choices, such as letting you manually choose the exact focus point you want or choosing a range of points from which the camera selects focus based on the motion of the subject.  This is rocket-science technology, but fortunately it is pretty straightforward to choose the desired method once you understand what each one does.  Read your camera’s manual and always practice in the different focus modes before going on any important shoots, especially on a major trip.
  4. Circumvent the whole problem by choosing a wide depth of field.  Sometimes the best artistic choice requires a narrow depth of field so that only the main subject is in sharp focus, and sometimes the light is too dim to choose a narrow aperture, but if you can make the shot work with a wide depth of field (in other words, using a small aperture, represented by a high f-stop number), then you don’t have to worry about focus at all.  In most situations, universal focus from several feet away from your lens through infinity is achieved at apertures of about f/16 or smaller.

Capturing tack-sharp images of fast-moving wildlife like the cheetah requires selection of an autofocus mode capable of dynamically refocusing on the moving subject.  For this shot of a cheetah in Serengeti National Park in Tanzania, there was the added challenge of having low contrast between the animal and the background.  I chose my camera’s continuous-focus mode with predictive focus so the camera would anticipate where the cheetah was moving and focus ahead of the shutter.  Buy this photo

By using these tips, you can achieve tack-sharp focus where you want it in nearly all of your images, whether you’re shooting with a simple point-and-shoot or phone camera, or the most advanced professional camera.  Any camera frequently makes the wrong guess about where the focus point should be, so do not rely blindly on autofocus.  It’s worth investing some time to learn how to configure autofocus appropriately for any shooting situation, and how to turn it off and instead focus manually when required.  Happy shooting!

How do you achieve sharp focus in tricky conditions?  Please share your thoughts in the comment box at the end of this post.

Want to see more articles about techniques?  Find them all here: http://www.to-travel-hopefully.com/category/techniques/.

Top Tips for Great Travel Images [Encore Publication]: These five simple “hacks” will result in more professional images

Festivals and street fairs can be challenging to shoot due to backgrounds cluttered with people, buildings, and cars.  To make this portrait of grandmother and granddaughter at Carnaval San Francisco, I got down low so that most of the background was covered by the cloth of the costume, and I used a wide aperture to throw the hectic street scene into soft focus.  Buy this photo

The web is positively overflowing with “life hacks,” simple tips and tricks to save us all time and effort and to achieve better results.  Some lists are better than others, but it is in the spirit of these lists that I bring you this compilation of five simple travel photography hacks.  These techniques are not difficult and do not require expensive gear.  They work equally well for your photography whether traveling or at home.  And I promise that if you follow them, your images will improve.  The pros do these things almost automatically; to them, it’s hygiene, like tooth brushing.  If you read no other post about photography, read this one.

  1. Avoid cluttered backgrounds: So often the travel images of a professional stand out from those of amateurs simply because they took careful notice of what was in the background while composing the shot.  Try to frame your subject against a clean backdrop such as a dark-colored wall or the sky.  If there’s no way to avoid including some clutter in the background, at least use a wide aperture (low F-stop number) to throw the background into soft focus.
  2. Watch your horizon: Frequently, we’re so intent on composing the main subject within our viewfinder that we forget to check whether the camera is level before firing the shutter.  An uneven horizon can give the impression of vertigo, like the subject is going to fall out of the frame.  Some cameras have a virtual horizon function to show you whether the horizontal and vertical axes are level, but whether you use it or not, be sure to check visually that the edge of the image looks correct.
  3. Achieve sharp focus: The one characteristic of an image that even the most inexperienced viewer can identify immediately, and one that’s almost impossible to fix in post-processing, is poor focus.  Today’s cameras are so easy to use that we often overlook this most basic element.  The camera can’t know for sure what subject you intend to have in focus; it can only make its best guess.  So take the extra fraction of a second while composing your image to move the camera’s focus point onto the main subject.  Or use a small aperture (high F-stop number) to provide a wide depth of field so that essentially everything is in focus.
  4. Choose the correct exposure: Another very basic element of any photograph, exposure can only be correctly chosen by the photographer, not by the camera.  Your camera’s Auto mode can be fooled very easily by many tricky situations, most commonly by backlighting of the subject.  It’s fine to use the camera’s guess as a starting point, but nearly every camera (including smartphone cameras) have a way to manually override this guess, so learn how to do this and add in about a stop or so of extra exposure if your subject is backlit, more if the backlighting is severe.
  5. Turn off the darned flash: Nearly every camera has a mode where it fires the flash automatically if it determines the extra light is needed.  This is rarely a good thing.  Far better to turn off the auto flash setting and make your own decision about when to use the flash.  Otherwise, your low-light images could end up with an eerie, unnatural color cast or your far-away subject could be underexposed (a flash typically lights an object only a few feet away from the camera, so why fire the flash when you’re photographing an object hundreds of yards or even miles away?).  Worse, if you are shooting through glass or another reflective surface, your flash reflects off the surface, ruining your whole image.  Worse still, your flash may blind everyone else near you in a very dim setting, damage sensitive artwork, or scare or anger nearby wildlife.  I’ve seen countless visitors ejected from museums, zoos and aquariums, and other wonderful destinations because they hadn’t figured out how to override their camera’s auto flash setting.  Just turn off the darned flash, and use it manually when appropriate.

Learn these simple techniques and follow them whenever you shoot, and you’ll start making images that stand out from the crowd.  Remember, you, and not the technology inside your camera, are the creative force behind your images.

While this image of a yurt in the remote mountainous region between China and Tajikistan succeeds in spite of (or perhaps because of) the off-kilter horizon, it serves as a good reminder to check the horizons at the edge of our photos.  Buy this photo

What are your favorite tips and tricks to ensure you make the best images possible?  Please share here!

Want to read more posts about photographic techniques?  Find them all here: Posts on Techniques.

Prime Time [Encore Publication]: Why a prime lens is often better than a zoom

Most photographers make most of their images using a zoom lens.  Aside from smartphone cameras, which typically feature a fixed focal-length lens, nearly every camera today comes with a zoom lens attached.  Most point-and-shoot and compact cameras do not have interchangeable lenses, so the zoom lens that comes with the camera is the only choice, while most mirrorless and DSLR cameras have interchangeable lenses.  That means these more advanced cameras offer the choice of using a broad range of different lenses, including both zoom and prime (fixed focal-length) lenses.  While many photographers own one or several prime lenses, from my observation the vast majority shoot nearly all of their images using one of their zoom lenses instead.  In today’s post, I make the case for using prime lenses in many, or even most, shooting situations.

This portrait of a Delhi girl outside India’s largest mosque is lovely and effective, but because I didn’t have time to change lenses and was forced to use my slower walkaround zoom lens, the depth-of-field is quite deep, making for a somewhat distracting background.  Buy this photo

Zoom lenses have one clear advantage over prime lenses: they offer a range of focal lengths, which helps the photographer compose the image without having to walk closer to or farther away from the subject.  But even here I would argue that in most cases it aids creativity to “zoom with the feet,” or walk around to compose the best shot.  Even when this isn’t possible, a high-resolution digital image can easily be cropped in post-processing to achieve the composition the photographer had in mind.

But prime lenses have many advantages over zoom lenses.  First, they are nearly always sharper and generally higher quality than zooms, because they don’t require extra internal glass elements to enable the zooming.  While zoom lenses have improved in optical quality over recent years, it remains the case that prime lenses offer a quality advantage.  Second, prime lenses are typically smaller and lighter than zooms.  This is a blessing especially to travel photographers.  Third, primes are less expensive than zooms of similar optical and build quality.  That means you can buy two or three different prime lenses for the price of one zoom lens covering a similar range of focal lengths.  And fourth, primes are usually faster (i.e., offer a wider maximum aperture size) than zooms.  This last point is a big advantage for many types of shooting, because a wide aperture (small F-number) lets in more light, allowing use of faster shutter speeds and lower ISO settings in low-light conditions.  This is a real boon for nighttime and astro-photography.  A wide aperture also results in shallow depth-of-field, which emphasizes the main subject by softening the focus of the background.  The best lenses offer a pleasing “bokeh”, or pleasant blurring of the out-of-focus elements of the image.  This effect makes for extremely effective portraits as well as wildlife images, but is also useful for other types of photography.


This portrait, made with my current favorite lens, an 85mm f/1.8 portrait lens, offers very sharp focus on the subject’s face and pleasing bokeh, or soft blurring of the out-of-focus background.  It would not have been possible to make this portrait using a zoom lens because the maximum aperture would be too small to achieve the soft background effect.  Buy this photo

I shoot a lot of performing arts events (dance, music, theater), which typically take place indoors where the light is very dim and frequently feature fast-moving action requiring a fast shutter speed.  Using a prime lens allows me to shoot at an action-freezing shutter speed without having to use extremely high ISO settings that introduce noise into the images.  And again, the pleasantly blurred backgrounds help set off the very sharp main subject for a striking overall effect.

I captured this image of a samba dancer at a dress rehearsal under very low-light conditions.  Using my 85mm f/1.8 prime portrait lens, I was able to freeze the motion using a fast shutter speed, keep the ISO at a reasonable level to avoid noise, and render a nice soft background.  Buy this photo

I would estimate that most enthusiast and professional photographers shoot about 80% of their images using zoom lenses.  My own usage pattern is the opposite, that is, I shoot about 80% of my images using prime lenses.  For some purposes, a zoom lens is still required, but it’s surprising how often we can achieve better results using a prime.  Prime lenses are smaller, lighter, less expensive, higher quality, and faster than zoom lenses.  I encourage you to dig out your prime lenses if you have a few, or borrow, rent, or buy one or two (remember, they are much less expensive than comparable zoom lenses) and try shooting with them exclusively, or at least much of the time, for a week or two.  Compare your images made with the primes vs. the ones made with zooms and come to your own conclusions.  If you’re like me, you’ll find that a prime lens is the right tool for most photographic jobs.

Here are my three favorite prime lenses, a “normal” lens, a medium telephoto or “portrait” lens, and a wide-angle lens:

If you pack only one prime lens, it most likely will be a “normal” lens, that is one with a focal length of about 50mm for a full-frame camera or about 35mm for a crop-sensor camera.  I carry the Nikon 50mm f/1.4G lens.  This is the one I use in very low-light situations or to get a really shallow depth-of-field.

I think my current favorite lens of all (including primes and zooms) is my Nikon 85mm f/1.8G lens.  This is a classic portrait lens and provides a flattering perspective and great image quality when your subject is a human being.  I use it for nearly all of my portrait work these days.  But this lens also shines for nature and action photography where you don’t need a really long focal length.  It renders really lovely “bokeh”, or the soft quality of the out-of-focus parts of the image.

A wide-angle prime lens can be useful for landscapes, architecture and interiors, and astro-photography, among other purposes.  I like the Nikon 24mm f/1.8.

What are your preferences regarding use of prime vs. zoom lenses, and why?  Please share your experiences in the comments box.

Want to read other posts about gear?  Find them all here: Posts on Gear.


Focus on Tahiti Dance Fete [Encore Publication]: A case study in shooting under challenging circumstances

The travel photographer must be prepared to shoot under challenging circumstances, because often we have little control over the conditions in the field.  We may plan our travel years in advance to observe and photograph a total solar eclipse, only to wake up on the morning of the eclipse to find the sky is totally overcast.  Or we could make arrangements months ahead to be at a major cultural festival, but learn upon arrival that the area we’re shooting from is hundreds of yards from the action.  These things happen, but the professional photographer still needs to get her shot.  So, what can be done to persevere and increase our odds of getting usable images under adversity?  The answer, of course, depends on the specific circumstances of each shoot, but there are some general tips I can offer.  Today’s post presents a case study based on my recent shoot of the solo dance competition at the Tahiti Fete in San Jose, California.

The dancers made lovely subjects, but the shooting conditions were very challenging.  Read on to learn how to make the best of a difficult situation.  Buy this photo

Upon arrival at the dance competition, I realized immediately that this shoot would be challenging.  It was held in a cramped hotel convention room with a makeshift stage, rows of folding chairs for spectators, insufficient lighting of poor color quality, and a bank of judges blocking most of the view of the stage.  To make matters worse, the room was packed with people, many of whom stood up to cheer on their friends, and the only available seats were near the far end of the room.  An extra challenge was thrown into the mix by the cluttered and unattractive background behind the performers on the stage.

Cluttered backgrounds are a significant obstacle, but good images can still be made in these situations.  Buy this photo

What can be done to mitigate against a cluttered background?  I shot plenty of images of each dancer to increase the likelihood that I could eliminate some of the more distracting background elements while still capturing the excitement, grace, and colors of the dancing.  This image was the best I could capture of this particular dancer, so I committed to it in post-processing.  I cropped the image to avoid the most distracting elements, adjusted the exposure curves, contrast, and sharpness of the background to de-emphasize it, and applied some post-crop vignetting to ensure the dancer would be highlighted.

When using a very high ISO, some noise will result.  This doesn’t have to be a disadvantage.  Buy this photo

The lighting was very dim at this venue.  Because I was shooting from far away, I needed to use a long telephoto lens, which limited me to a small aperture and no possibility of using flash.  Nonetheless, a fast shutter speed was required in order to freeze the fast action of the Polynesian dancing.  This combination (low lighting, small aperture, and fast shutter speed) leaves no option other than a very high ISO setting.  I shot the above image at ISO 6400.  Even with an excellent professional camera sensor, such a high ISO will generate some noise in the image.  Noise can often be reduced to acceptable levels during post-processing.  But for this particular image, I was aiming for a soft, painterly feel.  The visual effect of high contrast, soft colors, and a bit of visual noise here gives the feel of an impressionistic rendering.  For this expressive Tahitian subject, I was very happy to have a Gauguin-esque style shine through in the final image.

 Cut out elements that don’t work.  Buy this photo

To make the above image, I cropped out distracting portions such as the judges’ heads in the foreground and an ugly door and wall in the background.  The resulting aspect ratio is non-standard, but works well for this image.  I desaturated the background and used post-crop vignetting to focus attention on the dancer.


Black-and-white renderings can be more forgiving when color quality is low.  Buy this photo

This image portrays a lovely subject but the lighting was especially poor.  Realizing I couldn’t do much to mitigate the strange color cast resulting from the artificial lights, I converted the image to monochrome, boosted the contrast, and adjusted the color channel mix to render a pleasing and elegant final image.  Check out this post to learn how black-and-white conversion can be used to save the day when color temperatures or image noise are problems: Post on B&W conversion to save strangely colored images.

Bringing it all together: This image works nicely in spite of all the challenges present at the shoot, including foreground obstacles, dim and low quality lighting, a far-away vantage point, and a cluttered background.  Buy this photo

In spite of multiple significant technical issues, I was able to make some striking images of the lovely dancers at this Tahitian festival.  Hopefully, the tips presented here will help when you next are faced with a challenging shoot.  The most important thing is to keep shooting as best you can while in the field.  There are multiple methods you can use in post-processing to mitigate against the shooting challenges and end up with images you will be proud of.

What techniques do you use when faced with difficult shooting conditions?  Please share your thoughts here.

Want to read more posts about photographic techniques?  Find them all here: Posts on Techniques.

Beyond the Auto Mode [Encore Publication]: Take control of your images by learning to manually set exposure, focus, and more

Travel photography is so exciting and satisfying in part because it requires us to capture every kind of image in all kinds of shooting environments.  You could be heading out to shoot landscapes when suddenly a rare sighting of an animal transforms your activity into a wildlife shoot.  Or you may be on the road for your next destination when you stumble upon a colorful local festival, and now you’re shooting portraits of the revelers.  This rich diversity of subjects also creates one of the biggest challenges for travel photographers: how to be prepared for anything that comes our way.  For beginning photographers there is some comfort in using the Auto mode that nearly every camera offers.  After all, we’re more likely to get an acceptable shot this way, when the subject turns quickly from fast action to landscapes to the low light of evening, or to an indoor performance.  But in most cases, your camera’s Auto mode, which attempts to make its best guesses as to what settings to use given existing conditions, will yield only acceptable photos and not the striking and memorable images we’re after.

There is a better way.  Take control of your images by learning how to manually set your exposure, focus, and other aspects of your photo.  All advanced point-and-shoot cameras and all mirrorless and DSLR cameras allow you to set most functions manually.  Even some basic point-and-shoot models have a way to go manual, but often this will involve options buried deep in a menu somewhere.  And there are apps available for both iOS and Android smart phones that allow you to take manual control over your phone’s camera.  I use an iPhone 6S, and I’ve found the “ProCam 4” app to work very nicely for providing control over the phone’s camera setting for exposure, focus, and flash.  You can find it for less than $5 on the Apple App Store: ProCam 4 App.  Even without using an app, most smart phone cameras do allow you to override the automatic settings by clicking on the part of the image you want to be in focus and used for the exposure setting; usually you can also set the exposure based on a different area of the image from the area that you want to be in focus.  But the dedicated apps will give you greater control, as they allow you to choose the shutter speed, aperture (when not fixed), and ISO for each shot.

For this image of a whirling dervish in Goreme, Turkey, I wanted to blur the dancer so as to give a sense of the continual turning motion in the ceremony, so I used my camera’s shutter-priority exposure mode and selected a slower shutter speed.  Buy this photo

The key to successfully using your camera’s manual settings is to learn how they work and to practice at home, long before you actually take a trip.  Like anything else, selecting the settings we want on a camera takes practice.  In this digital era, it’s easier to learn because you can see the results of each setting immediately on your camera’s screen.  So dig out that camera user guide, or find it online, or search for a good tutorial.  But do learn how to adjust the key settings manually.

The first manual setting every photographer should learn is how to turn off your camera’s flash.  This sounds very basic, but I’m always amazed to see so many flashes going off in inappropriate places: museums that don’t allow flash photography, cultural performances, sports stadiums where the subject is thousands of feet away from the camera (the flash will only provide acceptable lighting for a few dozen feet, at most), and even the shy octopus exhibit at our local aquarium.  Believe me, you do not want to flash the octopus.  So learn how to turn your flash off, and be sure you actually do turn it off when you’re in a venue where flash is inappropriate or won’t help your image be better exposed.  Remember that glass reflects light, so you don’t want your flash on when shooting through windows of a vehicle or the glass windows of animal enclosures at zoos or aquariums.

Next, learn how to set your camera’s exposure manually.  The light meters built into today’s cameras are very smart, but they are also easily fooled by tricky lighting conditions.  The most common problem is backlighting.  If your subject is lit from behind, as many outdoor subjects are, your camera’s auto mode will likely expose for the brighter background and will leave your main subject underexposed.  You can adjust for this is several ways.  It may be good enough to just use your camera’s exposure compensation button to dial in, say, one extra stop of exposure.  Use your camera’s LCD screen and (if it has one) the histogram, to see how the subject is exposed with varying levels of compensation.  In some cases (if your main subject is quite close to the camera), you can use fill flash to fix backlighting problems.  To do so, manually turn on your camera’s flash, or attach a separate flash unit, and choose the setting for “fill flash” or “balanced TTL” (through the lens) flash mode.  Again, check exposure using your camera’s screen and histogram.  I find I usually get good results in tricky lighting conditions by using my camera’s spot metering mode, which tells the camera’s meter to use only the very center (or whatever area I select) of the image when choosing the exposure.

Other than allowing you to properly expose your main subject, manually setting the exposure also gives you control over what combination of shutter speed (how long the exposure lasts), aperture (how wide the lens is open), and ISO (how sensitive the camera is to light) you want for each shot.  If you’re shooting fast moving action like sports or wildlife, you will likely want to choose a fast shutter speed to freeze the motion (unless you want a blur effect as an artistic choice).  If you’re photographing a waterfall or sky and want to get some nice blurring of the water and/or clouds, you will probably want to choose a slower shutter speed.  Many times you want only certain parts of the image to be in focus.  A wide aperture (low F-stop number such as f/1.8) will give you a shallow depth-of-field, allowing only one part of the image to be in focus and blurring the other parts.  Conversely, a narrow aperture (high F-stop number such as f/16) will allow all parts of the photo to be in focus.  The final element determining exposure is the sensitivity of the camera’s sensor, measured by an ISO number.  Select a higher ISO (such as 1600 or above) only when you really need the extra sensitivity for very low-light subjects when a longer shutter speed or wider aperture is not suitable.  When you use very high ISO settings, the image will tend to have a lot of noise.  Today’s cameras are getting better at limiting noise at high ISO settings, and there are ways to reduce some of the effects of the noise using post-processing software, so my approach is to use as high an ISO as is required after considering the range of available shutter speeds and apertures.

To capture these professional beach volleyball players in sharp focus and to freeze the moment, I selected single-focus-point focus mode and chose the exact spot in the viewfinder where the players would be positioned, and also used my camera’s shutter-priority exposure mode to select a very fast shutter speed.  Buy this photo

The other major type of manual setting that you need to know how to use is focus.  Most cameras today do a pretty good job of choosing the right part of the image to focus on, but they often need some help from the photographer.  From simple smart phone cameras through professional DSLRs, the autofocus function almost always lets the photographer select what part of the image they want to be in focus.  If you keep your camera in fully autofocus mode and don’t help by selecting where your main subject is, it may very well guess incorrectly and put another part of the image as the center of focus.  So, learn how to select the focus point even while letting your camera’s autofocus mechanism actually choose the focus distance.  Sometimes a camera’s autofocus capability may not work for the conditions under which you’re shooting, and in these cases you need to turn off autofocus completely, and focus in manual mode.  Some instances when this is necessary are when shooting in very low light conditions, or when shooting in poor contrast environments (for example, your subject’s texture looks a lot like that of its background, or you’re shooting into the bright sun).  In these cases, turn off the autofocus function and adjust focus manually until the subject looks sharp.

It’s still fine to walk around during your travels with your camera set in fully Auto mode, just in case something very unexpected comes up.  But do know how to set the main functions manually so you’ll get the best possible images in the 95% of the shooting situations when you do have time to set up first.

Want to read other posts about photographic techniques?  Find them all here: http://www.to-travel-hopefully.com/category/techniques/

Do you have tips and tricks you can share on manually adjusting the camera’s settings to get great shots?  How about a time you kept the camera on Auto mode and got disappointing results?  Please share your thoughts using the comment box at the end of this post.

The Sharpest Tack in the Box [Encore Publication]: How to achieve sharp focus in tricky shooting situations

One of the most important elements of an image is focus, and even an untrained viewer can tell immediately when a key part of the image is not in sharp focus.  The stakes are even higher when we consider that poor focus is nearly impossible to correct in post-processing.  Most of us rely on our camera’s autofocus functionality to help us achieve tack-sharp focus while shooting, but as with every other automated system in a camera, even very sophisticated autofocus mechanisms can go awry, especially when we’re faced with tricky shooting situations.  Here’s a quick guide to minimizing focus problems and achieving sharp focus in nearly every shot.

Scenes with low contrast, such as in this image of ice floes on the Barents Sea in Svalbard after sunset, can fool even sophisticated autofocus systems.  Override your camera’s autofocus system and instead shoot manually in these conditions.  Buy this photo

  1. Make sure to select the part of your image that you want to be in sharp focus.  It sounds like a no-brainer, but surprisingly frequently the reason an image’s main subject is not in focus is because the photographer never told the camera’s autofocus system what to focus on.  Remember that as with any assistive technology, a camera’s autofocus system is just a collection of hardware and software designed to make a best guess about what the user wants.  If you leave your camera set to full autofocus mode, it does its best to identify what its software determines is likely to be your intended subject.  A human face, for example, is likely to be what you want to have in sharp focus, so the camera focuses on that.  But often the camera does not guess correctly.  Nearly every camera, including the one in your smartphone, allows you to manually select your desired focus point, often by simply touching the desired part of the image on the screen.  Be sure to check what your camera is doing and correct it by manually selecting the focus point if it guesses wrong.
  2. Recognize that your camera’s autofocus system will likely not work in certain tricky conditions. Most autofocus systems work by looking for areas of the image where the contrast is changing, such as at the outlines of a person or a building.  But in very dim lighting, or when the main subject is badly backlit, or in scenes with very low contrast (think of a stormy sky or the waves of an ocean), the autofocus does not work.  Recognize these deficiencies and be prepared when shooting in these conditions to take manual control.  Every camera has a mechanism to manually select focus, and you need to know how to use that feature.
  3. Choose the autofocus method best suited to your shooting needs.   Most advanced or professional cameras allow you to choose among several different types of autofocus methods.  Often, the first choice is between single-focus mode or continuous-focus mode.  Choose single-focus mode when your subject is relatively stationary and you must have precise focus achieved before releasing the shutter.  For subjects that are moving quickly or where you need to time your shot exactly, even at the expense of not yet having perfect focus, you should choose continuous-focus mode.  Within each of these modes, your camera may offer sub-choices, such as letting you manually choose the exact focus point you want or choosing a range of points from which the camera selects focus based on the motion of the subject.  This is rocket-science technology, but fortunately it is pretty straightforward to choose the desired method once you understand what each one does.  Read your camera’s manual and always practice in the different focus modes before going on any important shoots, especially on a major trip.
  4. Circumvent the whole problem by choosing a wide depth of field.  Sometimes the best artistic choice requires a narrow depth of field so that only the main subject is in sharp focus, and sometimes the light is too dim to choose a narrow aperture, but if you can make the shot work with a wide depth of field (in other words, using a small aperture, represented by a high f-stop number), then you don’t have to worry about focus at all.  In most situations, universal focus from several feet away from your lens through infinity is achieved at apertures of about f/16 or smaller.

Capturing tack-sharp images of fast-moving wildlife like the cheetah requires selection of an autofocus mode capable of dynamically refocusing on the moving subject.  For this shot of a cheetah in Serengeti National Park in Tanzania, there was the added challenge of having low contrast between the animal and the background.  I chose my camera’s continuous-focus mode with predictive focus so the camera would anticipate where the cheetah was moving and focus ahead of the shutter.  Buy this photo

By using these tips, you can achieve tack-sharp focus where you want it in nearly all of your images, whether you’re shooting with a simple point-and-shoot or phone camera, or the most advanced professional camera.  Any camera frequently makes the wrong guess about where the focus point should be, so do not rely blindly on autofocus.  It’s worth investing some time to learn how to configure autofocus appropriately for any shooting situation, and how to turn it off and instead focus manually when required.  Happy shooting!

How do you achieve sharp focus in tricky conditions?  Please share your thoughts in the comment box at the end of this post.
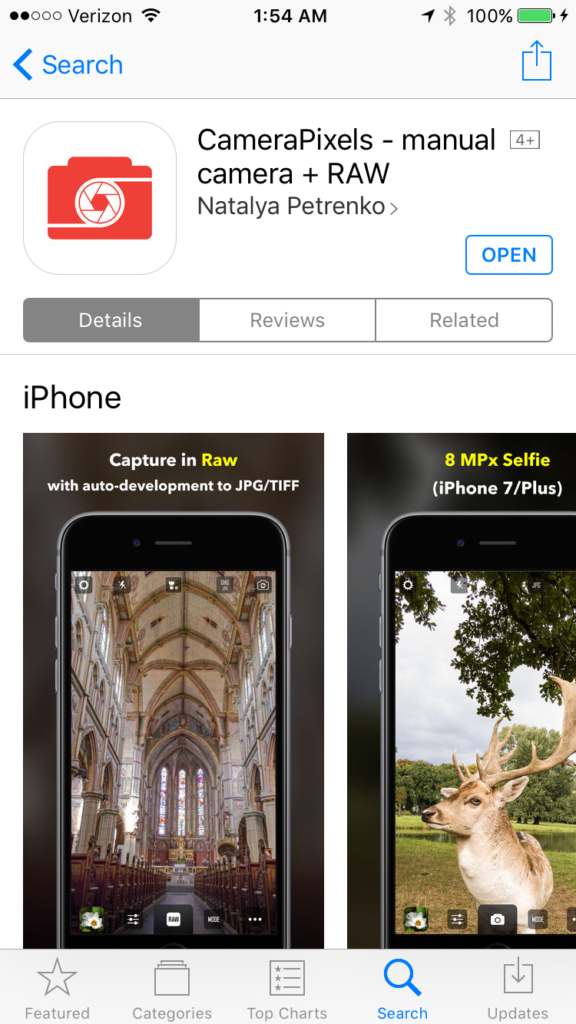
Want to see more articles about techniques?  Find them all here: http://www.to-travel-hopefully.com/category/techniques/.

Top Tips for Great Travel Images [Encore Publication]: These five simple “hacks” will result in more professional images

Festivals and street fairs can be challenging to shoot due to backgrounds cluttered with people, buildings, and cars.  To make this portrait of grandmother and granddaughter at Carnaval San Francisco, I got down low so that most of the background was covered by the cloth of the costume, and I used a wide aperture to throw the hectic street scene into soft focus.  Buy this photo

The web is positively overflowing with “life hacks,” simple tips and tricks to save us all time and effort and to achieve better results.  Some lists are better than others, but it is in the spirit of these lists that I bring you this compilation of five simple travel photography hacks.  These techniques are not difficult and do not require expensive gear.  They work equally well for your photography whether traveling or at home.  And I promise that if you follow them, your images will improve.  The pros do these things almost automatically; to them, it’s hygiene, like tooth brushing.  If you read no other post about photography, read this one.

  1. Avoid cluttered backgrounds: So often the travel images of a professional stand out from those of amateurs simply because they took careful notice of what was in the background while composing the shot.  Try to frame your subject against a clean backdrop such as a dark-colored wall or the sky.  If there’s no way to avoid including some clutter in the background, at least use a wide aperture (low F-stop number) to throw the background into soft focus.
  2. Watch your horizon: Frequently, we’re so intent on composing the main subject within our viewfinder that we forget to check whether the camera is level before firing the shutter.  An uneven horizon can give the impression of vertigo, like the subject is going to fall out of the frame.  Some cameras have a virtual horizon function to show you whether the horizontal and vertical axes are level, but whether you use it or not, be sure to check visually that the edge of the image looks correct.
  3. Achieve sharp focus: The one characteristic of an image that even the most inexperienced viewer can identify immediately, and one that’s almost impossible to fix in post-processing, is poor focus.  Today’s cameras are so easy to use that we often overlook this most basic element.  The camera can’t know for sure what subject you intend to have in focus; it can only make its best guess.  So take the extra fraction of a second while composing your image to move the camera’s focus point onto the main subject.  Or use a small aperture (high F-stop number) to provide a wide depth of field so that essentially everything is in focus.
  4. Choose the correct exposure: Another very basic element of any photograph, exposure can only be correctly chosen by the photographer, not by the camera.  Your camera’s Auto mode can be fooled very easily by many tricky situations, most commonly by backlighting of the subject.  It’s fine to use the camera’s guess as a starting point, but nearly every camera (including smartphone cameras) have a way to manually override this guess, so learn how to do this and add in about a stop or so of extra exposure if your subject is backlit, more if the backlighting is severe.
  5. Turn off the darned flash: Nearly every camera has a mode where it fires the flash automatically if it determines the extra light is needed.  This is rarely a good thing.  Far better to turn off the auto flash setting and make your own decision about when to use the flash.  Otherwise, your low-light images could end up with an eerie, unnatural color cast or your far-away subject could be underexposed (a flash typically lights an object only a few feet away from the camera, so why fire the flash when you’re photographing an object hundreds of yards or even miles away?).  Worse, if you are shooting through glass or another reflective surface, your flash reflects off the surface, ruining your whole image.  Worse still, your flash may blind everyone else near you in a very dim setting, damage sensitive artwork, or scare or anger nearby wildlife.  I’ve seen countless visitors ejected from museums, zoos and aquariums, and other wonderful destinations because they hadn’t figured out how to override their camera’s auto flash setting.  Just turn off the darned flash, and use it manually when appropriate.

Learn these simple techniques and follow them whenever you shoot, and you’ll start making images that stand out from the crowd.  Remember, you, and not the technology inside your camera, are the creative force behind your images.

While this image of a yurt in the remote mountainous region between China and Tajikistan succeeds in spite of (or perhaps because of) the off-kilter horizon, it serves as a good reminder to check the horizons at the edge of our photos.  Buy this photo

What are your favorite tips and tricks to ensure you make the best images possible?  Please share here!

Want to read more posts about photographic techniques?  Find them all here: Posts on Techniques.

Prime Time [Encore Publication]: Why a prime lens is often better than a zoom

Most photographers make most of their images using a zoom lens.  Aside from smartphone cameras, which typically feature a fixed focal-length lens, nearly every camera today comes with a zoom lens attached.  Most point-and-shoot and compact cameras do not have interchangeable lenses, so the zoom lens that comes with the camera is the only choice, while most mirrorless and DSLR cameras have interchangeable lenses.  That means these more advanced cameras offer the choice of using a broad range of different lenses, including both zoom and prime (fixed focal-length) lenses.  While many photographers own one or several prime lenses, from my observation the vast majority shoot nearly all of their images using one of their zoom lenses instead.  In today’s post, I make the case for using prime lenses in many, or even most, shooting situations.

This portrait of a Delhi girl outside India’s largest mosque is lovely and effective, but because I didn’t have time to change lenses and was forced to use my slower walkaround zoom lens, the depth-of-field is quite deep, making for a somewhat distracting background.  Buy this photo

Zoom lenses have one clear advantage over prime lenses: they offer a range of focal lengths, which helps the photographer compose the image without having to walk closer to or farther away from the subject.  But even here I would argue that in most cases it aids creativity to “zoom with the feet,” or walk around to compose the best shot.  Even when this isn’t possible, a high-resolution digital image can easily be cropped in post-processing to achieve the composition the photographer had in mind.

But prime lenses have many advantages over zoom lenses.  First, they are nearly always sharper and generally higher quality than zooms, because they don’t require extra internal glass elements to enable the zooming.  While zoom lenses have improved in optical quality over recent years, it remains the case that prime lenses offer a quality advantage.  Second, prime lenses are typically smaller and lighter than zooms.  This is a blessing especially to travel photographers.  Third, primes are less expensive than zooms of similar optical and build quality.  That means you can buy two or three different prime lenses for the price of one zoom lens covering a similar range of focal lengths.  And fourth, primes are usually faster (i.e., offer a wider maximum aperture size) than zooms.  This last point is a big advantage for many types of shooting, because a wide aperture (small F-number) lets in more light, allowing use of faster shutter speeds and lower ISO settings in low-light conditions.  This is a real boon for nighttime and astro-photography.  A wide aperture also results in shallow depth-of-field, which emphasizes the main subject by softening the focus of the background.  The best lenses offer a pleasing “bokeh”, or pleasant blurring of the out-of-focus elements of the image.  This effect makes for extremely effective portraits as well as wildlife images, but is also useful for other types of photography.


This portrait, made with my current favorite lens, an 85mm f/1.8 portrait lens, offers very sharp focus on the subject’s face and pleasing bokeh, or soft blurring of the out-of-focus background.  It would not have been possible to make this portrait using a zoom lens because the maximum aperture would be too small to achieve the soft background effect.  Buy this photo

I shoot a lot of performing arts events (dance, music, theater), which typically take place indoors where the light is very dim and frequently feature fast-moving action requiring a fast shutter speed.  Using a prime lens allows me to shoot at an action-freezing shutter speed without having to use extremely high ISO settings that introduce noise into the images.  And again, the pleasantly blurred backgrounds help set off the very sharp main subject for a striking overall effect.

I captured this image of a samba dancer at a dress rehearsal under very low-light conditions.  Using my 85mm f/1.8 prime portrait lens, I was able to freeze the motion using a fast shutter speed, keep the ISO at a reasonable level to avoid noise, and render a nice soft background.  Buy this photo

I would estimate that most enthusiast and professional photographers shoot about 80% of their images using zoom lenses.  My own usage pattern is the opposite, that is, I shoot about 80% of my images using prime lenses.  For some purposes, a zoom lens is still required, but it’s surprising how often we can achieve better results using a prime.  Prime lenses are smaller, lighter, less expensive, higher quality, and faster than zoom lenses.  I encourage you to dig out your prime lenses if you have a few, or borrow, rent, or buy one or two (remember, they are much less expensive than comparable zoom lenses) and try shooting with them exclusively, or at least much of the time, for a week or two.  Compare your images made with the primes vs. the ones made with zooms and come to your own conclusions.  If you’re like me, you’ll find that a prime lens is the right tool for most photographic jobs.

Here are my three favorite prime lenses, a “normal” lens, a medium telephoto or “portrait” lens, and a wide-angle lens:

If you pack only one prime lens, it most likely will be a “normal” lens, that is one with a focal length of about 50mm for a full-frame camera or about 35mm for a crop-sensor camera.  I carry the Nikon 50mm f/1.4G lens.  This is the one I use in very low-light situations or to get a really shallow depth-of-field.

I think my current favorite lens of all (including primes and zooms) is my Nikon 85mm f/1.8G lens.  This is a classic portrait lens and provides a flattering perspective and great image quality when your subject is a human being.  I use it for nearly all of my portrait work these days.  But this lens also shines for nature and action photography where you don’t need a really long focal length.  It renders really lovely “bokeh”, or the soft quality of the out-of-focus parts of the image.

A wide-angle prime lens can be useful for landscapes, architecture and interiors, and astro-photography, among other purposes.  I like the Nikon 24mm f/1.8.

What are your preferences regarding use of prime vs. zoom lenses, and why?  Please share your experiences in the comments box.

Want to read other posts about gear?  Find them all here: Posts on Gear.