Focus on Cuba: Go to Cuba now while you still can

Cuba is a remarkable destination for travel photographers!  This small island has all the iconic images we expect–beautiful but crumbling art deco buildings, American cars from the late 1950s, unspoiled Caribbean beaches–but there are so many more opportunities to connect with and photograph a culture and a nation that is undergoing very rapid change.

Lovers embrace on Havana’s Malecon at sunset.  Buy this photo

European and Latin American travelers already know about Cuba’s charms and have been coming here for decades.  But to many Americans, Cuba has felt off-limits, a destination forbidden by our government.  I’m going to steer clear of the political issues in this post, but it must be noted that President Trump’s recent orders to tighten Cuba travel restrictions previously relaxed under the Obama administration will make it more difficult once again to visit.  The recent changes do not outlaw all travel to Cuba, but most Americans will need to visit under an official “People-to-People Cultural Exchange” program.  The operators of these programs may have to revise their itineraries due to new prohibitions against travel to any facilities owned by the Cuban military, and the prices of these programs may rise as regularly scheduled commercial flights to the island could revert to more expensive charter flights.  But it is still quite straightforward, and 100% legal, for US residents to visit Cuba under one of these People-to-People programs.

I do not recommend trying to circumvent the licensing requirements.  This can lead to lots of trouble for the unlicensed American traveler later down the road: hefty fines, lots of questions to be answered, and restrictions on one’s future travel possibilities.  Instead, go with one of the many travel companies who operate People-to-People Cultural Exchanges.  These are legal trips licensed by the US government for the purposes of the people from the US and Cuba getting to know each other.  These trips do require that most of the traveler’s time be spent interacting with Cuban people of all walks of life, but isn’t that what we travel photographers seek, anyway?

We spent a delightful 1.5 weeks on one of these cultural exchange programs run by Grand Circle Foundation.  They offer a variety of different Cuban itineraries, and we would have preferred one of the longer ones, but schedule limitations required us to take the shorter trip.  This itinerary brought us to the capital Havana and to the rural Viñales Valley, the center of tobacco production and ecotourism on the island.  Here are some highlights from this travel photographer’s perspective.


Our small group was invited to attend a rehearsal by Opera de la Calle.  Held in a decrepit art deco building in downtown Havana, the spirited performance combined song, dance, and performance art.  Buy this photo


Getting to know some of the locals while visiting the exuberant art installation by Jose Fuster known as Fusterlandia.  Buy this photo

We left Havana’s vibrant urban vibe for a three-day excursion to the rural Viñales Valley.  Exploring this famed tobacco-producing region from our base at an eco-tourism village within a sustainable agricultural collective, we enjoyed hiking through terrain unlike any we’d seen elsewhere, taking in views of local wildlife and flowers along the way.

The picturesque Viñales Valley is noted for its mogotes, dramatic hilly outcroppings.  Buy this photo


Tobacco farmer Benito enjoying the fruit of his labor.  Buy this photo

Cuba’s national bird, the brightly colored Tocororo.  Buy this photo

The warm and engaging proprietor of Maria’s Cafe surveys her domain.  Buy this photo

During a Viñales Valley elementary school visit, we met the staff and great  kids in the classrooms!  Three classes for different ages shared one old church building.  Buy this photo

We got to know a friendly and enterprising rural family during a home-hosted dinner.  This is their typical family transportation.  Buy this photo

Back in Havana, we strolled through the city’s Old Town.  Buy this photo

A special performance of Santeria singing and dance.  Santeria combines Roman Catholicism with African religions to form a uniquely Cuban hybrid.  Buy this photo

This selection of photos barely scratches the surface of all the wonderful, unique photographic opportunities awaiting you in Cuba now.  Go soon, though, because for better or for worse, this nation is transitioning quickly into a very different future.

Nearly a year ago, the first commercial flight from the US to Cuba in over 50 years had just taken off from Florida: NY Times on US flights to Cuba.  For many Cubans, this seemed like the dawn of a new era that would mean a partial easing of a great deal of economic hardship suffered under the US embargo.  Instead, we are seeing a regression of US/Cuban relations to a situation more like the Cold War era policy.  It’s anybody’s guess as to how this situation will evolve over the coming years.  On the one hand, it’s possible a new US or Cuban administration could open up relations considerably, leading to huge continuing changes in Cuban society.  On the other hand, we could see further tightening on travel to Cuba, making it very difficult for Americans to visit at all.  I’m eager to visit again in a few years to meet more Cuban people and observe how their lives have changed in the interim.  But if you prefer to visit–and photograph–tiny colorful sidewalk cafes rather than Starbucks, authentic cultural interactions rather than slickly produced touristic shows, and wide open vistas rather than lavish resort developments, then now is the time to book your trip to Cuba!  Depending on the political environment, now could even be your last chance to visit for some years.

Have you been to Cuba?  What surprised you there?  What were some of your favorite photographic subjects?  If you haven’t been yet, what images do you associate with this island nation?  Please share your thoughts in the comment box at the end of this post.

Revealing Portraits [Encore Publication]: Inspirational women of India are struggling to empower themselves and others

Travel photography is about more than simply recording what we see and do during our trips.  It is more important even than creating art from our experiences while traveling.  I believe travel photography also has an important role to play in documenting and communicating to broad audiences the present situation facing underrepresented, repressed, and abused communities, and advocating for change to improve on the present situation.

Today’s post illustrates this point.  In a series of four portraits made during my recent travels in the north of India, I document several of the serious struggles faced by the girls and women of India–abuse of street children, poverty and lack of education, forced early marriage, and acid attacks–and show how these brave young women are working to empower themselves and others like them to end these abuses.

First, we meet a 17-year-old girl from the slums of New Delhi.  Let’s call her Sheela (the NGO supporting her work has requested that I not use her real time in order to protect her identity).  Sheela is the principal organizer of 10,000 street kids from similar slums across the sprawling city.  She helped start a newspaper, called Balaknama, to give a voice to the street kids and expose their stories of child labor exploitation, police harassment, and physical abuse.  Through her efforts and those of other kids from the streets, the editors who advise them, and the NGO that funds them, Balaknama has helped improve the lives of the poorest and most vulnerable residents of Delhi.  My portrait of Sheela is set in Balaknama’s offices and shows her calm and inspiring strength.  Lit by available light only, this image was made with a fast prime portrait lens, shot from a low angle so as not to condescend to the subject, and using a wide aperture to soften the background.  The feeling this image evokes is one of quiet power and a strong drive to expose and right the wrongs of her society.

Sheela, a 17-year-old resident of Delhi’s slums, organizes 10,000 street kids and reports for a newspaper run by and for the street children of the city.  Buy this photo

Next, we meet a girl who was born into poverty in Delhi and was forced at an early age to beg to earn money for her family.  Let’s call her Anika.  School was not an option for her.  However, Anika found a way to earn more and to avoid begging by selling bead necklaces on the streets of the city.  The portrait shows the contrast of her daily life: hopeful yet exhausted, bright yet uneducated, strong yet vulnerable.  This portrait was made using natural light with just a touch of fill flash to accentuate the saturated colors of her outfit and her wares.  The emphasis was placed on Anika by use of the fill flash, by exposing for her face, and by blowing out the overexposed background.

Anika is one of Delhi’s poorer residents.  Unable to attend school, she sells beaded jewelry to make a few rupees for her family.  Buy this photo

In a small village in rural Rajasthan, we met Parma at her modest house.  Forced to marry at the age of 11, Parma had four daughters at an early age.  She is fiercely committed to ensuring her daughters receive a good education so that they will have more options than she had.  Parma made the brave decision to become one of the first women to join a cooperative formed to allow women of the village to learn to make handicrafts in order to earn money for their families.  She and her husband faced considerable scorn from neighbors and relatives over her decision to earn her own income, but now many other village women have seen the success of this program and have also joined.  Parma is proud to have learned to sign her name and read a few words, thanks to her older daughters’ having taught her.  My portrait shows Parma in her kitchen with her third daughter preparing tea in the background and a neighbor child just in front of her.  The image radiates beauty, dignity, strength, and resolve.  In this environmental portrait, I wanted to portray Parma in relation to her home, her family, and her community, so I placed her in the center, exposing and focusing on her face, and allowing her daughter to be clearly identifiable yet slightly out of focus.

Parma, a child bride, vowed to educate her four daughters and works in a women’s cooperative to earn extra money to fulfill her promise.  Buy this photo

Finally, we meet Rupa at Sheroe’s Cafe in Agra.  Sheroes’ is a project founded by and for the women of India who are survivors of acid attacks. We were so inspired by meeting Rupa and learning about her story and her road to physical and emotional recovery after her brutal attack at the age of 15 by her stepmother.  Through this project, Rupa has gained the confidence and independence to leave home, meet other survivors and activists, build a business as a clothing designer, seek legal justice against her attacker, and access the surgical care required to reconstruct her face. The courage and resilience shown by Rupa and the other women we met at the cafe moved us to want to help their cause to educate people and improve the treatment of India’s women.  My portrait of Rupa is powerful because it doesn’t shy away from her scars but allows her courage, resilience, and beauty to shine through.  I got in close to Rupa using an 85-mm prime portrait lens and composed a head-and-shoulders image from eye level.  I exposed for her face and blouse, which she designed herself, bringing out the vibrant saturated colors.  A shallow depth-of-field ensured that Rupa’s face would be emphasized while the background would be soft.

Rupa was brutally attacked with acid by a relative when she was just 15 years old.  Rather than hide at home her whole life, she was empowered by the Stop Acid Attacks organization to live independently, fight for justice, and advocate to end acid attacks across India and Southeast Asia.  Buy this photo

I hope this series of portraits of four brave young women in India will inspire you, as their subjects inspired me, to advocate for improving women’s rights in this part of the world.  And more broadly, I hope you’ll recognize the power that travel photography has to give voice to the unheard and to fight for social change in the places where we travel.

Have you made the opportunity to advocate for change through your images?  Please share your story here!

Want to read more posts about what to shoot while traveling?  Find them all here: Posts on What to Shoot.


Baggage Claim [Encore Publication]: A photographer’s guide to how to pack for a trip

 Special trips often require specialized gear.  To photograph the total solar eclipse in Svalbard in 2015, I had to pack a heavy professional tripod, 500mm super-telephoto lens, a remote release capable of functioning in extreme cold, and a custom-made solar filter.  Thankfully, most trips are easier to pack for.  Buy this photo

Packing is never the most fun part of a trip, and the special challenges we travel photographers face can be particularly vexing.  But with a few guidelines and some common sense, we can easily bring along just what photo gear we’re likely to need and still be able to make room for some socks and underwear.  Here is my very opinionated guide to how to pack for any length and type of trip.

    1. What type of trip are you taking?
      • If it’s a driving trip directly from your home, you can bring all the gear your heart desires.  Just be sure not to leave valuables in plain sight in the car when you step away for more than a moment (thieves love camera gear), and make sure you have a shoulder bag or backpack to carry just what you need for car-free excursions.
      • If you’re flying (unless you have your own private jet, in which case you also need to make room for me on your next trip), you’re going to have to reduce the gear you carry to just the essentials.  It is possible to customize the foam insert in a hard-sided case to hold your photography gear, and then you can check this bag in the hold of the aircraft, but this requires some effort to prepare the case for your specific gear and then you will likely find the case quite heavy to lug around for the land portion of your trip.  And woe to you if your bag is misrouted, lost, or stolen.  I recommend packing a carry-on item that meets your carrier’s size requirements and filling it with just the most essential gear you’ll need on your trip.  More on that topic in a moment.
      •  For most purposes, a backpack is a good packing solution.  There are many styles available for photo gear, but my favorites are these two:
        1.  For those times when you need to bring most or all of your gear on a trip, I like the Tamrac 5586 Expedition 6x Backpack.  It carries a lot of gear snugly and flexibly, and it doesn’t look like a camera bag so it’s less likely to invite the wrong kind of attention.  It is almost always accepted as carry-on, but it is a bit bulky and heavy for all-day, everyday use while traveling.  I’ll often use this bag to get all my gear to my first destination, then pack a day bag for just the gear I’ll need for each day of the trip.
        2. My current favorite bag for day use for nearly any shooting situation near home or while traveling is the Manfrotto MB MA-BP-TRV Advanced Travel Backpack.  It can fit a reasonable amount of gear while leaving room for non-photography items like a jacket or a water bottle (yes, even photographers occasionally have to drink or stay warm).  It disguises your gear pretty well, has good rain protection, and even sports a special sleeve for carrying the Manfrotto Be-Free Travel Tripod.
    2. What types of shooting will you be doing on the trip?
      • Will wildlife or astrophotography be involved?  If so, you’re going to have to strain your back, anger the airline staff, and enlist your travel partner to help, because there’s really no substitute for a long and heavy super-telephoto lens in this situation.  When I’m on safari or chasing a solar eclipse, I pack my massive 500mm lens into the larger of my two backpacks and accept my fate.  You’ll realize it was worth the effort when you get home and are able to share your amazing photos of a leopard in a tree or the sun’s corona on full display during a total solar eclipse.
      • For most other types of trips, you won’t need to pack a really long lens.  My general rule is to pack a range of zoom lenses that covers from fairly wide (about 16mm) through fairly long (about 300mm), including a couple of fast prime lenses for when the light is low and/or the very best optical quality is required.
    3. How much redundancy do you need on the trip?
      • Always bring a backup battery (or several) and a backup battery charger.  Murphy’s Rule as applied to travel photography guarantees that batteries will die just as you frame the shot of a lifetime.  Bring at least one extra.  And chargers are left in hotel rooms or in tented camps on the Serengeti with some regularity, and they tend to get fried when plugged into unusual power grids, so bring an extra one with you.
      • Don’t forget the little things.  Pack several power adapters of the type used in the countries where you’ll be traveling.  These get lost easily and can be hard to replace while traveling.  Bring twice as many memory cards as you think you’ll require; it’s easy to fill them up when you get to shooting a mountain gorilla or carnaval dancers.  If you plan to back up to a laptop or external hard drive, bring extra connecting cables.  While traveling, I back up to a second type of memory card using my camera’s second card slot, so I bring quite a few memory cards of both types with me.
      • Lenses are heavy and expensive, but they sometimes stop working, so if you’re on a particularly important trip you may want to bring several lenses in overlapping focal lengths.  That is, you could bring a wide-angle zoom lens and a wide-angle prime lens, plus a walkaround zoom lens and a “normal” prime lens (about 50mm for a full size sensor or about 35mm for a crop sensor), plus a telephoto zoom lens and a telephoto prime lens or two telephoto zooms with overlapping ranges.
      • If it’s a once-in-a-lifetime chance to build your portfolio with very special and irreplaceable images, I recommend bringing a backup camera in addition to your primary camera.  For a recent safari trip in East Africa, I brought two DSLR bodies as well as quite a few lenses so that I’d have a backup solution to any single point of failure.  The more exotic your destination, the more likely that dust, wind, salt, extreme heat or cold, and heavy shocks or drops will damage your gear, so for those amazing one-of-a-kind trips I suggest biting the bullet and carrying backups for any gear that could fail.  For more on shooting in extreme conditions, read this post: Post on Extreme Conditions
    4. What accessories do you need to accompany the rest of your gear?
      • Attach a UV filter to each of your lenses before you leave and keep it on to protect the front element of the lens throughout your trip.
      • Carry a polarizing filter and a range of neutral density filters in the correct diameters to fit at least your wide-angle lens and your walkaround lens.
      • For more on filters, read this post: Post on Filters
      • A flash unit is helpful to have on most trips, unless you’re sure there will be ample natural light or you’re willing to use your camera’s built-in flash.
      • A good lightweight travel tripod with a head and mounting plate that suit your needs is essential gear on many trips.
      • Don’t forget any special-purpose gear that you need for just this type of trip.  When I travel to see a solar eclipse, for example, I need to be sure I bring my solar filter that attaches to my super-telephoto lens.  I also need to bring my heavy-duty professional tripod instead of the lightweight one I typically carry on trips.
    5. How will you be shooting from day to day during the trip?
      • If you’ll have constant vehicle support or won’t be going far from your hotel, you may be able to make do with just the bag you brought on the plane.  Or you can bring along a small shoulder bag to carry just a few items for the day’s shoot.
      • Most of my trips involve considerable hiking and public transportation from day to day, so I either carry everything in my smaller backpack or bring it along in checked baggage during the flight.  Then I can transfer just the gear I need for each day’s shoot into the smaller pack, which makes life easier when hiking 10 or so miles per day.

For a safari you will need a long lens to capture small or distant wildlife.  I recommend bringing a beanbag for camera support instead of a tripod, as the latter cannot be used in a safari vehicle.  Be sure to bring an extra camera and lenses, and carry more batteries and memory cards than you think you’ll need.  Buy this photo

Of course, if you use a mirrorless camera with only a couple of compact lenses or an advanced point-and-shoot camera, you do not have to worry about many of these items, but still be sure to review the list above to ensure you bring all required accessories.

With an overall strategy tailored to your itinerary and shooting style, and careful attention to execution to ensure you don’t forget anything, it’s really not that difficult to pack just what gear you’ll need in a way that will allow you to enjoy your trip when you’re not shooting.  After all, travel is about gaining experiences, and not all of those experiences can or should be photographed.  Pack for your photography, but also for your overall travel enjoyment.

What are your hacks for packing your photo gear for a trip?  Please share your tips and tricks in the comments box here.

Want to read more posts about how to plan for your travel photography?  Find them all here: Posts on Planning.

Focus on Tahiti Dance Fete: A case study in shooting under challenging circumstances

The travel photographer must be prepared to shoot under challenging circumstances, because often we have little control over the conditions in the field.  We may plan our travel years in advance to observe and photograph a total solar eclipse, only to wake up on the morning of the eclipse to find the sky is totally overcast.  Or we could make arrangements months ahead to be at a major cultural festival, but learn upon arrival that the area we’re shooting from is hundreds of yards from the action.  These things happen, but the professional photographer still needs to get her shot.  So, what can be done to persevere and increase our odds of getting usable images under adversity?  The answer, of course, depends on the specific circumstances of each shoot, but there are some general tips I can offer.  Today’s post presents a case study based on my recent shoot of the solo dance competition at the Tahiti Fete in San Jose, California.

The dancers made lovely subjects, but the shooting conditions were very challenging.  Read on to learn how to make the best of a difficult situation.  Buy this photo

Upon arrival at the dance competition, I realized immediately that this shoot would be challenging.  It was held in a cramped hotel convention room with a makeshift stage, rows of folding chairs for spectators, insufficient lighting of poor color quality, and a bank of judges blocking most of the view of the stage.  To make matters worse, the room was packed with people, many of whom stood up to cheer on their friends, and the only available seats were near the far end of the room.  An extra challenge was thrown into the mix by the cluttered and unattractive background behind the performers on the stage.

Cluttered backgrounds are a significant obstacle, but good images can still be made in these situations.  Buy this photo

What can be done to mitigate against a cluttered background?  I shot plenty of images of each dancer to increase the likelihood that I could eliminate some of the more distracting background elements while still capturing the excitement, grace, and colors of the dancing.  This image was the best I could capture of this particular dancer, so I committed to it in post-processing.  I cropped the image to avoid the most distracting elements, adjusted the exposure curves, contrast, and sharpness of the background to de-emphasize it, and applied some post-crop vignetting to ensure the dancer would be highlighted.

When using a very high ISO, some noise will result.  This doesn’t have to be a disadvantage.  Buy this photo

The lighting was very dim at this venue.  Because I was shooting from far away, I needed to use a long telephoto lens, which limited me to a small aperture and no possibility of using flash.  Nonetheless, a fast shutter speed was required in order to freeze the fast action of the Polynesian dancing.  This combination (low lighting, small aperture, and fast shutter speed) leaves no option other than a very high ISO setting.  I shot the above image at ISO 6400.  Even with an excellent professional camera sensor, such a high ISO will generate some noise in the image.  Noise can often be reduced to acceptable levels during post-processing.  But for this particular image, I was aiming for a soft, painterly feel.  The visual effect of high contrast, soft colors, and a bit of visual noise here gives the feel of an impressionistic rendering.  For this expressive Tahitian subject, I was very happy to have a Gauguin-esque style shine through in the final image.

 Cut out elements that don’t work.  Buy this photo

To make the above image, I cropped out distracting portions such as the judges’ heads in the foreground and an ugly door and wall in the background.  The resulting aspect ratio is non-standard, but works well for this image.  I desaturated the background and used post-crop vignetting to focus attention on the dancer.


Black-and-white renderings can be more forgiving when color quality is low.  Buy this photo

This image portrays a lovely subject but the lighting was especially poor.  Realizing I couldn’t do much to mitigate the strange color cast resulting from the artificial lights, I converted the image to monochrome, boosted the contrast, and adjusted the color channel mix to render a pleasing and elegant final image.  Check out this post to learn how black-and-white conversion can be used to save the day when color temperatures or image noise are problems: Post on B&W conversion to save strangely colored images.

Bringing it all together: This image works nicely in spite of all the challenges present at the shoot, including foreground obstacles, dim and low quality lighting, a far-away vantage point, and a cluttered background.  Buy this photo

In spite of multiple significant technical issues, I was able to make some striking images of the lovely dancers at this Tahitian festival.  Hopefully, the tips presented here will help when you next are faced with a challenging shoot.  The most important thing is to keep shooting as best you can while in the field.  There are multiple methods you can use in post-processing to mitigate against the shooting challenges and end up with images you will be proud of.

What techniques do you use when faced with difficult shooting conditions?  Please share your thoughts here.

Want to read more posts about photographic techniques?  Find them all here: Posts on Techniques.


“When someone shows you who they are, believe them the first time.” ~Maya Angelou [Encore Publication]: How to make great portraits while traveling or near home

“When someone shows you who they are, believe them the first time.” ~Maya Angelou

I have long believed that travel equates to growth; that we cannot know our place in the world until we have experienced the lives of people in many different places.  Of all the joys of travel photography, to me the greatest is having the chance to meet people from very different backgrounds, to get to know them for a few minutes or for much longer, and to collaborate with them to make memorable images.

A recurring theme in this forum will be how to use our cameras as a bridge to learn about and to share insights into other cultures.  But the emphasis of this particular post is on the technical elements of creating portraits.  These techniques apply as well to shooting portraits across the street from our home as to making great people images halfway around the world.

Most portraits that we see published in magazines or photography books were made in the studio, where the photographer has complete control over the lighting and background, and often is working with a professional model.  But when we’re traveling, there’s often only a moment after getting to know a person and receiving their permission to photograph them, during which to set up our gear and shoot.  We have to live with whatever lighting is available and often must make do with a cluttered background.  To make this portrait of a woman enjoying a coffee break at a carpet-weaving collective in Turkey, I wanted to give the image a soft, flattering look and to bring out the rich, saturated colors of her clothing.  I chose a smaller than usual aperture to provide greater depth-of-field, so that the old house itself became part of the environment.  To accommodate the soft and dim natural indoor lighting, I used a higher ISO setting and a slower shutter speed.

Turkey This portrait set in a weaving collective in Turkey evokes a sense of place and a mood of quiet repose.  Buy this photo 

While trekking in Nepal, we stopped to rest at a teahouse where these two sisters were also taking a break along their journey.  I wished them “Namaste,” or well wishes, and they responded with a traditional hand gesture of greeting.  This image was made long before the digital era on a film camera with a normal lens and natural lighting only (had I had a flash unit handy, it would have helped to bring out the girls’ hair against the dark background).  I love the warmth of the girls’ expressions and the simple but bright colors of their dresses set off against the black background of the teahouse’s interior.

NepalA friendly welcome from these two young sisters at a rural teahouse in Nepal.  Buy this photo

Sometimes we want to tell the viewer more about our subject than what is possible in a simple close-up portrait.  An environmental portrait allows us to include more than just the subject by zooming out and bringing in other elements.  I photographed this maker of traditional Turkish instruments in his workshop while he tested a nearly-completed Bağlama, surrounded by other partially made instruments.  To my eye, the resulting portrait is more compelling than a close-up because it shows the subject in his environment.  To make this portrait, I used a wider focal-length and a narrower aperture so as to have more of the environmental elements in the frame and in focus.

TurkeyAn environmental portrait of a maker of traditional Turkish musical instruments.  Buy this photo

A portrait doesn’t have to portray a stock-still person posing for the camera.  Some of my favorite portraits evoke a strong sense of motion.  I made this portrait of a samba dancer during the Carnaval San Francisco annual parade by getting in close and shooting with a medium-length telephoto lens set to a small aperture to soften the background.  I used a fast shutter speed to freeze the action (although sometimes a slower shutter speed can be used to create a nice blurred effect).  In post-processing, I cropped the image to further isolate the dancer and emphasize the grace of the motion.

USA This dancer in a Brazilian Samba krewe was captured in a tight composition that was further cropped in post-processing to give a strong sense of motion.  Buy this photo

Keep an eye on the total composition when framing a portrait.  It’s more than just a matter of framing the subject within the image: other considerations include the background and the overall flow of the viewer’s eye across the image.  In this portrait of the proprietor of Maria’s Cafe in rural Cuba, I composed the image to use the brightly colored door, balcony, staircase, and tree to frame the subject herself.

CubaComposing a portrait involves thinking about the background and the viewer’s overall experience in looking across the image.  Buy this photo

A really good portrait should tell a story about the subject.  Here, Cuban tobacco farmer Benito relaxes in his drying barn with a cigar he just rolled from his tobacco harvest.  I got in close and used the natural light of his cigar lighter and the diffused sunlight within the barn, with no flash added.

CubaThis portrait of a Cuban tobacco farmer tells a story about who he is and what he does.  Buy this photo  

Consider the angle from which you shoot a portrait, as it has a strong influence on the emotional response of the viewer.  Most of the time we want to shoot a head shot or head-and-shoulders shot from a height midway between the top and bottom of the image, but to make this portrait of sisters on the outskirts of Arusha, Tanzania, I chose to shoot from slightly above.  It’s a fine line between giving a sense of vulnerability and causing the image to seem condescending, but I like this photo in part because I feel the unusual vantage point evokes a strong sense of emotion.

TanzaniaAn unusual shooting angle can enhance a portrait, but be careful not to overdo this effect.  Buy this photo

Another rule meant to be broken is freezing the action of a portrait’s subject.  During a fitness photoshoot with my friend Crystal, I shot mostly with a fast shutter speed to freeze her while she worked out.  But for this image, we wanted a blurred effect to create a sense of her forward motion while running, so I used a slower shutter speed.

A slower shutter speed can be used to give more sense of motion to a rapidly moving subject.  Buy this photo

Sometimes a perspective change can work wonders for a portrait.  In this image of the chief of a remote village in Swaziland, I got down low and shot with a wide-angle lens to portray her in the context of the hut behind her and the gourds she holds in her hands.  A wide view in a portrait can lead to less-flattering likenesses, so this effect should be used sparingly.

SwazilandA wide-angle lens and unusual perspective shooting from low to the ground lend this portrait of a Swaziland village leader a sense of connection to the place.  Buy this photo

A note on gear: My go-to portrait lens is the Nikon 85mm f/1.8G lens.  This is a classic portrait lens and provides a flattering perspective and great image quality when your subject is a human.  I use it for nearly all of my portrait work these days.  But this lens also shines for nature and action photography where you don’t need a really long focal length.  It renders really lovely “bokeh,” or the soft quality of the out-of-focus parts of the image.

Which of your portraits do you find most memorable, and why?  How did you create them?  Please share your thoughts here.

Please read this post for my essential tips on how to photograph people while traveling: Post on Travel Portraiture.

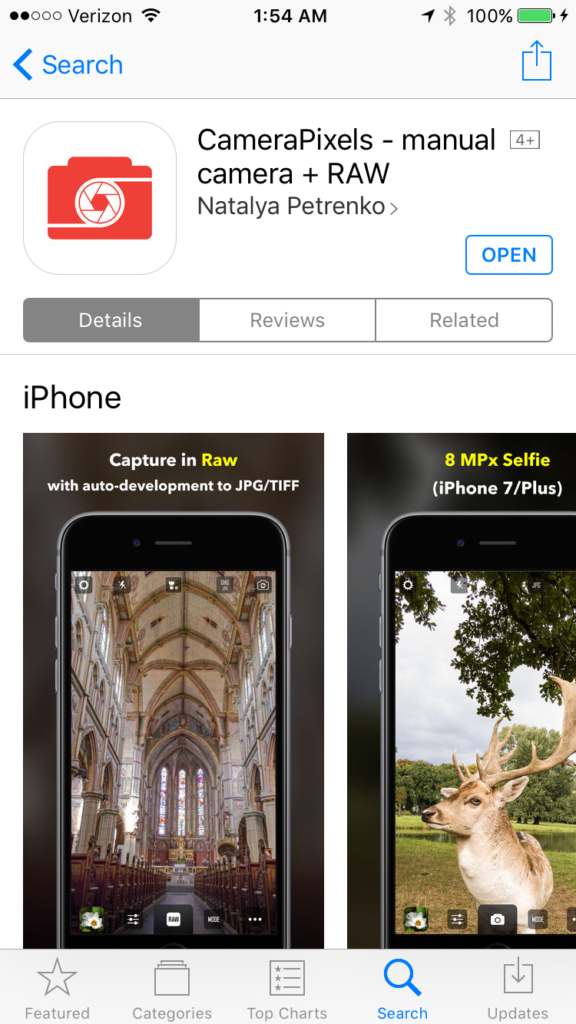
Camera Pixels App (Updated Review): Significant improvements in the new version make this a best-in-class app

I’ve posted repeatedly about the importance of understanding how to take manual control of your camera in order to make images that are properly exposed and focused.  Whether you are using a professional DSLR, an advanced full-frame mirrorless ILC, a compact point-and-shoot, or the camera built into your smart phone, there is no way you will get consistently acceptable results if you leave the camera’s settings to its auto mode.  See this post for an overview: Post on Beyond the Auto Mode.

About three months ago, I posted a review of an early version of an iPhone app called “Camera Pixels”.  In that review, I found the app to be a very promising concept due to its advanced DSLR-like features and intuitive controls, but I couldn’t fully endorse it in the earlier version because I found several bugs and interface quirks.  You can read that earlier review here: Previous review of early version of Camera Pixels app.  Since that review was published, I have had several discussions with the Camera Pixels support team to detail my concerns about the various issues I found.

For the past two days I have been testing a new version of the Camera Pixels app, and I can now recommend it wholeheartedly.  The new release preserves the advanced features and (relatively) simple interface of the earlier version, but it has addressed all of the significant issues I outlined in my review of the previous release.  Specifically:

  • the image flicker in the “viewfinder” area of the screen has been eliminated,
  • the bracketing of exposures now retains the proper requested spacing (unless at a physical limit of a setting),
  • there is a new “Pro View” mode that keeps the manual settings toolbar always on the screen so any manual overrides are immediately apparent, and
  • the controls to separate the exposure point from the focus point are now more intuitive.

Like the “Manual” camera app that I’ve been using for years and the “ProCam 4” app that has been my go-to camera control app for the past several months, the new “Camera Pixels” app allows the manual selection of ISO, shutter speed, exposure compensation, and focus distance (note that the iPhone camera’s lens has a fixed aperture, so F-stop cannot be manually set).  Also like the Manual app and the ProCam 4 app, Camera Pixels allows images to be captured using RAW mode, which has a great many advantages over capture in JPEG format (see this post for more information: Post on RAW Capture).  And all three of these camera apps display a histogram to assist in setting exposure properly.  

In addition, both Camera Pixels and ProCam 4 (but not Manual) offer some very useful advanced camera control capabilities, including the following:

  • Shutter Priority: You can choose an exposure mode in which you select the shutter speed first and the app will set the appropriate ISO.
  • Exposure Bracketing: You can shoot a series of four shots at different exposures to increase the likelihood that one of them will be at the best exposure for the lighting conditions.  The series of shots can also be combined using HDR tools found in Lightroom, Photoshop, and other editing software into a single image with a higher range of tones from very dark to very bright.
  • White Balance: You can adjust white balance in the app, which is often preferable to having to adjust it in your RAW files during post-processing.
  • Virtual Horizon: The display can show you when the horizon is level.
  • Slow Shutter Options: You can select long fixed shutter speeds as well as bulb mode to keep the shutter open for as long as you’d like.
  • RAW+JPEG: You can choose to store the image in both RAW and JPEG formats.

With all this incremental functionality, your little phone’s camera begins to behave a lot like a more advanced standalone camera.  While the iPhone’s camera, with its small sensor and its tiny fixed-aperture non-interchangeable lens, still cannot compare to a professional or enthusiast DSLR or ILC camera, the results using an advanced manual camera control app such as Camera Pixels or ProCam 4 are vastly improved compared to using the phone’s native camera app.  At iTunes App Store pricing of $2.99 for Camera Pixels or $4.99 (temporarily reduced to $1.99) for ProCam 4, either of these apps is a great buy and a serious enhancement to the iPhone’s built-in camera.

There are some significant differences between Camera Pixels and ProCam 4.  ProCam 4 offers advanced image editing capabilities, while Camera Pixels does not.  However, Camera Pixels offers more flexible exposure bracketing options, the ability to separate exposure point from focus point, a better histogram, and more advanced RAW and video shooting options.  And a significant advantage of the new Camera Pixels app over ProCam 4 is its simple and intuitive user interface for setting and resetting the manual camera control features such as exposure compensation, shutter priority, and ISO priority.  In fact, the Camera Pixels app comes the closest I’ve ever found to the user interface of an advanced DSLR or mirrorless camera.

One note to enhance the usability of the Camera Pixels app: As far as I can tell, there is no built-in help content in the app itself, but there is a very useful online user guide available from the app’s developers.  You can find the user guide here: Camera Pixels app user guide.

In summary, the new Camera Pixels app is a great concept that comes closest of any camera control app I’ve found to the look-and-feel of an advanced standalone camera.  With the greatly improved new release, Camera Pixels has become the best option I’ve found for iPhone users wishing to control the phone’s built-in camera like an advanced DSLR or mirrorless standalone camera.  I now fully recommend this app, and I plan to use it as my first choice for advanced control of my iPhone’s camera.

Here’s the link to the Camera Pixels app on the Apple App Store: Camera Pixels app.

What app do you use to control your phone’s camera?  What do you like and dislike about it?  Please share your thoughts here.

Want to read more posts about photography gear?  Find them all here: Posts on Gear.