A Good Camera Store is Hard to Find [Encore Publication]: Can anything be done to prevent the extinction of pro camera stores?

Dear Readers:

I’m republishing this post because I recently had an experience that reminded me of what is lost when we have no good local camera stores in our neighborhoods.  Two weeks ago, during a shoot for a local theater company, I found myself unable to remove the remote flash cable from my camera’s hot shoe.  I tried for hours to find a way to get it off, but to no avail.  It seems the locking pin on the flash cord’s hot shoe contact had broken and was stuck in place.  Since our local neighborhood camera store (Keeble & Shuchat; read on to get the full story) had closed, I brought the camera to the next best store in my area.  They had no trained repair technicians, so they had to package up the camera and ship it to Nikon.  Two weeks later, I just received the estimate: $350 to remove the broken accessory from my camera.  And they may not be able to return to me in time for a critical travel shoot I have scheduled in three weeks’ time, for which I will need both of my Nikon D810 bodies.  I’m confident that good ol’ K&S could have done this repair inexpensively and quickly in-house.  There is a great deal that is lost when our specialized and passionate local merchants are forced out of business.  Please read on for more!

Kyle

img_3689

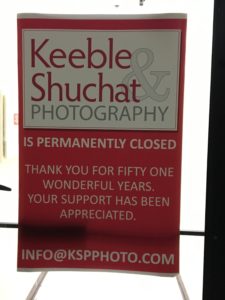
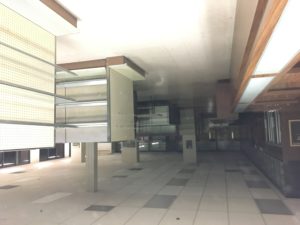
A few months ago, the doors closed permanently at one of the San Francisco Bay Area’s few remaining pro camera shops, Keeble & Shuchat of Palo Alto.  After 51 years of providing sales of a tremendous range of fairly priced photographic gear, friendly service, lifesaving repairs, and informative classes, this local institution was forced to shut down.  The story is a familiar one, and extends beyond the San Francisco Bay Area and beyond the photography sector.  Local brick-and-mortar stores nationwide and in all sectors of the retail economy are being forced out of business due to severe price competition with online and big-box retailers and rising commercial real estate prices.  Over the last few years, my neighborhood has lost the last of its independent coffee shops, bookstores, and movie theaters, and it now seems that camera stores oriented toward enthusiast and professional photographers are also going the way of the dodo bird.

I’m sad about the closure of Keeble & Schuchat because there really is no substitute store within an hour’s drive of my house, and because I knew several of the staff there and don’t know what they’ll do next.  But at the same time, I share some of the blame over their closing.  I was a regular in their store, where I browsed their range of new gear and asked all manner of questions of the friendly and helpful staff.  I made it a point to buy a few doodads at K&S, and I attended paid classes there from time to time.  I depended on them for the repair and maintenance of most of my gear.

But whenever it came time to drop some big bucks on a new pro camera or lens, guess what?  I always purchased from a big online retailer like Amazon or B&H.  I’m sure many other serious photographers behave similarly.  It’s hard to justify paying a 10-20% price premium as well as the local 9.25% sales tax in my county when we’re already stretching to afford the gear in the first place.  It’s very tempting to save so much money with just a few clicks in our web browser.  But something significant is lost when we drive away the local experts who sell books, cameras, or cappuccinos in our neighborhoods.  We lose the local merchant’s accumulated knowledge and the passion for the category we love.  For us photographers, that means there soon won’t be many places we can go locally to chat about the merits or drawbacks of some new piece of gear, to repair or maintain our existing gear, or to learn from people who share our passion for image-making.

When my main portrait lens had some dirt stuck between the inner elements that was causing a speck to appear on all my images, and I observed this on the day before a major portrait shoot for two clients, I took the lens to K&S and their tech diagnosed and repaired it while I waited.  He charged me the whopping sum of $10 for his efforts.  Why?  Because he also was a working photographer and he knew the importance of getting this problem solved quickly and without impacting the clients.  We may save a few dollars by buying our gear online, but what is lost by the mass shift from local stores to e-commerce sites?  I’d better be thinking about what I’m going to do the next time I need an urgent repair done, because there is no longer anywhere reliable to go within an hour’s drive of my home.

How about you?  Please share your thoughts on the value or lack thereof of having experienced, passionate tradespeople in our neighborhoods?  Is it worth spending extra cash to ensure we preserve access to these local stores?  Or do you have a different viewpoint?

img_3690

I See a Red Door and I Want to Paint It Black [Encore Publication]: When a black-and-white image is better than color, and how to convert to B&W

Back in the day, a photographer had to choose in advance whether to shoot with color film or black-and-white film.  Conversions from color to B&W were cumbersome and expensive, and conversions from B&W to color were essentially impossible.  During the film era, I typically shot exclusively using color transparency film while traveling, and reserved B&W photography for particularly artistic shoots near home.

Thankfully, in today’s digital world, we no longer have to commit ourselves in advance to monochrome vs. color images.  It’s now a simple procedure to convert our color images to B&W during post-processing.  And that’s a great blessing, because there are plenty of times when a black-and-white photo is better than a color photo.

Consider the image of the alligator at the start of this post.  One of my favorite photos, this one works just fine in color, too.  But the real power of the image is revealed in B&W through the striking textures of the alligator’s skin as seen above the water and as reflected off the water’s surface.  The background above the water fades to a deep, nearly true, black, with the background of the water itself rendered slightly less darkly and showing some nice ripples of motion.  Black-and-white photography is especially powerful when there are contrasts of pattern, texture, and background as in this image.  Buy this photo

When else might we want to render an image in B&W?

Portraits made in monochrome have a timeless look that evokes the earlier years of photography, and this rendering can also bring out the true nature of the subject.  There’s a lovely look to the skin tones and hair when displayed in B&W, and there are fewer distracting elements from the color of clothing or background objects.

This portrait takes on a vintage, timeless look when shown in B&W.  Our eye can focus on the model’s face and hair without the distractions of the colors in her sweater or the building.  There’s almost a street photography kind of documentary quality to this image in monochrome that is lost when viewed in color.  Buy this photo

Color can be distracting in an image where we want to emphasize the essence of a person or place.  In this portrait I made recently for a couple who are fellow musicians and friends of mine, we had beautiful “golden hour” light to work with, and the background and clothing worked well in color.  But converted to B&W, this image really places the emphasis on the couple without the distractions of the color cast in the reflections off the eyeglasses or of the mixed lighting in the background.

In this portrait, black-and-white presentation places the viewer’s attention squarely on the the couple and their instruments, without distractions from the multiple colors of the clothing and background components.  (Client photo not available for purchase.)

When you’re shooting under “mixed lighting”, which means there are multiple light sources with different color temperatures (i.e., some light sources are warmer and others are cooler), converting the image to B&W can be a real problem solver.  Consider the image below, made in Bruges at night.  The light from the street lamps was warmer than the light coming from the spotlights on various buildings, and there was also a bright moon that night, so when seen in color the photo would look less appealing due to the contrasting of the color temperatures in the different parts of the image.  But viewed in B&W, it brings out the grandeur of the old buildings and the beauty of the reflections in the waters of the canal, without the distractions of the color casts.

This image of Bruges at night, when processed in B&W, removes the contrasting color temperatures of the multiple different light sources and allows the viewer to enjoy the stately old buildings with consistent tone and texture.  Buy this photo

Now that we’ve covered a few of the many situations in which a black-and-white image is preferable over a color image, let’s look at how to convert from color to B&W.  There are many ways to perform this conversion, but I recommend it be done using the Color Adjustments settings in the Develop module of Adobe Lightroom.  Here’s how:

Click on the “B&W” tab above the individual color channel sliders, and then adjust the mix of how the colors are blended by increasing or decreasing each color’s slider to see how the black-and-white image looks.  I find that I often have to readjust the contrast slider at this point to get the image looking its best in black-and-white.

For more on using Lightroom to post-process your images, check out my previous post: Previous post on using Lightroom to post-process images.

I do not recommend using your camera’s built-in black-and-white mode, as you will then lose the color information in the image file.  I also do not suggest using the settings some cameras have to make a copy of the image in B&W, because in most cases the camera’s built-in software will not do a very good job of rendering the image in monochrome.  For the best results, either use Lightroom or a dedicated black-and-white conversion application such as Silver Efex Pro 2 from Nik Software, which is available as a plug-in for Lightroom or Photoshop.

Want to read other posts about travel photography techniques?  Find them all here: http://www.to-travel-hopefully.com/category/techniques/

What do you love about a black-and-white image?  When do you convert an image to B&W rather than share it in color?  Any tips or tricks for how to make great B&W photos?  Please share your thoughts in the comment box!


Faces of Myanmar [Encore Publication], Part II: Showcasing the Diversity of Burma’s People

My wife and I recently returned from an amazing 2.5-week adventure traveling through Myanmar.  Our itinerary took us from the main city of Yangon to the vast plains gleaming with ancient pagodas in Bagan; then to the former imperial capital and cultural hub of Mandalay; on to Kalaw, the gateway to many hill tribes of the region; and finally to Inle Lake, well known for its picturesque floating gardens and for the Inthe people with their unique traditional style of fishing.  While it was wonderful to view Myanmar’s gorgeous landscapes and fabled temples, what made this adventure truly unforgettable for us was its many opportunities to interact with Burmese people from many ethnic groups and all walks of life: Buddhist monks and nuns, villagers displaced by a typhoon 10 years ago who are still living in temporary bamboo huts with no running water, the Paduang hill tribe whose women traditionally wear heavy brass plates on their necks, an octogenarian master of the dying art form of Burmese marionette theater, young boys celebrating their initiation as novice monks, and the delightful girls who have found a caring home at an orphanage in Mandalay.  Burma is a photographer’s dream, filled with glorious pagodas, gorgeous vistas, and friendly, diverse cultures.

Yesterday’s and today’s posts showcase some of my favorite portraits, some of them not yet previously published, featuring a wide range of people we met during our adventure.  The portraits will be presented as a photo essay, but I will include brief descriptions of each and occasionally some commentary about how they were made.  You can click on any of these images to view or purchase them and many more from the Myanmar trip.  Yesterday’s post featured Part I, and today’s post comprises Part II.

A fascinating visit to Myawaddy Nunnery, where we had the opportunity to meet some of the more than 200 novice nuns who study there.  I composed this image to include the contrasting colors of the novices’ pink robes against the painted carved teak facade of the building.

Portrait of the abbess at Myawaddy Nunnery.  The lovely “bokeh”, or soft quality of the out-of-focus background elements, is created by using a very wide aperture on a lens known for having this property (in this case, an 85mm f/1.8 prime lens).  Even when traveling, it’s important to have the right lens for the right job.

The Mingun Bell, 13 feet high and weighing 90 tons, is the world’s second largest functioning bell.

A delightful visit to the Aye Yeik Mon Girls’ Orphanage. We were heartbroken to learn the stories of some of the abandoned girls who live here, but were uplifted to see the wonderful care and guidance they are receiving there now.

I had the opportunity to get to know 15-year-old Phyu Phyu at the Aye Yeik Mon Girls’ Orphanage. Abandoned by her mother at an early age, Phyu Phyu’s early life was challenging, but she has flourished under the care of the nuns at Aye Yeik Mon and is planning to continue her education and to enter a professional career.

We were invited into the Mandalay home of Oma and his family. His mother was a restaurant owner and chef for many years, so we were treated to an amazing Burmese meal.  It can be challenging to make portraits of groups, especially when young children are involved.  I shot several frames and chose one where the young boys are looking (nearly) directly at the lens, settling for some of the other family members to be looking elsewhere.

Kuthodaw Paya is called the world’s largest book because the entire canon of early Buddhist scripture is recorded on carved stone tablets housed in its hundreds of pagodas.  These young local women wanted me to pose for a selfie with them, so I asked them to return the favor.  Their brightly colored longyis (traditional Burmese attire) stand out nicely against the drab background of the pagoda behind them.

A quiet moment at the entrance to Shwenandaw Kyaung Monastery.  I used spot-metering based on the woman’s clothing so as to achieve proper exposure given the much brighter background.

A stop at the Kalaw morning market to purchase the produce for our visit to Myin Ma Htie village.

We visited the village monastery in Myin Ma Htie and met with the monk there.

On arrival at Myin Ma Htie, we are greeted by villagers who will be our hosts.  This portrait was carefully composed to provide nice soft natural lighting on the girl and to frame her in a pleasing way within the surrounding area.

Traditional spinning methods to create yarn from lotus plant fiber.  I was struck by the symmetry and the bright color of the yarn in this scene.  

A worker in a cheroot workshop demonstrates her craft. She makes about 1000 of these small and inexpensive cigars every day.  To make this portrait, I used my go-to 85mm portrait lens at a wide aperture and added just a small amount of balanced fill flash to evenly expose the subject’s face.

The Phaung Daw Oo Paya is one of Burma’s most sacred sites. Dating to the 11th century, this pagoda houses the four remaining Buddha statues that enclose relics from the body of the Buddha. Worshipers add a little gold leaf to these statues when they visit, so that today the shape cannot even be recognized as that of the Buddha.

A fisherman on Inle Lake demonstrates the ancient style of fishing with a netted basket.  I framed the shot through the fabric of the net to add texture and visual interest.

Meeting members of the Padaung ethnic minority, whose women are famous for wearing heavy brass coils to make their necks look longer.  This 18-year-old Padaung girl proudly wears the brass coils on her neck as a symbol of ethnic identity. She told us her younger sister chooses not to wear the ornaments as she goes to a Burman school where most of the other students are not Padaung. The tradition was often scorned as backwards during the military regime, but now young Padaung women are again often choosing to practice it.

Have you visited Myanmar?  What were your favorite photographic subjects?  Please leave your thoughts here.

Want to read more posts about what to shoot while traveling?  Find them all here: Posts about what to shoot.

All of these photos and many more from Myanmar are available for viewing or purchase here: Myanmar image gallery.

Missed Part I of this story in yesterday’s post?  You can read it here: Part I of this story.

Faces of Myanmar, Part I [Encore Publication]: Showcasing the Diversity of Burma’s People

My wife and I recently returned from an amazing 2.5-week adventure traveling through Myanmar.  Our itinerary took us from the main city of Yangon to the vast plains gleaming with ancient pagodas in Bagan; then to the former imperial capital and cultural hub of Mandalay; on to Kalaw, the gateway to many hill tribes of the region; and finally to Inle Lake, well known for its picturesque floating gardens and for the Inthe people with their unique traditional style of fishing.  While it was wonderful to view Myanmar’s gorgeous landscapes and fabled temples, what made this adventure truly unforgettable for us was its many opportunities to interact with Burmese people from many ethnic groups and all walks of life: Buddhist monks and nuns, villagers displaced by a typhoon 10 years ago who are still living in temporary bamboo huts with no running water, the Paduang hill tribe whose women traditionally wear heavy brass plates on their necks, an octogenarian master of the dying art form of Burmese marionette theater, young boys celebrating their initiation as novice monks, and the delightful girls who have found a caring home at an orphanage in Mandalay.  Burma is a photographer’s dream, filled with glorious pagodas, gorgeous vistas, and friendly, diverse cultures.

Today’s and tomorrow’s posts showcase some of my favorite portraits, some of them not yet previously published, featuring a wide range of people we met during our adventure.  The portraits will be presented as a photo essay, but I will include brief descriptions of each and occasionally some commentary about how they were made.  You can click on any of these images to view or purchase them and many more from the Myanmar trip.

Here is Part I, and tomorrow’s post will feature Part II.

A worshiper at Chaukhtatgyi Pagoda. I’m always on the lookout for ways to include local people when shooting monuments and other landmarks.  The human element adds great visual interest to travel images and also personalizes the photo, transforming a generic scene into a story.

We were shown around the Musmeah Yeshua Synagogue by one of the 17 remaining members of Myanmar’s only Jewish community.  Environmental portraits like this one include not only the person but also some other elements that help tell the person’s story, in this case the Torahs at the ark of the synagogue.

A worshiper at Shwedagon Pagoda, the most sacred Buddhist site in all of Burma.  At least 90% of the time I include people as a main element in my images, I obtain permission from them first.  I find that this approach, as well as being friendlier than shooting first and asking questions later, tends to lead to better portraits as there is an interpersonal connection between the subject and the photographer.  However, there are certain instances when asking first could interrupt the subject’s activities or negatively impact the dynamic being captured.  For this photo, I made no attempt to hide that I was shooting the woman, but I didn’t interrupt her meditation, either.

Armies of volunteer sweepers make the rounds at Shwedagon Pagoda to ensure the temple is kept spotless.  To shoot this large and fast-moving group, I positioned myself at a scenic spot, configured my camera’s setting in advance, then waited for the volunteers to move into position.

Rangoon’s Inya Lake, site of the former military junta’s brutal response to the 8888 uprisings and the Saffron Revolution, is now a peaceful place where young people picnic, make music, and go on dates.  When shooting strongly backlit subjects, be sure to use spot metering or exposure compensation unless you’re trying to create a silhouette.  

Street vendor in Yangon.

A fascinating visit to an informal housing settlement inhabited by people displaced by the devastating 2008 typhoon. A decade later they are still living in squalid conditions in bamboo huts with no running water. Here, children are filling containers with water from the lake and carrying 40 kg (88 pounds) of water, often more than their body weight, several miles to their families’ homes. This image is a favorite because it effectively combines the contrasting moods of the scenic beauty of the region with the hardship of the people living there.

As curious about me as I am about her, a young dweller in the informal settlement comes to say “mingalaba”.  I used a fairly narrow aperture to create enough depth-of-field allow some of the background to be emphasized in addition to the girl.

A traditional Burmese dance performance showcases the dancers’ grace and the beauty of their costumes.  Always look for an uncluttered background when composing and be sure to capture multiple shots so that one will be timed just right.

At the village market in Nyaung-U in the Bagan region.  I introduced myself to the vendor and received permission to make her portrait. At first she appeared stilted and posed, but as she tended to other customers and got accustomed to my being there, she returned to a natural state.

Escaping steam nearly obscures a worker at a Bagan workshop where pone ye gyi (a popular flavored soybean sauce) is made.  A portrait can become much more visually interesting when composed in an unexpected fashion.

The matriarch shows us around her family’s paper workshop where they make ceremonial fans for weddings and other events.  I made this image using my classic portrait technique: using a fast portrait lens (85mm f/1.8) nearly wide open to emphasize the subject, and choosing a location with nice soft lighting and as uncluttered a background as possible.

One of the family’s daughters kindly poses for a portrait. She wears thanaka, the tree bark paste that most Burmese women, and quite a few men, apply to their faces daily.

We had been invited by villagers to attend a Buddhist initiation ceremony, so we rose early and traveled to their village. The boys in the back row are preparing to start their service as novice monks in a monastery. All Buddhist boys in Myanmar are required to perform this service at some point during their childhood.  The girls in the front row are some of their sisters who are celebrating their ritual ear piercing.

The boys paraded through the village to the monastery on horseback, while the girls and some of the parents rode oxcarts.  Another classic portrait using a fast prime lens at a wide aperture to soften the background, this image also was made with a touch of balanced fill-in flash to reduce shadows on the subject’s face.

During an excursion to Phaw Saw Village outside Bagan, we met this artisan.


Have you visited Myanmar?  What were your favorite photographic subjects?  Please leave your thoughts here.

Want to read more posts about what to shoot while traveling?  Find them all here: Posts about what to shoot.

All of these photos and many more from Myanmar are available for viewing or purchase here: Myanmar image gallery.

Look for Part II of this story in tomorrow’s post!


Meteoric Rise [Encore Publication]: How to shoot the Perseid and other meteor showers

While the Geminid Meteor Shower in December and the Perseid Meteor Shower in August are the best-known, each year there are quite a few major meteor showers that afford great opportunities for seeing meteor activity.  Here is a partial list, courtesy of Sky & Telescope:

Major Meteor Showers in 2018
Shower Radiant and direction Morning of maximum Best hourly rate Parent
Quadrantid* Draco (NE) Jan. 4 60-100 2003 EH1
Lyrid Lyra (E) April 22 10-20 Thatcher (1861 I)
Eta Aquariid* Aquarius (E) May 6 20-60 1P/Halley
Delta Aquariid* Aquarius (S) July 29 20 96P/Machholz
Perseid Perseus (NE) Aug. 13 90 109P/Swift-Tuttle
Orionid* Orion (SE) Oct. 21 10-20 1P/Halley
Southern Taurid Taurus (S) Nov. 5 10-20 2P/Encke
Leonid* Leo (E) Nov. 18 10-20 55P/Tempel-Tuttle
Geminid Gemini (S) Dec. 14 100-120 3200 Phaethon
Ursid* Ursa Minor (N) Dec. 22 10 8P/Tuttle

* Strong moonlight will interfere with these showers.


Source: Sky & Telescope

While it’s still technically tricky to make great images of a meteor shower, today’s technology certainly makes it possible for those of us without astronomical budgets to do so.  I shot some nice images of last summer’s Perseid shower and would have been out there shooting the Geminids last December except that the cloud cover here in the San Francisco Bay Area was 95-100%.  Here’s a composite of several images I shot last August of the Perseids.

A composite image made up of one long exposure for the lake, mountain, and trees, plus several 25-second exposures capturing the individual meteors I observed over a 2-hour period.  Buy this photo

Most of the techniques you need for capturing a meteor shower are the same as for capturing the Milky Way.  Review my post from a few weeks ago for a refresher course: Post on Milky Way Photography.

The special challenge when shooting a meteor shower is that meteors can occur anywhere in the sky.  Even with a very wide-angle lens, such as a 14mm or 16mm lens on a full-frame camera, only a small portion of the sky can be covered.  As we are limited to a maximum exposure time of about 25-30 seconds with a 14mm or 16mm lens so as to avoid blurring the stars into star trails, it’s clear that we have to shoot a lot of consecutive images to be likely to capture several meteors throughout the night.  We then use software such as Photoshop to combine the images in which meteors are visible into a single composite image showing all of the meteor activity we captured during the night.

A good tutorial on shooting meteor showers, illustrated with amazing images by Glenn Randall, can be found here: Glenn Randall post on photographing meteor showers.

Have you photographed a meteor shower?  What techniques did you use?  Please share your experiences here.

Want to read more posts about photographic techniques?  Find them all here: Posts on Techniques.


Please Join Me for a Hands-on Portraiture Workshop: Learn to make beautiful portraits using natural light

Dear Readers,

If you’d like to learn how to make beautiful portraits using just natural light and a few simple techniques, then please join me for a 2-hour hands-on workshop/class that I’ll be teaching several times over the next few weeks. Held in a scenic location in Mountain View, CA, these classes will cover the basics of techniques and tools, and then we’ll practice by shooting in the field with a wonderful model. Learn more or register for a session here: Kyle’s workshop on portraiture using natural light.

In today’s post I am sharing a few favorite images that we shot during a recent session of this workshop.  Working with our wonderful model Roxy, I walked students through the entire process of creating stunning headshots, full-body and action portraits, and environmental portraits, all using only natural light and with a minimum of gear, fuss, and bother.  Students learned how to configure their cameras, what lenses to choose for different portrait situations, where to shoot, how to pose and direct the model, how to use light modifiers (reflectors and diffusers), and much more.

Learning to capture flattering and eye-catching headshots is a basic requirement for portrait photography.

We will also learn to make full-body and action shots that bring out our subject’s true personality.

Always be on the lookout for special and playful moments.

I emphasize the artistic as well as the technical aspects of portrait photography.

Roxy really went the extra mile by climbing a tree wearing heels and a red dress!  In my hands-on portrait workshops, we will collaborate with fun and creative models.  Students will gain skills and a comfort level in directing models, even if they have never worked with a model previously.

You can see more details and book a session of the class here: Kyle’s workshop on portraiture using natural light.  More dates will be added soon. Hope to see you at one of these sessions!