Comic Relief [Encore Publication]: A photo essay of images from SF Comic Con 2018

As a professional travel photographer, I’m at my happiest when I get to seek out new cultural experiences and work with the people I meet to capture their culture in images.  Sometimes this discovery takes place halfway around the world, and other times it happens very close to home.  This weekend I had the opportunity to make portraits at San Francisco Comic Con 2018 of some of the thousands of attendees who portray their favorite comic book characters.  This was my introduction to the culture of “cosplay”, where people dress up as characters and bring them to life through their performances.  Many cosplayers design and make their own costumes, a laborious process, and interpret the characters’ personalities through their acting abilities.  I was extremely impressed by the wide range of costumes, props, and makeup as well as the cosplayers’ passion and skill.  Comic Cons are also fun events to shoot because the cosplayers love to have their work captured in images.

In today’s post I present some of my favorite images from SF Comic Con 2018 in the form of a photo essay.  Note that all of these images and many others from this event are available to view and purchase on my website.  Click on any image to see a larger version on my site.

A few words about how these images were made:

  1. Any convention is a crowded and bustling affair, and comic cons are no exception.  To achieve as uncluttered a background as possible for my portraits, I engaged cosplayers in conversation and then asked them if they would pose in a less crowded area for a portrait.  Nearly everyone said yes, because they are thrilled to be photographed in costume.  I would then direct them to a wall, alcove, or other fairly clean background before starting to shoot.
  2. My gear was very simple.  I shot with a single DSLR body and just one lens, a 24-85mm “walkaround” zoom.
  3. I shot with available light only.  While quite a few photographers in attendance were using flash or even dedicated studio lights, in my opinion that was a miscalculation because the fluorescent lighting in the convention center was challenging to match with a flash.  This situation results in “mixed lighting”, where the subject is lit by lights of very different color temperatures.  It is often unappealing to look at and difficult to post-process.
  4. I used a high ISO setting, a moderate aperture, and a fairly fast shutter speed.
  5. For variety, I captured a range of poses from full-body to half-length to headshots.  I tried to include all of the subjects’ elaborate props.  If they were part of a group, I captured both group and individual portraits.
  6. This type of shoot requires an intensive effort in post-processing.  I adjusted color balance carefully to try to gain a pleasing and accurate tonal range given the unattractive fluorescent lighting under which the photos were shot.  I processed for a “high key” (bright subject against white background) effect so as to render the venue’s ugly walls as true white.  With effort, harsh shadows can also be reduced during post-processing.

I hope you enjoyed viewing these images from my first foray into capturing cosplayers as much as I enjoyed making them.  I will surely be seeking out and shooting upcoming comic cons, as these are among the more rewarding events to cover.

Have you shot comic cons or cosplay events?  Please share your experiences and your tips and tricks here.

Want to read more posts about what to shoot while traveling or near home?  Find them all here: Posts about what to shoot.

Celebration Time, Come On [Encore Publication]: How to shoot festivals, street fairs, and other celebrations

As a professional travel photographer, I have to be prepared at any given time to shoot in nearly every genre of photography.  Landscapes, urban scenes, street photography, night and astrophotography, sports, wildlife, and portraiture are all stock-in-trade, and I love them all!  But when I’m asked what my favorite photographic genre is, I reply that I love portraying living culture the most of all.  Making images of people celebrating their culture, especially when those images convey a sense of place, is my top objective when I shoot, whether I’m halfway around the world or near home.

Culture can be expressed in small everyday elements of dress, gesture, and environment.  But celebrations such as festivals, street fairs, religious observances, arts, and sports show us culture writ large.  It is these outpourings of color, sounds, motion, and ritual that show us how people are different and yet similar all around the world.  And of all the celebrations I shoot regularly, my favorite of all is the annual Carnaval San Francisco.  So in today’s post, we’ll explore how to shoot striking images of cultural celebrations, using Carnaval SF as an example.

This year’s Carnaval was held this past Sunday.  But I was privileged to be “embedded” with several of the comparsas, or Carnaval groups, during the months leading up to the big parade day.  This allowed me the opportunity to get to know the leaders and dancers in these groups, making very special images of the preparations for Carnaval.  While I won’t be including any of those behind-the-scenes images in today’s post, the images of the parade day itself did benefit from my having had the chance to get to know the members of these groups over the months leading up to the day.  We’ll include some discussion of this observation in the post.

I’d like to start with an observation on gear.  I see a lot of fellow photographers shooting at events like Carnaval with way too much gear.  When I say too much gear, I mean more gear than is good for them or for the participants and observers of the festival.  Several photographers had two or three DSLR bodies mounted with enormous zoom lenses and attached to large strobes with huge diffusers.  Some used monopods and a few even tried to set up tripods for this rapidly moving and crowded event.  I brought a single DSLR with two light and fast prime lenses (a 50mm “normal” lens, and an 85mm portrait lens).  That’s it.  I never mounted a zoom lens during the whole day of shooting and I never used any artificial light.  And of course I went handheld the whole day; there’s really no safe or practical way to use a tripod at a crowded and mobile event.  All 2500 images I made that day used just that compact kit, and I’m very happy with the results.

It’s a good idea to arrive well before the scheduled start time.  Often, the best images of the day will be the ones you make during the preparations rather than during the event itself.  For this image of a leader of the Viva la Diva group, who I knew well from working with them over the last few months, I got in close with an 85mm portrait lens and allowed her elaborate headdress to fill the entire frame.  Buy this photo

Try to include some of the elements surrounding the people in the celebration.  A portrait that shows a person or people within their surroundings is called an “environmental portrait,” and often these tell us more about the person and the culture than do close-ups.  Buy this photo

Seek out the key people in a celebration, such as the King of Carnaval shown here.  He has such an amazing presence that all I had to do was find the right vantage point and shoot away.  I always look for uncluttered backgrounds when making portraits, so the background doesn’t distract much from the image.  Buy this photo

Kids make wonderful subjects during celebrations, especially during those moments when they forget the camera is there and are completely uninhibited.  Buy this photo

Try to choose backgrounds that complement your subject without competing with it.  I asked this samba dancer to pose by a street mural whose bright blues complemented her own costume.  Buy this photo

Group portraits can be challenging.  It’s difficult during the chaos of a celebration to get everyone’s eyes on the camera.  Try to find a vantage point that flatters everyone in the image (for full-body portraits, it’s often best to shoot from the level of the middle of the body, not from head level), choose an uncluttered and undistracting background, and select an aperture that gives just enough depth-of-field to keep all the people in focus while softening the background.  Buy this photo

To make close-up portraits during the actual celebration (in this case, a parade), it is not necessary to use a long telephoto lens.  Shooting with a long lens means you’re “taking” the portrait, not “making” the portrait.  You simply can’t interact with your subject while shooting from far away.  I prefer to use a prime normal or portrait lens so that I can interact with my subject and make an image where his personality shines through.  It helped here that I knew the members of this group from our interactions over the last few months.  Buy this photo

Another reason to use a fast prime lens is that you can choose a very wide aperture (here, F/2.0 using an F/1.4 lens) to get tack-sharp focus on the subject’s face while softening the background and sometimes other parts of the body.  Here I wanted to emphasize the pointing gesture by having the fingers so close as to be out of focus, while the dancer’s face and body are in sharp focus.  Buy this photo

For images that really pop, use a large aperture (small F-stop number) to soften the background and separate the subject from the other people and objects around him.  Buy this photo

During the chaos and cacophony of an urban celebration, it’s nice to find those quiet moments, too.  While most festival dances are joyous and boisterous, this Latin American folkloric dance is quiet and mournful.  I wanted the portrait to reflect that mood, so I shot from the side as if walking next to the dancer and caught the quiet gesture of holding the white handkerchief.  Again, a large aperture was used to blur the background and emphasize the subject.  Buy this photo

I look for scenes where participants are just being themselves.  These girls were having a blast, marching and chatting with each other, but they also were interacting with the crowd.  I got down nearly to the ground so as to shoot from their level and framed the image so as to emphasize the color and pattern of their costumes.  Buy this photo

Most images of parades are shot from straight ahead looking backward onto the subjects.  You’ll observe in this post that most of my images are not made from that perspective, but occasionally it does work to frame a great scene, such as this delightful image of a salsa dancing couple.  Buy this photo

It can be challenging to include a whole parade contingent in one shot.  Here I was able to frame the whole group in formation, including some of the lovely San Francisco houses on the steep hill behind, by running ahead to the truck in front of the dancers and getting as much distance as I could between me and them.  I shot with an 85mm lens and selected a small aperture (large F-number) so as to keep all of the dancers and the background in focus.  Buy this photo

With bold and colorful costumes, some subjects cry out for a big striking close-up.  When this dancer stopped to interact with me, I got in close with a portrait lens and captured him full-frame.  Buy this photo

Don’t shy away from using non-standard aspect ratios.  To include the whole Muito Quente contingent, I moved back from the dancers and captured the whole width of the street, then in post-processing I cropped to keep the full width but remove the unwanted foreground and background portions.  Buy this photo

Again, it is helpful to know the participants in advance of the performance.  I had been working with the Muito Quente group for several months before the parade, which made it more natural to interact with each of the dancers and make the best images possible.  Buy this photo

Always shoot in RAW mode for maximum flexibility.  A few words about post-processing: Using Lightroom, I make small adjustments to the color and contrast curves so as to emphasize the subject.  A little boost to the vibrance (but not so much as to make the image appear unnatural) and a touch of post-crop vignetting can really make the image pop.  Buy this photo

Sometimes it’s okay to break the usual rules of composition.  A portrait is not supposed to be cropped at the joints, such as at the knee, but here it works because the dancer’s ornate flowing dress gives a sense of motion and fluidity in the bottom of the frame.  Buy this photo

Even in a fast-moving parade, find the opportunities to have your subject stop for a moment and interact with you.  The resulting images will convey much more personality that way, even if the personage is fully masked.  Buy this photo

We’ll close with this moment of sheer Carnaval magic.  It’s such a wonderful feeling when all the elements come together to make a memorable image.  This portrait uses most of the techniques we’ve discussed in today’s post–careful composition, bright vibrant colors, a perfect moment, sharp subject with soft background–and conveys a strong sense of personality, culture, and place.  And that is what Carnaval, and cultural celebrations in general, are all about!  Buy this photo

What are your favorite cultural celebrations?  How do you make images that capture their essence?  Please share your thoughts here.

Want to read more posts about what to shoot while traveling or close to home?  Find them all here: Posts on What to Shoot.

Focus on Asha Stanford Holi [Encore Publication] : Capturing the colors, joy, and exuberance of an iconic Indian celebration held close to home

I love all aspects of travel photography, but the moments I truly live for are when I have the opportunity to experience and to capture images of the world’s most exuberant celebrations.  The iconic Indian festival of Holi, celebrated annually throughout India in huge cities and small villages alike, is one of my absolute favorites.  This year I had the chance to shoot a large and vibrant Holi celebration without the need to fly for 30 hours to get to India.  As an official photographer for Asha Stanford’s Holi festival, I got to document all the color, joy, and revelry of a large, world-class Holi event, all within 20 minutes drive from my home.  In today’s post, I share some favorite images from the event along with some brief remarks about how each was made.  Note that all of these images and many more are available to view and purchase on my website–get there by clicking on any of the images here.

With colored powder and often sheets of water flying everywhere, Holi is by design a messy and mischievous celebration.  Protect yourself when “playing Holi” by wearing clothes you can part with after the event and by covering your camera body and lens with a rain sleeve.  Here’s the one I use, which is excellent–inexpensive, easy to use and very protective of the gear:

Note that even when using a high-quality rain cover like this one, the front end of the lens is still exposed, so be sure to protect your lens’ front element with a UV or Haze filter.  And to be extra safe, I brought only one camera body and only a single lens, which was an inexpensive but versatile “walk-around” travel zoom lens.

Crowded festivals, by their nature, have cluttered backgrounds.  When making portraits in such environments, I do try to reduce the clutter by choosing the background carefully, but capturing the moment is more important and in any case, it is futile trying to wait for completely uncluttered backgrounds.  In post-processing, some of the clutter can be minimized through careful cropping and the application of just a bit of post-crop vignetting.  Use too much vignetting, though, and the image begins to take on an artificial appearance.

To capture fast action, you obviously want to choose a fast shutter speed.  That’s no problem when shooting in bright sunshine such as we had during this Holi celebration.  Still, I choose a moderately high ISO (400) to ensure I could retain fast shutter speeds even when in the shade or when using a small aperture to maximize depth-of-field.

Get in close!  Portraits often are most effective when they emphasize a specific detail rather than show the entire environment.  To further emphasize that specific detail, try to select a wide aperture (low f-stop number) in order to obtain shallow depth-of-field.  I had only a relatively slow “walk-around” zoom lens with me, so for close-up portraits I shot wide open at f/4.5–not great for isolating the subject, but better than shooting at an even smaller aperture.  In typically less adverse environments, I would be shooting with a much faster portrait lens, most likely my favorite 85mm f/1.8 prime lens:


When your subject is backlit (the main light coming from behind), as is often the case when shooting outdoors in bright sunlight, be sure to choose exposure based on the main subject.  Here I used my camera’s spot metering mode to set the exposure based on the clothing of one of the people in the group, but it’s also fine to get your exposure by zooming in or walking up close to the group and then to set that exposure manually on your camera.  You can also use your camera’s exposure compensation control to dial up the automatic exposure by about 1.5 or 2 stops, but I recommend not trying to use automatic exposure modes in general.  If you use the exposure your camera’s auto mode chooses for you and your subject is strongly backlit, your image will be underexposed by typically 1.5-2 stops or even more.

I’m always on the lookout for great moments to capture.  When I saw this dad playing with his young daughter, I composed the frame around the two of them and started shooting continuously so as to get a shot at just the right instant.  During post-processing, I cropped the image to show only the portion that portrays the thrill and joy of the playful pair.

Careful composition is always important in photography, but it’s easy to forget this point during the heat of the moment when shooting in bustling and chaotic environments.  To compose this image, I framed it to get the splash of color from the two friends’ “high-five” moment right in front of the big sign boldly pronouncing, “COLOR”.  That’s a Holi moment.

One of the keys to successfully documenting huge festivals is finding the small, intimate moments.  Big, sweeping crowd shots showing chaotic motion are important to document, but it’s capturing those small interpersonal interactions that really make your portfolio shine.  I used as wide an aperture as I had available in order to cast the busy background in soft focus.

Performances are often a part of festivals, and these are wonderful fun to capture.  I’ve posted many times on the techniques required to make great images of performing arts, so I won’t repeat myself here.  Just be sure to compose appropriately, set the exposure correctly (challenging to do in direct sunlight), and shoot lots of images to be sure of capturing a few excellent ones.

The climactic moment of the Holi celebration comes near the end, when all the revelers simultaneous throw handfuls of colored powder high into the air.  Be ready for these big moments by preparing all your gear and composing all elements of the shot beforehand.  

To capture the sweeping scale of really big celebrations, sometimes it helps to make a panoramic image.  Some cameras can do this automatically in-the-camera, but I find those images don’t turn out very well, so I make panoramas manually by shooting a series of overlapping images that span the scene.  In theory this is quite simple.  Just take a series of photos starting from the far left side of the scene, then panning the camera a little bit to the right so the next photo just overlaps with the previous one, and so on until you reach the far right side of the scene.  You then use software such as Lightroom or Photoshop to stitch the separate, overlapping photos together into a single sweeping image.  In practice, this can be quite difficult.  I find the software often takes an extremely long time to process a panoramic image and sometimes even crashes while attempting to do so.  If you have a more powerful computer than I have, you may have an easier time with this process.  

Parting shot: When I see a great subject for a portrait, I will interact with him or her, get to know them a bit, then begin shooting with their permission.  Over time and in the heat of a celebration, they will forget I’m even there, but the resulting images will be better for the time spent interacting with the person first.

I hope you’ve enjoyed this photo essay and brief notes about how to shoot festivals and celebrations.  Whether we’re close to home or halfway around the world, such festive gatherings truly define the culture of the celebrants and make amazing photographic subjects.  If you’d like to read more posts about what to shoot while traveling or near home, find them all here: Posts about what to shoot.

What are your favorite celebrations to shoot, and how do you capture images there?  Please share your thoughts here!


Luck Favors the Prepared [Encore Publication]: Tools for planning your shot

It was Louis Pasteur who said, “Fortune favors the prepared mind.”  We usually hear the quote paraphrased as, “Luck favors the prepared.”  For travel photographers, there is often a great deal of luck involved in capturing a truly great image, but there are some very useful tools that we can use to help us plan to be in the right place at the right time with the right gear.  Let’s look at just a few of my favorites.

I’ll start with a quick review of the most obvious resources.  I would never plan an hour-long photo shoot, let alone a month-long trip to a far-flung travel destination, without doing some research.  What are the must-see locations, and what dates and times of day are perfect for each one?  What are the events or activities that most authentically represent the locations I am visiting?  Is there a livestock market, a street festival, or a religious celebration taking place while I’m in the region?  How can I build an itinerary that best incorporates all of these locations?  Great resources for this type of research include guidebooks (online and hardcopy), online review sites such as Trip Advisor and Yelp, mapping and navigation apps (Google Maps is still my all-around favorite, but several others have their own advantages), and local weather sites.  I like to build my itinerary by customizing an online map to show all of the locations I’d like to visit, then creating a routing that links the locations in the proper order.  If travel by air, rail, bus, or boat is involved, I research those schedules and fares to determine the best way to get from one place to the next.  Airline consolidation sites such as Orbitz can be quite helpful for finding the best flights at the best prices.  If the itinerary has been pre-planned by a travel company, then I will still do most of this background research to better understand the locations we’ll be visiting.

Once I know where I’ll be going and what events I plan to shoot, I develop a shot list.  Some photographers craft very detailed and specific shot lists, but I like to keep it quite flexible and informal, often simply jotting down my ideas in the calendar event on my phone that is associated with each planned shoot.  After all, if I adhere too closely to a shot list, I will just end up with the same images that hundreds or thousands of other visitors have captured after doing the same research.  Serendipity and the artist’s eye have their place in travel photography, too.  The research phase can also inform me as to what clothing, gear, and other essentials I should bring to each location.

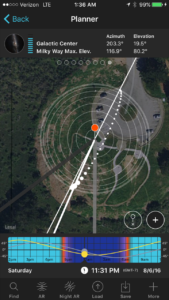
Now I’d like to introduce three smartphone apps that I consider indispensable for travel photography.  First, there’s Photo Pills, an app that incorporates several essential tools into one package.  I use Photo Pills for planning shots where I need to know how to get all the elements, including location, date, and time of day, to come together.  For example, during the Perseid Meteor Shower, I wanted to find a dark sky location with a nice foreground and a view toward the galactic core of our Milky Way.  This way, I could capture images including the meteor shower, the Milky Way, and the pretty landscape in the foreground.  I had a location in mind, a beautiful spot where there isn’t too much light pollution and with a gorgeous view over a reservoir and the Santa Cruz Mountains.  The Planner tool in Photo Pills allowed me to visualize the foreground as viewed by my phone’s camera, superimposed against the Milky Way as it would appear on different days and times of day.  I planned the shot for a certain time on each of several consecutive days, confirmed that the Milky Way would be rising in the desired direction and that the nearly full moon would have already set, and then waited for clear weather.  The first night of the meteor shower was cloudy, but the second night was the charm, and I was able to capture this striking image.
Using the Photo Pills app on my smartphone, I was able to plan in advance for a location, date, and time that would maximize the chances of capturing the Perseid Meteor Shower and Milky Way over the lovely Crystal Springs Reservoir.  Buy this photo

Here’s a screenshot of the Planner tool in Photo Pills that I used to prepare for this shoot.

img_3452

The Photo Pills app has a number of tools to help plan and execute your shots.

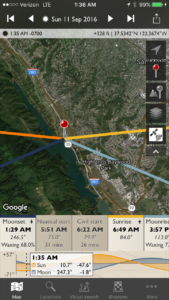
Another useful app for planning the best locations, dates, and times for your shoots is TPE (The Photographer’s Ephemeris).  I find this tool to be especially helpful for visualizing the path of the sun and moon across the field of view for any location I select.  This app is very powerful, and I have only scratched the surface of what it can do to predict and prepare for photo opportunities.

img_3453

The Photographer’s Ephemeris (TPE) is a powerful tool for planning any outdoor photo shoots.

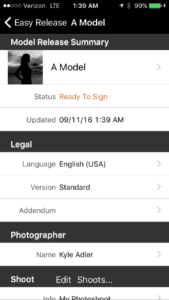
A final app I will mention here is called Easy Release.  Sometimes (read this post for details about model releases), we need a model release when a person or several people are clearly identifiable in a photo.  I know some photographers who carry hardcopy model releases with them wherever they travel, but I find this to be cumbersome and impractical when on the road shooting.  Instead, I use Easy Release on my phone, so I’m always ready to quickly prepare a release for a new friend to sign when they appear in my images.  Even though the app has the ability to translate the text of the release into several languages, there are situations in which it isn’t reasonable to try to explain to a local person what’s in the release and why it’s required.  Furthermore, I consider it to be exploitative if the person can’t reasonably be expected to understand what’s in the document or why they should be signing it.  But there are times when having immediate access to a model release that can be prepared, signed, and stored right on my phone is a big advantage.

img_3454

Easy Release is a convenient tool for creating, signing, sharing, and storing model releases when a person is clearly identifiable in photos.

With proper planning using readily available resources and various apps including the ones I’ve presented here, we can be better prepared to maximize our chances of capturing memorable images.  Happy shooting, and remember that luck favors the prepared!

Do you have a favorite tool you use to plan for your photo adventures?  How have you used this tool to get your shot?  Please share your experiences here.

Want to read more posts about tools for planning your travel photography?  Find them all here: Posts on Planning.

Focus on 2018 SF Pride Parade: Capturing diversity, purpose, and intimacy

It’s no surprise that San Francisco hosts one of the world’s oldest and largest LGBTQ Pride events in the world.  Each year, the parade and festival grow bigger and better attended.  SF Pride is one of my favorite annual events in my home region, the SF Bay Area, and what I love the most about this exuberant celebration is its remarkable focus on the central human values of diversity, inclusion, activism, hope, and love.  In today’s post, I share some of my favorite images from this year’s Pride Parade, along with a few words about how the images were made.  The goal is to showcase the incredible diversity and sense of social purpose of the participants and observers at this grand celebration, while also striving to capture the small, more intimate, moments.  Remember that you can view–and purchase–all of these images as well as many more by clicking on any of the images in this post.

In a frenzied environment like that of most festivals, parades, and street fairs, it can be a challenge to make a nice clean portrait with an uncluttered background.  Sometimes it’s possible to relocate the subject to an area with a clean and clutter-free background, but most often (as with this portrait) that isn’t feasible.  In those cases, my best practices are to use a moderate telephoto “portrait” lens, select a wide aperture (small F-stop number) to throw the background into soft focus, get in close to the subject, and use a touch of post-crop vignetting during post-processing.  

Huge festivals and celebrations such as SF Pride can be overwhelming, with hundreds of thousands of participants and observers present.  I strive to capture the smaller, more intimate, moments within this gigantic environment.  Here I captured a beautiful portrait of two participants sharing their love, which I think encapsulates the entire meaning of Pride events around the world.  I had been chatting with these two people and had obtained their permission to photograph them before making this image.  I used a medium telephoto “portrait” lens and got in close to isolate the couple from the busy background.

Color and texture play a huge role in photographic composition and expression.  As photographers, we’re very aware of these factors when we compose landscapes or nature scenes, but even when making a portrait, we should always be considering the mood evoked by the colors, patterns, and textures in the scene.  I love this portrait for its moody use of the similar shades of orange-red offset against the multiple colors of the flowers and the cigarette.  This is an image that tells a story, but that also leaves most of the story untold.

Another intimate portrait, this one made of a young woman doing yoga poses while waiting to march in the parade.  She had an adorable sense of humor and expressive face, which, coupled with her offbeat outfit, made a great closeup portrait.  Don’t be afraid to get in close to your subject, but always get to know them and ask permission first.

An iconic Pride scene, this portrait was made with a longer telephoto lens, its use made necessary by the greater distance to the parade float in the middle of a wide street.  While I prefer to get up-close and personal with my subjects, and to get to know them before shooting, sometimes we have to shoot from farther away, such as during a fast-moving and crowded parade.  It’s therefore important to have the gear and expertise to make portraits from any range.  Even when shooting from farther away, though, my key portrait rules still apply: try to capture the portrait with as uncluttered a background as possible, use a wide aperture to isolate the main subject from the background, and apply a bit of post-crop vignetting during post-processing.

It can be tricky to try to capture nudity in a tasteful way suitable for sharing and selling to broad audiences.  I spent some time chatting with these two activists to get to know them and to understand their cause–overturning San Francisco’s ban on public nudity–before starting to shoot.  Even though they had given me permission to photograph them nude (which is an important courtesy all photographers should follow, although no permission is legally required to photograph people in a public space in the US), my market for images containing graphic nudity is small, so I strive to capture scenes that tell the story but with implied nudity rather than graphic nudity.  Here I found a vantage point that allowed the subjects’ arms to strategically cover certain parts of their bodies.  The resulting portrait conveys the story of their purpose and gets across the idea of their nudity, but is still shareable and sell-able to a broad market.

Another close-up portrait, using the same techniques I shared earlier in this post.

Another of my favorite portraits from the day, this one also tells a small-scale, intimate story, conveyed by getting in close and isolating the subjects from the busy background.  The end result is a sense that these two people are celebrating their own story, even in the midst of the bustling celebration going on around them.

I met this young woman in a very crowded space, but fortunately I had the opportunity to walk her to a less cluttered space to make her portrait.  I’m always on the lookout for quieter and cleaner spaces when shooting festivals and celebrations.  A few steps was all it took for us to find this simple, clean background, allowing the portrait to really pop.

Group portraits pose a special challenge in busy public spaces: how to capture all the group members in crisp focus while also trying to isolate them from the cluttered background.  Here I used a medium aperture to keep the people in sharp focus while slightly softening the background, but since a very wide aperture cannot be used for groups, the softening effect will be mild.  As a result, it’s especially important when making these group portraits to seek an interesting, complementary, or clean background.

As their float passed by in the staging and assembly area before the official start of the parade, I observed an opportunity to capture this quiet scene of one woman helping to apply her friend’s makeup.  I used a moderate telephoto lens and shot several frames to increase the odds of getting a clean and interesting shot.

When making portraits of kids or seated people, it’s a good practice to get down to their level.  Getting in close is also usually an effective technique, both to isolate the subject and to capture a sense of their spirit.

What are some of your favorite celebrations, and how do you capture their diversity in your images?  Please share your thoughts here.

Want to read more posts about what to shoot while traveling or close to home?  Find them all here: Posts on What to Shoot.

In the Nik of Time [Updated]: Now owned by DxO, the Nik Collection offers leading-edge image editing tools

Note: In 2017 Google announced that they would no longer provide support for the Nik suite of tools.  That meant you can still download the latest version of Nik, but it may not work with the other software you are running.  Many in the photography community were concerned because sooner or later as we upgrade our other software, Nik will cease working for us.  Fortunately, a company called DxO purchased the Nik suite of tools from Google a few months after Google ceased supporting the software, and just this month DxO announced their first Nik release.  Read on for more details about the Nik tools and DxO’s new release.

In 2012, Nik Software, a small company known for their image processing tools that emulated the look and feel of using old film, was quietly acquired by a somewhat larger company known as Google.  Google announced they were making the entire suite of Nik tools available for free to all users.  As mentioned above, Google ceased supporting the Nik suite as of 2017, but the software was quickly purchased by DxO who just announced their first release.  The good news is that with this new release the photography community now has a reasonable assurance that these industry-leading image editing tools will be supported well into the future.  The bad news is that the Nik suite is no longer free; DxO is charging $69 to download the software.  That’s still less than the $150 that Google charged users for this software prior to 2016, and it’s a very reasonable price for software of this scope and quality.

For photographers who wish to access the Nik tool set and don’t already own it, or for photographers for whom the tool set has ceased working, I recommend downloading the new release from DxO’s website now, as the introductory price of $50 will increase to $69 at the end of June, 2018.  For those of us who already have the software installed and for whom it’s still working just fine, I don’t see a need to upgrade to the paid version right now  That’s because the new release, while more stable and better documented than the free older version from Google, does contain the same tools with the same functionality.  Personally, I will choose to wait until a new O/S or Lightroom upgrade forces my hand.  But I am very pleased to know that these wonderful editing tools will continue to be supported and developed into the future!

Here are my notes from the past two years of using the Nik suite of image editing software tools.  Its capabilities are leading-edge and would be well worth spending hundreds of dollars to obtain.  It doesn’t do everything, but what it does, it does better than tools such as Photoshop and Lightroom, each of which costs a good deal of money.  That Nik’s great capabilities are available for download for less than $70 is a wonderful value, and I strongly recommend you give them a try.

It’s important to note that the Nik Collection of software tools is not intended to be standalone image processing software.  It consists of a set of plugins, each specialized for a different specific purpose, that must be accessed by a general-purpose image editing application such as Photoshop, Lightroom, or Aperture.  I use Lightroom for nearly all of my post-processing, so I used that application to access the Nik Collection.

Once you have your general image editing application installed, then you can download the Nik Collection modules at the DxO website listed above.  When you are working in your application of choice, you will then have access to the various Nik Collection tools in the editing menus.  For example, when I select an image in Lightroom, I can access six of the seven Nik modules by pulling down the “Photo” menu and then pulling down the “Edit In” sub-menu.  One of the Nik modules, the HDR Efex tool, is accessed instead under the “File” and “Export with Preset” menu choices.

These are the seven Nik Collection modules included in the download:

Analog Efex Pro

Explore the look and feel of classic cameras, films, and lenses.

Color Efex Pro

A comprehensive set of filters for color correction, retouching, and creative effects.

Silver Efex Pro

Master the art of black-and-white photography with darkroom-inspired controls.

Viveza

Selectively adjust the color and tonality of your images without complicated masks or selections.

HDR Efex Pro

From natural to artistic, explore the full potential of HDR photography.

Sharpener Pro

Bring out hidden details consistently with the professional’s choice for image sharpening.

Dfine

Improve your images with noise reduction tailored to your camera.

So far, I’ve played around with just three of these tools.
Silver Efex Pro did a very good job of converting my test images to monochrome.  I’m pretty good at using Lightroom’s tools to convert color images to black-and-white, but they take a lot of practice to master.  In Nik’s Silver Efex module I was able to make some good choices very quickly.  For those who want to fine-tune their black-and-white conversions, there are very good tools for detailed control over the process.
I used Nik’s Dfine module to attempt to reduce noise in a favorite shot of the Milky Way over Yosemite Valley’s Half Dome.  The results of my quick trial looked comparable to what I had done in Lightroom, but I suspect if I took the time to learn the Nik tool more thoroughly, I could end up with even better results.
Finally, I tested Nik’s HDR Efex Pro tool.  This little gem is a joy to use.  Just select the series of shots from which you want to build an HDR (High Dynamic Range) image, export them to HDR Efex, and click a couple of buttons to generate the base HRD image there.  My default image looked pretty good, but the Nik tool has a wide range of presets that allow you to generate different HDR effects with the click of a button.  I tried several of these presets until I found one that perfectly suited the scene.  A few more small tweaks using the detailed adjustment sliders, and I was ready to save the HDR image back into Lightroom.  In the past I have been very disappointed with Lightroom’s built-in HDR tools, and only slightly more satisfied with Photoshop’s HDR module, but the Nik HDR Efex Pro plugin does an amazing job.  It’s both easier to use and generates better results than the other HDR software I’ve used.  Specifically, the Nik tool does a much better job than the other tools at producing natural-looking colors and at removing the “ghosting” effects from when the underlying images are just a little bit different from one another.  Now I’m eager to find the time to go back to some of my favorite HDR images and rebuild them using the Nik software!
For comparison, here is a favorite HDR image of mine, first shown after processing in Photoshop’s HDR tools and then shown after processing in Nik’s HDR Efex Pro tools.
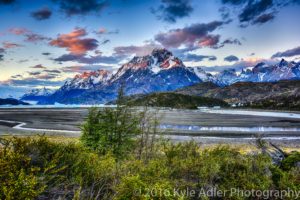
lrwm-lowres-5884This HDR image of Lago Grey with its glacier and the peaks of Torres del Paine National Park in Chile was processed using Photoshop’s HDR tools.  The colors appear unnaturally saturated and parts of the image (especially the tops of the mountains and the brush in the foreground) show some ghosting effects.
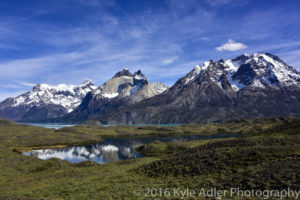
lrwm-lowres-5880-5884-hdrnikThis version was processed using the Nik Collection’s HDR Efex Pro tools.  The colors look much more natural and all parts of the image appear sharp and free from ghosting.
I am looking forward to revisiting many of my favorite images and reprocessing them using the Nik Collection’s tools.  I highly recommend this versatile, easy-to-use, and powerful suite of image editing modules.
Have you used the Nik Collection for your own photography?  What do you like and dislike?  Please share your thoughts here.
Want to read more posts about post-processing your images?  Find them all here: Posts on Post-Processing.

Faces of Myanmar [Encore Publication], Part II: Showcasing the Diversity of Burma’s People

My wife and I recently returned from an amazing 2.5-week adventure traveling through Myanmar.  Our itinerary took us from the main city of Yangon to the vast plains gleaming with ancient pagodas in Bagan; then to the former imperial capital and cultural hub of Mandalay; on to Kalaw, the gateway to many hill tribes of the region; and finally to Inle Lake, well known for its picturesque floating gardens and for the Inthe people with their unique traditional style of fishing.  While it was wonderful to view Myanmar’s gorgeous landscapes and fabled temples, what made this adventure truly unforgettable for us was its many opportunities to interact with Burmese people from many ethnic groups and all walks of life: Buddhist monks and nuns, villagers displaced by a typhoon 10 years ago who are still living in temporary bamboo huts with no running water, the Paduang hill tribe whose women traditionally wear heavy brass plates on their necks, an octogenarian master of the dying art form of Burmese marionette theater, young boys celebrating their initiation as novice monks, and the delightful girls who have found a caring home at an orphanage in Mandalay.  Burma is a photographer’s dream, filled with glorious pagodas, gorgeous vistas, and friendly, diverse cultures.

Yesterday’s and today’s posts showcase some of my favorite portraits, some of them not yet previously published, featuring a wide range of people we met during our adventure.  The portraits will be presented as a photo essay, but I will include brief descriptions of each and occasionally some commentary about how they were made.  You can click on any of these images to view or purchase them and many more from the Myanmar trip.  Yesterday’s post featured Part I, and today’s post comprises Part II.

A fascinating visit to Myawaddy Nunnery, where we had the opportunity to meet some of the more than 200 novice nuns who study there.  I composed this image to include the contrasting colors of the novices’ pink robes against the painted carved teak facade of the building.

Portrait of the abbess at Myawaddy Nunnery.  The lovely “bokeh”, or soft quality of the out-of-focus background elements, is created by using a very wide aperture on a lens known for having this property (in this case, an 85mm f/1.8 prime lens).  Even when traveling, it’s important to have the right lens for the right job.

The Mingun Bell, 13 feet high and weighing 90 tons, is the world’s second largest functioning bell.

A delightful visit to the Aye Yeik Mon Girls’ Orphanage. We were heartbroken to learn the stories of some of the abandoned girls who live here, but were uplifted to see the wonderful care and guidance they are receiving there now.

I had the opportunity to get to know 15-year-old Phyu Phyu at the Aye Yeik Mon Girls’ Orphanage. Abandoned by her mother at an early age, Phyu Phyu’s early life was challenging, but she has flourished under the care of the nuns at Aye Yeik Mon and is planning to continue her education and to enter a professional career.

We were invited into the Mandalay home of Oma and his family. His mother was a restaurant owner and chef for many years, so we were treated to an amazing Burmese meal.  It can be challenging to make portraits of groups, especially when young children are involved.  I shot several frames and chose one where the young boys are looking (nearly) directly at the lens, settling for some of the other family members to be looking elsewhere.

Kuthodaw Paya is called the world’s largest book because the entire canon of early Buddhist scripture is recorded on carved stone tablets housed in its hundreds of pagodas.  These young local women wanted me to pose for a selfie with them, so I asked them to return the favor.  Their brightly colored longyis (traditional Burmese attire) stand out nicely against the drab background of the pagoda behind them.

A quiet moment at the entrance to Shwenandaw Kyaung Monastery.  I used spot-metering based on the woman’s clothing so as to achieve proper exposure given the much brighter background.

A stop at the Kalaw morning market to purchase the produce for our visit to Myin Ma Htie village.

We visited the village monastery in Myin Ma Htie and met with the monk there.

On arrival at Myin Ma Htie, we are greeted by villagers who will be our hosts.  This portrait was carefully composed to provide nice soft natural lighting on the girl and to frame her in a pleasing way within the surrounding area.

Traditional spinning methods to create yarn from lotus plant fiber.  I was struck by the symmetry and the bright color of the yarn in this scene.  

A worker in a cheroot workshop demonstrates her craft. She makes about 1000 of these small and inexpensive cigars every day.  To make this portrait, I used my go-to 85mm portrait lens at a wide aperture and added just a small amount of balanced fill flash to evenly expose the subject’s face.

The Phaung Daw Oo Paya is one of Burma’s most sacred sites. Dating to the 11th century, this pagoda houses the four remaining Buddha statues that enclose relics from the body of the Buddha. Worshipers add a little gold leaf to these statues when they visit, so that today the shape cannot even be recognized as that of the Buddha.

A fisherman on Inle Lake demonstrates the ancient style of fishing with a netted basket.  I framed the shot through the fabric of the net to add texture and visual interest.

Meeting members of the Padaung ethnic minority, whose women are famous for wearing heavy brass coils to make their necks look longer.  This 18-year-old Padaung girl proudly wears the brass coils on her neck as a symbol of ethnic identity. She told us her younger sister chooses not to wear the ornaments as she goes to a Burman school where most of the other students are not Padaung. The tradition was often scorned as backwards during the military regime, but now young Padaung women are again often choosing to practice it.

Have you visited Myanmar?  What were your favorite photographic subjects?  Please leave your thoughts here.

Want to read more posts about what to shoot while traveling?  Find them all here: Posts about what to shoot.

All of these photos and many more from Myanmar are available for viewing or purchase here: Myanmar image gallery.

Missed Part I of this story in yesterday’s post?  You can read it here: Part I of this story.

Faces of Myanmar, Part I [Encore Publication]: Showcasing the Diversity of Burma’s People

My wife and I recently returned from an amazing 2.5-week adventure traveling through Myanmar.  Our itinerary took us from the main city of Yangon to the vast plains gleaming with ancient pagodas in Bagan; then to the former imperial capital and cultural hub of Mandalay; on to Kalaw, the gateway to many hill tribes of the region; and finally to Inle Lake, well known for its picturesque floating gardens and for the Inthe people with their unique traditional style of fishing.  While it was wonderful to view Myanmar’s gorgeous landscapes and fabled temples, what made this adventure truly unforgettable for us was its many opportunities to interact with Burmese people from many ethnic groups and all walks of life: Buddhist monks and nuns, villagers displaced by a typhoon 10 years ago who are still living in temporary bamboo huts with no running water, the Paduang hill tribe whose women traditionally wear heavy brass plates on their necks, an octogenarian master of the dying art form of Burmese marionette theater, young boys celebrating their initiation as novice monks, and the delightful girls who have found a caring home at an orphanage in Mandalay.  Burma is a photographer’s dream, filled with glorious pagodas, gorgeous vistas, and friendly, diverse cultures.

Today’s and tomorrow’s posts showcase some of my favorite portraits, some of them not yet previously published, featuring a wide range of people we met during our adventure.  The portraits will be presented as a photo essay, but I will include brief descriptions of each and occasionally some commentary about how they were made.  You can click on any of these images to view or purchase them and many more from the Myanmar trip.

Here is Part I, and tomorrow’s post will feature Part II.

A worshiper at Chaukhtatgyi Pagoda. I’m always on the lookout for ways to include local people when shooting monuments and other landmarks.  The human element adds great visual interest to travel images and also personalizes the photo, transforming a generic scene into a story.

We were shown around the Musmeah Yeshua Synagogue by one of the 17 remaining members of Myanmar’s only Jewish community.  Environmental portraits like this one include not only the person but also some other elements that help tell the person’s story, in this case the Torahs at the ark of the synagogue.

A worshiper at Shwedagon Pagoda, the most sacred Buddhist site in all of Burma.  At least 90% of the time I include people as a main element in my images, I obtain permission from them first.  I find that this approach, as well as being friendlier than shooting first and asking questions later, tends to lead to better portraits as there is an interpersonal connection between the subject and the photographer.  However, there are certain instances when asking first could interrupt the subject’s activities or negatively impact the dynamic being captured.  For this photo, I made no attempt to hide that I was shooting the woman, but I didn’t interrupt her meditation, either.

Armies of volunteer sweepers make the rounds at Shwedagon Pagoda to ensure the temple is kept spotless.  To shoot this large and fast-moving group, I positioned myself at a scenic spot, configured my camera’s setting in advance, then waited for the volunteers to move into position.

Rangoon’s Inya Lake, site of the former military junta’s brutal response to the 8888 uprisings and the Saffron Revolution, is now a peaceful place where young people picnic, make music, and go on dates.  When shooting strongly backlit subjects, be sure to use spot metering or exposure compensation unless you’re trying to create a silhouette.  

Street vendor in Yangon.

A fascinating visit to an informal housing settlement inhabited by people displaced by the devastating 2008 typhoon. A decade later they are still living in squalid conditions in bamboo huts with no running water. Here, children are filling containers with water from the lake and carrying 40 kg (88 pounds) of water, often more than their body weight, several miles to their families’ homes. This image is a favorite because it effectively combines the contrasting moods of the scenic beauty of the region with the hardship of the people living there.

As curious about me as I am about her, a young dweller in the informal settlement comes to say “mingalaba”.  I used a fairly narrow aperture to create enough depth-of-field allow some of the background to be emphasized in addition to the girl.

A traditional Burmese dance performance showcases the dancers’ grace and the beauty of their costumes.  Always look for an uncluttered background when composing and be sure to capture multiple shots so that one will be timed just right.

At the village market in Nyaung-U in the Bagan region.  I introduced myself to the vendor and received permission to make her portrait. At first she appeared stilted and posed, but as she tended to other customers and got accustomed to my being there, she returned to a natural state.

Escaping steam nearly obscures a worker at a Bagan workshop where pone ye gyi (a popular flavored soybean sauce) is made.  A portrait can become much more visually interesting when composed in an unexpected fashion.

The matriarch shows us around her family’s paper workshop where they make ceremonial fans for weddings and other events.  I made this image using my classic portrait technique: using a fast portrait lens (85mm f/1.8) nearly wide open to emphasize the subject, and choosing a location with nice soft lighting and as uncluttered a background as possible.

One of the family’s daughters kindly poses for a portrait. She wears thanaka, the tree bark paste that most Burmese women, and quite a few men, apply to their faces daily.

We had been invited by villagers to attend a Buddhist initiation ceremony, so we rose early and traveled to their village. The boys in the back row are preparing to start their service as novice monks in a monastery. All Buddhist boys in Myanmar are required to perform this service at some point during their childhood.  The girls in the front row are some of their sisters who are celebrating their ritual ear piercing.

The boys paraded through the village to the monastery on horseback, while the girls and some of the parents rode oxcarts.  Another classic portrait using a fast prime lens at a wide aperture to soften the background, this image also was made with a touch of balanced fill-in flash to reduce shadows on the subject’s face.

During an excursion to Phaw Saw Village outside Bagan, we met this artisan.


Have you visited Myanmar?  What were your favorite photographic subjects?  Please leave your thoughts here.

Want to read more posts about what to shoot while traveling?  Find them all here: Posts about what to shoot.

All of these photos and many more from Myanmar are available for viewing or purchase here: Myanmar image gallery.

Look for Part II of this story in tomorrow’s post!


Focus on FREEdom DANCEfest [Encore Publication]: Images from the second annual free festival of new work by emerging artists

Whether I’m halfway around the world or near home in the San Francisco Bay Area, I love to capture images of the performing arts.  Perhaps more than any other art form, dance distills the culture of its place and its time down to its essence.  This past weekend, I had the opportunity to shoot the second annual FREEdom DANCEfest, a free festival showcasing new work by emerging professional choreographers and dancers.  Today’s post presents some of my favorite images from the dress rehearsal and performance of the fifteen new pieces highlighted at the festival.

A few technical notes on how these images were made:

  1. For fast-moving action in low light conditions, use of a fast prime lens is advisable in order to allow use of a fast shutter speed to freeze the motion.  I used two DSLR bodies, one fitted with a 50mm f/1.4 “normal” lens and the other with an 85mm f/1.8 portrait lens.
  2. A high ISO sensitivity setting and a wide aperture (low f-stop number) are often both required to allow fast shutter speeds in dim lighting.  Don’t be afraid to boost the ISO to 3200, 6400, or even higher if your camera’s sensor can handle it.  Any resulting digital noise can be reduced later during post-processing.
  3. Always be aware of the background and lighting as well as the action of your primary subject.  It is the interplay of all of these compositional elements that makes your final image.  Most of the time the goal is a clean and uncluttered background, but once in a while (see the third image below, for example) the contrast between the background or lighting and the subject can actually enhance the impact of the image.
  4. Shoot plenty of frames to ensure you capture just the right moments.  I shot more than 5000 images of this one-day event and culled them down to about 100 that were delivered to the client.
  5. Occasionally a slow shutter speed can be used to blur the motion intentionally as a creative choice.  I’ve included a few such images in today’s post.
  6. During post-processing of performance images, my most common adjustments are applying noise reduction, adjusting color balance and lighting curves, cropping, and straightening horizons.  Sometimes I also apply a bit of post-crop vignetting to emphasize the subject and reduce clutter in the background.

I hope you have enjoyed these images and that they (along with my technical notes) will inspire your own performing arts photo shoots! While gear and technique do play a role in capturing great dance images, by far the most important element is the photographer’s eye.  A great dance image should artistically capture a special moment during the performance and should emphasize the choreographer’s and dancer’s physical ability, grace, hard work, and joy!

Now it’s your turn.  Please share your own stories and tips for capturing live performances in images.

Want to read more posts about what and how to shoot while traveling?  Find them all here: Posts about what to shoot.

Calibration Time, Come On! [Encore Publication]: Why you should color-calibrate your display devices and how to do it

We tend to take for granted that the colors we perceive when we look at a scene will be captured faithfully by our camera’s sensor and the lens in front of it, and then rendered accurately in every stage of processing thereafter, from the memory card to the computer and to all our displays including laptops, tablets, smartphones, TVs, projectors, and even on these same types of displays owned by our friends with whom we share our images.  (We also expect prints made from our images to faithfully reproduce the colors from our camera’s sensor, but that is a story for another day.)

As photographers, we want to ensure the colors in our final images reflect as best we can the original colors we perceived when first framing the scene.  With proper color-calibration of the display screens we use to process our images, we can keep the colors as true and accurate as possible.  Buy this photo

The reality is that every step of the process of capturing, processing, and sharing an image leads to changes in the rendition of the colors.  No device can fully represent every intensity of every color that the human eye can see.  Camera manufacturers go to great lengths to ensure the colors captured by the camera’s sensor are as accurate as possible when you attach a lens made by the same company.  And when you use software such as Lightroom or Photoshop to post-process your images, you may take great pains to ensure the colors you see on your screen look very close to what you remember you saw when you shot the image in the first place.  But without careful attention, the final image we see later on our various display screens can look very different from device to device.  That’s because every type of display, and even every individual screen, has a unique way of representing every color.  So your PC’s monitor will display any given color just a bit differently than your phone’s screen will show that color.  And your friend’s phone’s screen will look a bit different, still (even if it’s the exact same brand and model as yours).

Fortunately, there is a simple and quite affordable way to standardize the representation of colors across all your devices.  It’s called color calibration, and for less than the cost of a good polarizing filter, say about $100, you can purchase a little doodad that can calibrate all your displays.  I use the X-Rite ColorMunki, which can be had for about $110 at retail.

To use a color calibration device, you install some software on your display(s) and then place the device on your display screen.  The software cycles the screen through displaying a wide range of colors, which are read and recorded by the calibration device.  Finally, the needed adjustments to bring your screen’s settings into line so they render colors as accurately as possible are saved in a special file.  From this point on, whenever your display device is started up, it reads the configuration information in that file and renders colors as closely to their actual appearance as it is physically capable of doing.

Because our eyes perceive colors differently in different ambient light conditions, you’ll want to have your calibration device take an ambient light reading for the typical lighting conditions that will be present while you’re using each display.  For example, if you use your laptop PC mostly when bright daylight is streaming into your kitchen, you’ll want to calibrate when those conditions are present.  You can even save different versions of the configuration file for different lighting conditions.

And because display devices do change over time, it’s a good idea to re-calibrate each device every few weeks to control for that.

If you’re serious about your photography, you want your images to look great not only on your own display screen(s), but also when viewed by other people on other types of devices or on the printed page.  Using a reliable color-calibration device helps ensure the colors in your images remain as accurate as possible through all the stages of processing and sharing until they leave your personal control.  This is a good practice that all photographers should employ.

How do you control for color accuracy in your images?  Please share your methods here!

Want to see other posts about post-processing your images?  Find them all here: Posts on Post-Processing.


Amazing Landscapes [Encore Publication]: How to make images that capture the spirit of the place

I love landscape photography.  To create a really successful landscape image, several elements have to converge: the lighting must have a pleasing quality, objects in the foreground and/or middle ground should be intriguing, leading lines should take the viewer on a journey through the image, and (usually) the sky must be dramatic and compelling.  I shoot a lot more mediocre landscapes than great ones, but when all the stars align (sometimes literally, during astrophotography shoots) and all those compositional elements are in place, the results can be amazing.

Let’s take a look at some of my favorite landscape images and talk about how they were made.
Buy this photo

While traveling in Svalbard to view the total solar eclipse of March 2015, my wife and I booked a safari via snowmobile to search for polar bears.  We covered 80 miles by snowmobile, much of that after dark.  The temperature averaged -5 degrees, with wind chill about 25 below zero Fahrenheit.  We rode out to an area now used as a campground, where an early settler and his wife lived a century ago.  This was glorious, otherworldly scenery encompassing ice fields, mountains, and the icy Barents Sea.  Svalbard is located so far north (closer to the North Pole than to mainland Norway) that the sunsets last for hours, so I set up my gear at the edge of the Barents Sea, composed the frame so that the eye is led out to the horizon by the slabs of ice and the range of mountains, and waited for the best light.  A polarizing filter added some drama to the sky.  A very long exposure was not necessary because there was no point to trying in blur the frozen water.  I shot several frames before the light became too dim and the temperature too bitter to continue.  This shot was the keeper!

Buy this photo

This landscape was shot during a recent trip through Turkey and is a good example of how sometimes we photographers just get lucky.  On arriving in the Cappadocian village of Üçhisar, we were thrilled to learn our hotel room was inside an ancient cave dwelling.  We awoke at 5:30 AM the next morning to the sight out our cave-hotel’s window of hundreds of hot air balloons launching above the “fairy chimneys” that dominate the Cappadocian landscape.  I got (mostly) dressed and rushed out onto our balcony, set up the camera on the lightweight travel tripod I carried on the trip, put on a wide-angle zoom lens, and started shooting as the sun rose.  I bracketed the exposure but because the light was perfect in this one shot, I did not end up combining multiple exposures into an HDR (high dynamic range) image.  Instead, this shot, one of the first of the morning’s session, was the clear choice.

Buy this photo

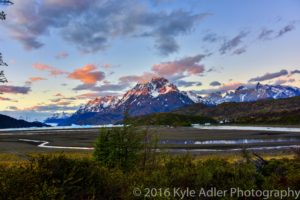
Chile’s Torres del Paine National Park is catnip for landscape photographers.  There are so many glorious subjects here that you can go crazy trying to photograph everything.  But Patagonian weather is notoriously changeable, and group travel doesn’t always afford photographers the chance to shoot at the right place at the right time of day with the right weather.  Fortunately, on our second night at the lodge on Lago Gray, I could see all the conditions were lining up for an epic image.  I skipped most of an excellent dinner so that I could set up my gear on the deck: camera with wide-angle lens, polarizing filter, steady tripod, and remote release.  I framed the image with a nice balance between sky, mountains, glaciers, lake, and foreground foliage.  And I started shooting.  I bracketed the exposure with 7-shot bursts, each one stop apart.  Later, in postprocessing, I combined a few of the shots from one burst into an HDR (high dynamic range) image using Lightroom’s photomerge feature.

Buy this photo

Closer to home, Yosemite is another photographer’s dream location.  While hiking to Dog Lake in Yosemite’s Tuolumne Meadows area, a freak hailstorm hit.  Suddenly the sky was hurling hailstones in biblical style and the formerly placid surface of the lake turned black with the force of the pelting ice.  What’s a photographer to do?  Start shooting, of course!  A tripod was impractical under these conditions, so I used a relatively fast shutter speed and shot handheld.  I took a series of bracketed exposures and combined them later using Lightroom into an HDR (high dynamic range) image.  For me, this image works because of the tension between the peaceful foreground of tree trunk and reeds, contrasted with the ominous sky and turbulent water.  The fallen tree and edge of the grasses provide nice leading lines from the peaceful to the violent portions of the frame.

Buy this photo

Another California landscape, this image was shot in the gorgeous Point Lobos reserve on California’s Central Coast.  As sunset neared, I set up camera and tripod right on the beach, shooting down onto the rocks and Pacific Ocean.  I used a neutral density filter to allow a very long exposure so that the water would blur.  I also attached a polarizing filter in an attempt to darken the sky and add drama to the image, but having two filters on the wide-angle lens did lead to some vignetting (the blocking of light at the edges of the photo), which I had to crop out in postprocessing.  This image was made from a single exposure with only minor adjustments to bring out the shadow details and saturate the colors.

Buy this photo

This year’s Perseid Meteor Shower was more active than we’ve seen in many years.  At the peak night of the shower, I headed out to a spot where a break in the trees allows a view over Crystal Springs Reservoir and the Santa Cruz Mountains.  We waited until about 2 AM so that the meteor activity was at a peak and the lights of the nearby towns were no longer bright.  Shooting with a wide-angle lens and a heavy professional tripod, I framed the image to include a pleasing foreground with trees, reservoir, and mountains, with most of the frame covering the dark sky.  I used a star finder app to shoot toward the galactic core of the Milky Way.  I set the camera to make 25-second exposures at f/4 and ISO 1600.  At this focal length, exposures longer than 25 seconds will cause the stars to appear blurry due to the motion of the earth.  And then I just kept shooting, one exposure after another, for nearly two hours.  Four meteors passed through the part of the sky in my image area during this time, and I combined the images that included them into one merged image using a software application called StarStaX.  While I like this image a lot, it could have been improved by finding a darker sky area (the lights from a nearby city caused the orange glow at the top of the mountains) and by bringing out the Milky Way a bit more prominently.  Now I know what to do during next year’s Perseid Shower!

A good wide-angle zoom lens is a must for landscape photography.  Many of the images featured in this post were shot with my Nikon 16-35mm f/4 lens.  It’s got great image quality and is well built, and I find it’s a great alternative (except perhaps for astrophotography where the extra speed is required) to the popular but very expensive Nikon 14-24mm f/2.8.

Want to see more articles on how to shoot travel images?  Find them all here: http://www.to-travel-hopefully.com/category/travel/shoot/

Now I’d love to hear from you!  What are your favorite landscape images, and why?  To what lengths have you gone to capture landscape photos?  Please share your thoughts in the comment box at the end of this post.

Comic Relief: A photo essay of images from SF Comic Con 2018

As a professional travel photographer, I’m at my happiest when I get to seek out new cultural experiences and work with the people I meet to capture their culture in images.  Sometimes this discovery takes place halfway around the world, and other times it happens very close to home.  This weekend I had the opportunity to make portraits at San Francisco Comic Con 2018 of some of the thousands of attendees who portray their favorite comic book characters.  This was my introduction to the culture of “cosplay”, where people dress up as characters and bring them to life through their performances.  Many cosplayers design and make their own costumes, a laborious process, and interpret the characters’ personalities through their acting abilities.  I was extremely impressed by the wide range of costumes, props, and makeup as well as the cosplayers’ passion and skill.  Comic Cons are also fun events to shoot because the cosplayers love to have their work captured in images.

In today’s post I present some of my favorite images from SF Comic Con 2018 in the form of a photo essay.  Note that all of these images and many others from this event are available to view and purchase on my website.  Click on any image to see a larger version on my site.

A few words about how these images were made:

  1. Any convention is a crowded and bustling affair, and comic cons are no exception.  To achieve as uncluttered a background as possible for my portraits, I engaged cosplayers in conversation and then asked them if they would pose in a less crowded area for a portrait.  Nearly everyone said yes, because they are thrilled to be photographed in costume.  I would then direct them to a wall, alcove, or other fairly clean background before starting to shoot.
  2. My gear was very simple.  I shot with a single DSLR body and just one lens, a 24-85mm “walkaround” zoom.
  3. I shot with available light only.  While quite a few photographers in attendance were using flash or even dedicated studio lights, in my opinion that was a miscalculation because the fluorescent lighting in the convention center was challenging to match with a flash.  This situation results in “mixed lighting”, where the subject is lit by lights of very different color temperatures.  It is often unappealing to look at and difficult to post-process.
  4. I used a high ISO setting, a moderate aperture, and a fairly fast shutter speed.
  5. For variety, I captured a range of poses from full-body to half-length to headshots.  I tried to include all of the subjects’ elaborate props.  If they were part of a group, I captured both group and individual portraits.
  6. This type of shoot requires an intensive effort in post-processing.  I adjusted color balance carefully to try to gain a pleasing and accurate tonal range given the unattractive fluorescent lighting under which the photos were shot.  I processed for a “high key” (bright subject against white background) effect so as to render the venue’s ugly walls as true white.  With effort, harsh shadows can also be reduced during post-processing.

I hope you enjoyed viewing these images from my first foray into capturing cosplayers as much as I enjoyed making them.  I will surely be seeking out and shooting upcoming comic cons, as these are among the more rewarding events to cover.

Have you shot comic cons or cosplay events?  Please share your experiences and your tips and tricks here.

Want to read more posts about what to shoot while traveling or near home?  Find them all here: Posts about what to shoot.

Approach with Care [Encore Publication]: Sensitive photographic practices help keep wildlife wild and healthy

Photographing wildlife in its natural habitat is one of the most exciting and rewarding activities I can imagine.  From researching the species’ behavior to seeking it (sometimes for days) in the field, to that wonderful moment its image is captured on our memory card and to the thrill of viewing that image when we return from the field, there’s something truly magical about this genre of photography.

Observing and photographing animals in the wild, such as this rare wildcat along Turkey’s Turquoise Coast, is thrilling.  Strive to put the animal’s welfare ahead of your image-making.  Buy this photo

Done properly, wildlife photography can have zero to very modest negative impact on the creatures whose images we capture.  In fact, photographers have done a great deal over the decades to help preserve wildlife through sharing images that inspire local people, governments, and the public to protect endangered species.

But by stalking and encroaching on a species’ territory, we photographers also put wildlife at risk of harm.  Improperly engaging with animals with the intent of photographing them can cause a predator to starve by allowing its prey to escape, cause another creature to become prey by distracting it from its natural wariness, stress the animal to harmful levels, or acclimatize them to being around humans.

Here are some important guidelines for photographing wildlife in as safe a manner as possible:

  1. Do your homework: The more you know before you set out to encounter a creature, the less likely you are to cause it harm inadvertently.  If you will be going with a safari or tour, research the outfit first to make sure they follow the highest ethical standards.  Get to know the behavior of the species you are seeking.  What is their daily and seasonal routine?  Where is their habitat?  What do they eat and what eats them?  What is a safe distance from which to view them?
  2. Keep a respectful distance: As kids we were told to keep away from wildlife for our safety, but as photographers we also need to consider how far away we must stay in order not to cause the animals undue stress.  Knowing where their meal ticket comes from, some safari and tour operators are willing to break park or preserve rules and approach the animals very closely so their clients can get great photos.  Do not encourage this.  Aside from the harm this stress can cause the animal, a stressed animal will look stressed in your photo and is more likely to bolt and leave you with no photo at all.  So, use a long telephoto lens, keep your distance, and both your subject and your images will be the better for it.
  3. Show special respect for the young: Baby animals are extremely vulnerable and should be treated with special care.  If you are traveling with a tour, defer to your guide’s knowledge.  If you’re on your own, be sure you’ve done your homework first, and err on the side of caution.Young animals, such as this baby baboon in Tanzania’s Serengeti National Park, should be photographed with special care.  I made this image using a long telephoto lens and shot from a safari vehicle parked at a respectful distance.  Buy this photo
  4. No kidding–don’t feed the animals: It seems almost too obvious to have to state, and yet nearly every day I encounter humans attempting to feed wildlife.  In Yosemite National Park, a number of bears must be killed each year because they have become dependent on humans for food.  At your local city park, you’ll probably observe people trying to feed the birds or squirrels.  And of course there are the big news stories (the recent major one was about the killing of the beloved Cecil the Lion) about hunters baiting animals with food.  A well placed and properly maintained bird feeder in the backyard may be okay, but no other attempts should be made to feed wildlife.
  5. Come back another time: In today’s networked world, word about rare animal sightings travels quickly.  If you hear about a sighting while traveling or near home, chances are many other photographers and watchers have also heard about it.  Multitudes of humans crowding around an animal will put it under undue stress and will also ensure you won’t make a great portrait of it.  Come back another time when there are fewer other people.  No photo opportunity is so irreplaceable that we should put the wildlife at risk.

With a little knowledge and courtesy, photographers can make great wildlife images while helping preserve and protect their subjects and keeping the wildlife wild.  Conversely, without respect or information about the local fauna, we run the risk of putting them at grave risk.  As the saying goes, make good choices!

The world’s smallest species of reindeer, the Svalbard reindeer is at risk due to global climate change.  Cautious and respectful photographers can use their images to help protect and preserve at-risk species.  Buy this photo

Do you have best practices about shooting (with a camera, that is) wildlife in the field?  Have you observed human behavior–positive or negative–that serves as an example?  Please share your thoughts here.

Want to read more posts about what to shoot while traveling or near home?  Find them all here: Posts on What to Shoot.


The Harsh Realities [Encore Publication]: How to shoot in extreme conditions

Travel is exciting because it exposes us to new environments from which we can learn about the diversity of the world and our own place within it.  But travel also can expose our expensive and sensitive photo gear to extreme conditions.  Heat, cold, humidity, dryness, wind, dust, sand, salt, water, and physical shocks are among the harsh realities of travel photography.  Let’s examine some of these hazards and discuss how to mitigate the potential harm.

  • Cold: Extremely low temperatures can cause all kinds of problems with modern electronics, including cameras.  Batteries don’t hold their charges very well in frigid conditions, so you need to carry extra batteries and keep them warm in your pocket or inside your parka.  Also expect to be recharging them more frequently than in warmer climes.  The LCD displays on your camera (and other devices such as your smartphone) can stop working partially or completely in very cold temperatures.  I’ve found there isn’t much that can be done when this happens except to try to gently warm the device, but that can be difficult when in the field shooting.  Fortunately, most of the time the display will return to normal functioning when it warms up.  Remember that very cold air is usually also very dry air, so be careful of condensation when getting out of the cold and returning to the warmth of an indoor environment.  The moisture that condenses on the inside of our lenses and electronic equipment can be damaging, so it’s best to let the gear warm up again while inside a sealed bag to prevent excessive condensation.  A large freezer-style bag works well for this purpose; just remember to place your camera and lens in the bag before coming inside from the cold.  Avoid lens changes in extreme cold conditions whenever possible.
  • Extreme cold, such as in Svalbard, can cause problems with the operation of batteries and LCD displays, and with condensation.  Buy this photo
  • Humidity: Excessive humidity can also cause condensation and fogging of the glass surfaces and displays on your gear.  In very humid conditions there is lots of moisture in the air, while in air conditioned vehicles and hotel rooms there is less moisture.  That means your lenses and LCDs will likely fog up quickly after leaving the air conditioned comfort of your hotel or vehicle.  To mitigate this problem, try to store your gear in an area that is less air conditioned, such as a storage area or bathroom.  And when you leave your hotel or car, keep the gear inside your camera bag to help prevent the buildup of moisture.
  • Wind and Dust: Recall that we’ve discussed many times in other posts the need to keep a UV (or haze) filter permanently attached to all lenses.  This protects the lenses from scratching damage, but has the secondary effect of protecting against dust building up on the front surface of the lens.  Dusty areas are also a good place to keep your lens cap on except when you are actually shooting.  Rule Number 1 in dusty environments is never, ever to change lenses outside unless it is absolutely necessary.  I like to carry two camera bodies with different lenses so that I can shoot with both lenses without the need to change in the field.  And if you do get dust on the camera’s viewfinder, lens, LCD, or mirror, you should have a good blower brush and soft lens cloth with you so you can clean it off.  I do not recommend trying to clean your camera’s sensor yourself unless you are confident you have the skills and equipment to do it properly.  Instead, turn on your camera’s sensor-cleaning function, if it has one, to try to prevent dust buildup, and heed the caution never to change lenses in dusty or windy environments.  A few small specks of dust on the sensor can even be removed in post-processing, although this becomes very difficult if the sensor is badly marred by the stuff.  I have a friend who is an ophthalmologist as well as an avid photographer, and he is one of the few people I know who will clean his own camera’s sensor.  I have a wonderful photo of him in full surgical regalia, using a microscope and surgical instruments to do the job.  For the rest of us, bring the camera to a good repair shop after your trip ends and before the next big adventure begins.
  • Physical Shocks: Travel is the school of hard knocks for camera gear.  Safari vehicles, “puddle hopper” bush planes, and long bus rides over bumpy roads are the norm for adventure travelers.  Once the gear takes a punishing blow that damages it, there is very little to be done in the field.  My best advice is to carry your gear in a very good padded bag with snug fittings around each piece, and to bring a backup camera body and lenses in overlapping ranges of focal lengths to ensure redundancy in the event of a mishap.

Game drives while on safari are near the top of every photographer’s “bucket list,” but the harsh realities of jolts, dust, and humid heat can threaten your sensitive camera gear.  Buy this photo

There’s an old saying, “If you can’t run with the big dogs, stay at home on the porch.”  If we were the types of photographers who wanted to avoid all these hazards, we’d just stay at home, right?  But travel photographers are the adventurous sort, and we consider these risks to be a cost of the intense pleasure we derive from shooting all kinds of fascinating subjects in new environments all around the world.  Plan well to minimize problems, bring extra gear for redundancy, and when something does go wrong keep a positive attitude: you’ll be well rewarded when you get home and have unique images as a souvenir of your efforts!

When have you faced extreme conditions for your shoots, and how did you overcome them?  Please share your thoughts here.

Want to read more posts about what to shoot while traveling?  Find them all here: Posts on What to Shoot.


The Camera Eats First [Encore Publication]: How to make delicious images of local food specialties

A big part of the joy of travel is learning about the local food and drink.  For the travel photographer, local culinary specialties represent a cornucopia of image possibilities.  In this post, we’ll look at some food images and discuss a few tips and tricks to make delectable photos of the victuals we meet while traveling.  Warning: Do not read this post while hungry.

When photographing plated food, it’s best to get in close.  Shoot straight down or at a slightly oblique angle, and always check your background to ensure it is as uncluttered as possible.  Be aware of your focal point and depth of field (how much of the image is in focus) so that the most important part(s) of your image are sharp.

For this photo of a cheese plate in Burgundy, France, I got in close to the subject and chose a small aperture to ensure all the different cheeses were sharply in focus.  Buy this photo

Don’t forget that  specialty drinks are also a big part of local culture.  For example, in Argentina the deep love of mate (pronounced MAH-tay), a local infusion, becomes almost a religious practice.  This image of the mate service engages all the senses with its bright colors, contrasting textures, and suggestion of the smell and taste of the drink. To capture a sense of the Argentinian obsession with mate, I shot this image of the serving of the drink with all its components.  I wanted to include some of the environment around the mate tray as well.  The scene was lit with natural light, which further saturated the bright colors.

Argentina’s national obsession, mate.  Buy this photo

Always be on the lookout for local dishes that are unusual or exotic to our own sensibilities.  This image of the local Peruvian specialty cuy, or guinea pig, has sold well on American and European stock photography sites because the main ingredient is so unfamiliar to our palettes.  I love the saturated colors and the humor inherent in the guinea pigs holding peppers in their mouths.  The ocher wall makes a lovely background to offset the colors of the dish.  To capture this image of Peruvian cuy served during a home-hosted lunch, I got in close as the hostess held up her dish, ensuring that the ocher wall behind was all that was visible in the background.  I chose a wide aperture to slightly blur one of the guinea pigs and the wall.  I used natural lighting with just a kiss of off-camera flash to accentuate the highlights.

 Cuy (guinea pig) is a Peruvian delicacy.  Buy this photo

Sometimes it is the ingredients rather than the final dish that are most interesting.  While on a shore excursion on the Greek island of Rhodes, my family saw these beautiful octopuses hanging to dry in the sun.  After photographing them, we ordered a plate of grilled octopus.  We very nearly missed the sailing of our ship, as the taverna’s cook took her time to grill the dish, but it was absolutely worth it!

Obviously, natural light was the way to go with this image.  I wanted to get in close, but not too tight, so that the lovely Rhodes scenery would be partly visible behind the drying octopus.  I used a medium-wide aperture to slightly soften the background.  Buy this photo

What’s even better than food images?  Portraits of local people making or serving the food!  Here’s a shot of a server holding up a tray of Istanbul’s best baklava.  The background is a bit cluttered, but I like this image for its blending of the beautiful dessert tray with the pride of the man serving it.

Often a street vendor, cook, or restaurant server will be reluctant to have their portrait made but will be happy to pose with their wares.  For this portrait of an Istanbul baklava server, I chose a wide-angle lens and got in very close to the food tray to emphasize the baklava while including the server in the composition.  Just natural light and balanced fill flash were used as lighting.  Buy this photo

Street markets are a wonderful source of travel images.  They tend to be bright, colorful, exotic, and characteristic of the location.  Be aware that some vendors will expect you to buy something if you want to photograph their wares.

I like the contrasting colors in this shot of Istanbul’s ancient Spice Market.  Buy this photo

Nearly every culture around the world has its own version of barbecue, and in my broad and diverse travel experience, it’s all good.  Here’s a photo of whole branzino (Mediterranean sea bass) fish being grilled topside by the captain of our small wooden sailing ship on the Turquoise Coast of Turkey.  It was nearly completely dark, so I lit this image using light from the burning coals and a touch of flash.  A relatively high ISO was required to balance the low natural light with the need for a small enough aperture to keep the whole subject in focus.

Whole fish on the grill aboard a gulet yacht in Turkey.  Buy this photo

Sometimes a local cuisine is all about diversity, such as the Dutch-Indonesian specialty rijsttafel (rice table).  Some presentations of rijsttafel in Amsterdam involve over a hundred different tiny plates, each containing a different food preparation.  To capture this tapestry of tastes, I stood on the bench and shot obliquely onto the table top, including as much of the spread as I could.

Indonesian rijsttafel served in Amsterdam.  Note that in restaurants at night we have little or no control over the artificial lighting, which can sometimes lead to an unnatural color cast on the food.  Shoot in RAW format so you can adjust the color balance during post-processing when you get home.  Buy this photo

I grew up in New England, and after traveling to more than 100 countries around the world I can say with authority that few meals can beat a good old-fashioned New England clambake with lobster.  To capture this iconic image, I shot up close and directly toward the lobster, using a normal lens with a medium aperture.  This allowed most of the meal to be sharply focused, but with some falloff in sharpness toward the edges in order to emphasize the Maine event.  The contrasting colors between lobster, clams, and corn make for a pleasing composition.

A lobster clambake in Maine showcases the contrasting colors and textures of this delicious meal.  Buy this photo

As a parting shot, I’ll leave you with this image of French haute cuisine.  The gloriously prepared and plated fish course at Paul Bocuse’s three-Michelin-starred restaurant made a fun subject because it is whimsical and artistic at the same time.  The available lighting was soft and subdued for artificial light, so no flash was needed.  I shot some closer compositions of just the plate, but preferred this one with some of the table setting included.

Bon appétit!  Buy this photo

What are your favorite food photos?  Do you have tips on how to make food images really pop?  Please share your comments.

Want to read more posts about what to shoot while traveling or at home?  Find them all here: Posts on What to Shoot.

When You Get Back Home [Encore Publication]: An introduction to the essentials of postprocessing

You may want to share some of your favorite images with friends and family right out of the camera while you’re still traveling, and as long as you’re not sharing so broadly that potential thieves may be alerted to your absence from home, that’s a fine thing to do.  To enable immediate and easy sharing, you can choose the setting available on many cameras to shoot both RAW and JPG files; the JPG images will often look pretty decent for sharing when they come straight from the camera, and you still have your much more detailed image data saved in the RAW files.

But when you get home from your trip, it’s worth making the effort to catalog and post-process the RAW files of your favorite images so that they will look their very best and so you will be organized for finding them in the future.  I’ll cover how to organize your catalog of images in a later post, but for now let’s take a look at the essentials of post-processing.

There are many software applications available to perform these tasks, but I strongly encourage you to check out Adobe Lightroom.  I use this tool, and nearly all professional and enthusiast photographers I know also use it.  You can license it along with other Adobe software on a pay-per-month basis as part of Adobe’s Creative Cloud, but it can also be purchased with a perpetual license (i.e., you purchase the software once and can use it forever), which is how I acquired it.

Once you have Lightroom installed on your PC, it’s easy to import your images from your camera’s memory card or from your PC’s hard drive and to organize your catalog of images using the software’s Library module.  When your images are in your Lightroom catalog, the software allows you to perform all post-processing you desire using its Develop module.  After shooting the image, my second-favorite part of the digital photography process is enhancing the the image in the Develop module.  The software package even gets its name, Lightroom, as the new digital equivalent of the work we older photographers formerly had to do in the darkroom, such as dodging, burning, and cropping our film negatives to get the images looking their best.

As an example of how a little post-processing can dramatically enhance an image, let’s take a look at a night shot I made of Copenhagen’s Christiansborg Palace, the seat of the Danish Parliament.  Here’s the “Before” picture:


Lightroom’s Develop module

The beauty of Lightroom’s method is that it doesn’t actually change your original image files as you edit them.  Instead Lightroom saves a roadmap of the various edits you make and stores this list of adjustments along with a pointer to the original file.  This is called “non-destructive editing”, and it allows you to edit your images to your heart’s content without overwriting or changing the originals at all.  You can go back as many times as you want later to revisit your edits and change them again and again.

Let’s look at this process in more detail.  Here is the basic Lightroom Develop module screen:

lightroom develop module

The left bar shows a thumbnail of the image you’re working on and a list of the most recent edits you have made.  The central part of the screen shows a larger version of your image and this can be zoomed in and out to work on details or the whole image.  The right bar has a histogram (a graph showing how many pixels in the image are at each brightness level from totally black to totally white) at the top, then a toolbar from which you can choose some of the editing tools quickly, and then a large area with sliders (only some of which are shown in this screenshot) that you move left or right to adjust various elements of your image.  The editing tools in Lightroom are comprehensive enough that I find I very rarely need to import an image into Adobe Photoshop to make really sophisticated edits; nearly all of the time, I can perform all of my post-processing using only Lightroom.

Some photographers spend a lot of time making major enhancements to their images, but I like to try to adjust my camera’s settings precisely enough that the image is made in the camera the way I envisioned it when shooting, so that I need to make only minor adjustments in post-processing.  While the exact steps of post-processing will be different for every image, here is my basic workflow (note that for the most part, I work from the top to the bottom of the adjustment tools found in the right bar):

  1. Adjust the white balance as needed.  Remember my advice to always shoot in RAW mode.  One of the advantages of RAW files is that you can adjust the white balance in post-processing, regardless of what your camera’s white balance controls were set for while you were shooting the image.  In JPG files you have much less control over the white balance after the fact.  Just choose a different preset white balance type (such as Daylight, Shade, or Flash) from Lightroom’s menu, or create a custom white balance yourself.
  2. Adjust the exposure as needed.  Use the histogram and the image preview pane to lighten or darken the whole image until it looks best.
  3. Adjust the contrast as needed.  Increasing contrast gives more separation between the darkest and lightest portions of the image, while decreasing contrast does the opposite.  I find that most images require the contrast to be increased slightly to moderately.
  4. Adjust the highlights and shadows as needed.  Highlights are the brighter parts of the image, and I find that often these need to be reduced in brightness to regain some detail that may have been lost in the camera.  Shadows are the darker parts of the image, and often these need to be made brighter to bring out lost shadow detail.  After the highlights and shadows have been adjusted, you may need to adjust the whites and blacks (very brightest and very darkest points in your image) if there are extremes of contrast present.  Most of the time I do not need to change the white and black points.
  5. Adjust the clarity as needed.  The clarity slider changes the contrast of the middle tones (neither the darker nor the lighter parts) of the image.  Usually images need a subtle increase in clarity to bring out the details in the texture.  Don’t overuse this tool or the image can become unnatural looking.
  6. Adjust the vibrance and/or saturation as needed.  Both of these sliders will change the concentration of the colors in your image, but vibrance tries to avoid changing the color of skin tones so images with people will often look more natural after increasing the vibrance than after increasing saturation.  Occasionally you might need to make adjustments to both vibrance and saturation, but usually I find a subtle increase in vibrance is sufficient.  Again, don’t overuse these tools or your image will start to look exaggerated and surreal (unless you’re going for those effects).
  7. Adjust the concentration of individual colors as needed.  Each color channel has its own slider to increase or decrease its saturation.  I don’t use these sliders often, but occasionally you may want to increase or decrease the saturation of just a single color.  For example, when shooting a landscape with sky or water, you may want to increase the blue saturation to bring out those parts of the image.
  8. If you want to work on your image in black-and-white, the color channels area is the tool I use to do the conversion from color to monochrome.  Click on the “B&W” tab above the individual color channel sliders, and then adjust the mix of how the colors are blended by increasing or decreasing each color’s slider to see how the black-and-white image looks.  I find that I often have to readjust the contrast slider at this point to get the image looking its best in black-and-white.
  9. There is some sharpening already applied to your image file by default, but if it looks too soft in the important areas, you can dial in some additional sharpening.
  10. When the image you’re editing was shot at a high ISO (sensitivity) and/or a very long shutter speed, there will likely be some noise in the image.  This can be managed somewhat in Lightroom’s noise reduction tool.
  11. Under basic lens corrections I will usually select all three of the check box items.  Lightroom knows how most camera and lens combinations work and can eliminate many of the optical glitches that would otherwise show up in the image.  Under manual lens corrections, I may need to rotate the image if the horizon wasn’t level when it was shot.
  12. All of the above adjustments affect the entire image.  After completing these adjustments, it’s time to make any selective adjustments that affect only a selected part of the image.  These selective adjustment tools can be found in the toolbar just below the histogram.
  13. Of these selective adjustment tools, the most generally useful is the cropping tool, which of course allows you to remove unwanted portions of the image on the sides, top, or bottom.  It’s always best to try to compose the image correctly in the camera, but cropping is often still needed in post-processing.
  14. The spot removal, filters, and adjustment brush are more complicated selective adjustment tools that can easily be subjects of additional posts in their own right.

These steps usually won’t all be needed for any one image.  If you have several images that were shot under similar conditions, you can select them all in the Library module and turn on Auto Sync, which then allows you to make the adjustments only once and apply them to all the selected images.  Another big time saver is creating your own presets, which are saved routines that you can call at the click of a button to automate tasks that would otherwise have taken multiple steps.  Unlike Photoshop, Lightroom was designed by Adobe specifically for photographers to use, so it is set up in such a way as to make life much easier for us to organize, edit, and share our images.

Here is the “After” version of our sample image of Copenhagen by night.  You can see how a few simple edits during post-processing can really make an image pop.

Buy this photo

I hope you’ve found this very basic introduction to the essentials of post-processing to be helpful.  Now it’s your turn.  What are your go-to techniques in editing your images?  Do you have tips and tricks that you’ve found make your life easier after you return from a trip?  Please share your thoughts in the comment box at the end of this post.

Want to read more posts about post-processing your images?  Find them all here: Posts on Post-Processing.

Sports Roundup [Encore Publication]: How to get amazing shots at sporting events

Whether we’re traveling afar or close to home, sporting events make for exciting photography.  The thrill of victory and the agony of defeat (credit: ABC’s Wide World of Sports), the heroic effort, and the little moments of humor and repose amidst the adrenaline rush of competition: all of these elements can be captured in images of athletic events.

While every sport has its own rhythm and rules, there are certain techniques that apply across a wide range of sports photography situations.  Let’s take a look at a few situations and discuss how to get the best images given the inherent challenges.  Note that these photos were all made during outdoor sporting events; there are special challenges with many indoor sports, such as basketball or hockey, because the action remains just as fast but there is less light to work with, and the artificial lighting can impart an unnatural color cast.  But that’s a topic for a different post.

Whatever the sport, I like to shoot from different perspectives, from wide to very close.  The wider views show the environment as well as the athletes, so these make good establishing shots.  But often the most compelling and dramatic sports images are the tight compositions, because they portray the athletes in a very personal and relatable way.

Below are two shots of the same rowing crew during the same race at a high school regatta.  The first image was composed from slightly farther away and with a less extreme focal length (300mm), so the resulting composition is more environmental.  It shows not only all the rowers and the coxswain in the shell, but also the width of the river and the surrounding scenery.  This shot establishes the setting and gives the big picture.
Environmental shot of a crew racing at a rowing regatta.  Buy this photo

Now here’s the same crew, but captured from a closer vantage point and using a longer focal length lens (750mm).  This perspective isolates the athletes from the background and shows their expressions and postures.  There’s certainly more drama here, at the expense of some insight into the environment.

A tighter shot of the same crew in the same race.  Buy this photo

There are exceptions, such as when you choose to blur the motion to give a sense of the athlete’s grace, but as rule you want to use a fast shutter speed to freeze the action in sports photography.  Very often that means shooting at 1/1000 of a second or even faster.  Choose the Shutter Priority mode on your camera to gain control over the shutter speed, and be sure to select a high enough ISO setting to allow the shutter speed you require.  If your camera has different auto-focus settings, you may find it helpful to choose a single-point focus setting if you know where the action will be, or a dynamic focus setting if the location of the action changes very quickly.  For this image of a professional beach volleyball tournament, I chose single-point auto-focus so I could select the exact spot where the players would be jumping.  I also find the best way to capture a great image in fast-moving sports (as with wildlife photography) is to set the camera to continuous or burst mode and continue to shoot rapidly through the action.  That way, you’ll have several different images to choose from, and with luck at least one will have caught that “decisive moment.”

A fast shutter speed and single-point auto-focus allow the fast action of a beach volleyball competition to be captured precisely.  Buy this photo

My favorite sports images portray the human element in a very personal way.  This photo from a Spartan Race (an extreme athletic event that combines long-distance running with a supersized obstacle course) captures the strength and the struggle of the athlete as he nears the end of a long race through the 100-degree California desert.  Keys to success in making this image were shooting from a vantage point low to the ground, using a medium-length prime telephoto lens with a large aperture to soften the background, and waiting for just the right moment.

An endurance athlete completes an obstacle near the end of a Spartan Race.  Buy this photo

The fun of shooting a sporting event doesn’t end when the competition is over.  Be sure to capture the dramatic and often humorous moments during award ceremonies and downtime during and after the action.

These athletes have finished their Spartan Race and strike a humorous pose at the finish line.  Buy this photo

Want to see more posts on what to shoot at home and while traveling?  See them all here: http://www.to-travel-hopefully.com/category/travel/shoot/

What sports do you enjoy shooting?  Do you have tips on how to get great sports images?  Please leave a comment in the box after this post.


Focus on Sacramento Spartan Race [Encore Publication]: Covering a Spartan Race can be an endurance event

Some events are just plain fun to shoot from beginning to end.  One of my favorite types of sporting events to cover is the Spartan Race.  Basically a combination of long-distance running with a supersized obstacle course, a Spartan Race is an extreme athletic event that attracts thousands of athletes from elite to weekend warrior.  I enjoy shooting these races because they offer so many exciting elements: color, drama, showmanship, grit, stamina, and humor.  Adding to the photographic fun quotient are the glorious natural surroundings, the photogenic and extraordinarily fit athletes, and the wide range of athletic rigors required of them.

In this post I’ll present some of my images from this past weekend’s Super Spartan Race held near Sacramento, California.  I will also share some tips on how to capture the best of a big and sprawling event like this one.

The Spartan Race organization recognizes and welcomes professional and enthusiast photographers more readily than do many US sporting authorities.  For any large sporting event, I apply several weeks in advance for a media (or press) pass so that I can bring in all my gear, shoot in all areas including those off-limits to spectators, gain free or reduced-price entrance and parking, and access VIP areas.  I’ve found the Spartan Race organizers to be quite helpful and understanding of what working photographers do.

img_3701
Yours truly with media badge.  This pass is important for the professional, as it allows access to otherwise off-limits areas and lets athletes and officials know you’re a working photographer.

One point to keep in mind when covering an endurance event spread out over long distances is that as a photographer, you will experience some portion of the rigors the athletes face.  The Super Spartan Race traverses a course about 8 miles long over steep and often muddy hills, interspersed with a couple of dozen obstacles of different types.  While I don’t typically try to cover all of the obstacles, it’s important to get a reasonable sample of the different challenges, so I do usually hike quite a few miles during the course of the day.  Photographers with a media pass have access to the whole course, but there are no special roads or ramps to get us there.  We have to trek up and down the same hills, through the same mud, and over the same terrain as the athletes do.  So come prepared for a bit of a workout!

The starting line is a good place to set the stage for your photo essay.  There is usually a DJ and music to get the athletes pumped up for the race.  Everyone is fresh, clean, and excited at this early stage.  Buy this photo

In addition to portraits and close-ups of individual athletes, it’s important to capture some establishing shots to set the context of the race.  I like to get some images of large contingents of athletes running over the hills.  I shoot from a distance, but often use a telephoto lens to compress the perspective and emphasize the massive scale of these races.  Buy this photo

When shooting individual athletes on the obstacles, use a fast shutter speed to freeze the action and a relatively small aperture to blur the background.  Buy this photo

Portraits of athletes don’t have to be in the cliche pose of standing, legs apart, on the ground flexing their biceps.  Athletes are happy to pose in the midst of whatever they’re doing when they see a photographer nearby.  Buy this photo

After finishing the course, athletes gather in the festival area.  This is a great place to make portraits.  The athletes are exhausted and muddy but in a celebratory mood.  Buy this photo

Spartan athletes in the festival area display strength as well as excitement for having completed the race.  Buy this photo

The finish line itself is a dramatic vantage point.  In this particular race, athletes must jump over a line of fire to finish the course.  I shot from a low perspective to emphasize the height of the jump, and used a fast shutter speed and small aperture to freeze the moment and isolate the athlete from the background.  Buy this photo

This image works so well because the shooting angle looking upward from below emphasizes the athlete’s power, and because the timing captured her expression at just the perfect moment.  I shot many frames to increase the likelihood of capturing the right moment, and, once again, I chose a fast shutter speed to freeze the motion along with a small aperture to blur the background.  Buy this photo

The shower area at the end of the race was taken over by hordes of kids who used the hoses for water play.  Humorous moments like this one lend a playful element to the day’s portfolio of images.  Buy this photo

An iconic Spartan Race image.  I captured the strenuous activity of carrying buckets filled with sand by shooting from a distance with a telephoto lens.  This technique compresses the perspective to include more athletes in the frame while still showing the strain on their faces.  Buy this photo

I like to seek out the athletes who have something special to say.  This racer stopped for a moment so I could make a portrait.  His flag makes a nice counterpoint to the rolling hills and featureless sky in the background.  Buy this photo

Although Spartan Race athletes are fierce competitors, they also make an effort to support one another and cheer their fellow racers on.  I enjoy capturing these interactions because these moments often tell a strong story visually.  Buy this photo

What are your favorite sporting events to shoot?  Do you have tips you can share for making great images of athletes?

Want to read more posts about what to shoot while traveling?  Find them all here: Posts on What to Shoot.


Cards, Calendars, and Keepsakes: Oh, My! [Encore Publication]: Ways to share your images beyond social media and prints

With the holidays fast approaching, now is a great time to think about creative ways to share your favorite images as gifts for family and friends or perhaps to enhance your own home.  Most commonly we share images via social media and, for more special occasions, as prints.  Review this classic post for a list of 10 ideas for sharing your images: Post on Image-Sharing Ideas.   

In today’s post, I discuss three of these methods that are particularly festive and well-suited to the holiday season: cards, calendars, and keepsakes.

5x7folded
A  likeness of one of the earliest holiday cards my wife and I created.  The original version was in black-and-white and had a humorous caption at the bottom.  This version was made more recently using a modern digital process.

Cards: For the entire 31 years we’ve been together, my wife and I have sent our families and friends custom-made holiday cards.  We created our first card in 1986, the year we started dating.  The process was extremely complicated back then.  We had to take the photograph using a film camera, send the film to a lab for processing, wait for the prints to be mailed back to us, select the image we wanted to use, cut the print down to the right size, tape it onto a printed template we had to design ourselves using a primitive word processor, and photocopy it onto card stock at a graphics store.  It was strictly a black-and-white affair because color copying was very expensive in that era.  Even for black-and-white cards, the cost was quite high.

Today, the process is vastly simpler and less expensive, and the quality very high.  There are countless companies that will take your photo files and caption information, blend them with a design you choose from their library of sometimes up to hundreds of choices, and create an attractive customized card for a range of occasions.  Shop around carefully before selecting one, because price, quality, and flexibility vary tremendously.  My current favorite is Snapfish.  Even though I no longer use Snapfish to host my image galleries, I continue to create and order photo cards from this site because it offers a good range of card designs, reasonably high printing quality, and affordable pricing.  There are often very deep discounts available at Snapfish and other photo sharing sites.  Try using a search engine to find discount or coupon codes.  I rarely pay more than 60% of the listed price.

When creating a card on any platform, there are a few basic steps to follow.  First, you choose the card design from a library of choices.  There may be only a few designs for some types of occasions, but for the winter holidays there are usually dozens to choose from.  Then you upload your images if they’re not already on the site, and select where you want them to go in the card template.  Next, you add captions to customize the card.  You may be able to include a return address on the envelopes shipped with the cards.  Be sure to review your card carefully before ordering.  The final step is to place your order by specifying the quantity (per-unit prices usually drop when ordering larger quantities), shipping address, and payment information.

Calendars: Photo calendars make great holiday gifts because they are personal, functional, and seasonal (the weeks before the start of the new year is typically when your loved ones will be looking for a calendar).  Every year I create a calendar with images that present the past year in review.  I send it to several family members and keep one for my own home and one for my office.  As with cards, calendars can be ordered from a wide variety of companies with differing levels of quality and cost, so shop around.

Creating a calendar is similar to making a card.  You choose a size and design, upload your images, and lay them out on the calendar template.  Some sites allow you to further customize your calendar by including special dates such as birthdays, anniversaries, and other events important to your family or friends.  The better companies let you include a photo to represent each special date during the year, and will save these dates for creating new calendars in future years.  The ordering process for calendars is similar to that for cards: review the calendar and then place the order.  Again, you may be able to find discount or coupon codes that will substantially lower your cost.

Keepsakes: These days, it seems that images can be reproduced on nearly any type of item you can imagine.  This variety translates into a high likelihood of finding something for everyone on your gift list.  I use SmugMug, the platform that powers my online professional photography business, for nearly all of the keepsakes I order as gifts, and my clients also have been happy with their purchases of these items.  There’s a wide array of keepsake items to choose from, each customized with your image(s), including coffee mugs, coasters, smartphone cases, playing cards, desk organizers, and stickers.

To make a keepsake, simply upload your photo(s) if they’re not already on the site, select the type of item you want to order, ensure the image is cropped and/or sized appropriately for the item, and go through the checkout procedure.

This holiday season, get creative.  Share your images on holiday cards, calendars, and a range of keepsakes.  It’s never been as easy or inexpensive to make these items as it is right now, so have fun and experiment.

What are your favorite ways to share you images during the holiday season?  Please add a comment with your ideas.

Want to read more posts about sharing your images?  Find them all here: Posts on Sharing.

Black-and-White to the Rescue [Encore Publication]: Converting a noisy or strangely colored image to monochrome can save the day

In a recent post (Post on Circus Automatic), I shared several practical tips for shooting fast-moving indoor performances, using a circus performance as an example.  While I was happy with many of my images from that evening’s shoot, I discussed how the single-colored LED lights now used at many indoor performances can impart an unnatural color cast to photos that can be hard to correct in post-processing.  In today’s post, I show how converting these images to black-and-white can overcome some of the limitations of shooting under these adverse lighting conditions, with the added bonus that the noise imparted to the images (from having to shoot at a very high ISO setting) can also be less noticeable in black-and-white conversions.

First, a little background explanation on why these LED lights are so troublesome for the photographer to work with.  When we refer to the resolution, or number of pixels, in our camera’s sensor, that number is actually the total count of three different kinds of pixels, each kind sensitive to only one of the three primary colors (red, blue, and green).  Without going into the nitty-gritty technical details, suffice it to say that in most camera sensors, about 50% of the pixels record only green data, about 25% only red data, and about 25% only blue data.  My camera (the Nikon D810) is said to have a resolution of 36.3 megapixels (MP), but if my subject is lit by a single-colored red LED, in reality only about 9 MP of resolution is recorded.  The other two color channels will essentially contain no data.  This is bad for several reasons, most notably because the image will be cast unnaturally toward the red color channel and because its effective resolution will be low.

There’s very little we can do in post-processing to recover from the loss of resolution during capture, but we can adjust the color temperature to try to correct a little bit of the strange color cast.  Converting the image to black-and-white, though, can restore the image to a more natural appearance by masking the color cast.  This can be aided by using Lightroom’s contrast and color control sliders to adjust the balance of the black-and-white version until it appears closest to a normal tone.

Consider the following two versions of the same shot.  The first version is in color, and even after adjusting the color temperature and contrast, there is still a distracting red color cast.  There is also some noise apparent in the image as a result of the high ISO setting required to freeze the acrobats’ motion.

The color version of this image appears unnatural even after adjusting color temperature, due to the lighting which consisted of a red-colored LED array.

Now, take a look at the black-and-white version of the same image.  Creating this version required careful attention to the balance of each color and contrast setting to make the final image.  The good news: the monochrome image appears much more natural to the eye than does the color version.  The skin tones seem less artificial, and the curtain in the background does not distract as much.  Furthermore, there is less noise apparent in the black-and-white version.
The same shot appears more natural and less noisy when converted to a black-and-white photo.  Buy this photo

This next shot appears much more acceptable in its color version.  During a live performance, the lighting often changes drastically from one moment to the next, and in this image the LED lights didn’t impart as harsh a red cast as in the previous image.  Furthermore, the aerialist was dressed entirely in red and was working with red ropes, so what red color cast was present does not appear as unnatural.

This image is highly effective when presented in full color.  Buy this photo

While I like this image for its dramatic power and strikingly vibrant red colors, let’s take a look at a black-and-white conversion for comparison.  The monochrome version lacks the visceral impact of the strident red color, but it benefits from a more natural tone, a quasi-documentary look and feel, and a nice clean black background.  In this case, the black-and-white conversion doesn’t so much rescue the image as change the kind of feeling it elicits.  I like both versions.
The black-and-white version is cleaner and evokes a very different set of emotions than does the color version.  Buy this photo

When you are forced to shoot under very difficult lighting conditions, try converting to black-and-white during post-processing.  It just might rescue some of your images and can evoke a very different feel in other images.

For a refresher on the black-and-white conversion process and when you may want to use it, read this post: Post on B&W Conversion.

During post-processing, have you been able to rescue or improve images shot under challenging lighting conditions?  Did you convert to black-and-white, or use different techniques?  Please share your experiences here.

Post-Processing without Post-Traumatic Stress [Encore Publication]: A pro’s case study on quick and simple workflow for large batches of images

As a working professional photographer, I wouldn’t trade my job for any other in the world.  I get to travel the world while capturing images of the diversity of cultures, landscapes, foods, events, and wildlife it has to offer.  And when I’m not traveling, I have the opportunity to document so many wonderful people and events in my own San Francisco Bay Area neighborhood.  Every job, not matter how wonderful, has its challenges.  In this digital age, we photographers are often faced with workflow challenges: how do we cull 10,000 images from a big shoot down to a manageable number, post-process the best ones so that they’ll look their best, and distribute them quickly to the client?  Today’s post offers one professional’s take on a quick and simple workflow that meets these challenges, delivering wonderful images to the client in a short period of time while (hopefully) preserving the sanity of the photographer.

I recently had the opportunity to capture two dress rehearsals and two performances of Dance Identity’s annual Spotlight production, showcasing 250 students and company dancers in 22 numbers.  I shot nearly 10,000 images, culled them down to about 700, post-processed, and delivered a gallery to the client, all within 24 hours of the final show.  Here’s how.

To illustrate the workflow, we’ll use as a case study the annual Spotlight production of local dance school and company Dance Identity.  To document their 250 dancers in 22 dance numbers, I shot both dress rehearsals and both performances, as well as capturing dancers backstage and during candid moments.  I captured some group shots of all the performers, instructors, and crew.  And to get the big picture, I even shot from the catwalks at the top of the theater down onto the stage.  In all, I shot nearly 10,000 images, which I culled to about 700 of the best photos, each of which required individual attention in post-processing.  I delivered a gallery with these top images to the client within 24 hours of the end of the final show.  Needless to say, without an efficient workflow this challenge would have been crushing.  Here’s how I did it.  The process I share here will be helpful for enthusiast photographers as well as pros.  It doesn’t matter whether you’re delivering your images to a paying client or to your friends and family.  When it’s crunch time and you have to turn around thousands of images from a shoot very quickly, this is a workflow that gets results.

Every image is different, but for large-scale shoots it is important to have a workflow that is streamlined so much of the processing can be done in an automated fashion.

Step 1: Culling Your Images

After each shoot, if there’s time before the next one starts, I review and begin to cull my images.  There are some advantages to culling on a bigger screen, but to save time during big events like Dance Identity’s Spotlight production, I cull right on my camera’s LCD screen.  Sure, some excellent images will be discarded using this approach, but with 10,000 images to get through quickly, it’s impractical to upload all of them to a PC and rank them all in a tool like Lightroom.  I zoom in on the images when required in order to get a closer look at focus, facial expressions, etc., and I use the camera’s histogram to check exposure.  I delete liberally as I go, keeping only the best images for a second review on the laptop.  In the case of the Dance Identity shoots, I culled in-camera from 10,000 down to about 1500 images.

With so many similar images to choose from, the culling process needs to be quick and dirty.  I do it using my camera’s LCD screen, transferring only the best images to the laptop for further culling and processing.

Step 2: Post-Processing

After culling down to a manageable number of images, but ensuring that the selected photos still represent all the dance numbers and all the performers, as well as a range of styles (group shots, motion shots, closeups, etc.), it’s time to post-process.  I use Lightroom nearly exclusively as the tool for this job when it’s a large-scale shoot.  Lightroom is optimized for the professional photographer’s workflow, and its presets, synchronization tools, and intuitive layout allow photographers to get the job done quickly and properly.

First, I import the selected images into Lightroom, using a preset to automatically adjust white balance, exposure, and noise reduction to the subject, in this case a fast-moving dance performance shot in an indoor theater.  For example, I use the import preset and/or synchronization capability in the Develop module to quickly apply noise reduction for all the shots made at high ISO settings (1600 and above).

Next, I turn off synchronization and go through each image individually in the Develop module, fine-tuning the settings for that specific image.  With many hundreds of images to fine-tune, I can only spend about thirty seconds on each one, so the workflow has to be very straightforward.  Typically I use the crop tool first, as this will be required for nearly every image.  I use the straightening tool within the crop toolset, selecting a line (such as a line on the stage or the bottom of the theater’s curtain) that I want to align with the top and bottom of the image.  Then I crop the image to highlight the subject in the most powerful way.  Sometimes I turn off the aspect ratio lock and set the image’s proportions manually, but most of the time I try to work with the aspect ratio as shot in the camera.  After straightening and cropping the image, I do some fine adjustments on the exposure and color settings, and then apply any needed effects such as post-crop vignetting or conversion to black-and-white.  Rarely, I may have to apply some selective adjustments such as brightening just one part of the image or removing a distracting background, but this slows down the workflow and should only be used when required.

Each image should be quickly straightened and cropped, then color and exposure settings (like the black point in the image above) can be applied to show the subject most effectively.  

Step 3: Delivering the Final Images

Once all the selected images have been processed, it’s time to deliver them to the client.  It can save time and simplify the workflow to use Lightroom’s Publish module to send your images directly to the platform you plan to use to deliver them.  My website is powered by SmugMug, which integrates well with Lightroom.  However, in the case of the Dance Identity shoots, I exported the top images to my PC’s hard drive, then uploaded the files from there to a new gallery on my website.  It’s your call as to which method you like to use.  In either case, once your final image files have been uploaded to your platform, it’s a good idea to apply security settings such as watermarking, right-click protection, and passwords to protect the images from misuse.  This is also the time to apply keywording so that you, your clients, and the public can find the images now and in the future.  Finally, communicate the availability of the final images, the access method, and the pricing to your client.

Delivering your images to a high quality platform quickly is a requirement to meet client needs in today’s world of fast-paced digital media.

So, there you have it: A quick but effective workflow to go from many thousands of raw images down to a few dozen or a few hundred beautifully processed photos, delivered to the client quickly and professionally.  And the best part is that you, the photographer, can retain at least some of your sanity in the process.  Of course, if you’re preparing fine art images for a major competition or exhibition, you’ll want to labor painstakingly over each one, hand-crafting every element of the image until you get it perfect.  But when you’ve got many, many raw images that need to be delivered promptly, this process is a workmanlike way to get the job done!

Take a bow!  You’ve married art with process engineering to deliver high-quality images to your client in a minimum amount of time.

Whether you’re a pro shooting for a paying client or an enthusiast shooting for family and friends, this basic workflow will get your images looking great and in the hands of those who want to see them in the shortest possible time.

What tips and tricks do your use when processing very large batches of images?  Please share your suggestions here!

Want to see more posts about image post-processing?  Find them all here: Posts about post-processing.

Beyond the Postcard Shot [Encore Publication]: Some sites are so iconic, you have to think differently to get a unique shot

Much of the joy of travel photography is seeking out and capturing images of little-known places and the ordinary daily lives of the people who live in them.  But when we’re traveling it is also inevitable that we’ll come face to face with the world’s most famous, overexposed, iconic sites.  You know, those places that are so often documented and discussed that we automatically associate them with the city or country where they are located.  London has Big Ben, Paris has the Eiffel Tower, San Francisco has the Golden Gate Bridge, Tibet has Potala Palace, India has the Taj Mahal, Cambodia has the Angkor Wat temple complex, and so on.  These sites have been photographed and shared so many millions of times that they are ingrained in our visual memories.  But there are ways we can approach and photograph the world’s iconic sites so as to avoid the “postcard shots” and create something different.  In today’s post, we’ll explore a few methods you can use to make less familiar images of the world’s most familiar locations.

Focus on part rather than the whole: Instead of capturing an iconic site such as London’s Big Ben with a normal or wide-angle lens to include the whole structure, try using a longer lens or getting up close to capture just a portion.

Big Ben is nearly always photographed from a distance using a normal or wide-angle lens to include the whole tower.  Here I used a medium telephoto lens looking up at the clock’s face to emphasize some of the detail on the facade.  Buy this photo

Embrace the crowds: Instead of working to remove the hordes of visitors from images of iconic locations, sometimes it is effective to embrace the crowds.  This can create a “nod and a wink”, self-referential photo that tells the viewer we all know this site is a tourist draw.  In this image of Stonehenge, I used a wide-angle lens to include not only the monoliths but also the long line of visitors who have come to see them.

Intentionally including the hordes of visitors in some of our images can give a different effect from the usual photos in which we attempt to remove the people.  Buy this photo

Try a different time of day: Many of the world’s most famous sites are associated with a specific time of day or lighting conditions.  The Golden Gate Bridge, for example, is often photographed at sunset or as the banks of fog roll over it.  Tibet’s Potala Palace is usually pictured by day.  So, for a different view of this lovely temple/palace complex, I visited it by night.  The resulting images offer a different mood from the postcard shots.

A different time of day can yield very different images from the usual ones.  Here, Potala Palace is captured by night, a seldom seen view that offers a very different mood than the postcard pictures.  Buy this photo

Incorporate unexpected visual elements: We associate certain visual themes with iconic locations, so surprise your viewers by including unexpected elements in your images.  I especially enjoy incorporating anachronistic visuals, such as a Buddhist monk speaking on a cell phone (though even that is becoming something of a cliche these days).  In this image of Delhi’s iconic Qutub Minar, I framed the shot first and then waited for the jetliner to enter the frame just behind the minaret.

Including non-contextual visual references in our shots of iconic sites can surprise the viewer.  This image of Delhi’s ancient Qutub Minar minaret incorporates a modern jet airplane for a mashup of old and new.  Buy this photo

Find a different vantage point: The Taj Mahal is a gloriously lovely building, but its true beauty is often overlooked by photographing it straight on from the iconic vantage point across the reflecting pool at the main entrance to the site.  Instead, try capturing the Taj from an unusual vantage point, such as the Moonlight Garden across the river from the back of the Taj.  The resulting image will surprise the viewer by offering a less-seen perspective and by framing the iconic site in an unusual context.

This image of the back side of India’s iconic Taj Mahal was made from the Moonlight Garden across the river.  Freed from the usual framing of the front of the Taj with its reflection in the pool, the viewer can truly appreciate the gracious beauty of the structure itself.  Buy this photo

Next time you visit one of the world’s most overexposed sites, try making some images using one of more of these new approaches to surprise the viewer with something different.  Avoid the cliches by emphasizing just certain portions of the site or by including crowds or non-contextual elements in your images.  Shoot from a different vantage point or at an unexpected time of day.  There’s really no need to add one more to the heap of millions of identical photos of these places, so go wild and try something unique!

How have you created unusual images of the world’s most iconic locations?  Please share your thoughts here!

Want to read more posts about what to shoot while traveling?  Find them all here: Posts on What to Shoot.

Planning a Shoot [Encore Publication]: A case study in planning and executing a photo shoot

Whether traveling or near home, some of our best photo opportunities occur spontaneously.  Serendipity is part of the fun of photography, but another big part of the photographer’s craft is to carefully plan and professionally execute a photo shoot.  Using a recent shoot in which I collaborated with professional dancer Molly as a case study, in this post I’ll cover the essential elements of planning and conducting a shoot.

Good planning is key to ensuring a fun, safe, and efficient shoot as well as obtaining the desired artistic outcome.  Buy this photo

Elements to Consider When Planning a Shoot:

  • What is the theme or mood?  The artistic concept will inform all the other elements of the shoot.  For the shoot with Molly, we decided on an edgy, urban theme.  Based on that choice, the decisions about location, timing, gear, technique, and post-processing all flowed consistently.

We chose a gritty, urban theme for this shoot, and all other decisions flowed from that choice.  Buy this photo

  • Where is the location?  Often one of the most challenging aspects of planning a shoot is scouting for a suitable location.  The location, of course, should support the theme of the shoot.  It also needs to be accessible, safe (for this shoot, we rejected shooting on or near railroad tracks for safety reasons), and suitable for making the type of images desired.  There are also legal considerations, as in most cases permission is required to shoot on private property and even some public spaces require permission for commercial uses.  Molly and I eventually decided on using the old barracks at the decommissioned Presidio of San Francisco and the adjacent Crissy Field recreation area.  This space was accessible, relatively safe, provided a gritty and urban mood, and afforded sufficient working room for both dancer and photographer.
  • When should the shoot be scheduled?  Obviously, the date and time scheduled need to work for all parties involved.  These parties include not only the model(s) and photographer, but also other client(s) and often an assistant.  Equally important is ensuring the timing supports your artistic choices.  The season of the year and the time of day should offer the best chances of obtaining the lighting you desire.  The scheduled time should also work as well as possible with respect to other considerations such as opening hours of the chosen space, traffic and volume of other people in the location, and even tides, snowfall amounts, or other environmental factors.  Molly and I chose to shoot in the “golden hour” just before sunset on a Sunday to ensure good lighting and access to the location.
  • What gear and techniques should be used?  After choosing the theme and the supporting logistical elements, it’s time to select the techniques desired to capture the images and the gear required to execute.  Elements to consider include lighting (I prefer to work with available light and reflectors/diffusers whenever possible, but sometimes speedlights or portable studio lights are required), lenses (it’s often best to bring a range of lenses for different perspectives), props, and accessories (will you need to stabilize with a tripod, or perhaps you’ll require neutral density filters to obtain the shutter speed and/or aperture you want?).  In the shoot with Molly, I used the camera handheld at mostly fast shutter speeds and low camera angles with fast prime lenses to get that edgy look.

To capture the fast motion of the dancing and to support the urban theme, I worked handheld with fast prime lenses and low camera angles.  Buy this photo

  • How should the images be post-processed?  Again, the overall artistic concept should inform decisions about post-processing.  For this shoot, I aimed for a high-contrast, slightly grainy look and also converted several of the images to black-and-white.
  • How will the images be distributed and used?  All parties should agree before the shoot on how the images will be shared and/or sold.  To protect both model and photographer, it’s a good idea to sign a model release.  For more information on model releases, see this post: Post on Model Releases.

With attention to planning and execution, a photo shoot will be more enjoyable and productive and the artistic results will be better.  Buy this photo

Do you have tips and tricks you use when preparing for your shoots?  Please share your thoughts here.

Want to read more posts about planning your photography?  Find them all here: Posts on Planning.

Focus on Dia de los Muertos [Encore Publication]: When a local festival takes you around the world

Sometimes you can attend a local event and feel as though you’re transported to a far-off part of the world, or even feel like you’re traveling across a wide cultural tableau of a whole region.  That’s how I felt while shooting the recent Dia de los Muertas (Day of the Dead) celebrations in downtown San Jose.  Although I had traveled only half an hour from my house, this festival celebrating life and honoring departed relatives took me on a cultural and historic journey across all of Latin America and beyond.  In today’s post I will present a simple photo essay featuring some of my favorite images from this festival.
An Aztec dancer helps convene the day’s celebrations.  Buy this photo

The Aztec fire dance’s origins date back to pre-Columbian times.  Buy this photo

This shrine, erected on the back of a pickup truck, is dedicated to the memory of the owner’s deceased father and brother.  Buy this photo

The “elegant skull” face painting is an element of Day of the Dead celebrations in several Latin American countries.  Buy this photo

These lovely ladies awoke at 5 AM to paint their own faces and those of their family members.  Buy this photo

More wonderful face art.  Buy this photo

I love the cultural juxtaposition of Hello Kitty with Day of the Dead.  Buy this photo

Although this portrait of a couple also worked well in color, I love the dramatic impact it makes when converted to a high-contrast black-and-white image.  Buy this photo

Elegant and beautiful!  Buy this photo

I hope you’ve enjoyed this brief compilation of images from this recent festival and that it inspires you to seek out Day of the Dead celebrations near your own home.

What are some of your favorite cultural traditions?  Have you captured these traditions using your camera?  Please share your experiences in the comments box.

Want to see other posts about what to shoot while traveling and near home?  Find them all here: http://www.to-travel-hopefully.com/category/travel/shoot/