Architecture in Ireland and Scotland [Encore Publication]: From Neolithic to today, Ireland has remarkable buildings; here’s how to capture them

During our recent travels in Dublin, hiking across southwestern Ireland, and visiting Edinburgh, we encountered fascinating architecture at every turn.  From ruined farmhouses to stately manor houses, and from Neolithic-era “beehive huts” made of stone to modern fishing shacks, there is a wealth of diversity in the buildings in this region.  Here I present some images of the architecture we saw during our rambles, along with a few words about each.

Dublin’s Trinity College is one of the oldest universities in the world.  Famous as the home of the ancient Book of Kells, the college also boasts the Long Room, quite possibly the grandest study hall in the world.  This image was made with a wide-angle lens using only available light.  I used a relatively high ISO setting so that I could choose a small aperture for greater depth-of-field while still using a fast enough shutter speed to handhold the camera.  Buy this photo

Another perspective on the Long Room, this image captures only the upper gallery, emphasizing the repeating patterns of the ladders, arches, and shelves.  During post-processing I decided to render the photo in black-and-white to bring out the texture and pattern.  Buy this photo

An architectural photo doesn’t have to isolate the building from its surroundings.  I combined a shot of Dublin’s famous Olympia Theatre with a street scene by framing the theater and waiting for an interesting cast of characters to walk by.  Buy this photo

Dublin Castle was built during the Anglo-Norman period and has witnessed nearly the entire history of the city.  It is an austere but not particularly pretty building.  To capture this image I shot with a wide-angle lens and a polarizing filter to bring out the texture of the stonework and to attempt to enhance a rather undramatic grey sky.  Buy this photo

The interior of Dublin Castle is prettier than its exterior.  This shot was handheld, as tripods are not allowed inside.  I used a fast normal lens, but even with a high ISO setting the light was sufficiently low that I had to use a large aperture, resulting in a shallow depth-of-field.  Although the foreground objects are not in sharp focus, I think this scene works rather well to capture a sense of the place.  Buy this photo

In the remote and beautiful Gougane Barra Forest Park lie the ruins of a Sixth Century abbey founded by St. Finbarr.  To make this image, I shot from inside one of the cells where the monks lived, looking outward toward the ruins of the abbey walls and altar.  From this perspective the viewer gets a sense of what it would have been like to live a mostly solitary and austere life here many centuries ago.  Buy this photo

On the same tiny island where the ruined abbey is located on Gougane Barra, there is a more modern but quite lovely church.  We spent some time getting to know the American bride and groom who were celebrating their wedding here, and I shot them in front of the little chapel looking across the lake from the mainland.  Including people in the context of the building makes architectural photography more relatable and compelling.  Buy this photo

Hiking along the remote Sheep’s Head Way, we came across this old farmhouse.  I framed the image with an extreme wide-angle lens to lend it an interesting perspective, and I used a circular polarizing filter to saturate the colors of the building and to enhance the sky and lawn.  Buy this photo

The stately Bantry House lies at the end of the Sheep’s Head Way and has been owned by the same family since 1750.  This photo was made from the top of the hundred steps leading through the gardens and up a hill behind the house.  It’s a lovely vantage point from which to photograph the mansion, its gardens, and the gorgeous harbor and mountains in the background.  A polarizing filter was used to add drama to the sky and to saturate the colors of the water and gardens.  Buy this photo

This old farmhouse is now an interpretive center and shop open to the public to give a sense of what rural Irish life was like a century ago.  The front of the house is especially charming when framed to include the rustic surroundings.  Buy this photo

We started our walk in Killarney National Park at the lovely Derrycunnihy Church.  I framed this scene from a low angle looking slightly upward at the church and using a wide-angle lens.  The perspective gives a sense of the stark isolation of the church in this very remote wilderness setting.  As always when shooting upward with a wide-angle lens, one must take care not to distort the lines of the image too severely.  Buy this photo

Along the Gap of Dunloe we hiked past this bucolic scene around a ruined farmhouse.  I framed the image to include the horse carts and the rutted pathway.  Buy this photo

The Wild Atlantic Way showcases some of the most scenic views in all of Ireland as it winds through rolling hills toward the remote Blasket Islands.  Along the way the observant hiker will see dozens of strangely shaped stone enclosures called beehive huts, some of which date back to the Neolithic Period.  This image was shot with a telephoto lens to highlight the beehive huts and to compress the distance between the huts and the Blasket Islands dotting the coast of the Atlantic Ocean.  Buy this photo

The quaint seaside village of Dingle is chock full of charming stone houses with brightly painted doors and windows.  Because it was pouring rain all day and I was recovering from an illness, I brought only my phone’s camera.  Even so, I was able to make some nice images of the houses by using the Manual app to take control of the phone’s camera.  Buy this photo

Edinburgh, Scotland has a tremendous variety of architecture, which could be the subject of a separate post.  For today, I’ll close with this image of the ruins of the ancient abbey at Holyroodhouse at the end of the Royal Mile.  I shot with a wide-angle lens using a small aperture to maximize the depth-of-field and taking care to keep the horizon level so as not to distort the lines of the archways any more than necessary.  Buy this photo

For a refresher on architecture photography, check out this post: Post on Architecture Photography.

What are your favorite destinations for architecture?  Please share your thoughts in the comment box.

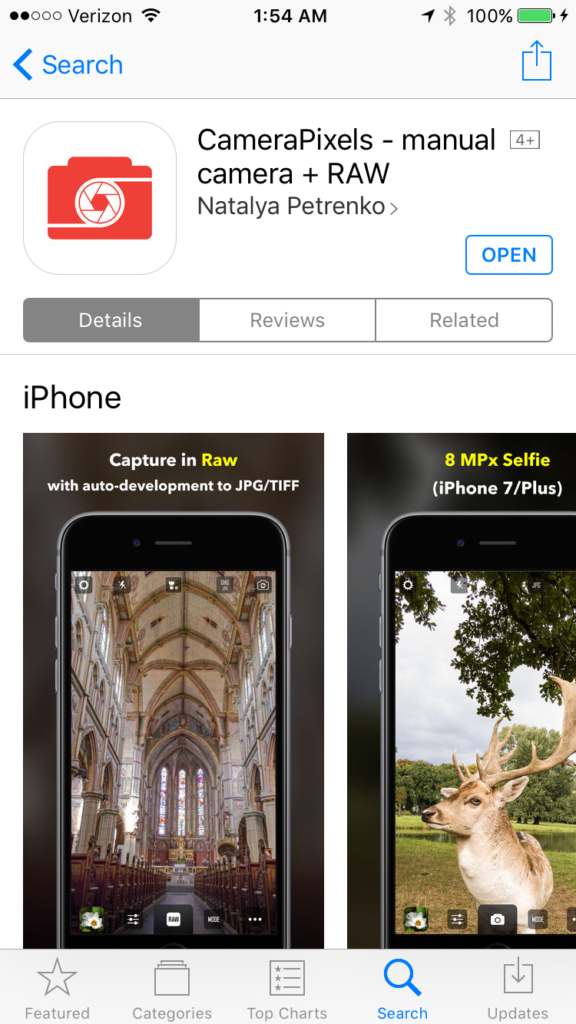
Camera Pixels App (Updated Review): Significant improvements in the new version make this a best-in-class app

I’ve posted repeatedly about the importance of understanding how to take manual control of your camera in order to make images that are properly exposed and focused.  Whether you are using a professional DSLR, an advanced full-frame mirrorless ILC, a compact point-and-shoot, or the camera built into your smart phone, there is no way you will get consistently acceptable results if you leave the camera’s settings to its auto mode.  See this post for an overview: Post on Beyond the Auto Mode.

About three months ago, I posted a review of an early version of an iPhone app called “Camera Pixels”.  In that review, I found the app to be a very promising concept due to its advanced DSLR-like features and intuitive controls, but I couldn’t fully endorse it in the earlier version because I found several bugs and interface quirks.  You can read that earlier review here: Previous review of early version of Camera Pixels app.  Since that review was published, I have had several discussions with the Camera Pixels support team to detail my concerns about the various issues I found.

For the past two days I have been testing a new version of the Camera Pixels app, and I can now recommend it wholeheartedly.  The new release preserves the advanced features and (relatively) simple interface of the earlier version, but it has addressed all of the significant issues I outlined in my review of the previous release.  Specifically:

  • the image flicker in the “viewfinder” area of the screen has been eliminated,
  • the bracketing of exposures now retains the proper requested spacing (unless at a physical limit of a setting),
  • there is a new “Pro View” mode that keeps the manual settings toolbar always on the screen so any manual overrides are immediately apparent, and
  • the controls to separate the exposure point from the focus point are now more intuitive.

Like the “Manual” camera app that I’ve been using for years and the “ProCam 4” app that has been my go-to camera control app for the past several months, the new “Camera Pixels” app allows the manual selection of ISO, shutter speed, exposure compensation, and focus distance (note that the iPhone camera’s lens has a fixed aperture, so F-stop cannot be manually set).  Also like the Manual app and the ProCam 4 app, Camera Pixels allows images to be captured using RAW mode, which has a great many advantages over capture in JPEG format (see this post for more information: Post on RAW Capture).  And all three of these camera apps display a histogram to assist in setting exposure properly.  

In addition, both Camera Pixels and ProCam 4 (but not Manual) offer some very useful advanced camera control capabilities, including the following:

  • Shutter Priority: You can choose an exposure mode in which you select the shutter speed first and the app will set the appropriate ISO.
  • Exposure Bracketing: You can shoot a series of four shots at different exposures to increase the likelihood that one of them will be at the best exposure for the lighting conditions.  The series of shots can also be combined using HDR tools found in Lightroom, Photoshop, and other editing software into a single image with a higher range of tones from very dark to very bright.
  • White Balance: You can adjust white balance in the app, which is often preferable to having to adjust it in your RAW files during post-processing.
  • Virtual Horizon: The display can show you when the horizon is level.
  • Slow Shutter Options: You can select long fixed shutter speeds as well as bulb mode to keep the shutter open for as long as you’d like.
  • RAW+JPEG: You can choose to store the image in both RAW and JPEG formats.

With all this incremental functionality, your little phone’s camera begins to behave a lot like a more advanced standalone camera.  While the iPhone’s camera, with its small sensor and its tiny fixed-aperture non-interchangeable lens, still cannot compare to a professional or enthusiast DSLR or ILC camera, the results using an advanced manual camera control app such as Camera Pixels or ProCam 4 are vastly improved compared to using the phone’s native camera app.  At iTunes App Store pricing of $2.99 for Camera Pixels or $4.99 (temporarily reduced to $1.99) for ProCam 4, either of these apps is a great buy and a serious enhancement to the iPhone’s built-in camera.

There are some significant differences between Camera Pixels and ProCam 4.  ProCam 4 offers advanced image editing capabilities, while Camera Pixels does not.  However, Camera Pixels offers more flexible exposure bracketing options, the ability to separate exposure point from focus point, a better histogram, and more advanced RAW and video shooting options.  And a significant advantage of the new Camera Pixels app over ProCam 4 is its simple and intuitive user interface for setting and resetting the manual camera control features such as exposure compensation, shutter priority, and ISO priority.  In fact, the Camera Pixels app comes the closest I’ve ever found to the user interface of an advanced DSLR or mirrorless camera.

One note to enhance the usability of the Camera Pixels app: As far as I can tell, there is no built-in help content in the app itself, but there is a very useful online user guide available from the app’s developers.  You can find the user guide here: Camera Pixels app user guide.

In summary, the new Camera Pixels app is a great concept that comes closest of any camera control app I’ve found to the look-and-feel of an advanced standalone camera.  With the greatly improved new release, Camera Pixels has become the best option I’ve found for iPhone users wishing to control the phone’s built-in camera like an advanced DSLR or mirrorless standalone camera.  I now fully recommend this app, and I plan to use it as my first choice for advanced control of my iPhone’s camera.

Here’s the link to the Camera Pixels app on the Apple App Store: Camera Pixels app.

What app do you use to control your phone’s camera?  What do you like and dislike about it?  Please share your thoughts here.

Want to read more posts about photography gear?  Find them all here: Posts on Gear.


Focus on SF Pride Parade and Festival [Encore Publication]: Some images of this year’s San Francisco LGBTQ pride events

It’s no surprise that San Francisco hosts one of the world’s oldest and largest LGBTQ Pride events in the world.  Each year, the parade and festival grow bigger and better attended.  SF Pride is one of my favorite annual events in my home region, the SF Bay Area, and while I find it gratifying to see the mainstream acceptance of this event, it’s also a bit disconcerting to see this once edgy and over-the-top celebration partly subsumed into a blander, more corporate culture.  In today’s post, I share some of my favorite images from this year’s Pride Parade and Festival.  The goal is to showcase the incredible diversity of the participants and observers at this grand celebration, along with a few words about how the images were made.


The theme of this year’s parade is Resist.  It’s a worthy goal given that gains celebrated over the last 50+ years are being systematically and broadly undone by all branches of the US federal government.  In this image, I wanted to capture an establishing shot of the large parade contingent without losing the personal element, so I used a medium lens and composed to include the first few rows of marchers.  Buy this photo

To personalize the message of activism, I focused on an individual marcher.  I used a fast portrait lens set to a wide aperture to defocus the background, and I included the bright pride flag carried over the subject’s head.  Buy this photo

Another individual portrait, this image sets off the subject from the background through use of tight composition and shallow depth-of-field.  Buy this photo

I captured the joy of the young “marcher” by getting in close and shooting at a very wide aperture, so only the young girl’s face is in sharp focus while all other foreground and background elements are soft.  Buy this photo

A touch of post-crop vignetting applied in Lightroom during post-processing helps emphasize the sheer exuberance in this image.  Buy this photo

At a huge event such as SF Pride, with more than half a million participants and spectators, it’s important to capture some intimate images in order to emphasize the impact on individual people’s lives.  Here I’ve used an 85mm portrait lens to share a private moment during a big public event.  Buy this photo

Another intimate couple’s portrait, this image is awash in the colors of the pride flag and the marchers’ clothing.  Careful attention to composition and selective focus help bring out the private moment within the context of the larger contingent.  Buy this photo

I’m not usually a big fan of selective colorizing, but sometimes its use is appropriate.  When I pre-visualized this image of a parade spectator dressed in white, I imagined the entire scene in black-and-white except for the vivid rainbow colors of the pride symbol.  It’s an easy effect to achieve during post-processing in Lightroom.  Simply select the part of the image you want to remain in color using the Radial Filter tool, and then remove the color from everywhere else in the image by bringing the Saturation slider down to zero.  Buy this photo

To convey the grand scale of the event, I shot from a low angle and composed to include several rows of festival participants with San Francisco’s City Hall in the background.  Buy this photo

What are some of your favorite celebrations, and how do you capture their diversity in your images?  Please share your thoughts here.

Want to read more posts about what to shoot while traveling or close to home?  Find them all here: Posts on What to Shoot.

Prime Time [Encore Publication]: Why a prime lens is often better than a zoom

Most photographers make most of their images using a zoom lens.  Aside from smartphone cameras, which typically feature a fixed focal-length lens, nearly every camera today comes with a zoom lens attached.  Most point-and-shoot and compact cameras do not have interchangeable lenses, so the zoom lens that comes with the camera is the only choice, while most mirrorless and DSLR cameras have interchangeable lenses.  That means these more advanced cameras offer the choice of using a broad range of different lenses, including both zoom and prime (fixed focal-length) lenses.  While many photographers own one or several prime lenses, from my observation the vast majority shoot nearly all of their images using one of their zoom lenses instead.  In today’s post, I make the case for using prime lenses in many, or even most, shooting situations.

This portrait of a Delhi girl outside India’s largest mosque is lovely and effective, but because I didn’t have time to change lenses and was forced to use my slower walkaround zoom lens, the depth-of-field is quite deep, making for a somewhat distracting background.  Buy this photo

Zoom lenses have one clear advantage over prime lenses: they offer a range of focal lengths, which helps the photographer compose the image without having to walk closer to or farther away from the subject.  But even here I would argue that in most cases it aids creativity to “zoom with the feet,” or walk around to compose the best shot.  Even when this isn’t possible, a high-resolution digital image can easily be cropped in post-processing to achieve the composition the photographer had in mind.

But prime lenses have many advantages over zoom lenses.  First, they are nearly always sharper and generally higher quality than zooms, because they don’t require extra internal glass elements to enable the zooming.  While zoom lenses have improved in optical quality over recent years, it remains the case that prime lenses offer a quality advantage.  Second, prime lenses are typically smaller and lighter than zooms.  This is a blessing especially to travel photographers.  Third, primes are less expensive than zooms of similar optical and build quality.  That means you can buy two or three different prime lenses for the price of one zoom lens covering a similar range of focal lengths.  And fourth, primes are usually faster (i.e., offer a wider maximum aperture size) than zooms.  This last point is a big advantage for many types of shooting, because a wide aperture (small F-number) lets in more light, allowing use of faster shutter speeds and lower ISO settings in low-light conditions.  This is a real boon for nighttime and astro-photography.  A wide aperture also results in shallow depth-of-field, which emphasizes the main subject by softening the focus of the background.  The best lenses offer a pleasing “bokeh”, or pleasant blurring of the out-of-focus elements of the image.  This effect makes for extremely effective portraits as well as wildlife images, but is also useful for other types of photography.


This portrait, made with my current favorite lens, an 85mm f/1.8 portrait lens, offers very sharp focus on the subject’s face and pleasing bokeh, or soft blurring of the out-of-focus background.  It would not have been possible to make this portrait using a zoom lens because the maximum aperture would be too small to achieve the soft background effect.  Buy this photo

I shoot a lot of performing arts events (dance, music, theater), which typically take place indoors where the light is very dim and frequently feature fast-moving action requiring a fast shutter speed.  Using a prime lens allows me to shoot at an action-freezing shutter speed without having to use extremely high ISO settings that introduce noise into the images.  And again, the pleasantly blurred backgrounds help set off the very sharp main subject for a striking overall effect.

I captured this image of a samba dancer at a dress rehearsal under very low-light conditions.  Using my 85mm f/1.8 prime portrait lens, I was able to freeze the motion using a fast shutter speed, keep the ISO at a reasonable level to avoid noise, and render a nice soft background.  Buy this photo

I would estimate that most enthusiast and professional photographers shoot about 80% of their images using zoom lenses.  My own usage pattern is the opposite, that is, I shoot about 80% of my images using prime lenses.  For some purposes, a zoom lens is still required, but it’s surprising how often we can achieve better results using a prime.  Prime lenses are smaller, lighter, less expensive, higher quality, and faster than zoom lenses.  I encourage you to dig out your prime lenses if you have a few, or borrow, rent, or buy one or two (remember, they are much less expensive than comparable zoom lenses) and try shooting with them exclusively, or at least much of the time, for a week or two.  Compare your images made with the primes vs. the ones made with zooms and come to your own conclusions.  If you’re like me, you’ll find that a prime lens is the right tool for most photographic jobs.

Here are my three favorite prime lenses, a “normal” lens, a medium telephoto or “portrait” lens, and a wide-angle lens:

If you pack only one prime lens, it most likely will be a “normal” lens, that is one with a focal length of about 50mm for a full-frame camera or about 35mm for a crop-sensor camera.  I carry the Nikon 50mm f/1.4G lens.  This is the one I use in very low-light situations or to get a really shallow depth-of-field.

I think my current favorite lens of all (including primes and zooms) is my Nikon 85mm f/1.8G lens.  This is a classic portrait lens and provides a flattering perspective and great image quality when your subject is a human being.  I use it for nearly all of my portrait work these days.  But this lens also shines for nature and action photography where you don’t need a really long focal length.  It renders really lovely “bokeh”, or the soft quality of the out-of-focus parts of the image.

A wide-angle prime lens can be useful for landscapes, architecture and interiors, and astro-photography, among other purposes.  I like the Nikon 24mm f/1.8.

What are your preferences regarding use of prime vs. zoom lenses, and why?  Please share your experiences in the comments box.

Want to read other posts about gear?  Find them all here: Posts on Gear.


Focus on Balaknama [Encore Publication]: Making portraits that go beyond documentation to help Delhi’s street kids

During a recent trip through the north of India, I had the opportunity to meet with the advisors and some of the young staff at the Balaknama Newspaper, a project to empower the street kids of New Delhi.  I’ve long been interested in the plight of the street kids who live in Delhi’s sprawling slums and have historically been terribly mistreated at the hands of exploitative child labor bosses, a corrupt police force, and often their own abusive families, so this visit was important to me personally.  In this post I share some of the images I made of the kids who risk their own safety to expose the abuses against the young people in their community, and I also discuss how to go beyond the purely documentary function of portrait photography to give your portraits more power.

The images I share here are published with permission from Balaknama’s editor and the NGO who supports the project.  However, I will not share the location of the offices nor the real names of the kids who work there, in order to protect their identities.

The power of a portrait to advocate for social change depends primarily on its ability to go beyond simple documentation and to reveal the personality, background, and/or motivation of the subject.  For this shoot, I wanted to convey the passion and bravery of the young reporters.  I shot with available light only (no flash) in order to capture the intimate and urgent mood of the work the kids are doing.  I used several lenses for different perspectives, but most of the images were made using a fast prime portrait lens.  My shooting perspective was from a low angle so as not to give the appearance of looking down on the subjects.  People appear more empowered when the camera observes them from the perspective of their peers–it should appear as though the viewer is a part of the conversation.

This 17-year-old reporter is also the primary organizer of more than 10,000 of Delhi’s street kids.  I wanted to capture her intensity and focus in this portrait, so I got in close with a medium-length portrait lens and shot from the perspective of a participant in the conversation.  A wide aperture (low F-stop number) is helpful to isolate the subject from the background.  Buy this photo

The “decisive moment.”  I shot several frames of this young reporter as he described the horrific abuses of his peers in the slums of New Delhi, in order to maximize the chances of capturing just the right instant.  I love this image, which to me appears to emulate the drama and body language of Francisco Goya’s famous painting, “The Executions of the Third of May, 1808”.

This powerful portrait has a painterly feel and freezes the tension and drama of the harrowing stories retold by the young reporter.  Buy this photo

The interaction between the students at the newspaper is an important theme.  Here I worked to capture the girls’ engagement with each other and with the overall discussion.  Buy this photo

Language barriers are less important than many photographers believe them to be.  A simple “thumbs-up” gesture evoked a playful response from these young Balaknama staffers, providing a light moment during the intensity of our conversation.  Buy this photo

As I’ve often written in To Travel Hopefully, it’s important to remember to include your own group in some of your images.  While I most likely won’t publish this image in my stories about Balaknama, I am happy to have this documentation of my fellow travelers as we interacted with the students and staff at the newspaper.

For large group shots in tight spaces, use a wide-angle lens.  This was shot with a Nikon 16-35mm f/4 lens at its widest setting, giving the viewer a sense of the setting as well as the people there.  Buy this photo

I wanted to capture a final portrait of the two primary student organizers as we left the newspaper’s offices, so I asked them to pose together during our walk through the neighborhood.  This gives a sense of the environment in which they live and work.  I got in close using a wide aperture to soften the background, but I also chose a background that would inform the viewer about the kids’ environment.  Buy this photo

Do you have techniques for making powerful portraits that go beyond pure documentation to advocate for the people and causes in the images?  Please share your thoughts here!

Want to read more posts about what and how to shoot while traveling?  Find them all here: Posts on What to Shoot.

Focus on Tahiti Dance Fete [Encore Publication]: A case study in shooting under challenging circumstances

The travel photographer must be prepared to shoot under challenging circumstances, because often we have little control over the conditions in the field.  We may plan our travel years in advance to observe and photograph a total solar eclipse, only to wake up on the morning of the eclipse to find the sky is totally overcast.  Or we could make arrangements months ahead to be at a major cultural festival, but learn upon arrival that the area we’re shooting from is hundreds of yards from the action.  These things happen, but the professional photographer still needs to get her shot.  So, what can be done to persevere and increase our odds of getting usable images under adversity?  The answer, of course, depends on the specific circumstances of each shoot, but there are some general tips I can offer.  Today’s post presents a case study based on my recent shoot of the solo dance competition at the Tahiti Fete in San Jose, California.

The dancers made lovely subjects, but the shooting conditions were very challenging.  Read on to learn how to make the best of a difficult situation.  Buy this photo

Upon arrival at the dance competition, I realized immediately that this shoot would be challenging.  It was held in a cramped hotel convention room with a makeshift stage, rows of folding chairs for spectators, insufficient lighting of poor color quality, and a bank of judges blocking most of the view of the stage.  To make matters worse, the room was packed with people, many of whom stood up to cheer on their friends, and the only available seats were near the far end of the room.  An extra challenge was thrown into the mix by the cluttered and unattractive background behind the performers on the stage.

Cluttered backgrounds are a significant obstacle, but good images can still be made in these situations.  Buy this photo

What can be done to mitigate against a cluttered background?  I shot plenty of images of each dancer to increase the likelihood that I could eliminate some of the more distracting background elements while still capturing the excitement, grace, and colors of the dancing.  This image was the best I could capture of this particular dancer, so I committed to it in post-processing.  I cropped the image to avoid the most distracting elements, adjusted the exposure curves, contrast, and sharpness of the background to de-emphasize it, and applied some post-crop vignetting to ensure the dancer would be highlighted.

When using a very high ISO, some noise will result.  This doesn’t have to be a disadvantage.  Buy this photo

The lighting was very dim at this venue.  Because I was shooting from far away, I needed to use a long telephoto lens, which limited me to a small aperture and no possibility of using flash.  Nonetheless, a fast shutter speed was required in order to freeze the fast action of the Polynesian dancing.  This combination (low lighting, small aperture, and fast shutter speed) leaves no option other than a very high ISO setting.  I shot the above image at ISO 6400.  Even with an excellent professional camera sensor, such a high ISO will generate some noise in the image.  Noise can often be reduced to acceptable levels during post-processing.  But for this particular image, I was aiming for a soft, painterly feel.  The visual effect of high contrast, soft colors, and a bit of visual noise here gives the feel of an impressionistic rendering.  For this expressive Tahitian subject, I was very happy to have a Gauguin-esque style shine through in the final image.

 Cut out elements that don’t work.  Buy this photo

To make the above image, I cropped out distracting portions such as the judges’ heads in the foreground and an ugly door and wall in the background.  The resulting aspect ratio is non-standard, but works well for this image.  I desaturated the background and used post-crop vignetting to focus attention on the dancer.


Black-and-white renderings can be more forgiving when color quality is low.  Buy this photo

This image portrays a lovely subject but the lighting was especially poor.  Realizing I couldn’t do much to mitigate the strange color cast resulting from the artificial lights, I converted the image to monochrome, boosted the contrast, and adjusted the color channel mix to render a pleasing and elegant final image.  Check out this post to learn how black-and-white conversion can be used to save the day when color temperatures or image noise are problems: Post on B&W conversion to save strangely colored images.

Bringing it all together: This image works nicely in spite of all the challenges present at the shoot, including foreground obstacles, dim and low quality lighting, a far-away vantage point, and a cluttered background.  Buy this photo

In spite of multiple significant technical issues, I was able to make some striking images of the lovely dancers at this Tahitian festival.  Hopefully, the tips presented here will help when you next are faced with a challenging shoot.  The most important thing is to keep shooting as best you can while in the field.  There are multiple methods you can use in post-processing to mitigate against the shooting challenges and end up with images you will be proud of.

What techniques do you use when faced with difficult shooting conditions?  Please share your thoughts here.

Want to read more posts about photographic techniques?  Find them all here: Posts on Techniques.

Join Me on a Photography Tour of India: Capture unique images of cultural celebrations, wild tigers, glorious monuments, and people from all walks of life

Dear Readers,

From Jan. 24 through Feb. 8, 2018, join our small group of photography enthusiasts and experience India with all your senses. India is a dream destination for travel photographers: a vivid tapestry of colors, cultures, and chaos. We’ve planned this unique itinerary to provide ample opportunities to capture unforgettable images that you won’t find in travel brochures and on postcards. Included are visits to two of the most colorful and exciting of India’s exotic annual cultural celebrations, the Republic Day Parade and the Desert Festival (similar to the Pushkar Camel Festival but with far fewer tourists and photographers). We also search for wildlife in a national park hosting among the world’s highest density of wild tigers, visit India’s iconic forts and monuments, and seek authentic interactions with a diverse range of local people.

Our extraordinary photographic journey will take us through Delhi’s colorful bazaars and to its annual Republic Day Parade, to the incomparable Taj Mahal in Agra, on to the annual Desert Festival with its rich tableau of dancing and cultural activities, and then on safari to seek the royal Bengal tigers of Bandhavgarh National Park, among other memorable destinations. Throughout this journey, we will be interacting with fascinating local people from all walks of life, whom we will get the opportunity to meet and to photograph.

Award-winning professional travel photographer Kyle Adler will be shooting alongside tour participants and will provide personalized in-the-field instruction. During our optional informal workshops, we’ll review our recent images, plan our shot list for upcoming locations, and cover techniques to make the best images possible. Topics will be tailored to the group’s interests and may cover any aspects of travel photography from shot planning to capture technique, and on to post-processing and image sharing. Unlike most photography tours, we will place a special emphasis on learning to use the camera as a bridge to enhanced understanding of the land and people we visit. Photographers of any level will see their images improve, and non-photographer friends and family are also most welcome to join this tour. You can make memorable images using whatever camera gear you wish to bring; it is not necessary to invest in specialized gear.

See the detailed itinerary, hotel list, pricing, and other information here: KYLE ADLER- COLORS OF INDIA PHOTOGRAPHY TOUR

Please let me know if you have questions or are interested in learning more about the trip. Mary and I hope that you can join us for this rare opportunity to experience the people, cultures, landscapes, and wildlife of India on a one-of-a-kind adventure tailored to photographers like you!


Celebration Time, Come On [Encore Publication]: How to shoot festivals, street fairs, and other celebrations

As a professional travel photographer, I have to be prepared at any given time to shoot in nearly every genre of photography.  Landscapes, urban scenes, street photography, night and astrophotography, sports, wildlife, and portraiture are all stock-in-trade, and I love them all!  But when I’m asked what my favorite photographic genre is, I reply that I love portraying living culture the most of all.  Making images of people celebrating their culture, especially when those images convey a sense of place, is my top objective when I shoot, whether I’m halfway around the world or near home.

Culture can be expressed in small everyday elements of dress, gesture, and environment.  But celebrations such as festivals, street fairs, religious observances, arts, and sports show us culture writ large.  It is these outpourings of color, sounds, motion, and ritual that show us how people are different and yet similar all around the world.  And of all the celebrations I shoot regularly, my favorite of all is the annual Carnaval San Francisco.  So in today’s post, we’ll explore how to shoot striking images of cultural celebrations, using Carnaval SF as an example.

This year’s Carnaval was held this past Sunday.  But I was privileged to be “embedded” with several of the comparsas, or Carnaval groups, during the months leading up to the big parade day.  This allowed me the opportunity to get to know the leaders and dancers in these groups, making very special images of the preparations for Carnaval.  While I won’t be including any of those behind-the-scenes images in today’s post, the images of the parade day itself did benefit from my having had the chance to get to know the members of these groups over the months leading up to the day.  We’ll include some discussion of this observation in the post.

I’d like to start with an observation on gear.  I see a lot of fellow photographers shooting at events like Carnaval with way too much gear.  When I say too much gear, I mean more gear than is good for them or for the participants and observers of the festival.  Several photographers had two or three DSLR bodies mounted with enormous zoom lenses and attached to large strobes with huge diffusers.  Some used monopods and a few even tried to set up tripods for this rapidly moving and crowded event.  I brought a single DSLR with two light and fast prime lenses (a 50mm “normal” lens, and an 85mm portrait lens).  That’s it.  I never mounted a zoom lens during the whole day of shooting and I never used any artificial light.  And of course I went handheld the whole day; there’s really no safe or practical way to use a tripod at a crowded and mobile event.  All 2500 images I made that day used just that compact kit, and I’m very happy with the results.

It’s a good idea to arrive well before the scheduled start time.  Often, the best images of the day will be the ones you make during the preparations rather than during the event itself.  For this image of a leader of the Viva la Diva group, who I knew well from working with them over the last few months, I got in close with an 85mm portrait lens and allowed her elaborate headdress to fill the entire frame.  Buy this photo

Try to include some of the elements surrounding the people in the celebration.  A portrait that shows a person or people within their surroundings is called an “environmental portrait,” and often these tell us more about the person and the culture than do close-ups.  Buy this photo

Seek out the key people in a celebration, such as the King of Carnaval shown here.  He has such an amazing presence that all I had to do was find the right vantage point and shoot away.  I always look for uncluttered backgrounds when making portraits, so the background doesn’t distract much from the image.  Buy this photo

Kids make wonderful subjects during celebrations, especially during those moments when they forget the camera is there and are completely uninhibited.  Buy this photo

Try to choose backgrounds that complement your subject without competing with it.  I asked this samba dancer to pose by a street mural whose bright blues complemented her own costume.  Buy this photo

Group portraits can be challenging.  It’s difficult during the chaos of a celebration to get everyone’s eyes on the camera.  Try to find a vantage point that flatters everyone in the image (for full-body portraits, it’s often best to shoot from the level of the middle of the body, not from head level), choose an uncluttered and undistracting background, and select an aperture that gives just enough depth-of-field to keep all the people in focus while softening the background.  Buy this photo

To make close-up portraits during the actual celebration (in this case, a parade), it is not necessary to use a long telephoto lens.  Shooting with a long lens means you’re “taking” the portrait, not “making” the portrait.  You simply can’t interact with your subject while shooting from far away.  I prefer to use a prime normal or portrait lens so that I can interact with my subject and make an image where his personality shines through.  It helped here that I knew the members of this group from our interactions over the last few months.  Buy this photo

Another reason to use a fast prime lens is that you can choose a very wide aperture (here, F/2.0 using an F/1.4 lens) to get tack-sharp focus on the subject’s face while softening the background and sometimes other parts of the body.  Here I wanted to emphasize the pointing gesture by having the fingers so close as to be out of focus, while the dancer’s face and body are in sharp focus.  Buy this photo

For images that really pop, use a large aperture (small F-stop number) to soften the background and separate the subject from the other people and objects around him.  Buy this photo

During the chaos and cacophony of an urban celebration, it’s nice to find those quiet moments, too.  While most festival dances are joyous and boisterous, this Latin American folkloric dance is quiet and mournful.  I wanted the portrait to reflect that mood, so I shot from the side as if walking next to the dancer and caught the quiet gesture of holding the white handkerchief.  Again, a large aperture was used to blur the background and emphasize the subject.  Buy this photo

I look for scenes where participants are just being themselves.  These girls were having a blast, marching and chatting with each other, but they also were interacting with the crowd.  I got down nearly to the ground so as to shoot from their level and framed the image so as to emphasize the color and pattern of their costumes.  Buy this photo

Most images of parades are shot from straight ahead looking backward onto the subjects.  You’ll observe in this post that most of my images are not made from that perspective, but occasionally it does work to frame a great scene, such as this delightful image of a salsa dancing couple.  Buy this photo

It can be challenging to include a whole parade contingent in one shot.  Here I was able to frame the whole group in formation, including some of the lovely San Francisco houses on the steep hill behind, by running ahead to the truck in front of the dancers and getting as much distance as I could between me and them.  I shot with an 85mm lens and selected a small aperture (large F-number) so as to keep all of the dancers and the background in focus.  Buy this photo

With bold and colorful costumes, some subjects cry out for a big striking close-up.  When this dancer stopped to interact with me, I got in close with a portrait lens and captured him full-frame.  Buy this photo

Don’t shy away from using non-standard aspect ratios.  To include the whole Muito Quente contingent, I moved back from the dancers and captured the whole width of the street, then in post-processing I cropped to keep the full width but remove the unwanted foreground and background portions.  Buy this photo

Again, it is helpful to know the participants in advance of the performance.  I had been working with the Muito Quente group for several months before the parade, which made it more natural to interact with each of the dancers and make the best images possible.  Buy this photo

Always shoot in RAW mode for maximum flexibility.  A few words about post-processing: Using Lightroom, I make small adjustments to the color and contrast curves so as to emphasize the subject.  A little boost to the vibrance (but not so much as to make the image appear unnatural) and a touch of post-crop vignetting can really make the image pop.  Buy this photo

Sometimes it’s okay to break the usual rules of composition.  A portrait is not supposed to be cropped at the joints, such as at the knee, but here it works because the dancer’s ornate flowing dress gives a sense of motion and fluidity in the bottom of the frame.  Buy this photo

Even in a fast-moving parade, find the opportunities to have your subject stop for a moment and interact with you.  The resulting images will convey much more personality that way, even if the personage is fully masked.  Buy this photo

We’ll close with this moment of sheer Carnaval magic.  It’s such a wonderful feeling when all the elements come together to make a memorable image.  This portrait uses most of the techniques we’ve discussed in today’s post–careful composition, bright vibrant colors, a perfect moment, sharp subject with soft background–and conveys a strong sense of personality, culture, and place.  And that is what Carnaval, and cultural celebrations in general, are all about!  Buy this photo

What are your favorite cultural celebrations?  How do you make images that capture their essence?  Please share your thoughts here.

Want to read more posts about what to shoot while traveling or close to home?  Find them all here: Posts on What to Shoot.

“Boundless Theft in Limited Professions” ~Shakespeare: What to do if your images are being stolen

Disclaimer: I am not an attorney and cannot dispense legal advice.  In this post I am simply sharing as-is my own experiences of learning about unauthorized use of my images and taking steps to correct this situation.  You should consult with a qualified lawyer if you are facing theft of your intellectual property.

I recently traveled to London to receive an award and attend the opening of the Travel Photographer of the Year winners exhibition.  When I returned from the trip, I performed a Google image search on my winning photograph to see if it had garnered more international press coverage in the wake of the show’s opening.  The good news: there were dozens of new articles featuring my winning image, and hundreds of articles in total, spanning dozens of countries around the world.  The bad news: I learned that my image was being used without my permission on dozens of sites.  A winner of Travel Photographer of the Year and shortlisted for National Geographic’s Travel Photography Awards, this particular image is an important asset in my professional photography portfolio.  And while I don’t mind it being shared without authorization if it includes an attribution to me as the photographer, or at least includes my watermark, there were several quite egregious cases of my work literally being stolen.  In some of these cases, other people were trying to pass off my image as their own, one fellow even going to the point of claiming he had shot the photo “with a black-and-white camera.”  In a couple of other cases, my valuable intellectual property was being made available for download as a wallpaper image to the general public, without my permission.  Every one of these illegal downloads takes away the opportunity for me to sell the image on my own site or to earn a royalty through the image being sold by my authorized agents.

It has never been easier to steal intellectual property–in the form of photos, videos, or the written word–than in today’s interconnected digital world.  While it can be good for an artist’s reputation and business to have her or his work “go viral” on the web, the benefits only accrue when the work is attributed to the artist who created it.  If other people are passing the work off as their own or distributing it widely to others without authorization, then we have a problem.

After consulting with an intellectual property attorney (who also happens to be my brother), I realized that I need to act promptly to protect my rights.  I have started the process of identifying the worst cases of theft of my image and taking steps to stop the unauthorized use.  If you also have had your photographs used without your permission, here are some steps you may consider taking:

  1. Search the web for all uses of your image and identify the sites where it is being used without authorization: The remarkable technology to search the vast Internet for specific groupings of pixels that resemble your image is actually very easy to use.  Just right-click on your image and select “Search Google for image” from the drop-down menu.  You’ll see a listing of all likely matches to your image throughout the web.  From this listing, select the uses that are not authorized.  My image, for example, matched several hundred occurrences on the web, but most of these were valid press outlets reporting on the image’s success with Travel Photographer of the Year and National Geographic Travel Photography Awards.  I studied the list of sites to find the ones that were using my image without permission, and I further pared down this list to focus only on sites that were using my image without attribution to me and without my watermark.
  2. Identify the owners of the offending domains: Using a who-is directory search, you can often find contact information for the registered owner of the domain that is using your work illegally.  You can first try https://www.whois.net/, although other directory lookup services may provide better information.  Enter the domain (for example, reddit.com) from the URL of the site where your image is being misused, and who-is will provide some information on the domain owner.  You’re looking for the contact info about the owner so that you can complain about the abuse.  Look for a field like this one: “Registrar Abuse Contact Email: abusecomplaints@markmonitor.com”.
  3. Write and send DMCA Takedown Requests to the owners of the offending sites: The Digital Millennium Copyright Act, or DMCA, is a US copyright law that also provides some protection of intellectual property rights in certain other countries.  It provides for copyright owners (including photographers) to demand an unauthorized use of their property be taken down.  There is a standardized form called a DMCA Takedown Request that can be used to notify the owner of a site that they are using work you own without your permission, and to insist they remove promptly remove the infringement from their site.  There are numerous locations on the web where you can find sample Takedown Request forms.  Tailor one of these sample forms with your own info, the info about your property, and the location of the infringement of your copyright.  You will need to sign (electronically or physically) the form, including a statement that you swear under penalty of perjury that you own the copyright of the work in question.
  4. Follow up to ensure compliance with your DMCA Takedown Request: While the owner of the infringing site or domain is obligated to promptly remove the infringing post, frequently they may not do so in a timely manner, or they may ignore your request completely.  Two days after filing seven takedown requests, I have received only two responses, and both of them were from ISPs who claimed they were not responsible for the content their subscribers posted (I have since identified the actual owners of the infringing sites and directly sent them new takedown requests).  I plan to continue to follow up over the coming weeks to ensure compliance.
  5. Consider further legal action if required: So far, I have not asked for legal damages from the infringing site owners, but if they disregard my takedown requests and continue to either pass off my work as their own or propagate my photo in bulk to the general public, then I may choose to sue them for damages.  I will publish a followup to this post to share how this situation progresses, but I do want readers to be aware that there are further actions that can be taken beyond a DMCA Takedown Request.
  6. Consider registering your most valuable images: A photograph, like other forms of intellectual property, may be registered with the US Copyright Office at https://www.copyright.gov/.  Doing so it not required to initiate a DMCA Takedown Request, but having your copyright registered for your most valuable images may offer you more protection and give you standing for further legal action.

I hope that by sharing my own experiences with having my images stolen, readers may gain some context on the problem.  In this digital and interconnected era, most working photographers will likely see at least a few of their images used without permission.  We all need to be aware of the situation and how to deal with it.  Please consult with a qualified lawyer about the specifics of your own situation.  Nothing in this post should be interpreted as legal advice.

Have you had your images used without authorization?  Please share your experiences here.

What to read other posts about sharing your images?  Find them all here: Posts on Sharing Images.

Penny Wise and Pound Foolish: How saving $20 on an off-brand accessory cost me $750

Like most photographers, I try to economize on the purchase of the less sexy items in my bag.  I’d rather spend my limited Gear Acquisition Syndrome cash on a new camera body or a long-coveted lens than on those little, boring, but necessary accessories like memory cards or batteries.  So when I recently needed to buy a new flash extension cord, I found an off-brand model that cost a whopping $20 less than the equivalent-seeming Nikon model.  Little did I realize that this decision to purchase a Vello Off-Camera TTL Flash Cord for $22 vs. splurging for the comparable Nikon product (priced at about twice that amount) would, less than six months later, end up costing me about $750 in repairs and lost use of my camera.  Here, as a cautionary tale for fellow photographers, is the story of what happened.

For the first few months, everything seemed fine.  What a value I thought I’d found.  I even published a post in this very forum about how great a value the Vello flash cable was (I plan to write a disclaimer in that post).  Then, with no warning at all, during a professional photo shoot for a local theater company, it happened.  I tried to remove the flash cord mount from my camera’s hot shoe and it wouldn’t budge.  Thinking it was just a bit misaligned, I pushed harder, but still it wouldn’t move.  I didn’t want to force it, so I relented for the moment and made it through the rest of the shoot with a useless and distracting flash cord dangling by the side of my camera the whole time.  Upon getting home that night, I researched the problem and realized that many people had had the same problem with the Vello cable.  Apparently, this accessory is made with cheap materials, and the mechanism that actuates the metal locking pin to hold the cable onto the camera’s hot shoe is made from plastic vs. metal.  This plastic part is subject to sudden breakage, which results in the locking pin being permanently stuck in place and the accessory being stuck on the camera with no ability to remove it.  There was no alternative other than sending in the camera to a Nikon authorized repair center to have the flash cord disassembled and removed from the camera.

Over a month later, I just got back my repaired camera.  The repairs and shipping cost just over $300.  But I also lost a month’s use of one of my Nikon D810 camera bodies, and the rental price for that use is about $450.  That makes a total of about $750 that I lost over my zeal to save $20 on a poorly made off-brand accessory.  We tend to look only at the direct purchase price when deciding which accessory to buy, but the lesson I learned through this painful experience is that we need to consider the full cost a failure could impart, including such potential damages as a disabled or destroyed camera or lens, a missed priceless shot or a bungled shoot for an important client, lost use of our other gear, and even personal injury (imagine if a heavy light stand falls on a model or if a failed light housing delivers an electric shock).

Lesson learned!  From now on I will only consider purchasing an off-brand item after ascertaining it poses no significant risk of causing other problems.  I will not be penny wise and pound foolish.

Do you have a story to share about the higher than expected cost of some piece of gear?  Please leave a comment at the end of this post.

Want to read more posts about gear?  Find them all here: Posts on Gear.


Meteoric Rise [Encore Publication]: How to shoot the Perseid and other meteor showers

Dear Readers,

Tomorrow night (August 12) will be the peak of this year’s Perseid Meteor Shower.  Weather permitting, I plan to be outside in a dark-sky location shooting away at this amazing celestial event.  I’m republishing this popular post as a tutorial for those of you who are new to meteor shower photography, or as a refresher for those who have shot these events before.  Enjoy!

Kyle Adler

=======

While the Geminid Meteor Shower in December and the Perseid Meteor Shower in August are the best-known, each year there are quite a few major meteor showers that afford great opportunities for seeing meteor activity.  Here is a partial list, courtesy of Sky & Telescope:

Major Meteor Showers in 2017
Shower Radiant and direction Morning of maximum Best hourly rate Parent
Quadrantid Draco (NE) Jan. 3 60-100 2003 EH1
Lyrid Lyra (E) April 22 10-20 Thatcher (1861 I)
Eta Aquariid* Aquarius (E) May 6 20-60 1P/Halley
Delta Aquariid Aquarius (S) July 30 20 96P/Machholz
Perseid* Perseus (NE) Aug. 12 90 109P/Swift-Tuttle
Orionid Orion (SE) Oct. 21 10-20 1P/Halley
Southern Taurid* Taurus (S) Nov. 5 10-20 2P/Encke
Leonid Leo (E) Nov. 17 10-20 55P/Tempel-Tuttle
Geminid Gemini (S) Dec. 14 100-120 3200 Phaethon

* Strong moonlight will interfere with these showers.

Source: Sky & Telescope

While it’s still technically tricky to make great images of a meteor shower, today’s technology certainly makes it possible for those of us without astronomical budgets to do so.  I shot some nice images of last summer’s Perseid shower and would have been out there shooting the Geminids last December except that the cloud cover here in the San Francisco Bay Area was 95-100%.  Here’s a composite of several images I shot last August of the Perseids.

A composite image made up of one long exposure for the lake, mountain, and trees, plus several 25-second exposures capturing the individual meteors I observed over a 2-hour period.  Buy this photo

Most of the techniques you need for capturing a meteor shower are the same as for capturing the Milky Way.  Review my post from a few weeks ago for a refresher course: Post on Milky Way Photography.

The special challenge when shooting a meteor shower is that meteors can occur anywhere in the sky.  Even with a very wide-angle lens, such as a 14mm or 16mm lens on a full-frame camera, only a small portion of the sky can be covered.  As we are limited to a maximum exposure time of about 25-30 seconds with a 14mm or 16mm lens so as to avoid blurring the stars into star trails, it’s clear that we have to shoot a lot of consecutive images to be likely to capture several meteors throughout the night.  We then use software such as Photoshop to combine the images in which meteors are visible into a single composite image showing all of the meteor activity we captured during the night.

A good tutorial on shooting meteor showers, illustrated with amazing images by Glenn Randall, can be found here: Glenn Randall post on photographing meteor showers.

Have you photographed a meteor shower?  What techniques did you use?  Please share your experiences here.

Want to read more posts about photographic techniques?  Find them all here: Posts on Techniques.


More Hassles Coming for Travel Photographers? [Encore Publication]: The airline electronics ban and its likely impact on travel photographers

A polar bear prowls the arrivals hall at Svalbard Airport.  What new horrors will await travel photographers in these troubled times?

The life of a travel photographer is inherently complicated because the cost, fragility, weight, and size of the photography gear we need is incompatible with the rigors of global travel.  I’ve written several times before about strategies for selecting and packing gear so as to take along just what we need and maximize our chances of keeping it safe during our travels.  But the times, they are a-changin’.  The US and UK governments recently instituted regulations banning all electronic devices larger than a smartphone from carry-on luggage on flights originating from 10 Middle Eastern and Northern African countries.  Before long, these restrictions could be extended to flights to and from other countries.  Camera gear is likely to be explicitly or implicitly categorized as electronic devices, so quite soon we may find ourselves obligated to check all of our gear in the hold of the plane whenever we travel.  In today’s post, I will share some thoughts on how travel photographers could handle such a challenge.

Laptops are already problematic for air travel.  They must be inspected separately from other carry-on items, leading to delays at airport security areas.  Their batteries can, in rare situations, catch fire.  And of course their use is always banned during portions of every flight.  They are expensive, breakable, and highly coveted by thieves.  And the data contained on our laptops must be very carefully protected.  For these and other reasons, I already try not to take my laptop with me on most trips.  There are image backup strategies, which I’ll cover later in this post, that do not require use of a laptop.  I don’t tend to do much captioning, post-processing, or sharing of my images during the trip, preferring instead to take care of these tasks upon returning home.  On certain trips, especially when I am leading photography tours or workshops, I do need to take the laptop to get my job done, but I would recommend not bringing along a PC unless it’s really needed.  In the future, as regulations may spread requiring that laptops be placed in checked baggage, I see no good alternative other than purchasing a hard-sided and well padded case such as a Pelican brand case to hold the PC.

Regrettably, it seems likely that most modern camera gear will be considered “electronic devices” for the purposes of these sorts of airline restrictions.  Today nearly every camera, lens, and even many accessories contain embedded electronics, so they will almost certainly be included under these types of bans.  While until now I have always managed to carry on all of my gear on every trip, I see the winds shifting and in the near future I expect to need to be able to securely pack all of my gear as checked baggage.  Obviously, a hard-sided and well padded, customizable case will be required for this purpose.  I don’t yet own such a case, but many of my photographer friends swear by cases made by Pelican.  Here’s one I am considering purchasing soon to hold most of my gear when I travel.  It is affordable, very durable, offers a good deal of physical protection, is lockable, and also rolls on solid wheels that can support a lot of weight.  I will need to do more homework to determine whether this particular size of case will adequately fit all my gear.  Note that I generally do not recommend products I haven’t personally used, but this item is representative of the category of hard-sided cases we travel photographers will need to consider purchasing.

When checking camera gear, it is imperative that we remember to carry with us into the cabin of the airplane all of our memory cards that have images on them.  I’m only being semi-facetious when I say I’d rather part with my prescription medications than with my brand new images during a long international flight.  But regardless of what new regulations may soon be issued about what items we can carry onto our flights, it is essential to set and follow a good backup plan for our images when we travel.  Gear can be lost or stolen, memory cards corrupted, and so on.  Images we make during a trip *always* must be backed up so that there are at least two files in physically separate locations for each image.  Many photographers use a laptop for their image backups while traveling, but for reasons I’ve already mentioned, I prefer not to bring a laptop unless it’s absolutely required.  Instead, I make the time every night during a trip to copy that day’s images to a second memory card, which I store separately from the ones in my camera bag.  I do this in-camera because my camera bodies have dual memory card slots, but if your camera has only one slot you can backup to a portable hard drive or another memory card using a card reader.  Some cameras have WiFi and/or Bluetooth capabilities, which can facilitate backups to a separate device such as a smartphone or even to the cloud, though network connectivity in many parts of the world is rudimentary at best.  A backup strategy that I use when the images are extremely important is to shoot simultaneously to both of my camera’s memory cards, so that the instant the image is shot it is recorded as two separate files.  I will then store one memory card separately from my camera gear.  Again, this approach will only work if your camera has dual card slots.  A final word of advice: bring enough memory cards so that you won’t have to reformat any of them during the trip.

It’s already a hassle traveling the world with a lot of camera gear.  Most likely, the hassle factor will increase soon as a result of the turmoil in our modern world.  I’m not looking forward to these changes, but I do expect they will happen soon, so I am rethinking my packing and traveling procedures to be prepared.  Hopefully, some of the thoughts I’ve shared in this post will help others get prepared, as well.

What gear and procedures do you use to travel safely with all your gear?  How do you see your approach changing as new airline regulations are enacted?  Please share your thoughts here.

Want to read more posts about gear?  Find them all here: Posts on Gear.


Tyger, Tyger, Burning Bright [Encore Publication]: In search of the elusive royal bengal tiger in India’s Ranthambore National Park

Wildlife photography is one of the most exciting and rewarding pursuits I know, but it requires some special knowledge and gear, plenty of time, and lots of luck.  I’ve posted on this topic before, specifically about wildlife photography gear (Post on Wildlife Photography Gear) and about sensitivity to the wildlife we’re shooting (Post on Approaching Wildlife).  Today’s post is a case study on my recent wildlife safari in Ranthambore National Park in Rajasthan, India.  The park is famous for its population of wild royal bengal tigers, but even with its high concentration of the big cats, it is rare to see them.  We were fortunate to encounter two tigers during our game drives, one a female who was stalking prey at some distance from us across a meadow, the other a large male who was close to us but obstructed by dense jungle vegetation.

I was rewarded with a few marvelous images of the female tiger, my favorite of which is this one:

The money shot!  After weeks of planning, days of travel, hours of driving on rough tracks, and minutes of shooting, I had bagged several hundred images of this remarkable female tiger.  A few of the images had the required combination of tack-sharp focus, uncluttered background, and appealing view of the animal.  Buy this photo

Making an image like this requires careful planning to be in the right place at the right time.  In our case, our travel company lined up the logistics and hired an expert guide and driver, which certainly helps, but it is still necessary to prepare for a photo safari like this.  It requires some knowledge of the behavior of the wildlife you are seeking.  It calls for having the right gear and knowing how to use it under time pressure and without hesitating.  And it requires shooting a whole lot of frames in rapid succession, because most will not turn out perfectly.

To capture most wildlife, a long telephoto lens is a necessity.  My go-to long lens for wildlife photography is the Sigma 150-500mm f/5-6.3 lens.  It’s more economical than a Nikon or Canon super-tele, and it produces reasonably sharp images even when used at its widest aperture.  You can spend much more on this type of big glass if you want or need to, but I’ve found this lens works quite well for me.

Stability is very important when shooting a moving subject far away using a super-telephoto lens.  During most game drives around the world, a tripod or monopod cannot be used due to space constraints in the vehicle.  I will often use a beanbag to support the camera and lens, but on our canter (a large open vehicle that seats more than 20 people) in Ranthambore National Park, even that could not be used, as there is no surface to support the beanbag.  So the only option here is to shoot handheld.  Fortunately, the lens has good image stabilization built in, but it is also important to use good shooting technique and a very fast shutter speed.  Remember to keep one hand under the lens to support it, the other hand on the grip of the camera, and both elbows firmly pressed against your sides.  Gently squeeze the shutter release.  I recommend setting your camera to continuous shooting mode if it has this feature, as this will maximize the number of images you can capture as well as avoiding the camera shake from having to press the shutter release repeatedly.

To control exposure when shooting wildlife, I usually use Manual Mode with Auto ISO.  This little-known but extremely useful exposure mode allows you to set both shutter speed (which needs to be fast enough to avoid camera shake and to freeze the animal’s motion) and aperture (which I like to keep close to wide-open in order to soften the background), while adjusting the ISO to keep the exposure correct during changing lighting conditions.  To learn more about this technique, read this post: Post on Manual Mode with Auto ISO.

Shoot many images while encountering the animal in the field.  Keep them all on your memory card (which, of course, you should back up to another medium) until you have the opportunity to carefully cull them down to the ones that are technically adequate.  Finally, during post-processing, you can select the few images that are both technically acceptable (tack-sharp focus, proper exposure) and artistically appealing (the subject looks great, the background is uncluttered and attractive).  These selected images should then be carefully cropped and adjusted for exposure, contrast, and color balance.

There you have it.  The effort that goes into making just a handful of really excellent wildlife images is disproportionate to the workload involved in most tasks we do, and the frustrations are many, but the rewards when it all goes well and we have a wonderful portrait of the animal in hand make it all worthwhile.

What are your favorite wildlife photography techniques?  Please share them in the comment box.

Want to read more posts about photographic techniques?  Find them all here: Posts on Techniques.

“To Travel Hopefully” News Flash!: I am honored to be a winner of the Travel Photographer of the Year competition

Dear Readers,

I’m just home after a whirlwind trip to London to receive my award and attend the opening of the exhibition for the prestigious Travel Photographer of the Year competition.  I was named a winner in the Wildlife and Nature category for my image of an alligator and its reflection in a Louisiana bayou.  TPOTY is considered by many in the industry to be the premier international travel photography competition.  A panel of highly regarded judges considered tens of thousands of entrants from 123 countries.

The experience attending the exhibition opening was exhilarating.  I had the amazing opportunity to meet the competition’s organizers, many of the esteemed judges, and several fellow winning photographers.  I was interviewed on-camera for British news outlets.  The quality of the show is first-rate.  Until the opening, I’d never seen my winning image displayed as a photograph should be: printed at museum quality to a large size, and properly lit.  The TPOTY exhibition started last month at the UK City of Culture festival in Hull, runs in London through September 3, and then moves on to several international venues.

My image may be purchased on TPOTY’s website in formats ranging from a postcard for less than one British pound up through a large framed museum-quality print.  The retrospective book featuring all winning images can also be purchased on this site: Travel Photographer of the Year online store.

Feeling very honored and humbled by this major validation of my recent career change.

Thank you for your incredible support thus far.  Please invite your friends and family members who are also passionate about travel and/or photography to join us here at To Travel Hopefully.  Here’s to the many further travel photography adventures we will share together!

Cheers,

Kyle Adler


Focus on Dia de los Muertos [Encore Publication]: When a local festival takes you around the world

Sometimes you can attend a local event and feel as though you’re transported to a far-off part of the world, or even feel like you’re traveling across a wide cultural tableau of a whole region.  That’s how I felt while shooting the recent Dia de los Muertas (Day of the Dead) celebrations in downtown San Jose.  Although I had traveled only half an hour from my house, this festival celebrating life and honoring departed relatives took me on a cultural and historic journey across all of Latin America and beyond.  In today’s post I will present a simple photo essay featuring some of my favorite images from this festival.
An Aztec dancer helps convene the day’s celebrations.  Buy this photo

The Aztec fire dance’s origins date back to pre-Columbian times.  Buy this photo

This shrine, erected on the back of a pickup truck, is dedicated to the memory of the owner’s deceased father and brother.  Buy this photo

The “elegant skull” face painting is an element of Day of the Dead celebrations in several Latin American countries.  Buy this photo

These lovely ladies awoke at 5 AM to paint their own faces and those of their family members.  Buy this photo

More wonderful face art.  Buy this photo

I love the cultural juxtaposition of Hello Kitty with Day of the Dead.  Buy this photo

Although this portrait of a couple also worked well in color, I love the dramatic impact it makes when converted to a high-contrast black-and-white image.  Buy this photo

Elegant and beautiful!  Buy this photo

I hope you’ve enjoyed this brief compilation of images from this recent festival and that it inspires you to seek out Day of the Dead celebrations near your own home.

What are some of your favorite cultural traditions?  Have you captured these traditions using your camera?  Please share your experiences in the comments box.

Want to see other posts about what to shoot while traveling and near home?  Find them all here: http://www.to-travel-hopefully.com/category/travel/shoot/


Focus on Cuba [Encore Publication]: Go to Cuba now while you still can

Cuba is a remarkable destination for travel photographers!  This small island has all the iconic images we expect–beautiful but crumbling art deco buildings, American cars from the late 1950s, unspoiled Caribbean beaches–but there are so many more opportunities to connect with and photograph a culture and a nation that is undergoing very rapid change.

Lovers embrace on Havana’s Malecon at sunset.  Buy this photo

European and Latin American travelers already know about Cuba’s charms and have been coming here for decades.  But to many Americans, Cuba has felt off-limits, a destination forbidden by our government.  I’m going to steer clear of the political issues in this post, but it must be noted that President Trump’s recent orders to tighten Cuba travel restrictions previously relaxed under the Obama administration will make it more difficult once again to visit.  The recent changes do not outlaw all travel to Cuba, but most Americans will need to visit under an official “People-to-People Cultural Exchange” program.  The operators of these programs may have to revise their itineraries due to new prohibitions against travel to any facilities owned by the Cuban military, and the prices of these programs may rise as regularly scheduled commercial flights to the island could revert to more expensive charter flights.  But it is still quite straightforward, and 100% legal, for US residents to visit Cuba under one of these People-to-People programs.

I do not recommend trying to circumvent the licensing requirements.  This can lead to lots of trouble for the unlicensed American traveler later down the road: hefty fines, lots of questions to be answered, and restrictions on one’s future travel possibilities.  Instead, go with one of the many travel companies who operate People-to-People Cultural Exchanges.  These are legal trips licensed by the US government for the purposes of the people from the US and Cuba getting to know each other.  These trips do require that most of the traveler’s time be spent interacting with Cuban people of all walks of life, but isn’t that what we travel photographers seek, anyway?

We spent a delightful 1.5 weeks on one of these cultural exchange programs run by Grand Circle Foundation.  They offer a variety of different Cuban itineraries, and we would have preferred one of the longer ones, but schedule limitations required us to take the shorter trip.  This itinerary brought us to the capital Havana and to the rural Viñales Valley, the center of tobacco production and ecotourism on the island.  Here are some highlights from this travel photographer’s perspective.


Our small group was invited to attend a rehearsal by Opera de la Calle.  Held in a decrepit art deco building in downtown Havana, the spirited performance combined song, dance, and performance art.  Buy this photo


Getting to know some of the locals while visiting the exuberant art installation by Jose Fuster known as Fusterlandia.  Buy this photo

We left Havana’s vibrant urban vibe for a three-day excursion to the rural Viñales Valley.  Exploring this famed tobacco-producing region from our base at an eco-tourism village within a sustainable agricultural collective, we enjoyed hiking through terrain unlike any we’d seen elsewhere, taking in views of local wildlife and flowers along the way.

The picturesque Viñales Valley is noted for its mogotes, dramatic hilly outcroppings.  Buy this photo


Tobacco farmer Benito enjoying the fruit of his labor.  Buy this photo

Cuba’s national bird, the brightly colored Tocororo.  Buy this photo

The warm and engaging proprietor of Maria’s Cafe surveys her domain.  Buy this photo

During a Viñales Valley elementary school visit, we met the staff and great  kids in the classrooms!  Three classes for different ages shared one old church building.  Buy this photo

We got to know a friendly and enterprising rural family during a home-hosted dinner.  This is their typical family transportation.  Buy this photo

Back in Havana, we strolled through the city’s Old Town.  Buy this photo

A special performance of Santeria singing and dance.  Santeria combines Roman Catholicism with African religions to form a uniquely Cuban hybrid.  Buy this photo

This selection of photos barely scratches the surface of all the wonderful, unique photographic opportunities awaiting you in Cuba now.  Go soon, though, because for better or for worse, this nation is transitioning quickly into a very different future.

Nearly a year ago, the first commercial flight from the US to Cuba in over 50 years had just taken off from Florida: NY Times on US flights to Cuba.  For many Cubans, this seemed like the dawn of a new era that would mean a partial easing of a great deal of economic hardship suffered under the US embargo.  Instead, we are seeing a regression of US/Cuban relations to a situation more like the Cold War era policy.  It’s anybody’s guess as to how this situation will evolve over the coming years.  On the one hand, it’s possible a new US or Cuban administration could open up relations considerably, leading to huge continuing changes in Cuban society.  On the other hand, we could see further tightening on travel to Cuba, making it very difficult for Americans to visit at all.  I’m eager to visit again in a few years to meet more Cuban people and observe how their lives have changed in the interim.  But if you prefer to visit–and photograph–tiny colorful sidewalk cafes rather than Starbucks, authentic cultural interactions rather than slickly produced touristic shows, and wide open vistas rather than lavish resort developments, then now is the time to book your trip to Cuba!  Depending on the political environment, now could even be your last chance to visit for some years.

Have you been to Cuba?  What surprised you there?  What were some of your favorite photographic subjects?  If you haven’t been yet, what images do you associate with this island nation?  Please share your thoughts in the comment box at the end of this post.

Camera of the Future? [Encore Publication]: A new company promises DSLR quality from a cellphone-sized device

The Holy Grail for us travel photographers would be to have a tiny and affordable cellphone-sized camera that can capture images with the quality and versatility found today only in large, heavy, and expensive digital cameras (DSLRs and medium- to large-format cameras).  A new company called Light promises to offer just such a device starting sometime in 2018.  Reading their pitch in IEEE’s newsletter for this innovative camera design, I was excited by the revolutionary concept but not convinced that their first offering would truly meet travel photographers’ needs.  Take a look at the prototype photo and the IEEE article, and then we’ll discuss the bottom line.

lightcameraconcept

IEEE Article on Light camera concept

My take on Light’s pitch is that they have an exciting new design concept which someday could translate into a truly remarkable product.  The idea of combining multiple cheap camera systems, each with a cellphone camera’s small plastic fixed-aperture lens and tiny inexpensive sensor, and then combining their data using controlling mirrors and software into a single high-resolution image with control over such elements as focal length, depth-of-field, and bokeh effects, is creative and compelling.  By combining the separate power from all of these small cheap lenses and sensors, none of which by itself can gather much light, capture high resolution, nor provide manual control over focal length or aperture, the device and its software can achieve a final image that will be brighter, more detailed, and more controllable than the sum of its parts.

But given how little the sum of its parts costs to produce, this next-gen technology carries a hefty early-adopter premium when priced at $1699.  For that money, one could buy an enthusiast DSLR system (body and a couple of zoom lenses) with similar resolution and a greater range of focal lengths than the Light camera will have.  But there are many other serious advantages to a DSLR or a good advanced mirrorless ILC  system than just resolution and focal length.  Even if the Light device’s software can generate a final processed image that overcomes each lens and sensor’s weaknesses to rival a DSLR’s image in terms of brightness and image quality (and I have real reservations about its ability to do so), it still won’t likely be able to match a DSLR’s power-up time (the time from when you turn it on until it is ready to shoot), capture frame rate (the speed at which it can capture multiple shots), or bright optical viewfinder.

In summary, I like the concept and believe it could hold the key to building a future breed of travel cameras that are smaller, lighter, and cheaper than today’s “serious” cameras while retaining much of their quality.  But the initial device’s high price and design trade-offs won’t leapfrog the advantages of a good DSLR or mirrorless camera just yet.  The first offering would be fun to play with, in the spirit of “the best camera is the one you have with you,” but it won’t get me to leave my DSLR system at home.  This will be a fun technology and a fun company to watch, though.  I’ll provide updates in future posts as I learn of new information.

What do you think of Light’s new camera concept?  Do you see this design as the basis for a new generation devices that would replace your DSLR or mirrorless camera system?  Please share your thoughts here.

Want to read more posts about photography gear?  Find them all here: Posts on Gear.

News Flash: Google Trips now available [Encore Publication]: A new app for your smartphone can help plan and manage your next trip

Google recently announced a new smartphone app (for iOS and Android) that claims to simplify the planning and management of travel.  Called Google Trips, the new tool appears to have some useful capabilities for many travelers, including travel photographers.  I’ve had a chance to download this free app and play around with it a little bit. Here’s what I found:

    • It’s handy to be able to consolidate all of your reservation info in one place. When I travel, I typically enter every flight, ground transportation segment, hotel, meal, and event as separate items in my phone’s calendar app.  I link the email messages containing each item’s confirmation info to that item.  This allows me to access all of my reservation info in one place, but to set it all up requires quite a lot of time and effort.  With Google Trips, you have the option of handling this consolidation in a simpler fashion.  I was not able to try this out, though, because it seems only to work for reservations made using gmail accounts, and I am not a gmail user.
    • The local content is helpful to have in your pocket. The only reason I still carry a small hardcopy guidebook on many of my trips is for quick and convenient access to information on local attractions, restaurants, and nightlife.  With Google Trips, this may no longer be necessary.  I looked at the content for two cities I plan to visit in Ireland, Dublin and Dingle.  For a large city like Dublin, the app seems to have hundreds of local listings, and a cursory glance confirms they appear to be fairly accurate.  However, for smaller towns like Dingle, most of the listings seem not to be local at all, but an assortment of attractions culled from the surrounding region.  One would expect the coverage to get better over time.
    • Far and away the best feature is the capability to download content. My international data plan, probably like yours, costs an arm and a leg, so when I travel I must turn off cellular data roaming on my phone and use it sparingly to avoid massive overage charges.  In one day of using the phone as a navigation tool to stroll around London, I incurred $50 of data charges.  Google Trips has the capability of downloading directly to your phone all of the maps and content about local attractions for your whole trip, which means it is always available even when there is no cellular data signal, and it won’t eat up your international data allowance.  I haven’t had a chance to test this feature in the field, but plan to do so on my next international trip.

In a single day of using my phone to navigate on a family trip in London, I incurred $50 in data surcharges.  Google Trips’s offline data feature could save a bundle in these situations.  Buy this photo

  • I like the ability to find out what is open nearby and to plan an itinerary to see all the attractions I want in a customized fashion. Just as a good guidebook can suggest an itinerary in a given location for one day, three days, or longer, so can Google Trips recommend top local sights to fit into the time you have available.  The difference is that this app can customize your itinerary to include just the sights you’re interested in, and can provide directions from each location to the next.
  • Be careful about privacy if you choose to use this app. I have concerns about what data Google says it may collect and how it may use this data.  I recommend you read their privacy policy carefully and make your own informed decision about whether to use this app.

You can learn more about the app right from the Google horse’s mouth here: https://googleblog.blogspot.com/2016/09/see-more-plan-less-try-google-trips.html.

Note that I don’t specifically endorse this app or Google products or services in general, nor have I had a chance to use this app in the field.  I am providing this information to my readers in the hope that it may be of interest to some.  There also appear to be some privacy concerns in this and other Google apps, so be sure to research what data will be collected and how it will be used before deciding whether to use this service.

Have you tried out Google Trips?  What do you think?  How does it work in the field while you’re traveling?  Please share your thoughts here.

Focus on Mardi Gras SF [Encore Publication]: New Orleans and Latin American colors and sounds in San Francisco

Anyone who reads “To Travel Hopefully” at least occasionally knows that I’m a major lover of street fairs and festivals.  Nowhere else can you capture the colors, sounds, flavors, and feel of a city’s local culture as readily.  I’m fortunate to live in the San Francisco Bay Area, where there are literally hundreds of diverse and fascinating festivals each year.  Probably my favorite of all is the annual Carnaval celebration, a pan-Latin outpouring of samba dancing, music, color, culture, and even cars.  Anyone in San Francisco can tell you that Carnaval here takes place in late May, thanks to the rather chilly weather that prevails during the more traditional carnival season around Mardi Gras in February.  But Carnaval SF has a lesser-known cousin, Mardi Gras SF, that does indeed take place at the same time Mardi Gras is celebrated in New Orleans, Rio de Janeiro, Martinique, and other places around the world.  Today’s post focuses on yesterday’s Mardi Gras celebrations all around the city of San Francisco, during which the music, traditions, costumes, and dancing of the world’s more famous carnivals comes to California for one crazy night.

New Orleans style mummers dance along with the dixieland music in a parade in San Francisco’s Hayes Valley neighborhood.  I wanted to capture a sense of the chaos even while making a portrait of just these two revelers, so I used a shallow depth-of-field to throw the closer woman into slightly softer focus.  Buy this photo

At this time of day there was enough natural light remaining to make this portrait without any fill flash.  During post-processing in the Lightroom application, I adjusted the contrast and exposure, enhanced the vibrance, and used just a touch of post-crop vignetting to bring out the main subject.  Buy this photo

The classic Victorian townhouses known as “painted ladies” attest that this scene is taking place in San Francisco, but the foreground subject is pure French Quarter.  To gain this perspective on the scene, I climbed on top of a bench and used a wide-angle lens.  I was careful to keep the camera level so as not to distort the image, and I further corrected the perspective during post-processing.  Buy this photo

I rushed across town to the Mission District, an historically Latino neighborhood, where a different sort of parade was beginning.  This parade is styled as much on the Latin American carnival traditions as on the New Orleans creole traditions.  This portrait documenting the preparations of one of my favorite Carnaval groups, Viva la Diva, was made as the parade was forming.  I used an off-camera fill flash with its power dialed down by one stop to saturate the colors and set off the main subject from the background.  Buy this photo

I loved this reveler’s carnival mask, so I asked her if I could make a portrait.  I used a classic 85mm portrait lens and got in close to minimize clutter in the background, using a bit of off-camera fill flash.  Buy this photo

Another example of a portrait shot close to the subject using a touch of fill flash.  I use an effective and inexpensive cord to tether my speedlight to the camera’s hot-shoe, while I hand-hold the flash off to the side and away from the camera.  To learn more about this gear and technique, read this earlier post: Post on Off-Camera Flash.  Buy this photo

I have been working with the group Viva la Diva for several weeks already to document their preparations for San Francisco’s big Carnaval parade in late May, so I made certain to capture these lovely ladies during the smaller Mardi Gras celebrations.  Once again, the secrets to making a stunning portrait are to establish rapport with your subject, use a moderate and fast portrait lens, get in close, use a wide aperture to throw the background into soft focus, throw in a touch of fill flash to isolate your subject even more, and shoot several frames to ensure you capture just the right moment.  It takes practice, but it really isn’t that difficult, and the results are truly eye-catching.  Buy this photo

Kids are great fun to photograph.  This group of youngsters from a nearby school wanted to dance with the Viva la Diva samba dancers.  I got down low so as to shoot them from their eye level, and I held the flash up high so as to light them evenly and without harsh shadows.  Buy this photo

Viva la Diva!  Even though by this time of the evening there was effectively no ambient light, I was still able to capture a portrait of the Divas without the glaring artificial color cast that is typical with images lit mostly by flash.  The keys to success here are to use a diffuser on the flash head, get the flash off-camera, hold it very close to your subject to soften the lighting further, and adjust in post-processing.  Buy this photo

Do you have favorite local events you love to shoot?  Which ones, and what techniques do you use?  Please share your stories here.

Want to read more posts about what to shoot while traveling or close to home?  Find them all here: Posts on What to Shoot.


I See a Red Door and I Want to Paint It Black [Encore Publication]: When a black-and-white image is better than color, and how to convert to B&W

Back in the day, a photographer had to choose in advance whether to shoot with color film or black-and-white film.  Conversions from color to B&W were cumbersome and expensive, and conversions from B&W to color were essentially impossible.  During the film era, I typically shot exclusively using color transparency film while traveling, and reserved B&W photography for particularly artistic shoots near home.

Thankfully, in today’s digital world, we no longer have to commit ourselves in advance to monochrome vs. color images.  It’s now a simple procedure to convert our color images to B&W during post-processing.  And that’s a great blessing, because there are plenty of times when a black-and-white photo is better than a color photo.

Consider the image of the alligator at the start of this post.  One of my favorite photos, this one works just fine in color, too.  But the real power of the image is revealed in B&W through the striking textures of the alligator’s skin as seen above the water and as reflected off the water’s surface.  The background above the water fades to a deep, nearly true, black, with the background of the water itself rendered slightly less darkly and showing some nice ripples of motion.  Black-and-white photography is especially powerful when there are contrasts of pattern, texture, and background as in this image.  Buy this photo

When else might we want to render an image in B&W?

Portraits made in monochrome have a timeless look that evokes the earlier years of photography, and this rendering can also bring out the true nature of the subject.  There’s a lovely look to the skin tones and hair when displayed in B&W, and there are fewer distracting elements from the color of clothing or background objects.

This portrait takes on a vintage, timeless look when shown in B&W.  Our eye can focus on the model’s face and hair without the distractions of the colors in her sweater or the building.  There’s almost a street photography kind of documentary quality to this image in monochrome that is lost when viewed in color.  Buy this photo

Color can be distracting in an image where we want to emphasize the essence of a person or place.  In this portrait I made recently for a couple who are fellow musicians and friends of mine, we had beautiful “golden hour” light to work with, and the background and clothing worked well in color.  But converted to B&W, this image really places the emphasis on the couple without the distractions of the color cast in the reflections off the eyeglasses or of the mixed lighting in the background.

In this portrait, black-and-white presentation places the viewer’s attention squarely on the the couple and their instruments, without distractions from the multiple colors of the clothing and background components.  (Client photo not available for purchase.)

When you’re shooting under “mixed lighting”, which means there are multiple light sources with different color temperatures (i.e., some light sources are warmer and others are cooler), converting the image to B&W can be a real problem solver.  Consider the image below, made in Bruges at night.  The light from the street lamps was warmer than the light coming from the spotlights on various buildings, and there was also a bright moon that night, so when seen in color the photo would look less appealing due to the contrasting of the color temperatures in the different parts of the image.  But viewed in B&W, it brings out the grandeur of the old buildings and the beauty of the reflections in the waters of the canal, without the distractions of the color casts.

This image of Bruges at night, when processed in B&W, removes the contrasting color temperatures of the multiple different light sources and allows the viewer to enjoy the stately old buildings with consistent tone and texture.  Buy this photo

Now that we’ve covered a few of the many situations in which a black-and-white image is preferable over a color image, let’s look at how to convert from color to B&W.  There are many ways to perform this conversion, but I recommend it be done using the Color Adjustments settings in the Develop module of Adobe Lightroom.  Here’s how:

Click on the “B&W” tab above the individual color channel sliders, and then adjust the mix of how the colors are blended by increasing or decreasing each color’s slider to see how the black-and-white image looks.  I find that I often have to readjust the contrast slider at this point to get the image looking its best in black-and-white.

For more on using Lightroom to post-process your images, check out my previous post: Previous post on using Lightroom to post-process images.

I do not recommend using your camera’s built-in black-and-white mode, as you will then lose the color information in the image file.  I also do not suggest using the settings some cameras have to make a copy of the image in B&W, because in most cases the camera’s built-in software will not do a very good job of rendering the image in monochrome.  For the best results, either use Lightroom or a dedicated black-and-white conversion application such as Silver Efex Pro 2 from Nik Software, which is available as a plug-in for Lightroom or Photoshop.

Want to read other posts about travel photography techniques?  Find them all here: http://www.to-travel-hopefully.com/category/techniques/

What do you love about a black-and-white image?  When do you convert an image to B&W rather than share it in color?  Any tips or tricks for how to make great B&W photos?  Please share your thoughts in the comment box!


Focus on Amsterdam, Bruges, and Copenhagen [Encore Publication]: Canal cities of Northern Europe

On a recent independent driving trip through Northern Europe, my wife and I covered a lot of kilometers in our new Volvo, from the factory in Sweden through Denmark, Germany, the Netherlands, and Belgium.  In this post, I hone in on the ABC’s of European canal cities: Amsterdam, Bruges, and Copenhagen, three of the most photogenic places you’re ever likely to visit.  I share some highlights in the order we visited these cities, beginning with Copenhagen, Denmark; then on to Bruges, Belgium; and ending up in Amsterdam, the Netherlands.

Familiar sights, such as Christiansborg Palace, seat of the Danish Parliament, can transform by night.  To make this image, I set up a tripod on a bridge crossing the canal and framed the shot to capture the building along with its reflection.  Buy this photo

Our hotel in Copenhagen was right on the harbor, or Nyhaven.  This was the view from our window.  Buy this photo

When photographing iconic subjects, like Copenhagen’s Little Mermaid statue, try to avoid the postcard image clichés.  Here, I framed the statue from an unusual perspective and used a very wide aperture to throw the less attractive background into soft focus.  While the subject is still recognizable, to my eye it’s more contemplative and serene than in conventional photos. Buy this photo

Bruges is a gloriously beautiful city, and at its most lovely by night.  This image was shot from a bridge over a small canal, with the camera on a tripod and a fairly wide focal length to capture the reflection in the water.  I converted the image to black-and-white using Lightroom in post-processing.  Buy this photo

Instead of just shooting up at the famous Belfort tower in Markt square, turn the tables and shoot down on the square from the top of the tower.  I love the colorful façades of the old houses on the square in this tight crop looking down.  Buy this photo

I’ve said it before, and I’ll say it again: Don’t forget to capture some shots of yourself wherever you travel.  It’s easy to get lost in the splendor of a city like Bruges, and to return home with hundreds or thousands of images of lovely medieval buildings, but you want to have a few that include your traveling companions.  Ask another competent photographer to compose the shot for you (after setting up your camera exactly the way you want), or set up the camera on a tripod and shoot with a remote release or self-timer.  Buy this photo

Amsterdam is another canal city filled with gorgeous subjects for photography.  And like Bruges and Copenhagen, Amsterdam is at its most lovely by night.  I captured this impressionistic night scene of Amsterdam’s Westerkerk (West Church) reflected in the waters of the Prinsengracht Canal.  Buy this photo

Museum art makes a great photographic subject.  Just be sure to understand the museum’s policy on photography and never use flash.  I love Jan Steen’s painting, “The Merry Family”, because it reminds me of dinnertime in my household.  In Holland, unruly families are still referred to as “Steen families.”  I consider it a compliment.  Buy this photo

Amsterdam’s most visited sight remains the so-called “Red Light District,” which actually features some of the city’s most beautiful old canal houses.  The working women in this area do not take kindly to being photographed through the windows, so don’t try this unless you want your camera to end up at the bottom of the canal.  Instead, set up a tripod on a bridge and shoot the bustling crowds as they wander the stately old neighborhood.  Buy this photo

These three atmospheric old cities, with their beautiful canals, lovely architecture, and iconic sights, offer remarkable photographic opportunities.  Visit, get lost along the ancient waterways, and keep on shooting!

Have you visited Amsterdam, Bruges, Copenhagen, or any of Europe’s other great canal cities such as Venice?  What were your favorite experiences and images from the trip?  Please share your thoughts in the comment box.

Want to read about more travel photography destinations?  Find all of the destination posts here: http://www.to-travel-hopefully.com/category/destinations/.


If You Can’t Be with The Camera You Love [Encore Publication]: How to make the best of it when you don’t have ideal kit with you

There’s an old adage that goes, “The best camera is the one you have with you.”  That is never more true than for travel photography.  As travelers, we have to compromise regarding what gear we pack for a whole trip, and then we have to compromise again with respect to what equipment we can pack on a particular day’s outing during the trip.  If a flight is involved, we’re often obligated to leave much of our gear at home so as to avoid having to check our precious photography equipment.  If a good deal of hiking, biking, or travel via public transportation is required, we may have to leave bulky or heavy items in the hotel room for the day.

Fortunately, it’s never been easier to ensure we always have at least some backup solution to keep shooting even when a key camera, lens, filter, or tripod has to be left behind.  The smartphone that nearly everyone carries with them at all times likely has a pretty darn good camera attached to it.  My Apple iPhone 6s, for example, comes with a 12 MP camera, incorporating a decent if small sensor and a tolerable quality and moderately fast (f/2.2) lens.  Even the smaller “selfie” camera has a 5 MP sensor.

No one will confuse the images made using this camera phone with those made using my professional DSLR camera and collection of lenses, but in a pinch I can get acceptable quality shots with just the phone’s camera.  The trick is understanding how to use your smartphone’s camera, or your small point-and-shoot camera, in the right way to capture the images, and then to post-process the images in such a way as to overcome the compromises built into the camera.

Just yesterday I found myself on a family day trip to the annual Scottish Highland Gathering and Games without my professional camera gear.  I made the best of things and shot all day with just my camera’s phone.  I’m fairly pleased with the resulting images, even though of course they would have been better had I had access to my regular camera and a few choice lenses and accessories.  Here are a few of my images along with some tips on how to get the best out of a not-so-great camera.

First of all, learn how to control your phone’s camera manually so that you can choose what part of the image you want to be in focus and what part of the image you want to drive the exposure.  Nearly all modern phone’s cameras allow you to touch the screen to select where on the image you want to set the focus and exposure.  In this photo of a Scottish traditional music performance, I set the focus point on the fiddler to ensure sharp focus on the musicians.  Then I adjusted the exposure by moving the vertical slider upward, in order to add some brightness to the image and avoid underexposing the backlit performers.

Touch your smartphone camera’s screen to select the focus point, and then move the exposure slider up or down to adjust the exposure separately from the focus point.  Buy this photo on my website

Better yet, take full manual control over your phone’s camera by installing an app.  There are good free and inexpensive apps for both iOS and Android.  The one I use for iOS is called “Manual” and is available on the Apple App Store: Manual app.  With such an app installed on your camera, you can specify manually exactly what settings you want to use for the focus point, aperture, shutter speed, ISO, flash, etc.  This level of control was essential for a shot like the one below.  The tossin’ of the caber, a “heavy athletics” event in which the contestants throw a 75-pound tree trunk as far as possible, requires a fast shutter speed in order to freeze the rapid action.

Note: Since I first wrote this post, I have started using a different iOS app to take manual control over my phone’s camera.  It’s called “ProCam 4” and it’s quite a bit more sophisticated, but as easy to use, as the “Manual” app.  You can purchase it on the Apple iTunes Store here: ProCam 4 App.

Using the “Manual” app I was able to focus on the athlete and choose a fast shutter speed to freeze the rapidly moving caber.   Buy this photo on my website

To capture this action shot of an indoor sheepdog trial, I had to set a fast shutter speed and increase the camera sensor’s sensitivity (ISO) to accommodate the quick action and the low-light setting.  Again, the Manual app allowed for this flexibility.  I also cropped the image during post-processing because the phone’s camera does not have a long enough focal length lens to zoom in closely on the subject.

Both manual selection of the ISO and shutter speed and cropping during post-processing are required to get a decent shot of action like this sheepdog trial.  Buy this photo on my website

To capture this image of a girl teaching young children how to dance around the maypole, I had to use all the elements we’ve been discussing here.  I used manual settings to choose a focus and exposure that were correct for this subject, forced the camera’s flash to fire to try to even out the harsh shadows across the girl’s face, and employed cropping and lighting adjustments during post-processing to achieve a pleasing composition.

Bringing it all together: To make this image of the maypole celebration, I manually selected the focus, exposure, and flash, and then cropped and adjusted exposure during post-processing.  Buy this photo on my website

Next time you can’t or just don’t have the best equipment with you, use the tips we’ve covered here to make the best of a challenging situation.

When did you have to make do with less than ideal gear for a shoot?  How did you make the best of it?  Do you have tips or tricks you can add?  Please contribute your thoughts using the comment box at the end of this post.

Want to read more post about photographic gear?  Find them all here: Posts on Gear.

When You Get Back Home [Encore Publication]: An introduction to the essentials of postprocessing

You may want to share some of your favorite images with friends and family right out of the camera while you’re still traveling, and as long as you’re not sharing so broadly that potential thieves may be alerted to your absence from home, that’s a fine thing to do.  To enable immediate and easy sharing, you can choose the setting available on many cameras to shoot both RAW and JPG files; the JPG images will often look pretty decent for sharing when they come straight from the camera, and you still have your much more detailed image data saved in the RAW files.

But when you get home from your trip, it’s worth making the effort to catalog and post-process the RAW files of your favorite images so that they will look their very best and so you will be organized for finding them in the future.  I’ll cover how to organize your catalog of images in a later post, but for now let’s take a look at the essentials of post-processing.

There are many software applications available to perform these tasks, but I strongly encourage you to check out Adobe Lightroom.  I use this tool, and nearly all professional and enthusiast photographers I know also use it.  You can license it along with other Adobe software on a pay-per-month basis as part of Adobe’s Creative Cloud, but it can also be purchased with a perpetual license (i.e., you purchase the software once and can use it forever), which is how I acquired it.

Once you have Lightroom installed on your PC, it’s easy to import your images from your camera’s memory card or from your PC’s hard drive and to organize your catalog of images using the software’s Library module.  When your images are in your Lightroom catalog, the software allows you to perform all post-processing you desire using its Develop module.  After shooting the image, my second-favorite part of the digital photography process is enhancing the the image in the Develop module.  The software package even gets its name, Lightroom, as the new digital equivalent of the work we older photographers formerly had to do in the darkroom, such as dodging, burning, and cropping our film negatives to get the images looking their best.

As an example of how a little post-processing can dramatically enhance an image, let’s take a look at a night shot I made of Copenhagen’s Christiansborg Palace, the seat of the Danish Parliament.  Here’s the “Before” picture:


Lightroom’s Develop module

The beauty of Lightroom’s method is that it doesn’t actually change your original image files as you edit them.  Instead Lightroom saves a roadmap of the various edits you make and stores this list of adjustments along with a pointer to the original file.  This is called “non-destructive editing”, and it allows you to edit your images to your heart’s content without overwriting or changing the originals at all.  You can go back as many times as you want later to revisit your edits and change them again and again.

Let’s look at this process in more detail.  Here is the basic Lightroom Develop module screen:

lightroom develop module

The left bar shows a thumbnail of the image you’re working on and a list of the most recent edits you have made.  The central part of the screen shows a larger version of your image and this can be zoomed in and out to work on details or the whole image.  The right bar has a histogram (a graph showing how many pixels in the image are at each brightness level from totally black to totally white) at the top, then a toolbar from which you can choose some of the editing tools quickly, and then a large area with sliders (only some of which are shown in this screenshot) that you move left or right to adjust various elements of your image.  The editing tools in Lightroom are comprehensive enough that I find I very rarely need to import an image into Adobe Photoshop to make really sophisticated edits; nearly all of the time, I can perform all of my post-processing using only Lightroom.

Some photographers spend a lot of time making major enhancements to their images, but I like to try to adjust my camera’s settings precisely enough that the image is made in the camera the way I envisioned it when shooting, so that I need to make only minor adjustments in post-processing.  While the exact steps of post-processing will be different for every image, here is my basic workflow (note that for the most part, I work from the top to the bottom of the adjustment tools found in the right bar):

  1. Adjust the white balance as needed.  Remember my advice to always shoot in RAW mode.  One of the advantages of RAW files is that you can adjust the white balance in post-processing, regardless of what your camera’s white balance controls were set for while you were shooting the image.  In JPG files you have much less control over the white balance after the fact.  Just choose a different preset white balance type (such as Daylight, Shade, or Flash) from Lightroom’s menu, or create a custom white balance yourself.
  2. Adjust the exposure as needed.  Use the histogram and the image preview pane to lighten or darken the whole image until it looks best.
  3. Adjust the contrast as needed.  Increasing contrast gives more separation between the darkest and lightest portions of the image, while decreasing contrast does the opposite.  I find that most images require the contrast to be increased slightly to moderately.
  4. Adjust the highlights and shadows as needed.  Highlights are the brighter parts of the image, and I find that often these need to be reduced in brightness to regain some detail that may have been lost in the camera.  Shadows are the darker parts of the image, and often these need to be made brighter to bring out lost shadow detail.  After the highlights and shadows have been adjusted, you may need to adjust the whites and blacks (very brightest and very darkest points in your image) if there are extremes of contrast present.  Most of the time I do not need to change the white and black points.
  5. Adjust the clarity as needed.  The clarity slider changes the contrast of the middle tones (neither the darker nor the lighter parts) of the image.  Usually images need a subtle increase in clarity to bring out the details in the texture.  Don’t overuse this tool or the image can become unnatural looking.
  6. Adjust the vibrance and/or saturation as needed.  Both of these sliders will change the concentration of the colors in your image, but vibrance tries to avoid changing the color of skin tones so images with people will often look more natural after increasing the vibrance than after increasing saturation.  Occasionally you might need to make adjustments to both vibrance and saturation, but usually I find a subtle increase in vibrance is sufficient.  Again, don’t overuse these tools or your image will start to look exaggerated and surreal (unless you’re going for those effects).
  7. Adjust the concentration of individual colors as needed.  Each color channel has its own slider to increase or decrease its saturation.  I don’t use these sliders often, but occasionally you may want to increase or decrease the saturation of just a single color.  For example, when shooting a landscape with sky or water, you may want to increase the blue saturation to bring out those parts of the image.
  8. If you want to work on your image in black-and-white, the color channels area is the tool I use to do the conversion from color to monochrome.  Click on the “B&W” tab above the individual color channel sliders, and then adjust the mix of how the colors are blended by increasing or decreasing each color’s slider to see how the black-and-white image looks.  I find that I often have to readjust the contrast slider at this point to get the image looking its best in black-and-white.
  9. There is some sharpening already applied to your image file by default, but if it looks too soft in the important areas, you can dial in some additional sharpening.
  10. When the image you’re editing was shot at a high ISO (sensitivity) and/or a very long shutter speed, there will likely be some noise in the image.  This can be managed somewhat in Lightroom’s noise reduction tool.
  11. Under basic lens corrections I will usually select all three of the check box items.  Lightroom knows how most camera and lens combinations work and can eliminate many of the optical glitches that would otherwise show up in the image.  Under manual lens corrections, I may need to rotate the image if the horizon wasn’t level when it was shot.
  12. All of the above adjustments affect the entire image.  After completing these adjustments, it’s time to make any selective adjustments that affect only a selected part of the image.  These selective adjustment tools can be found in the toolbar just below the histogram.
  13. Of these selective adjustment tools, the most generally useful is the cropping tool, which of course allows you to remove unwanted portions of the image on the sides, top, or bottom.  It’s always best to try to compose the image correctly in the camera, but cropping is often still needed in post-processing.
  14. The spot removal, filters, and adjustment brush are more complicated selective adjustment tools that can easily be subjects of additional posts in their own right.

These steps usually won’t all be needed for any one image.  If you have several images that were shot under similar conditions, you can select them all in the Library module and turn on Auto Sync, which then allows you to make the adjustments only once and apply them to all the selected images.  Another big time saver is creating your own presets, which are saved routines that you can call at the click of a button to automate tasks that would otherwise have taken multiple steps.  Unlike Photoshop, Lightroom was designed by Adobe specifically for photographers to use, so it is set up in such a way as to make life much easier for us to organize, edit, and share our images.

Here is the “After” version of our sample image of Copenhagen by night.  You can see how a few simple edits during post-processing can really make an image pop.

Buy this photo

I hope you’ve found this very basic introduction to the essentials of post-processing to be helpful.  Now it’s your turn.  What are your go-to techniques in editing your images?  Do you have tips and tricks that you’ve found make your life easier after you return from a trip?  Please share your thoughts in the comment box at the end of this post.

Want to read more posts about post-processing your images?  Find them all here: Posts on Post-Processing.

Total Eclipse of the Heart [Encore Publication]: Techniques for photographing solar eclipses

Dear Readers:

With the Great American Eclipse coming up in just a couple of weeks (it’s on August 21, 2017), I am republishing this popular post on how to shoot a total solar eclipse.  If you have not yet booked your trip to a spot along the path of totality, now is the time to do it!

Kyle

Prof. Jay Pasachoff and his student set up scientific gear for observing the total solar eclipse in Svalbard in 2015.  Buy this photo

If there’s a more thrilling experience anywhere on our planet than observing a total solar eclipse, I’ve not yet found it.  The experience of observing the moon slowly move in front of the sun, obscuring our view of the sun one nibble at a time until day turns into night, the temperature drops, the stars come out in the middle of the day, and the delicate corona of the sun is exposed, is like nothing else we earthlings can feel.  An eclipse is a singular event, each a bit different from any other that has ever occurred, and an exclusive event that often can be observed only from a narrow swatch of land and in very remote corners of the planet.  I’ve stood in the umbra (shadow) of the moon during three total solar eclipses thus far in my life: first in Virginia Beach in the USA when I was 7 years old, then in the mountains above Anji in China in 2009, and most recently in 2015 in Svalbard well above the Arctic Circle.  I plan to be in Salem, Oregon in the USA on August 21, 2017 when the next total solar eclipse occurs.  These events are truly life-changing, and once you’ve experienced an eclipse you will want to seek out others.

Photographing an eclipse takes all of the normal challenges of travel photography and throws a few special ones into the mix.  To start with, an eclipse can take place anywhere on the planet, and often the best location from which to view one is very remote with little or no travel infrastructure.  The eclipse I experienced in 2015 in Longyearbyen, high in the Arctic on the island of Svalbard, was a transformative event, but the extreme cold coupled with the lack of infrastructure made getting there and photographing the eclipse a special challenge.  And of course, during an eclipse the already challenging conditions are stressed even further due to the tremendous crush of visitors who rush in from all over the world to try to view the solar event.

I recommend you travel with an expert in managing the complicated logistics required to stage a successful eclipse trip.  I always go with A Classic Tours Collection (https://aclassictour.com/solar-eclipse-tours/).  Run by travel logistics guru Mark Sood and with scientific consulting from Professor Jay Pasachoff, a world expert in eclipses and the human being who has stood in the shadow of the moon more times than any other, this company has delivered an unprecedented track record of successful eclipse trips since 1980.

Special challenges in photographing a total solar eclipse, like this one in Svalbard in 2015, include remoteness, lack of infrastructure, extreme conditions, the risk of poor weather, and the need for specialized photographic gear.  Go with an expert or risk missing the action.  Buy this photo

Assuming you are able to get all the right gear to the best possible location to observe the eclipse, and then the weather cooperates, the actual technique required to capture remarkable images of this phenomenal event is fairly straightforward.  Here’s what you need to do:

Gather the right gear.  You will need at least one (and I prefer to have two) DSLR or mirrorless ILC camera bodies with a long telephoto lens or two.  I use a Nikon D810 with a Sigma 150-500mm super-telephoto zoom lens.  For each lens you will need a specialized solar filter to block 99.999% of the sun’s light to enable you to shoot the sun safely during the partial stages of the eclipse.  The solar filter blocks much more of the sun’s light than a standard photographer’s neutral density filter, so don’t try to find this item at your local camera shop.  Instead, you will need to order it from a specialized astronomy company such as Thousand Oaks Optical (http://www.thousandoaksoptical.com/solar.html).  Be sure to order a black polymer threaded camera filter in the proper diameter for your specific lens.  Without a properly fitted solar filter on each lens you plan to shoot with, it is not safe for your eyes or for your camera’s sensor to attempt to photograph a solar eclipse.  You will also need a heavy-duty professional tripod with a good ball head and mounting plate to hold your camera and lens steady during the eclipse.  Also be sure to pack a remote shutter release with extra batteries (if required), the tripod collar that came with your lens (if included), a mini flashlight for checking your camera’s settings, extra memory cards, and extra batteries and chargers for your camera.

Super-telephoto zoom lens with tripod mounting collar.  Don’t forget to order a solar filter to fit your lens(es).


Heavy-duty professional tripod.


Remote shutter release.

Test your gear.  Before the trip, test your full setup at home by shooting the sun with your solar filter on the lens, and by shooting the full moon without the solar filter.  These two scenarios will allow you to test your gear in conditions similar to the partial stages of the eclipse and to totality, respectively.

Prepare your gear the evening before the eclipse.  Charge all batteries, format all memory cards, make all camera and lens settings (per my instructions below), and check all your equipment.  Remove the UV filter you ordinarily keep on your lens(es), because they will interfere with the solar filter you will use during the partial stages.  On eclipse day, have in your pocket your flashlight, extra camera batteries, extra remote batteries, and extra memory cards.  It will be dark during totality and you will be excited, so best to have everything well planned in advance and within easy reach on eclipse day.

Configure your camera’s and lenses’ settings in advance of the eclipse.  Shoot in RAW mode (or RAW + JPEG mode if you must have JPEG versions of  your images) using the highest quality setting available on your camera.  I recommend using an ISO setting of 400, and be sure to turn your camera’s Auto ISO setting off.  The exposure changes constantly throughout the eclipse, so I do not recommend manual exposure mode; instead, choose aperture priority mode with the aperture set at f/11.  You may want to choose highlight-weighted metering if your camera has this option; otherwise, select center-weighted metering.  Choose single-frame shooting mode.  I recommend using exposure bracketing to shoot bursts of about 7 frames, each 1 stop (or even 1.3 stops) different from the previous one, so as to capture more of the huge dynamic range in a solar eclipse; this is especially important to do during totality.  Turn off vibration reduction (also referred to as image stabilization), as your camera will be on a sturdy tripod throughout the eclipse.  Set your focus mode to manual, because autofocus will not work during or near totality.  Tape your lens’s focus ring to infinity to be sure it won’t move during the eclipse.  Take a deep breath.  You’re almost ready for the eclipse.

Set everything up at the eclipse viewing site.  Place your camera on the heavy-duty tripod and install your remote control.  Remove your regular UV filter and attach your special solar filter.  As the first contact between sun and moon occurs, start to shoot.  Remember to shoot in bursts of 7 (whatever number of exposure levels you have selected) if you have turned on exposure bracketing.  Due to the rotation of the earth, you will have to recenter the sun in your viewfinder periodically (unless you are shooting through a telescope with an equatorial mount).

This image shows the early partial stages of the Svalbard total solar eclipse.  Shoot periodically during all the partial stages, and remember to reposition your shooting angle so the sun remains in the center of your field of view.  Buy this photo

Remove your solar filter only during the period of totality.  When the diamond ring effect signals the start of totality, and the world around you is suddenly plunged into darkness, quickly take off your lens’s solar filter.  You won’t need it during totality.  The brightness of the sun during totality is similar to that of the full moon, so viewing and photographing the sun during totality will not be dangerous.  This is the most exciting time, and it will last for only about 1-4 minutes, so enjoy the spectacle of the sun’s corona revealed!  Remember to spend some of the time just looking and not shooting.  This is an experience you will want to remember not only through your camera!

For the brief but exhilarating period of totality, remove your solar filter.  This image captures the diamond ring effect that ushers in the period of totality.  The sun’s delicate corona can be seen around the edge of the photosphere.  Buy this photo

Put your solar filter back on after totality.  The partial stages that follow the period of totality, just like the partial stages that came before totality, are not safe to view or photograph without the special solar filter.  Keep shooting those later partial stages because you will want a complete record of the eclipse to show a compelling narrative and to create montages of the images.

Shoot some landscapes and people images, too.  Don’t forget to use a second camera–either a second DSLR or mirrorless ILC body you brought for the occasion or your smartphone’s camera–for landscape and people shots during the eclipse.  You don’t want all of your images to be close-up portraits of the sun and moon only.  You will need a solar filter on the second camera, too, if you plan to include the sun itself in these shots.

Remember to shoot some images, with a second camera, of yourself and your travel companions during the eclipse.  Here’s a shot of my family standing in the umbra during totality at the China eclipse of 2009.  Buy this photo

Return all settings to normal after the eclipse.  You will have made quite a few special adjustments in order to capture the eclipse properly.  Don’t forget to restore your usual settings after the eclipse has ended.

Get creative with your eclipse images once you return home.  There are many ways to compile and share your images to give the world a sense of the thrill you experienced while in the shadow of the moon.

Once home from the eclipse trip, get creative about how to share your experience.  Here I have put together a montage of some of my favorite images from each stage of the Svalbard eclipse.  Using Photoshop, I created a composite image showing the sequence of stages from partial to total and back again.  Buy this photo

This image is a composite of three bracketed exposures combined using High Dynamic Range (HDR) software.  Without HDR techniques, it is impossible to capture in a single image the huge variation in brightness between the sun’s inner corona and outer corona during totality. Buy this photo 

Have you experienced a total solar eclipse?  Photographed one?  Please share your tips and tricks.

Want to read more posts about photographic techniques?  Find them all here: Posts on Techniques.

The Best Auto Mode You’ve Never Heard Of [Encore Publication]: What is manual mode with auto ISO, and when should you use it?

I’ve written often in “To Travel Hopefully” about the importance of learning to go beyond your camera’s full “Auto Mode,” in order to be able to control the exposure of your images.  Frequently I like to shoot in full “Manual Mode” so as to be able to choose both my shutter speed and my aperture for full creative control.  But in rapidly changing lighting conditions, it is a real challenge to stay in full manual mode, and it’s a big help to allow the camera’s exposure programs to choose the best overall exposure from image to image.  There are a few ways to do this.  In between the full auto mode and full manual control, there are two common semi-automatic exposure program modes that most photographers are aware of, namely Aperture Priority and Shutter Priority modes.  In today’s post I introduce another exposure mode that few photographers are aware of, but that can give the best of both worlds: automatic exposure setting while retaining full manual control over both aperture and shutter speed.  This exposure mode is called “Manual Mode with Auto ISO.”

It’s important to be able to control shutter speed because that’s the mechanism by which we can freeze action or allow it to blur for creative effect.  It’s equally important to retain control over aperture because this is the means by which we can increase depth-of-field to keep everything in focus or decrease depth-of-field to soften the background.  But there’s a third side to the exposure triangle beyond shutter speed and aperture.  This third parameter is our ISO setting.  Several years ago, most camera sensors weren’t very good at handling noise at very high ISO settings, so we took a risk of ending up with very noisy images if we used our camera’s Auto ISO setting.  Not so today.  Many modern sensors are quite adept at capturing nearly noiseless images at ISO settings up to at least 3200 and often to 6400 or even a lot higher.  So the stigma that “serious” photographers have historically attached to using the Auto ISO setting should really be laid to rest.

That happy development allows us to use a mode called “Manual Mode with Auto ISO,” in which we set the camera’s exposure program to “M” or full manual mode but also enable the camera’s Auto ISO setting.  By doing so we can preserve full control over both our shutter speed and our aperture, but also allow the camera to choose the best ISO setting to give a good overall exposure as lighting conditions change.  Making this mode even more appealing, most cameras let us select the highest ISO setting (say, 6400) that we’re willing to allow.  So if the lighting level gets sufficiently dim, the ISO won’t go so high as to introduce a lot of noise into the image; instead, we just select a slower shutter speed and/or a wider aperture.

A good example of when it makes sense to use Manual Mode with Auto ISO is when shooting a street fair or an outdoor sporting event.  In these situations the lighting can change quickly depending on the cloud cover, what direction we’re shooting, and the subject and type of image we’re making.  The following three images were all shot at last year’s Carnaval San Francisco, a big street festival and parade.  It was a sunny day, but much of the parade route was in open shade, and depending on the subject there were times when I wanted to use some fill flash.  To freeze the motion, I needed a fast shutter speed, and to isolate my main subject I usually wanted a wide aperture.  Using Manual Mode, I could choose both of these settings.  But because the light conditions were ever-changing, coupling the use of Auto ISO with Manual Mode allowed the camera to adapt the exposure to the light levels for each image.

Full direct sunlight on the main subject made for very bright lighting.  Buy this photo

Open shade with a touch of fill flash required slightly different settings.  Buy this photo

A close-up portrait made in cross-lighting needed yet another exposure level.  Buy this photo

The next time you’re shooting in a shifting lighting environment yet also want to preserve full control over both shutter speed and aperture, try Manual Mode with Auto ISO.  It’s not covered in most cameras’ instruction manuals, but it can be a big problem-solver in many situations.

Do you use Manual Mode with Auto ISO to control exposure?  Do you have other tips for how to adapt to changing lighting conditions without handing over the creative control to your camera?  Please share your experiences here.

Want to read other posts about photographic techniques?  Find them all here: Posts on Techniques.