Post-Processing without Post-Traumatic Stress [Encore Publication]: A pro’s case study on quick and simple workflow for large batches of images

As a working professional photographer, I wouldn’t trade my job for any other in the world.  I get to travel the world while capturing images of the diversity of cultures, landscapes, foods, events, and wildlife it has to offer.  And when I’m not traveling, I have the opportunity to document so many wonderful people and events in my own San Francisco Bay Area neighborhood.  Every job, not matter how wonderful, has its challenges.  In this digital age, we photographers are often faced with workflow challenges: how do we cull 10,000 images from a big shoot down to a manageable number, post-process the best ones so that they’ll look their best, and distribute them quickly to the client?  Today’s post offers one professional’s take on a quick and simple workflow that meets these challenges, delivering wonderful images to the client in a short period of time while (hopefully) preserving the sanity of the photographer.

I recently had the opportunity to capture two dress rehearsals and two performances of Dance Identity’s annual Spotlight production, showcasing 250 students and company dancers in 22 numbers.  I shot nearly 10,000 images, culled them down to about 700, post-processed, and delivered a gallery to the client, all within 24 hours of the final show.  Here’s how.

To illustrate the workflow, we’ll use as a case study the annual Spotlight production of local dance school and company Dance Identity.  To document their 250 dancers in 22 dance numbers, I shot both dress rehearsals and both performances, as well as capturing dancers backstage and during candid moments.  I captured some group shots of all the performers, instructors, and crew.  And to get the big picture, I even shot from the catwalks at the top of the theater down onto the stage.  In all, I shot nearly 10,000 images, which I culled to about 700 of the best photos, each of which required individual attention in post-processing.  I delivered a gallery with these top images to the client within 24 hours of the end of the final show.  Needless to say, without an efficient workflow this challenge would have been crushing.  Here’s how I did it.  The process I share here will be helpful for enthusiast photographers as well as pros.  It doesn’t matter whether you’re delivering your images to a paying client or to your friends and family.  When it’s crunch time and you have to turn around thousands of images from a shoot very quickly, this is a workflow that gets results.

Every image is different, but for large-scale shoots it is important to have a workflow that is streamlined so much of the processing can be done in an automated fashion.

Step 1: Culling Your Images

After each shoot, if there’s time before the next one starts, I review and begin to cull my images.  There are some advantages to culling on a bigger screen, but to save time during big events like Dance Identity’s Spotlight production, I cull right on my camera’s LCD screen.  Sure, some excellent images will be discarded using this approach, but with 10,000 images to get through quickly, it’s impractical to upload all of them to a PC and rank them all in a tool like Lightroom.  I zoom in on the images when required in order to get a closer look at focus, facial expressions, etc., and I use the camera’s histogram to check exposure.  I delete liberally as I go, keeping only the best images for a second review on the laptop.  In the case of the Dance Identity shoots, I culled in-camera from 10,000 down to about 1500 images.

With so many similar images to choose from, the culling process needs to be quick and dirty.  I do it using my camera’s LCD screen, transferring only the best images to the laptop for further culling and processing.

Step 2: Post-Processing

After culling down to a manageable number of images, but ensuring that the selected photos still represent all the dance numbers and all the performers, as well as a range of styles (group shots, motion shots, closeups, etc.), it’s time to post-process.  I use Lightroom nearly exclusively as the tool for this job when it’s a large-scale shoot.  Lightroom is optimized for the professional photographer’s workflow, and its presets, synchronization tools, and intuitive layout allow photographers to get the job done quickly and properly.

First, I import the selected images into Lightroom, using a preset to automatically adjust white balance, exposure, and noise reduction to the subject, in this case a fast-moving dance performance shot in an indoor theater.  For example, I use the import preset and/or synchronization capability in the Develop module to quickly apply noise reduction for all the shots made at high ISO settings (1600 and above).

Next, I turn off synchronization and go through each image individually in the Develop module, fine-tuning the settings for that specific image.  With many hundreds of images to fine-tune, I can only spend about thirty seconds on each one, so the workflow has to be very straightforward.  Typically I use the crop tool first, as this will be required for nearly every image.  I use the straightening tool within the crop toolset, selecting a line (such as a line on the stage or the bottom of the theater’s curtain) that I want to align with the top and bottom of the image.  Then I crop the image to highlight the subject in the most powerful way.  Sometimes I turn off the aspect ratio lock and set the image’s proportions manually, but most of the time I try to work with the aspect ratio as shot in the camera.  After straightening and cropping the image, I do some fine adjustments on the exposure and color settings, and then apply any needed effects such as post-crop vignetting or conversion to black-and-white.  Rarely, I may have to apply some selective adjustments such as brightening just one part of the image or removing a distracting background, but this slows down the workflow and should only be used when required.

Each image should be quickly straightened and cropped, then color and exposure settings (like the black point in the image above) can be applied to show the subject most effectively.  

Step 3: Delivering the Final Images

Once all the selected images have been processed, it’s time to deliver them to the client.  It can save time and simplify the workflow to use Lightroom’s Publish module to send your images directly to the platform you plan to use to deliver them.  My website is powered by SmugMug, which integrates well with Lightroom.  However, in the case of the Dance Identity shoots, I exported the top images to my PC’s hard drive, then uploaded the files from there to a new gallery on my website.  It’s your call as to which method you like to use.  In either case, once your final image files have been uploaded to your platform, it’s a good idea to apply security settings such as watermarking, right-click protection, and passwords to protect the images from misuse.  This is also the time to apply keywording so that you, your clients, and the public can find the images now and in the future.  Finally, communicate the availability of the final images, the access method, and the pricing to your client.

Delivering your images to a high quality platform quickly is a requirement to meet client needs in today’s world of fast-paced digital media.

So, there you have it: A quick but effective workflow to go from many thousands of raw images down to a few dozen or a few hundred beautifully processed photos, delivered to the client quickly and professionally.  And the best part is that you, the photographer, can retain at least some of your sanity in the process.  Of course, if you’re preparing fine art images for a major competition or exhibition, you’ll want to labor painstakingly over each one, hand-crafting every element of the image until you get it perfect.  But when you’ve got many, many raw images that need to be delivered promptly, this process is a workmanlike way to get the job done!

Take a bow!  You’ve married art with process engineering to deliver high-quality images to your client in a minimum amount of time.

Whether you’re a pro shooting for a paying client or an enthusiast shooting for family and friends, this basic workflow will get your images looking great and in the hands of those who want to see them in the shortest possible time.

What tips and tricks do your use when processing very large batches of images?  Please share your suggestions here!

Want to see more posts about image post-processing?  Find them all here: Posts about post-processing.

Focus on Tahiti Dance Fete [Encore Publication]: A case study in shooting under challenging circumstances

The travel photographer must be prepared to shoot under challenging circumstances, because often we have little control over the conditions in the field.  We may plan our travel years in advance to observe and photograph a total solar eclipse, only to wake up on the morning of the eclipse to find the sky is totally overcast.  Or we could make arrangements months ahead to be at a major cultural festival, but learn upon arrival that the area we’re shooting from is hundreds of yards from the action.  These things happen, but the professional photographer still needs to get her shot.  So, what can be done to persevere and increase our odds of getting usable images under adversity?  The answer, of course, depends on the specific circumstances of each shoot, but there are some general tips I can offer.  Today’s post presents a case study based on my recent shoot of the solo dance competition at the Tahiti Fete in San Jose, California.

The dancers made lovely subjects, but the shooting conditions were very challenging.  Read on to learn how to make the best of a difficult situation.  Buy this photo

Upon arrival at the dance competition, I realized immediately that this shoot would be challenging.  It was held in a cramped hotel convention room with a makeshift stage, rows of folding chairs for spectators, insufficient lighting of poor color quality, and a bank of judges blocking most of the view of the stage.  To make matters worse, the room was packed with people, many of whom stood up to cheer on their friends, and the only available seats were near the far end of the room.  An extra challenge was thrown into the mix by the cluttered and unattractive background behind the performers on the stage.

Cluttered backgrounds are a significant obstacle, but good images can still be made in these situations.  Buy this photo

What can be done to mitigate against a cluttered background?  I shot plenty of images of each dancer to increase the likelihood that I could eliminate some of the more distracting background elements while still capturing the excitement, grace, and colors of the dancing.  This image was the best I could capture of this particular dancer, so I committed to it in post-processing.  I cropped the image to avoid the most distracting elements, adjusted the exposure curves, contrast, and sharpness of the background to de-emphasize it, and applied some post-crop vignetting to ensure the dancer would be highlighted.

When using a very high ISO, some noise will result.  This doesn’t have to be a disadvantage.  Buy this photo

The lighting was very dim at this venue.  Because I was shooting from far away, I needed to use a long telephoto lens, which limited me to a small aperture and no possibility of using flash.  Nonetheless, a fast shutter speed was required in order to freeze the fast action of the Polynesian dancing.  This combination (low lighting, small aperture, and fast shutter speed) leaves no option other than a very high ISO setting.  I shot the above image at ISO 6400.  Even with an excellent professional camera sensor, such a high ISO will generate some noise in the image.  Noise can often be reduced to acceptable levels during post-processing.  But for this particular image, I was aiming for a soft, painterly feel.  The visual effect of high contrast, soft colors, and a bit of visual noise here gives the feel of an impressionistic rendering.  For this expressive Tahitian subject, I was very happy to have a Gauguin-esque style shine through in the final image.

 Cut out elements that don’t work.  Buy this photo

To make the above image, I cropped out distracting portions such as the judges’ heads in the foreground and an ugly door and wall in the background.  The resulting aspect ratio is non-standard, but works well for this image.  I desaturated the background and used post-crop vignetting to focus attention on the dancer.


Black-and-white renderings can be more forgiving when color quality is low.  Buy this photo

This image portrays a lovely subject but the lighting was especially poor.  Realizing I couldn’t do much to mitigate the strange color cast resulting from the artificial lights, I converted the image to monochrome, boosted the contrast, and adjusted the color channel mix to render a pleasing and elegant final image.  Check out this post to learn how black-and-white conversion can be used to save the day when color temperatures or image noise are problems: Post on B&W conversion to save strangely colored images.

Bringing it all together: This image works nicely in spite of all the challenges present at the shoot, including foreground obstacles, dim and low quality lighting, a far-away vantage point, and a cluttered background.  Buy this photo

In spite of multiple significant technical issues, I was able to make some striking images of the lovely dancers at this Tahitian festival.  Hopefully, the tips presented here will help when you next are faced with a challenging shoot.  The most important thing is to keep shooting as best you can while in the field.  There are multiple methods you can use in post-processing to mitigate against the shooting challenges and end up with images you will be proud of.

What techniques do you use when faced with difficult shooting conditions?  Please share your thoughts here.

Want to read more posts about photographic techniques?  Find them all here: Posts on Techniques.

Focus on Amsterdam, Bruges, and Copenhagen [Encore Publication]: Canal cities of Northern Europe

On a recent independent driving trip through Northern Europe, my wife and I covered a lot of kilometers in our new Volvo, from the factory in Sweden through Denmark, Germany, the Netherlands, and Belgium.  In this post, I hone in on the ABC’s of European canal cities: Amsterdam, Bruges, and Copenhagen, three of the most photogenic places you’re ever likely to visit.  I share some highlights in the order we visited these cities, beginning with Copenhagen, Denmark; then on to Bruges, Belgium; and ending up in Amsterdam, the Netherlands.

Familiar sights, such as Christiansborg Palace, seat of the Danish Parliament, can transform by night.  To make this image, I set up a tripod on a bridge crossing the canal and framed the shot to capture the building along with its reflection.  Buy this photo

Our hotel in Copenhagen was right on the harbor, or Nyhaven.  This was the view from our window.  Buy this photo

When photographing iconic subjects, like Copenhagen’s Little Mermaid statue, try to avoid the postcard image clichés.  Here, I framed the statue from an unusual perspective and used a very wide aperture to throw the less attractive background into soft focus.  While the subject is still recognizable, to my eye it’s more contemplative and serene than in conventional photos. Buy this photo

Bruges is a gloriously beautiful city, and at its most lovely by night.  This image was shot from a bridge over a small canal, with the camera on a tripod and a fairly wide focal length to capture the reflection in the water.  I converted the image to black-and-white using Lightroom in post-processing.  Buy this photo

Instead of just shooting up at the famous Belfort tower in Markt square, turn the tables and shoot down on the square from the top of the tower.  I love the colorful façades of the old houses on the square in this tight crop looking down.  Buy this photo

I’ve said it before, and I’ll say it again: Don’t forget to capture some shots of yourself wherever you travel.  It’s easy to get lost in the splendor of a city like Bruges, and to return home with hundreds or thousands of images of lovely medieval buildings, but you want to have a few that include your traveling companions.  Ask another competent photographer to compose the shot for you (after setting up your camera exactly the way you want), or set up the camera on a tripod and shoot with a remote release or self-timer.  Buy this photo

Amsterdam is another canal city filled with gorgeous subjects for photography.  And like Bruges and Copenhagen, Amsterdam is at its most lovely by night.  I captured this impressionistic night scene of Amsterdam’s Westerkerk (West Church) reflected in the waters of the Prinsengracht Canal.  Buy this photo

Museum art makes a great photographic subject.  Just be sure to understand the museum’s policy on photography and never use flash.  I love Jan Steen’s painting, “The Merry Family”, because it reminds me of dinnertime in my household.  In Holland, unruly families are still referred to as “Steen families.”  I consider it a compliment.  Buy this photo

Amsterdam’s most visited sight remains the so-called “Red Light District,” which actually features some of the city’s most beautiful old canal houses.  The working women in this area do not take kindly to being photographed through the windows, so don’t try this unless you want your camera to end up at the bottom of the canal.  Instead, set up a tripod on a bridge and shoot the bustling crowds as they wander the stately old neighborhood.  Buy this photo

These three atmospheric old cities, with their beautiful canals, lovely architecture, and iconic sights, offer remarkable photographic opportunities.  Visit, get lost along the ancient waterways, and keep on shooting!

Have you visited Amsterdam, Bruges, Copenhagen, or any of Europe’s other great canal cities such as Venice?  What were your favorite experiences and images from the trip?  Please share your thoughts in the comment box.

Want to read about more travel photography destinations?  Find all of the destination posts here: http://www.to-travel-hopefully.com/category/destinations/.


Baggage Claim: A photographer’s guide to how to pack for a trip

 Special trips often require specialized gear.  To photograph the total solar eclipse in Svalbard in 2015, I had to pack a heavy professional tripod, 500mm super-telephoto lens, a remote release capable of functioning in extreme cold, and a custom-made solar filter.  Thankfully, most trips are easier to pack for.  Buy this photo

Packing is never the most fun part of a trip, and the special challenges we travel photographers face can be particularly vexing.  But with a few guidelines and some common sense, we can easily bring along just what photo gear we’re likely to need and still be able to make room for some socks and underwear.  Here is my very opinionated guide to how to pack for any length and type of trip.

    1. What type of trip are you taking?
      • If it’s a driving trip directly from your home, you can bring all the gear your heart desires.  Just be sure not to leave valuables in plain sight in the car when you step away for more than a moment (thieves love camera gear), and make sure you have a shoulder bag or backpack to carry just what you need for car-free excursions.
      • If you’re flying (unless you have your own private jet, in which case you also need to make room for me on your next trip), you’re going to have to reduce the gear you carry to just the essentials.  It is possible to customize the foam insert in a hard-sided case to hold your photography gear, and then you can check this bag in the hold of the aircraft, but this requires some effort to prepare the case for your specific gear and then you will likely find the case quite heavy to lug around for the land portion of your trip.  And woe to you if your bag is misrouted, lost, or stolen.  I recommend packing a carry-on item that meets your carrier’s size requirements and filling it with just the most essential gear you’ll need on your trip.  More on that topic in a moment.
      •  For most purposes, a backpack is a good packing solution.  There are many styles available for photo gear, but my favorites are these two:
        1.  For those times when you need to bring most or all of your gear on a trip, I like the Tamrac 5586 Expedition 6x Backpack.  It carries a lot of gear snugly and flexibly, and it doesn’t look like a camera bag so it’s less likely to invite the wrong kind of attention.  It is almost always accepted as carry-on, but it is a bit bulky and heavy for all-day, everyday use while traveling.  I’ll often use this bag to get all my gear to my first destination, then pack a day bag for just the gear I’ll need for each day of the trip.
        2. My current favorite bag for day use for nearly any shooting situation near home or while traveling is the Manfrotto MB MA-BP-TRV Advanced Travel Backpack.  It can fit a reasonable amount of gear while leaving room for non-photography items like a jacket or a water bottle (yes, even photographers occasionally have to drink or stay warm).  It disguises your gear pretty well, has good rain protection, and even sports a special sleeve for carrying the Manfrotto Be-Free Travel Tripod.
    2. What types of shooting will you be doing on the trip?
      • Will wildlife or astrophotography be involved?  If so, you’re going to have to strain your back, anger the airline staff, and enlist your travel partner to help, because there’s really no substitute for a long and heavy super-telephoto lens in this situation.  When I’m on safari or chasing a solar eclipse, I pack my massive 500mm lens into the larger of my two backpacks and accept my fate.  You’ll realize it was worth the effort when you get home and are able to share your amazing photos of a leopard in a tree or the sun’s corona on full display during a total solar eclipse.
      • For most other types of trips, you won’t need to pack a really long lens.  My general rule is to pack a range of zoom lenses that covers from fairly wide (about 16mm) through fairly long (about 300mm), including a couple of fast prime lenses for when the light is low and/or the very best optical quality is required.
    3. How much redundancy do you need on the trip?
      • Always bring a backup battery (or several) and a backup battery charger.  Murphy’s Rule as applied to travel photography guarantees that batteries will die just as you frame the shot of a lifetime.  Bring at least one extra.  And chargers are left in hotel rooms or in tented camps on the Serengeti with some regularity, and they tend to get fried when plugged into unusual power grids, so bring an extra one with you.
      • Don’t forget the little things.  Pack several power adapters of the type used in the countries where you’ll be traveling.  These get lost easily and can be hard to replace while traveling.  Bring twice as many memory cards as you think you’ll require; it’s easy to fill them up when you get to shooting a mountain gorilla or carnaval dancers.  If you plan to back up to a laptop or external hard drive, bring extra connecting cables.  While traveling, I back up to a second type of memory card using my camera’s second card slot, so I bring quite a few memory cards of both types with me.
      • Lenses are heavy and expensive, but they sometimes stop working, so if you’re on a particularly important trip you may want to bring several lenses in overlapping focal lengths.  That is, you could bring a wide-angle zoom lens and a wide-angle prime lens, plus a walkaround zoom lens and a “normal” prime lens (about 50mm for a full size sensor or about 35mm for a crop sensor), plus a telephoto zoom lens and a telephoto prime lens or two telephoto zooms with overlapping ranges.
      • If it’s a once-in-a-lifetime chance to build your portfolio with very special and irreplaceable images, I recommend bringing a backup camera in addition to your primary camera.  For a recent safari trip in East Africa, I brought two DSLR bodies as well as quite a few lenses so that I’d have a backup solution to any single point of failure.  The more exotic your destination, the more likely that dust, wind, salt, extreme heat or cold, and heavy shocks or drops will damage your gear, so for those amazing one-of-a-kind trips I suggest biting the bullet and carrying backups for any gear that could fail.
    4. What accessories do you need to accompany the rest of your gear?
      • Attach a UV filter to each of your lenses before you leave and keep it on to protect the front element of the lens throughout your trip.
      • Carry a polarizing filter and a range of neutral density filters in the correct diameters to fit at least your wide-angle lens and your walkaround lens.
      • For more on filters, read this post: Post on Filters
      • A flash unit is helpful to have on most trips, unless you’re sure there will be ample natural light or you’re willing to use your camera’s built-in flash.
      • A good lightweight travel tripod with a head and mounting plate that suit your needs is essential gear on many trips.
      • Don’t forget any special-purpose gear that you need for just this type of trip.  When I travel to see a solar eclipse, for example, I need to be sure I bring my solar filter that attaches to my super-telephoto lens.  I also need to bring my heavy-duty professional tripod instead of the lightweight one I typically carry on trips.
    5. How will you be shooting from day to day during the trip?
      • If you’ll have constant vehicle support or won’t be going far from your hotel, you may be able to make do with just the bag you brought on the plane.  Or you can bring along a small shoulder bag to carry just a few items for the day’s shoot.
      • Most of my trips involve considerable hiking and public transportation from day to day, so I either carry everything in my smaller backpack or bring it along in checked baggage during the flight.  Then I can transfer just the gear I need for each day’s shoot into the smaller pack, which makes life easier when hiking 10 or so miles per day.

For a safari you will need a long lens to capture small or distant wildlife.  I recommend bringing a beanbag for camera support instead of a tripod, as the latter cannot be used in a safari vehicle.  Be sure to bring an extra camera and lenses, and carry more batteries and memory cards than you think you’ll need.  Buy this photo

Of course, if you use a mirrorless camera with only a couple of compact lenses or an advanced point-and-shoot camera, you do not have to worry about many of these items, but still be sure to review the list above to ensure you bring all required accessories.

With an overall strategy tailored to your itinerary and shooting style, and careful attention to execution to ensure you don’t forget anything, it’s really not that difficult to pack just what gear you’ll need in a way that will allow you to enjoy your trip when you’re not shooting.  After all, travel is about gaining experiences, and not all of those experiences can or should be photographed.  Pack for your photography, but also for your overall travel enjoyment.

What are your hacks for packing your photo gear for a trip?  Please share your tips and tricks in the comments box here.

Calibration Time, Come On! [Encore Publication]: Why you should color-calibrate your display devices and how to do it

We tend to take for granted that the colors we perceive when we look at a scene will be captured faithfully by our camera’s sensor and the lens in front of it, and then rendered accurately in every stage of processing thereafter, from the memory card to the computer and to all our displays including laptops, tablets, smartphones, TVs, projectors, and even on these same types of displays owned by our friends with whom we share our images.  (We also expect prints made from our images to faithfully reproduce the colors from our camera’s sensor, but that is a story for another day.)

As photographers, we want to ensure the colors in our final images reflect as best we can the original colors we perceived when first framing the scene.  With proper color-calibration of the display screens we use to process our images, we can keep the colors as true and accurate as possible.  Buy this photo

The reality is that every step of the process of capturing, processing, and sharing an image leads to changes in the rendition of the colors.  No device can fully represent every intensity of every color that the human eye can see.  Camera manufacturers go to great lengths to ensure the colors captured by the camera’s sensor are as accurate as possible when you attach a lens made by the same company.  And when you use software such as Lightroom or Photoshop to post-process your images, you may take great pains to ensure the colors you see on your screen look very close to what you remember you saw when you shot the image in the first place.  But without careful attention, the final image we see later on our various display screens can look very different from device to device.  That’s because every type of display, and even every individual screen, has a unique way of representing every color.  So your PC’s monitor will display any given color just a bit differently than your phone’s screen will show that color.  And your friend’s phone’s screen will look a bit different, still (even if it’s the exact same brand and model as yours).

Fortunately, there is a simple and quite affordable way to standardize the representation of colors across all your devices.  It’s called color calibration, and for less than the cost of a good polarizing filter, say about $100, you can purchase a little doodad that can calibrate all your displays.  I use the X-Rite ColorMunki, which can be had for about $110 at retail.

To use a color calibration device, you install some software on your display(s) and then place the device on your display screen.  The software cycles the screen through displaying a wide range of colors, which are read and recorded by the calibration device.  Finally, the needed adjustments to bring your screen’s settings into line so they render colors as accurately as possible are saved in a special file.  From this point on, whenever your display device is started up, it reads the configuration information in that file and renders colors as closely to their actual appearance as it is physically capable of doing.

Because our eyes perceive colors differently in different ambient light conditions, you’ll want to have your calibration device take an ambient light reading for the typical lighting conditions that will be present while you’re using each display.  For example, if you use your laptop PC mostly when bright daylight is streaming into your kitchen, you’ll want to calibrate when those conditions are present.  You can even save different versions of the configuration file for different lighting conditions.

And because display devices do change over time, it’s a good idea to re-calibrate each device every few weeks to control for that.

If you’re serious about your photography, you want your images to look great not only on your own display screen(s), but also when viewed by other people on other types of devices or on the printed page.  Using a reliable color-calibration device helps ensure the colors in your images remain as accurate as possible through all the stages of processing and sharing until they leave your personal control.  This is a good practice that all photographers should employ.

How do you control for color accuracy in your images?  Please share your methods here!

Want to see other posts about post-processing your images?  Find them all here: Posts on Post-Processing.


Filtered Down to the Essentials [Encore Publication]: Why you should always have these filters in your bag

Filters are the Rodney Dangerfield of photographic gear: They don’t get enough respect.  Most photographers will begin to salivate when talking about the latest camera bodies or lenses and even plates or heads for our tripods, but we tend to think of filters as pedestrian items, if we think about them at all.  I nearly always make room in my bag for several filters, and I believe that using them properly is more important than what camera or even which lens I choose.  Let’s look into why these affordable little accessories are so important.

Three kinds of filters are essential gear for most photographers.  I’ll cover each type here.  Note that you must use a filter that is the correct size to attach to your lens.

It’s a good idea to keep a UV filter (also known as a haze filter) attached to your lenses at all times, as this helps protect the front element of the lens from fingerprints, moisture, and even scratches.  In addition to offering some physical protection for your lens, a good UV filter can also improve image quality when there is atmospheric haze or moisture in the air.  Use a good quality filter, though, as some can adversely affect your image quality.  I would recommend removing the UV filter when shooting with certain other combinations of filters, as the edges of the image can be cut off (vignetting) with too thick a stack of filters on the end of the lens.  In most cases, use of a UV filter does not affect the exposure more than about half a stop, so they can be used in most lighting conditions. I’ve had good luck with Hoya UV filters.  Always be sure to look at the specifications for your lens before buying any screw-on filter, because the diameter of the filter thread must match the size of the lens.

The second must-have type of filter is the circular polarizer.  A polarizing filter can reduce glaring reflections and can darken skies and enhance natural colors.  This little gadget is almost a secret weapon for making images that really pop.  Again, I like the Hoya products, which are thin, well made, and perform as they should.

It takes a bit of practice to learn to use a polarizing filter properly.  While looking through your camera’s viewfinder or LCD screen, turn the outer part of the filter slowly to see the effect.  The greater the angle between the light source (typically the sun) and the shooting direction, the bigger the effect of turning the outer ring of the filter.  You will observe as you rotate the outer ring of the filter that the sky, clouds, and any bodies of water will transform quite dramatically.  When you see the effect you like best, overshoot a little bit and then rotate the outer ring back to where you want it.  In most cases, I recommend not using the maximum amount of polarizing effect when there are reflections from water or glass, because you usually want some of these reflections to be visible in your final image, but this is art, not science, so you get to choose the effect you want.  Note that using a polarizing filter will cost you about 2-3 stops of exposure.  You will have to use a slower shutter speed and/or faster ISO or wider aperture, so use a steady tripod if the lighting conditions are dim.

Here’s an example of a shooting situation in which a polarizing filter can really make an image pop.  For this shot of the imposing peaks in Southern Patagonia’s Torres del Paine National Park, I rotated the polarizer to about 2/3 of its maximum effect to darken the sky, make the clouds more dramatic, and bring out the bright sheer faces of the granite peaks.

A circular polarizing filter makes a big difference when shooting mountains, skies, and/or bodies of water.  Buy this photo

The final essential filter is the neutral density (ND) filter.  These reduce the amount of light that reaches the camera’s sensor, so you can use slower shutter speeds to blur motion, or so you can use a wider aperture to get a shallow depth-of-field, even in bright sunlight.  ND filters come in different strengths as designated by the number in the filter’s specifications.  For example, an ND2 filter blocks 1/2 the light for a one-stop reduction in exposure, while an ND8 filter blocks 7/8 of the light for a three-stop reduction in exposure.  It’s a good idea to carry a range of ND filters for each lens you plan to use in the field.  A newer type of ND filter even allows for variable adjustment of the strength of the ND effect with just one filter, but these tend to be expensive.

A classic example of a situation in which you’d want to use an ND filter is when shooting moving water in bright lighting conditions.  You may want to use a longer shutter speed to blur the water, but even at your camera’s lowest ISO setting and your lens’ smallest aperture there could still be too much light for a slow shutter speed.  Mounting an ND8 filter to your lens will allow you to use a shutter speed eight times longer than without the filter, so for example you could move from shooting at 1/30 of a second to 1/4 of a second.

Here’s a photo of my younger daughter by a waterfall in Yosemite National Park.  The image was made in the early afternoon under very bright sunlight, bright enough that even using my camera’s slowest native ISO sensitivity and my lens’s most narrow aperture, I would still have had to use a shutter speed of 1/60 of a second, which would have frozen the water in the falls.  Using an ND8 filter, however, I was able to slow down the shutter speed to 1/8 of a second, long enough to impart a nice blur to the falling water.

 Use of a neutral density filter allowed me to blur the falling water even under very bright lighting conditions.  Buy this photo

I recommend carrying a kit containing several ND filters of different strengths for each lens you plan to use for landscape images.  Once again, make sure the diameter of the filter matches the diameter of the lens you intend to fit it to.

Note that there’s another type of ND filter called the “graduated ND filter,” and this filter varies the light-blocking effect from one end of the filter to the other end.  I used to use this type of filter quite often, but in this digital era I find it usually works just as well to simulate the effect of a graduated ND filter using post-processing software later.

Armed with these three types of filters, you will be prepared to create the images you have in your mind, even under challenging shooting conditions.  Happily, filters are small, light, and not terribly expensive, making them one of the better values we photographers can find.

Which filters do you always carry, and when have you found them most useful?  Any tips or tricks on how to use filters for the best results?  Please leave a comment in the box after this post to share your thoughts.

Want to see more posts about photography gear?  Find them all here: Posts on Gear.


Beyond the Auto Mode [Encore Publication]: Take control of your images by learning to manually set exposure, focus, and more

Travel photography is so exciting and satisfying in part because it requires us to capture every kind of image in all kinds of shooting environments.  You could be heading out to shoot landscapes when suddenly a rare sighting of an animal transforms your activity into a wildlife shoot.  Or you may be on the road for your next destination when you stumble upon a colorful local festival, and now you’re shooting portraits of the revelers.  This rich diversity of subjects also creates one of the biggest challenges for travel photographers: how to be prepared for anything that comes our way.  For beginning photographers there is some comfort in using the Auto mode that nearly every camera offers.  After all, we’re more likely to get an acceptable shot this way, when the subject turns quickly from fast action to landscapes to the low light of evening, or to an indoor performance.  But in most cases, your camera’s Auto mode, which attempts to make its best guesses as to what settings to use given existing conditions, will yield only acceptable photos and not the striking and memorable images we’re after.

There is a better way.  Take control of your images by learning how to manually set your exposure, focus, and other aspects of your photo.  All advanced point-and-shoot cameras and all mirrorless and DSLR cameras allow you to set most functions manually.  Even some basic point-and-shoot models have a way to go manual, but often this will involve options buried deep in a menu somewhere.  And there are apps available for both iOS and Android smart phones that allow you to take manual control over your phone’s camera.  I use an iPhone 6S, and I’ve found the “ProCam 4” app to work very nicely for providing control over the phone’s camera setting for exposure, focus, and flash.  You can find it for less than $5 on the Apple App Store: ProCam 4 App.  Even without using an app, most smart phone cameras do allow you to override the automatic settings by clicking on the part of the image you want to be in focus and used for the exposure setting; usually you can also set the exposure based on a different area of the image from the area that you want to be in focus.  But the dedicated apps will give you greater control, as they allow you to choose the shutter speed, aperture (when not fixed), and ISO for each shot.

For this image of a whirling dervish in Goreme, Turkey, I wanted to blur the dancer so as to give a sense of the continual turning motion in the ceremony, so I used my camera’s shutter-priority exposure mode and selected a slower shutter speed.  Buy this photo

The key to successfully using your camera’s manual settings is to learn how they work and to practice at home, long before you actually take a trip.  Like anything else, selecting the settings we want on a camera takes practice.  In this digital era, it’s easier to learn because you can see the results of each setting immediately on your camera’s screen.  So dig out that camera user guide, or find it online, or search for a good tutorial.  But do learn how to adjust the key settings manually.

The first manual setting every photographer should learn is how to turn off your camera’s flash.  This sounds very basic, but I’m always amazed to see so many flashes going off in inappropriate places: museums that don’t allow flash photography, cultural performances, sports stadiums where the subject is thousands of feet away from the camera (the flash will only provide acceptable lighting for a few dozen feet, at most), and even the shy octopus exhibit at our local aquarium.  Believe me, you do not want to flash the octopus.  So learn how to turn your flash off, and be sure you actually do turn it off when you’re in a venue where flash is inappropriate or won’t help your image be better exposed.  Remember that glass reflects light, so you don’t want your flash on when shooting through windows of a vehicle or the glass windows of animal enclosures at zoos or aquariums.

Next, learn how to set your camera’s exposure manually.  The light meters built into today’s cameras are very smart, but they are also easily fooled by tricky lighting conditions.  The most common problem is backlighting.  If your subject is lit from behind, as many outdoor subjects are, your camera’s auto mode will likely expose for the brighter background and will leave your main subject underexposed.  You can adjust for this is several ways.  It may be good enough to just use your camera’s exposure compensation button to dial in, say, one extra stop of exposure.  Use your camera’s LCD screen and (if it has one) the histogram, to see how the subject is exposed with varying levels of compensation.  In some cases (if your main subject is quite close to the camera), you can use fill flash to fix backlighting problems.  To do so, manually turn on your camera’s flash, or attach a separate flash unit, and choose the setting for “fill flash” or “balanced TTL” (through the lens) flash mode.  Again, check exposure using your camera’s screen and histogram.  I find I usually get good results in tricky lighting conditions by using my camera’s spot metering mode, which tells the camera’s meter to use only the very center (or whatever area I select) of the image when choosing the exposure.

Other than allowing you to properly expose your main subject, manually setting the exposure also gives you control over what combination of shutter speed (how long the exposure lasts), aperture (how wide the lens is open), and ISO (how sensitive the camera is to light) you want for each shot.  If you’re shooting fast moving action like sports or wildlife, you will likely want to choose a fast shutter speed to freeze the motion (unless you want a blur effect as an artistic choice).  If you’re photographing a waterfall or sky and want to get some nice blurring of the water and/or clouds, you will probably want to choose a slower shutter speed.  Many times you want only certain parts of the image to be in focus.  A wide aperture (low F-stop number such as f/1.8) will give you a shallow depth-of-field, allowing only one part of the image to be in focus and blurring the other parts.  Conversely, a narrow aperture (high F-stop number such as f/16) will allow all parts of the photo to be in focus.  The final element determining exposure is the sensitivity of the camera’s sensor, measured by an ISO number.  Select a higher ISO (such as 1600 or above) only when you really need the extra sensitivity for very low-light subjects when a longer shutter speed or wider aperture is not suitable.  When you use very high ISO settings, the image will tend to have a lot of noise.  Today’s cameras are getting better at limiting noise at high ISO settings, and there are ways to reduce some of the effects of the noise using post-processing software, so my approach is to use as high an ISO as is required after considering the range of available shutter speeds and apertures.

To capture these professional beach volleyball players in sharp focus and to freeze the moment, I selected single-focus-point focus mode and chose the exact spot in the viewfinder where the players would be positioned, and also used my camera’s shutter-priority exposure mode to select a very fast shutter speed.  Buy this photo

The other major type of manual setting that you need to know how to use is focus.  Most cameras today do a pretty good job of choosing the right part of the image to focus on, but they often need some help from the photographer.  From simple smart phone cameras through professional DSLRs, the autofocus function almost always lets the photographer select what part of the image they want to be in focus.  If you keep your camera in fully autofocus mode and don’t help by selecting where your main subject is, it may very well guess incorrectly and put another part of the image as the center of focus.  So, learn how to select the focus point even while letting your camera’s autofocus mechanism actually choose the focus distance.  Sometimes a camera’s autofocus capability may not work for the conditions under which you’re shooting, and in these cases you need to turn off autofocus completely, and focus in manual mode.  Some instances when this is necessary are when shooting in very low light conditions, or when shooting in poor contrast environments (for example, your subject’s texture looks a lot like that of its background, or you’re shooting into the bright sun).  In these cases, turn off the autofocus function and adjust focus manually until the subject looks sharp.

It’s still fine to walk around during your travels with your camera set in fully Auto mode, just in case something very unexpected comes up.  But do know how to set the main functions manually so you’ll get the best possible images in the 95% of the shooting situations when you do have time to set up first.

Want to read other posts about photographic techniques?  Find them all here: http://www.to-travel-hopefully.com/category/techniques/

Do you have tips and tricks you can share on manually adjusting the camera’s settings to get great shots?  How about a time you kept the camera on Auto mode and got disappointing results?  Please share your thoughts using the comment box at the end of this post.

Focus on Dia de los Muertos [Encore Publication]: When a local festival takes you around the world

Sometimes you can attend a local event and feel as though you’re transported to a far-off part of the world, or even feel like you’re traveling across a wide cultural tableau of a whole region.  That’s how I felt while shooting last year’s Dia de los Muertas (Day of the Dead) celebrations in downtown San Jose.  Although I had traveled only half an hour from my house, this festival celebrating life and honoring departed relatives took me on a cultural and historic journey across all of Latin America and beyond.  In today’s post I will present a simple photo essay featuring some of my favorite images from this festival.
An Aztec dancer helps convene the day’s celebrations.  Buy this photo

The Aztec fire dance’s origins date back to pre-Columbian times.  Buy this photo

This shrine, erected on the back of a pickup truck, is dedicated to the memory of the owner’s deceased father and brother.  Buy this photo

The “elegant skull” face painting is an element of Day of the Dead celebrations in several Latin American countries.  Buy this photo

These lovely ladies awoke at 5 AM to paint their own faces and those of their family members.  Buy this photo

More wonderful face art.  Buy this photo

I love the cultural juxtaposition of Hello Kitty with Day of the Dead.  Buy this photo

Although this portrait of a couple also worked well in color, I love the dramatic impact it makes when converted to a high-contrast black-and-white image.  Buy this photo

Elegant and beautiful!  Buy this photo

I hope you’ve enjoyed this brief compilation of images from this recent festival and that it inspires you to seek out Day of the Dead celebrations near your own home.

What are some of your favorite cultural traditions?  Have you captured these traditions using your camera?  Please share your experiences in the comments box.

Want to see other posts about what to shoot while traveling and near home?  Find them all here: http://www.to-travel-hopefully.com/category/travel/shoot/


Comic Relief [Encore Publication]: A photo essay of images from SF Comic Con 2018

As a professional travel photographer, I’m at my happiest when I get to seek out new cultural experiences and work with the people I meet to capture their culture in images.  Sometimes this discovery takes place halfway around the world, and other times it happens very close to home.  This weekend I had the opportunity to make portraits at San Francisco Comic Con 2018 of some of the thousands of attendees who portray their favorite comic book characters.  This was my introduction to the culture of “cosplay”, where people dress up as characters and bring them to life through their performances.  Many cosplayers design and make their own costumes, a laborious process, and interpret the characters’ personalities through their acting abilities.  I was extremely impressed by the wide range of costumes, props, and makeup as well as the cosplayers’ passion and skill.  Comic Cons are also fun events to shoot because the cosplayers love to have their work captured in images.

In today’s post I present some of my favorite images from SF Comic Con 2018 in the form of a photo essay.  Note that all of these images and many others from this event are available to view and purchase on my website.  Click on any image to see a larger version on my site.

A few words about how these images were made:

  1. Any convention is a crowded and bustling affair, and comic cons are no exception.  To achieve as uncluttered a background as possible for my portraits, I engaged cosplayers in conversation and then asked them if they would pose in a less crowded area for a portrait.  Nearly everyone said yes, because they are thrilled to be photographed in costume.  I would then direct them to a wall, alcove, or other fairly clean background before starting to shoot.
  2. My gear was very simple.  I shot with a single DSLR body and just one lens, a 24-85mm “walkaround” zoom.
  3. I shot with available light only.  While quite a few photographers in attendance were using flash or even dedicated studio lights, in my opinion that was a miscalculation because the fluorescent lighting in the convention center was challenging to match with a flash.  This situation results in “mixed lighting”, where the subject is lit by lights of very different color temperatures.  It is often unappealing to look at and difficult to post-process.
  4. I used a high ISO setting, a moderate aperture, and a fairly fast shutter speed.
  5. For variety, I captured a range of poses from full-body to half-length to headshots.  I tried to include all of the subjects’ elaborate props.  If they were part of a group, I captured both group and individual portraits.
  6. This type of shoot requires an intensive effort in post-processing.  I adjusted color balance carefully to try to gain a pleasing and accurate tonal range given the unattractive fluorescent lighting under which the photos were shot.  I processed for a “high key” (bright subject against white background) effect so as to render the venue’s ugly walls as true white.  With effort, harsh shadows can also be reduced during post-processing.

I hope you enjoyed viewing these images from my first foray into capturing cosplayers as much as I enjoyed making them.  I will surely be seeking out and shooting upcoming comic cons, as these are among the more rewarding events to cover.

Have you shot comic cons or cosplay events?  Please share your experiences and your tips and tricks here.

Want to read more posts about what to shoot while traveling or near home?  Find them all here: Posts about what to shoot.

Sneak Preview [Encore Publication]: Behind the scenes on my ongoing Human/Machine Dance Project

How does the human body move when interacting with artificial intelligence technologies? This is the question that my collaborator Carly Lave embarks on a year-long Fulbright grant to research. A talented dancer, choreographer, and scholar, Carly will present her research findings in visual form via a self-choreographed dance solo performance. I approached her to collaborate on a photography series informed by her research goals and artistry as a dancer. We explored several visual themes, each related to the timely question of how we humans will be transformed by increasing immersion into advanced technologies, including virtual reality, robotics, and interconnectivity. To complete this ongoing project, we will continue to collaborate across two continents during Carly’s research fellowship. Stay tuned!

In the meantime, I’d like to share a few early images from this work-in-process along with some words about how they were made.  It can be tricky to imagine a visual concept and realize it via photography, and all the more challenging when the concept is abstract like the ones Carly and I selected.  I’ll present four of our initial concepts, each illustrated with an image and a description of the techniques required to execute it.

  1. Virtual Reality Motion Study: Virtual meets reality as Carly’s body floats through the physical world while her motion is informed by her interactions with the virtual world playing inside her headset.This concept sounds simple but is quite difficult to execute photographically.  We wanted to capture Carly’s physical motion in the real world as she reacts to the experience of the VR world.  Images like these require a long time exposure (here about 15 seconds), which in turn necessitates shooting in a darkened photography studio.  I used a black backdrop and continuous LED lighting to illuminate Carly as she moved across the studio, with a single studio strobe light at the front right part of the set to capture her final pose at the end of the exposure.  The strobe was set to trigger as the camera’s shutter closed at the end of each shot (“rear curtain sync”).  Using this technique, Carly’s motion can be traced during the whole exposure but the vivid exposure is what we see last.  Considerable post-processing is then required to clean up the scene.
  2. Interconnectivity: Carly shared, “I found myself visualizing my body wrapped in cables coiled around my limbs and torso. I was thinking about the body in relation to embedded systems here, and how now all of our world is connected through cables either in the air or sea.”To shoot this visual concept, we used a dance studio with a mirrored wall.  Using different angles to obtain a variety of perspectives, I shot both Carly and her reflection as she improvised motion along the wall.  The technique conveys the impression of the interconnectedness between a human and a similar being across a network.  Post-processing was required to remove clutter and render the background as white.
  3. Human (de-)Evolution Series: A whimsical re-imagining of the classic ape-to-human evolution series, this montage asks us to consider whether technology contributes to or detracts from human evolution.This striking montage is actually quite straightforward to execute.  In a photography studio against a black backdrop, I shot images of Carly in each stage of the evolution series and then combined them using layers in Photoshop.
  4. Robotic Motion: Machines often perform the same tasks traditionally undertaken by humans, but the robot’s motion is constrained by its programming. How might the human dancer’s motion become similarly constrained if her movement is choreographed by programming instructions?For this concept, my job was fairly easy and Carly had to do the heavy lifting.  She choreographed movement indicative of robotic motion while I captured a series of images using a studio strobe light and a black fabric backdrop.

I hope this behind-the-scenes peek at my ongoing passion project will help inspire your own creative process.  It’s important to be personally and deeply invested in a project before you begin.  Select your partner(s) carefully and plan thoroughly.  Then the process becomes joyful and exhilarating as you begin to bring your concept to life!

Have you carried out a photography project?  Please share your key learnings–positive and otherwise–here!

Want to read more posts about what to photography while traveling or near home?  Find them all here: Posts about What to Shoot.


Portraits from Irish Pubs [Encore Publication]: Ireland’s trad music scene is a visual as well as an aural treat

The Republic of Ireland has undergone tremendous social and financial changes over the last 20 years.  It’s now indisputably a modern global society with a strong diversified economic engine.  Yet it’s also a happy truth that today, as in days of old, the pub remains at the center of Irish social life.  Far more than a simple watering hole, the local Irish pub, whether in the center of cosmopolitan Dublin or in a tiny coastal fishing village, is a gathering place where stories are shared, traditional music is played, old friends catch up, and new friends are made.  Oh, and a pint or two might just be downed.

Many pubs feature live traditional, or “trad,” music on a nightly basis.  The casual informality of Ireland’s pub scene allows local amateur musicians to sit in with seasoned pros and pass down the songs from old to young.  Members of the “audience” (it’s hard to distinguish between performers and audience when the sessions are so participatory) are invited to step up to the “stage” (usually just a table covered with pints of beer) to sing a song at any time.  This informality allows the travel photographer to get to know these wonderful musicians over a few pints and to make authentic portraits without feeling like we’re intruding.

Today’s post is a simple photo essay featuring portraits I made of musicians and fellow customers at a variety of pubs across Ireland (plus one in Scotland).  I will forgo the usual technical details except to remind you that when shooting portraits in low-light settings where the use of flash is impossible, that a good fast portrait lens should be used along with a high ISO setting.

My current favorite lens of all is my Nikon 85mm f/1.8G lens.  This is a classic portrait lens and provides a flattering perspective and great image quality when your subject is a human being.  I use it for nearly all of my portrait work these days.  But this lens also shines for nature and action photography where you don’t need a really long focal length.  It renders really lovely “bokeh,” or the soft quality of the out-of-focus parts of the image.

This young singer and fiddler who we met at Dublin’s famous O’Donoghue’s Pub was already a seasoned pro.  In this portrait I sought to capture her expressiveness with hand gestures.  Even without hearing her sing, the viewer can tell that she is expert at weaving stories.  Buy this photo

O’Donoghue’s is widely known as the spot where bands such as the Dubliners sparked the Irish folk music revival in the 1960s.  This band carries on the tradition, sharing songs old and new.  With a wide aperture comes shallow depth-of-field, so when photographing several people at one time you may have to choose which part of the image will be in focus.  Here I wanted to place the emphasis on the guitarist, so the other players are in softer focus.  Buy this photo

Another of Dublin’s great spots for trad music is the Cobblestone Pub.  On this night they were holding a very casual session, where all musicians were invited to come and play some tunes together.  The informality gave me a chance to get to know most of the players over the course of the evening and to make portraits without feeling like an intruder.  Again, the shallow depth-of-field required artistic choices about which subject would be in sharp focus and which would be in softer focus.  Buy this photo

In lively Kenmare, we wandered into a pub where a fabulous folksinger was performing many of the Irish songs I remember from childhood in Boston.  I chatted with Pat during his set breaks and bought a couple of his CDs.  He was a great subject for some expressive portraits, too.  Buy this photo

We didn’t have to leave our hotel on our first night in Killarney to hear some wonderful trad music.  This trio played many of our favorite songs right in the hotel’s pub, and they got most of the audience up to sing and dance along.  Buy this photo

Surprisingly, we heard only one rendition of Cockles and Mussels (aka “Sweet Molly Malone”) during our whole stay in Ireland.  This brave soul stood up in front of the crowd to sing that old standard.  Buy this photo

There’s nothing like watching an Irish crowd respond to the playing and singing of “The Wild Rover” to get one’s blood pumping.  Be ready to capture action in the “audience” as well as on the “stage.”  Buy this photo

Our second night in Killarney brought us into the center of town to an old and lively pub.  The table next to ours had four generations of a local family in attendance, each enjoying the musical set in their own way.  The oldest generation was my favorite.  Buy this photo

I got to know this fiddler over the course of the evening in Killarney.  During the break between sets she was kind enough to let me make her portrait.  It can be difficult in these crowded settings to avoid a cluttered background, but using a wide aperture for a shallow depth-of-field can help, as can careful post-processing.  Buy this photo

Elements I look for when making a portrait are faces with character and colorful details.  I found both with this accordion player and his beautiful instrument.  Buy this photo


The tiny fishing hamlet of Dingle has a population of just 1900 people, yet it somehow supports 52 lively pubs.  My kind of town!  Over pints of ale and shots of local whiskey in this colorful old pub, we made new friends from across the street and from as far away as Newfoundland.  This portrait of a musician was made almost entirely with light from the fireplace.  Buy this photo

The Scottish traditional music scene is as vibrant as Ireland’s, as evidenced by this band we heard at Edinburgh’s Sandy Bell’s Pub.  This place was bustling and extremely crowded.  The cluttered background somehow doesn’t detract too much from the power of this portrait.  Buy this photo

Have you traveled in Ireland or Scotland?  Do you have favorite portraits of the generous and friendly people you encountered there?  Please share your thoughts in the comment box.

Want to read more posts about what to shoot while traveling?  Find them all here: Posts on What to Shoot.

Focus on Chile and Argentina [Encore Publication]: Rugged mountain landscapes and distinctive cultural experiences abound

Our wonderful 3.5-week adventure took us from Santiago, where we visited our older daughter, to fabled Easter Island, sophisticated Buenos Aires, the mystical island of Chiloe, and then through much of Southern Patagonia.  For much of this itinerary we were traveling with a local leader and a small group of fellow travelers on a trip operated by Overseas Adventure Travel (OAT).  The knowledge of our local trip leader coupled with the small group size allowed us to travel to largely untouristed areas and to engage in authentic cultural interactions that would not have been easy to set up on our own and would have been impractical to include on larger group trips.  Such a format offers amazing opportunities for photographers, as it provides access to an array of experiences beyond the “postcard-type” shots.  From home-hosted meals to wildlife encounters to hiking across glaciers and on the slopes of a volcano, this trip packed a lot of memorable moments–and images–into just a few weeks’ time.

Easter Island is a small and extremely remote island, accessible via daily flights from Santiago.  It is, of course, famed for the monolithic human figures carved by the Rapa Nui people centuries ago, called moai, that are scattered across the island.  But there is a lot more to Easter Island than the moai, including a distinctive Polynesian culture and a wealth of natural beauty.

When photographing iconic sites like this grouping of moai on Easter Island, look for a different perspective.  Here, I have framed the image from an unusual vantage point, shooting with a telephoto lens to compress the moai so that they appear closer together and more imposing than they would if framed from directly in front.   Buy this photo on my website

From Easter Island we traveled to Argentina’s capital city of Buenos Aires.  This city has a high-energy feel, offers a huge array of food specialties, and is graced with stately European style avenues and architecture.


Buenos Aires’ colorful and historic barrio (neighborhood) of La Boca is the birthplace of the tango.  To give a sense of the dance’s motion, I shot with a slightly slower shutter speed.  The rich colors of La Boca can be brought out in post-processing with subtle adjustments to the vibrance and/or saturation tools in image editing software such as Lightroom.  Buy this photo on my website

A stay in the Alpine style village of San Carlos de Bariloche included fascinating interactions with Hans, who as a German boy growing up in Bariloche uncovered his father’s Nazi past and wrote several scholarly books about Nazis living in Argentina; and with Christina, a Mapuche Indian grandmother, civil rights activist, and jewelry maker.  We then crossed overland toward the border with Chile, stopping en route for a home-hosted lunch of grilled lamb and for some horseback ridingon a family estancia (ranch).

Chango, the family patriarch, saddles up the horses for a ranch ride.  An environmental portrait includes not only the person who is the subject of the portrait, but also enough of the surroundings to give a deeper sense of who the person is.  A classic portrait lens would also work nicely for a shot like this one, but to emphasize the relationship between man and horse, and to give some separation between the subject and the background, I chose a longer telephoto lens.  Buy this photo on my website


An otherworldly sight: a lenticular cloud forms on the summit of Osorno Volcano as we were hiking on the slopes.  To capture high-contrast scenes like this one, it often helps to underexpose by about one stop to preserve the detail in the highlights.  Then the shadow detail can be brought back later during post-processing. Buy this photo on my website

The same Osorno Volcano viewed from Vicente Perez Rosales National Park.  To blur the water, I placed the camera on a steady tripod and used a longer shutter speed.  Attaching a neutral density filter to the lens can help by reducing the amount of light reaching the camera’s sensor, thus allowing a longer shutter speed even in bright daylight. Buy this photo on my website

A ferry crossing from mainland Chile brought us to the island of Chiloe for an overnight stay.  Chiloe exudes a strong sense of its mystical past and is characterized by colorful houses rising on stilts out of the water.

Characteristic brightly colored Chilote houses built on stilts.  Choose a vantage point from which the houses can be framed in a pleasing manner, shoot with a wide angle lens to include more of the houses, and add a bit of vibrance in post-processing to bring out the saturated colors. Buy this photo on my website

The island of Chiloe includes a fascinating bird preserve reachable by small boat.  Here is a penguin couple out strolling in their formal wear.  To stabilize the camera and long telephoto lens while shooting from a heavily rocking small boat, use a fast shutter speed (choosing a higher ISO can help), turn on vibration reduction if your lens or camera offers it, and release the shutter at the instant when the boat reaches the top of its cycle of rocking.  It’s helpful to use a monopod if you have one (I didn’t) and to shoot a continuous burst of images so that you are more likely to get a good sharp one. Buy this photo on my website

After traveling south all the way to the Strait of Magellan (the farthest south I have ever stood, with Antarctica the only land mass below it), we continued northwest until we reached Torres del Paine National Park, any photographer’s dream destination.  The photographic possibilities here are endless, with rugged mountains meeting brilliant blue glaciers and clear lakes.  We had the opportunity to view this breathtaking beauty from various hikes and by boat.

Blue ice on Lago Grey’s glacier imitates the mountain peaks soaring behind.  I used a polarizing filter on the lens to bring out the intense blues in the glacier and sky, but had to be careful not to remove too much of the reflection in the water of the lake. Buy this photo on my website

Alpenglow lights the peaks behind Lago Grey and its glacier.  To make this image, I had to forego much of a really good dinner by shooting through the mealtime out on the deck of our lodge.  With the camera on a steady tripod, I shot a series of images using different exposures, a process known as bracketing.  Later, these shots can be blended together using the high dynamic range (HDR) tools in software such as Lightroom or Photoshop. Buy this photo on my website

Heading out of Torres del Paine through the heart of Patagonia, our adventure was not yet over.  We still had another national park (Los Glacieres) to visit on the Argentinian side before returning to Buenos Aires for our farewell dinner and our flights back home.

Patagonian Paradise.  Don’t forget to include yourself and your traveling companions in some of your images.  This one, made as we headed out of Torres del Paine National Park, made a great holiday card. Buy this photo on my website

Have you visited Patagonia, the capital cities of Argentina and Chile, Easter Island, or Chiloe Island?  What did you find most memorable?  Please add your suggestions for places to visit or subjects to shoot.  Just enter your thoughts in the comment box.

Want to read more posts about travel photography destinations?  Find them all here: Posts on Destinations.


Every Day I Write the Book [Encore Publication]: Even in the digital world, there’s a place for a hardcover photo book from your trip

In the brave new digital world, we have a lot of ways to share our travel photos after (and sometimes even before) we return from the trip: social media, on-screen slideshows, video montages, and of course the enduringly popular paper print.  Even with all of these very immediate sharing options, one of my favorite formats for preserving my travel images is the hardcopy photo book, and today there are more choices than ever before regarding how to create these wonderful keepsakes.

Our living room bookshelf and coffee table are home to more than a dozen photo books, each one showcasing the images and preserving the often fleeting memories of the details of a major trip we’ve taken.  Here’s why I love this method of sharing travel photography and how to create your own photo books.

img_3497

The leather cover of a photo book showcasing our recent travels in Turkey.

Why create a photo book?  Over time, new digital formats replace existing ones, and the very old ones become obsolete.  Within about 20 years, it is quite likely that none of our present formats of storing data will still be readable.  The printed page has much more staying power.  It is estimated that photos printed on high quality paper using high quality inks, and stored away from direct sunlight, can last for 100 years.  I’m a big fan of framed prints, as well, but a photo book is more cost-effective and space-efficient as a means to preserve many more photos than we could easily hang on our walls.  And because photo books can include customized captions to accompany the included images, they’re a great reference source for refreshing our memories about what we saw, when, and where.  Finally, photo books look great and are fun conversation-starters to tell the story of our travels when friends and family come to visit.

How do you create a photo book?  There are a number of methods, but unless you are a scrapbooker or handy with bookbinding, all of them involve sending your specifications and images to a vendor that will print the book, bind it, and mail it to you.  Some software packages, including Lightroom, have built-in modules for creating photo books.  And most photo sharing websites, including SmugMug (a fabulous site used by many professionals including me), Snapfish, Shutterfly, and Apple Photos, allow you to create and purchase photo books from your images.  These services vary in features, price, and quality, so shop carefully.  Most of my past photo books were created using Snapfish, but I am transitioning to using Lightroom’s and SmugMug’s services instead.  I will report on the results in a future post.

img_3493

Good book-creation software should allow you to choose from a wide range of formats on each page to display one or several photos plus text.

The basic process works similarly for any of these services.  You specify the book size, cover material, paper quality, printing quality, and other basic parameters for your book.  Then, you fill the pages of the book with your photos, specifying the layout you want for each page.  You can add captions for individual images or series of images, and you may be able to add various special effects.  At the end of the process, you place your order for the book to be printed and mailed to you.  Using the service offered by Blurb, which is available via SmugMug and Lightroom, you can self-publish a large or small print run of books and make them available for sale on Amazon or directly on your own website.

lightroom-book-module
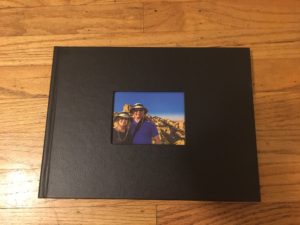
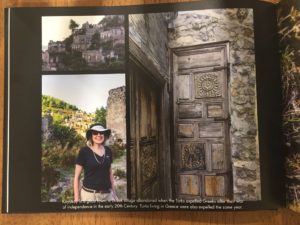
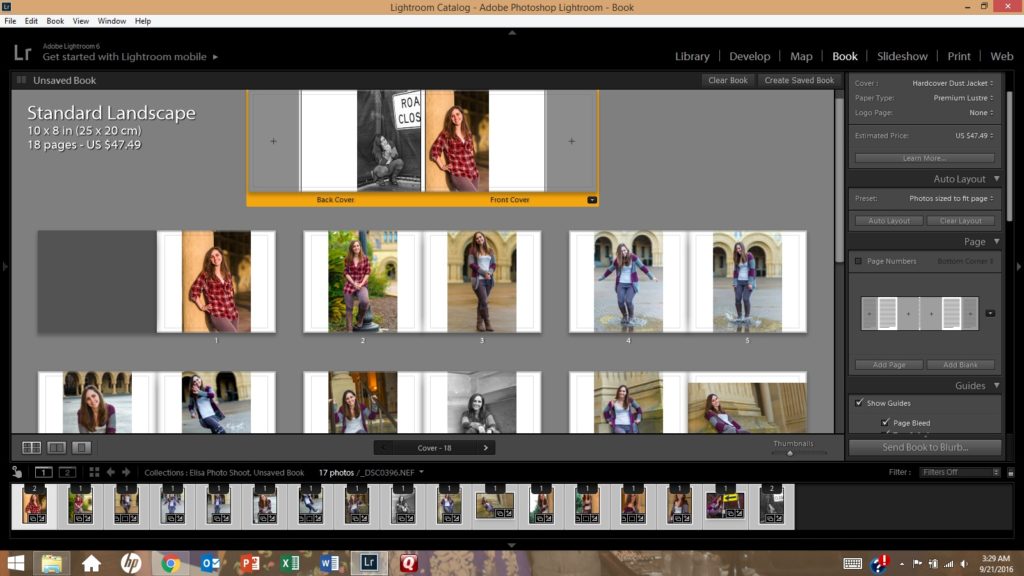
The process of creating a photo book using Lightroom’s Book module (shown here) is fairly straightforward.  It’s even more intuitive using an online service such as Snapfish or Shutterfly.

When you receive your photo book a few days after placing your order, you’ll have a keepsake suitable for sharing with visitors and for preserving your own precious travel memories.

img_3494

A two-page spread in our Turkey photo book showcases several images of the incredible rock formations in the Cappadocia region.

Have you created photo books from your travel images?  Which service did you use and how was your experience?  Please share your thoughts here.

Interested in reading more posts about sharing your travel images?  Click here to see them all: http://www.to-travel-hopefully.com/category/travel/share/.

Focus on 2018 SF Pride Parade [Encore Publication]: Capturing diversity, purpose, and intimacy

It’s no surprise that San Francisco hosts one of the world’s oldest and largest LGBTQ Pride events in the world.  Each year, the parade and festival grow bigger and better attended.  SF Pride is one of my favorite annual events in my home region, the SF Bay Area, and what I love the most about this exuberant celebration is its remarkable focus on the central human values of diversity, inclusion, activism, hope, and love.  In today’s post, I share some of my favorite images from this year’s Pride Parade, along with a few words about how the images were made.  The goal is to showcase the incredible diversity and sense of social purpose of the participants and observers at this grand celebration, while also striving to capture the small, more intimate, moments.  Remember that you can view–and purchase–all of these images as well as many more by clicking on any of the images in this post.

In a frenzied environment like that of most festivals, parades, and street fairs, it can be a challenge to make a nice clean portrait with an uncluttered background.  Sometimes it’s possible to relocate the subject to an area with a clean and clutter-free background, but most often (as with this portrait) that isn’t feasible.  In those cases, my best practices are to use a moderate telephoto “portrait” lens, select a wide aperture (small F-stop number) to throw the background into soft focus, get in close to the subject, and use a touch of post-crop vignetting during post-processing.  

Huge festivals and celebrations such as SF Pride can be overwhelming, with hundreds of thousands of participants and observers present.  I strive to capture the smaller, more intimate, moments within this gigantic environment.  Here I captured a beautiful portrait of two participants sharing their love, which I think encapsulates the entire meaning of Pride events around the world.  I had been chatting with these two people and had obtained their permission to photograph them before making this image.  I used a medium telephoto “portrait” lens and got in close to isolate the couple from the busy background.

Color and texture play a huge role in photographic composition and expression.  As photographers, we’re very aware of these factors when we compose landscapes or nature scenes, but even when making a portrait, we should always be considering the mood evoked by the colors, patterns, and textures in the scene.  I love this portrait for its moody use of the similar shades of orange-red offset against the multiple colors of the flowers and the cigarette.  This is an image that tells a story, but that also leaves most of the story untold.

Another intimate portrait, this one made of a young woman doing yoga poses while waiting to march in the parade.  She had an adorable sense of humor and expressive face, which, coupled with her offbeat outfit, made a great closeup portrait.  Don’t be afraid to get in close to your subject, but always get to know them and ask permission first.

An iconic Pride scene, this portrait was made with a longer telephoto lens, its use made necessary by the greater distance to the parade float in the middle of a wide street.  While I prefer to get up-close and personal with my subjects, and to get to know them before shooting, sometimes we have to shoot from farther away, such as during a fast-moving and crowded parade.  It’s therefore important to have the gear and expertise to make portraits from any range.  Even when shooting from farther away, though, my key portrait rules still apply: try to capture the portrait with as uncluttered a background as possible, use a wide aperture to isolate the main subject from the background, and apply a bit of post-crop vignetting during post-processing.

It can be tricky to try to capture nudity in a tasteful way suitable for sharing and selling to broad audiences.  I spent some time chatting with these two activists to get to know them and to understand their cause–overturning San Francisco’s ban on public nudity–before starting to shoot.  Even though they had given me permission to photograph them nude (which is an important courtesy all photographers should follow, although no permission is legally required to photograph people in a public space in the US), my market for images containing graphic nudity is small, so I strive to capture scenes that tell the story but with implied nudity rather than graphic nudity.  Here I found a vantage point that allowed the subjects’ arms to strategically cover certain parts of their bodies.  The resulting portrait conveys the story of their purpose and gets across the idea of their nudity, but is still shareable and sell-able to a broad market.

Another close-up portrait, using the same techniques I shared earlier in this post.

Another of my favorite portraits from the day, this one also tells a small-scale, intimate story, conveyed by getting in close and isolating the subjects from the busy background.  The end result is a sense that these two people are celebrating their own story, even in the midst of the bustling celebration going on around them.

I met this young woman in a very crowded space, but fortunately I had the opportunity to walk her to a less cluttered space to make her portrait.  I’m always on the lookout for quieter and cleaner spaces when shooting festivals and celebrations.  A few steps was all it took for us to find this simple, clean background, allowing the portrait to really pop.

Group portraits pose a special challenge in busy public spaces: how to capture all the group members in crisp focus while also trying to isolate them from the cluttered background.  Here I used a medium aperture to keep the people in sharp focus while slightly softening the background, but since a very wide aperture cannot be used for groups, the softening effect will be mild.  As a result, it’s especially important when making these group portraits to seek an interesting, complementary, or clean background.

As their float passed by in the staging and assembly area before the official start of the parade, I observed an opportunity to capture this quiet scene of one woman helping to apply her friend’s makeup.  I used a moderate telephoto lens and shot several frames to increase the odds of getting a clean and interesting shot.

When making portraits of kids or seated people, it’s a good practice to get down to their level.  Getting in close is also usually an effective technique, both to isolate the subject and to capture a sense of their spirit.

What are some of your favorite celebrations, and how do you capture their diversity in your images?  Please share your thoughts here.

Want to read more posts about what to shoot while traveling or close to home?  Find them all here: Posts on What to Shoot.

Brave New World [Encore Publication]: AI tools for photographers are improving

As a working professional photographer who also spent nearly 30 years as a technology manager/executive, I’ve long had an interest in the intersection between art/creativity and technology.  Recent attempts to marry photography with artificial intelligence have ranged from useful (facial recognition) to silly (Instagram filters) to hype (an expensive camera that several days after you shoot sends you only the images it deems worthy).  But as pattern matching algorithms improve and machine learning becomes more reliable, we are starting to see some amazing applications at the intersection of AI and photography.

I’ve recently been playing around with two good examples from Adobe.  Available only in the online version of Lightroom as “Technology Previews”, these tools enable you to search all your images for specific attributes and to have the AI automatically select what it determines to be your best photos.

To activate these new tools, go to https://lightroom.adobe.com, log in using your Adobe Creative Cloud credentials, and then click on the Lighroom logo in the upper left and select “Technology Previews” from the drop-down menu.  Click the check box next to “Best Photos”, and you’re good to go.

There are two main tools available at this time:

  1. Intelligent Photo Search: This is already very impressive technology.  You can search all or a subset of your images using any natural language term you want.  You could, for example, search all your images for photos of cats, or of mountains, or of dancers, or of waterfalls.  The more specific your search term is, the more accurate the results are likely to be.  When I searched for “waterfall” or for “dancer”, the AI seemed to get many or most of my photos featuring those themes, and only occasionally did it include photos that did not feature those themes.  When my search terms were broader, like “clouds” or “mountains”, the results were less accurate.  Aesthetic searches, say for the color “blue” or the effect of “motion” resulted in mostly accurate selections of images featuring these concepts.  While there are a few false matches, and likely quite a few more errors of omission of images that should have matched, this technology is quite useful in its current state.
  2. Best Photos Selection: This one is more of a work in process.  You can select any of your online galleries and ask the AI to select what it “thinks” the best photos are.  You can move a slider to increase or decrease how selective this tool is.  As a default, it shows you its picks for the top half of your photos, and then you can refine the selectivity to include more or fewer photos.  I tried this advanced technology using several of my recent photo galleries.  In most cases, it included my two or three favorite images in its initial selection of the top half of all the photos, but dropped them from its cut as I increased the selectivity.  In one gallery, for example, an image that was recently selected as a favorite by the editors of “National Geographic” was dropped by Adobe’s AI in the first cut of 10% of the images.  That image was quite artsy and abstract, and it’s not reasonable to expect that a machine could choose it as special.  Yet in another of my galleries, the AI included an image that recently won a major local competition in its final cut of just 1% of the images.  That image is a more traditional landscape that could reasonably be evaluated by a machine as a “good” photograph.

The bottom line here is that the applications of advanced technology to the art of photography are improving at an astonishing rate.  While neither of Adobe’s AI tools is as good as a human artist at selecting images by their features or their quality, both tools are off to an impressive start and one of them (Intelligent Photo Search) is already very usable.  I would not be surprised if, in a year or two, this technology advances to the point where machines can be making decisions about photography along with humans.  Both human and AI evaluations will have their strengths and weaknesses, and I can see them coexisting for the foreseeable future.  I recommend we all, as photographers, get steeped in this advanced technology and prepare for a future in which man and machine will both play a role in sophisticated evaluation of images.

Please Join Me for a Hands-on Portraiture Workshop: Learn to make beautiful portraits using natural light

Dear Readers,

If you’d like to learn how to make beautiful portraits using just natural light and a few simple techniques, then please join me for a 2-hour hands-on workshop/class that I’ll be teaching on Sunday, October 14.  Held in a scenic location in Mountain View, CA, this class will cover the basics of techniques and tools, and then we’ll practice by shooting in the field with a wonderful model. Learn more or register for a session here: Kyle’s workshop on portraiture using natural light.

In today’s post I am sharing a few favorite images that we shot during a recent session of this workshop.  Working with our wonderful model Roxy, I walked students through the entire process of creating stunning headshots, full-body and action portraits, and environmental portraits, all using only natural light and with a minimum of gear, fuss, and bother.  Students learned how to configure their cameras, what lenses to choose for different portrait situations, where to shoot, how to pose and direct the model, how to use light modifiers (reflectors and diffusers), and much more.

Learning to capture flattering and eye-catching headshots is a basic requirement for portrait photography.

We will also learn to make full-body and action shots that bring out our subject’s true personality.

Always be on the lookout for special and playful moments.

I emphasize the artistic as well as the technical aspects of portrait photography.

Roxy really went the extra mile by climbing a tree wearing heels and a red dress!  In my hands-on portrait workshops, we will collaborate with fun and creative models.  Students will gain skills and a comfort level in directing models, even if they have never worked with a model previously.

You can see more details and book your place in the class here: Kyle’s workshop on portraiture using natural light.


Focus on Yellowstone and Grand Teton [Enore Publication]: The oldest national park in the US remains one of the best photographic destinations

My last visit to Yellowstone National Park and its nearby cousin Grand Teton National Park was in June of 2011, and I am long overdue for a return trip.  These two gems of the US National Park system are among the world’s best photographic destinations.  Featuring an amazing array of mountain scenery, geothermal activity, wildlife, and human cultural records, Yellowstone and Grand Teton are, simply put, indispensable destinations for travel photographers.  In today’s post, let’s look at a few of my favorite images from the 2011 trip and discuss how they were made.  While the parks haven’t changed too much over the past six years, the state of the art of photographic gear certainly has changed a great deal.  Today’s cameras and lenses will afford photographers even more options for capturing the remarkable beauty of these parks.

Yellowstone N.P. has more geothermal activity than any other region of the world, and this activity manifests itself in many fascinating ways.  The Mammoth Terraces area of the park is known for its gloriously delicate and colorful silica terraces, including the one in this image.  For a great landscape image, it’s best to combine the main subject (here, the silica terraces) with striking foreground and/or background elements (here, the Teton Mountain Range, behind).  I used a circular polarizing filter to bring out the drama in the sky and the highlights in the mountain range, but I dialed back the polarizing effect a bit so as not to eliminate the gorgeous reflections in the pools.  Buy this photo

Yellowstone and Grand Teton N.P.’s are filled with fascinating wildlife, including American bison, elk, wolf, coyote, marmot, osprey, and many other mammal and bird species.  Here I’ve captured (in images, of course) an intrepid coyote that cut across our hiking trail.  For striking wildlife portraits, it’s best to use a medium to long telephoto lens so as not to have to get so close as to stress the animal (or risk your own safety).  Tack-sharp focus is important, and I always strive to frame the subject with as uncluttered a background as possible.  Buy this photo

Photographs that tell stories are perennial favorites.  I love the humor apparent in this image, which tells the story of a standoff between a large male bison and two park rangers attempting to shepherd a convoy of park visitors across the field to an interpretive nature program and barbecue dinner.  At the time this photo was made, the bison was winning.  Buy this photo

Just as in a portrait of a person, a wildlife portrait should capture the spirit of the subject.  This large marmot was sitting up as if to get a better look at us.  His expression is both comical and wise.  To maximize the chances of capturing just the right expression and position, frame the subject first, set the proper focus and exposure, and then shoot continuously for several seconds.  Buy this photo

The quaint Chapel of the Transfiguration, located amidst some of the world’s most lovely mountain scenery in Grand Teton N.P., is a wonderful photographic subject.  Here I framed the Tetons in the chapel’s window and fired an off-camera speedlight to illuminate the walls and altar of the church.  Buy this photo

The iconic Moulton Barn sits on a field in Grand Teton N.P. with the glory of the Teton Mountain Range arrayed behind it.  This landscape image was made with great care to ensure a pleasing composition including barn, mountains, and cloudy sky, as well as to expose for the wooden texture of the barn.  A small aperture (high F-stop number) was used to keep the entire scene in focus.  I used a polarizing filter to bring out the drama in the sky and mountains, as well as to concentrate the lovely green and blue colors.  The scene was further enhanced to achieve a pleasing balance through tone and saturation adjustments in post-processing.  Buy this photo

I was drawn to the texture and patterns of the cracked muddy ground in a geothermal area of Yellowstone N.P.  Composing the image to include just enough of the pattern as well as leading lines to draw the eye downrange, I converted it to black-and-white and made adjustments to contrast and tonal range in post-processing.  Buy this photo

Yellowstone’s Grand Prismatic Spring is a breathtaking feature that is almost impossible not to photograph well.  That said, there are techniques to capture it in all its glory.  Grand Prismatic Spring is one of the world’s few iconic subjects that is best photographed in the harsh light of mid-day, when the reflection from the direct sun most vibrantly brings out the array of colors.  Unless you can shoot it from above, looking directly down on the spring, it is best to include some foreground and background elements other than the spring itself, to provide context.  Here, I framed the spring through some lodgepole pine trees and included some forests and mountains in the background.  Buy this photo

Every visitor to Yellowstone N.P. will stop to observe some geyser eruptions.  But instead of just shooting straight on during mid-day into the eruption of a famous geyser like Old Faithful, seek out some of the lesser-known geysers at sunrise and sunset, and compose to include compositional elements other than the eruption itself.  This image, a favorite of mine, was made on a geyser basin at sunset.  I set up the camera on a steady tripod, set the exposure for a wide depth-of-field, and composed the scene to include the cracked earth and and the reflection of the sunset and eruption within the pools of sulfurous water.  Buy this photo

I can hardly wait to return to Yellowstone and Grand Teton National Parks!  I’m even more eager to visit during the winter than during the much more crowded summer months.  The rich array of scenery, wildlife, and otherworldly geothermal features elevate these parks to the pinnacle of travel photography destinations.

Have you visited Yellowstone and Grand Teton?  What did you find most remarkable?  What do you recommend your fellow travel photographers shoot while there, and what techniques do you use?  Please share your comments here.

Want to read other posts about travel photography destinations around the world?  Find them all here: Posts on Destinations.


Capturing a Sense of Place [Encore Publication]: A case study on how to integrate the natural surroundings into a creative photo shoot

Whether halfway around the world or in my own backyard, I strive to capture a strong sense of place in my work.  Most often we associate “sense of place” with images of indigenous people living close to the land, but this sensibility can be extended to incorporate the local natural surroundings into any creative images.  As I collaborate with local people close to my home in the San Francisco Bay Area, I’m always seeking ways to integrate the intense beauty of our landscapes into my work.  Today’s post is a case study on this theme based on a recent shoot I did with a favorite movement practitioner, mia.

mia is an amazingly intuitive artist who improvises her movement by sensing the energy of the space around her, so we chose a glorious and deserted stretch of the central California coastline near sunset for our shoot.  We built in plenty of time, more than two hours, and I gave mia lots of space to move with very little direction on my part.  I had all my gear ready and was wearing beach attire myself so I could just let her create her art while following her and capturing her expressive movement using my own creative approach.

In the following images, presented as a photo essay with just brief captions explaining how they were made, I share the results of this collaboration.  You can view or purchase all of these images and many more in this gallery: mia beach shoot photo gallery.

My gear was simple: two camera bodies, one with a fast prime normal lens (and occasionally with a fast prime portrait lens), the other with a wide-angle zoom lens.  Obviously, these optics were selected so that I could alternate between capturing mia up close and documenting her motion within the broader environment.  All images were made with natural light only and were handheld.  A general piece of advice is to shoot lots of frames to ensure capturing your model during the moments when they express just the right sensibility, gesture, or emotion.  Memory card storage space is cheap and abundant, so always shoot more images than you think you need.

Using the wide-angle lens, I captured images of mia interacting with the space around her.  This “environmental portrait” technique helps create a strong sense of place.

Even with the glorious color palette of a California coastline near sunset, there were times I chose to render the images in black-and-white to achieve a timeless graphics art look.

Environmental portraits, full-body shots, and head shots are not the only options when shooting creative portraits.  Here I chose to capture only mia’s legs as she traced a circle in the wet sand.  Sometimes the part can be more interesting than the whole.

Shooting from a low angle just above the water, I captured a powerful vision of mia interacting with the ocean.  Obviously one has to be careful of one’s gear when choosing to shoot so close to salt water, but I love the resulting image made from this perspective.

Not every image needs to be tack sharp.  I like to create a sense of motion by using a slow shutter speed to blur the movement.  Here I was able to achieve a slow enough shutter speed by using my camera’s slowest native ISO setting along with a very small aperture setting, but sometimes in very bright light a neutral density filter has to be used.

Note that when shooting a backlit subject it is crucial to choose an exposure based on the light coming from the model rather than allowing your camera’s meter to choose the exposure for you (unless you are trying to create a silhouette).  Two techniques suitable for this situation are spot-metering on your subject’s body or dialing in at least two stops of exposure compensation.

As sunset approached, I shot a series of images using both wide-angle and closeup perspectives.  This shot nicely captures mia from a medium distance, close enough to see some detail in her expression while far enough away to include some sense of place.

The setting sun can evoke very powerful emotions.  It can be risky to include the sun in your images, so tread carefully.  Careless shooting into the sun can cause permanent damage to both the photographer’s eyes and the camera’s sensor.  This image was made moments before sunset under conditions I assessed to be safe, but if in doubt do not ever shoot into the sun.  

A wide-angle capture suggests mia’s celebratory motion as the sun sets, but she appears relatively small within this awe-inspiring natural environment.

At the moment of sunset, a parting shot is made where mia bids farewell to the day.  I chose an exposure partway between silhouette and spot-metering on mia’s body so as to show some detail on her expression while allowing the ocean and sky to shine.

I hope you’ve found these images to be inspiring and the associated tips to be helpful.  Now go out in your own neck of the woods make some images that integrate a sense of place into your favorite subjects!

Do you have techniques you use to infuse your local images with a strong sense of place?  Please share them here.

Want to read more posts about what to shoot while near home or traveling?  Find them all here: Posts about what to shoot.

Focus on Edinburgh [Encore Publication]: Ancient and modern, Scotland’s capital city offers great architecture, museums, and more

At the end of our two-week hiking adventure in Ireland, we added a stop in Edinburgh for a family visit.  Ancient and modern at the same time, Scotland’s capital offers a wide range of experiences for the traveler, and a wide array of subjects for the travel photographer.  From architecture to museums, castles to palaces, glorious views and creative contemporary cuisine, this city has become a world-class destination.  Here is a brief photo essay capturing some of our experiences there.

The main attraction, dominating the city from its high central vantage point, is the ancient Edinburgh Castle.  It’s an easy walk from the center of town up the hill to tour the castle.  On the way up, a variety of interesting views of the castle unfold.  Try different lenses and compositions to take advantage of the many moods of this place.

Edinburgh Castle towers above the city center and offers a variety of different perspectives for the photographer.  Here I’ve shot from halfway up the hill using a telephoto lens and polarizing filter to isolate this one portion of the edifice and to enhance the stonework and the sky.  Buy this photo

Edinburgh’s Royal Mile stretches from the Castle down to the Palace at Holyrood House.  It’s easy to see this street as a shopping mall jammed with tourists, but it would be a shame to overlook the stately old architecture and the little closes (alleyways) off the main street.

To make this image along the Royal Mile, I chose an unusual perspective and used a medium telephoto lens to align the different colors, textures, and angles of the statue with the cathedral.  Buy this photo

Edinburgh is changing.  During several visits over the decades, I’ve heard many a bagpiper playing in the center of the city, but this is the first time I’ve met a female piper.  She was happy to pose for a portrait.  Buy this photo

Brightly painted façades lend a splash of color to the old stone architecture in this lovely neighborhood.  Buy this photo

Scottish food has also evolved a great deal in recent years, with several restaurants serving contemporary takes on traditional Scottish dishes.  Nowhere is the ambiance nicer than at the Witchery by the Castle, along the Royal Mile.

To capture the lovely interior of the Witchery, I used a fast normal lens and a high ISO setting.  This scene was lit entirely by candlelight and a few sconce lights in the ceiling.  Buy this photo

Revisiting Edinburgh Castle on our second day, I wanted to shoot it from a different perspective at a different time of day.  During post-processing I decided that a black-and-white rendering of the image would highlight the austere tone of the castle.  Buy this photo

Edinburgh has a proud literary tradition, from Burns to Scott to Stevenson.  The city’s literature museum, while small, is worth a visit.

I couldn’t resist capturing this display sign in the Writers’ Museum highlighting the Stevenson quote that graces the name of this website.  For more on the importance of this quote to the development of my passion for travel and photography, please see this page: About To Travel Hopefully.

At the other end of the Royal Mile from the Castle lies the Palace of Holyroodhouse.  This is the Queen’s official residence when she’s in Scotland, and its tour is first-rate.  While photography is not allowed inside the lovely palace, it is okay to photograph the stately and much older abbey adjacent to the palace.

Again here, I tried to seek out an unusual perspective in this shot of the abbey at Holyroodhouse.  I shot upward with a wide-angle lens, using spot metering to expose for the stonework and a small aperture to provide broader depth-of-field.  Buy this photo

I made this portrait of our daughter with two of her friends from university by stepping back and framing them using a medium portrait lens.  I chose a medium aperture to ensure sharp focus on the subjects while also keeping the façade of the abbey reasonably sharp.  Buy this photo

Behind Holyroodhouse is a hill towering above the city.  A short but fairly strenuous hike leads to Arthur’s Seat at the summit.  From the summit there are glorious views over the whole of the Edinburgh area.  This image of the Palace at Holyroodhouse was shot from partway up the hill.

A view of Holyroodhouse from partway up the hike to Arthur’s Seat.  A polarizer helped bring out the drama in the sky and the saturated green of the lawns.  Buy this photo

On our final evening in Edinburgh, we dined on exquisite contemporary Scottish cuisine at the Tower Restaurant.  Sitting atop the Scottish National Museum, this spot has marvelous views over the city to the castle.  The view shown in this image was just as marvelous.

To photograph the beautifully plated trio of smoked Scottish salmon accompanied by a glass of old single malt whisky, I shot from above using a touch of off-camera flash to balance the ambient light of the restaurant.  I used a diffuser on the flash and bounced the flash off the wall to soften its light.  To learn more about food photography, check out this post: Post on Food Photography     Buy this photo

Scottish traditional music is alive and well and performed almost every night at Sandy Bell’s Pub.  This portrait was made using my favorite portrait lens set to a wide aperture, with a high ISO setting on the camera.  The shallow depth of field throws the whistle player into soft focus, so the emphasis in the image is placed on the fiddler.  Buy this photo

Have you visited Edinburgh?  What are your favorite spots there?  What experiences should a photographer be sure to seek out?  Please leave your comments here.

Want to read more posts about travel photography destinations?  Find them all here: Posts on Destinations.

Nikon’s New Mirrorless Cameras [Encore Publication]: Impressive new technology catches and beats Sony, but issues remain

Update from 9/6/18: Canon joins Nikon in announcing its first full-frame mirrorless camera system.  Read more about Canon’s new EOS R system here: The Verge article on Canon EOS R.  Canon’s initial launch will include a more extensive and useful lens lineup than Nikon’s, but both manufacturers have a lot of work to do in order to catch up with Sony’s portfolio of lenses.  Canon’s initial feature set seems less advanced than that of Nikon’s high-end Z7 camera.  It’s unclear at this time whether either Canon or Nikon will have an edge in usability over Sony’s design, but, frankly, Sony has set the bar very low with a complicated menu system and a poor set of controls.  It is becoming increasingly clear that mirrorless is the future of professional and enthusiast photography, but for the next few years DSLR technology will retain some key advantages.  Read on to see my original post from a few weeks ago when the Nikon launch was announced.

=======

After months of teasing, Nikon has finally announced the details of their first-ever mirrorless camera launch.  The Nikon Z Series, with its first two models, the Z6 and Z7, represents the venerable company’s most ambitious new product launch in years.  Not surprisingly, the new full-frame Nikon models take aim squarely at Sony’s popular A7 III and A7R III models, with similar pricing and specs, respectively.  The Nikon Z6 will be priced at $1995.95 (body only) and the Z7 at $3399.95 (body only).  Initially only a 24-70mm f/4 “kit lens” and fast 35mm f/1.8 and 50mm f/1.8 prime lenses will be available, with more Z-mount lenses to launch in the future.  An adapter will also be available at additional cost to allow use of many existing F-mount lenses on the new Z Series bodies.

Details of the new cameras can be found on Nikon’s website: Nikon’s new mirrorless cameras.

While these new cameras offer very impressive technology and catch–and in many ways leapfrog–Sony’s mirrorless offerings, there are some disappointments specific to this Nikon launch as well as plenty of issues facing mirrorless cameras in general.

Regarding the shortfalls specific to the new Nikon Z6 and Z7, here are a few of my observations for how they fall short of my expectation:

  1. They lack a second memory card slot.  For pro shooters, this is a showstopper.
  2. The initial lens lineup will be very sparse, with only three lenses.  Over the next couple of years, Nikon will be rolling out additional lenses, but compared to the venerable F-mount glass lineup, the new Z-mount offerings will remain thin.
  3. The lens converter to enable use of existing F-mount lenses will have a considerable additional cost, won’t allow full auto focus and exposure on many existing lenses, and will likely cause the autofocus to perform slowly.

Mirrorless camera technology in general suffers relative to DSLR technology in substantial ways:

  1. They’re really not all that small and light relative to pro-level full-frame DSLR bodies.  And after the weight and bulk of the many lenses required by series shooters are factored in, the mirrorless kit ends up almost as heavy and bulky as a comparable DSRL system.  A related issue is that many shooters find the smaller mirrorless bodies to be unbalanced when fitted with a heavy and large professional lens.
  2. The electronic viewfinders (EVF) on mirrorless cameras have evolved quite a bit in recent years, but they remain difficult to use, in my opinion.  They suffer from flicker and slow refresh rates, and they just don’t provide a realistic view of the scene.  It’s like looking at the world through a miniature TV screen vs. seeing it through your own eyes.
  3. Replacing not only our existing camera bodies but also all of our lenses to make a full move to native mirrorless technology is a very expensive prospect.
  4. With no mirror to protect the sensor, it’s very easy to get dust and dirt on the sensor when changing lenses.
  5. The Sony A-series suffers from poor usability (most functionality is relegated to sub-menus that are difficult to navigate) and from scant weather sealing that doesn’t meet the needs of most professional travel photographers.  I’ll have to get the new Nikon Z-series in my hands to assess whether Nikon has resolved these issues for their new offering.

With Nikon now joining Sony in the pro-level full-frame mirrorless game, and with Canon gearing up to announce its own mirrorless offering, there is increasing evidence that mirrorless technology represents the future of photography.  That said, as of today there are plenty of good reasons to continue using DSRL technology for its robustness, better viewfinders, much fuller lens lineups, and investment protection.  I’ll be much quicker to upgrade my Nikon D810 bodies by buying a pair of Nikon D850 bodies than by purchasing Nikon’s Z6 or Z7 bodies.  Your mileage may vary, and I’m eager to hear feedback from “To Travel Hopefully” readers.

Please share your thoughts about the new Nikon Z-series and about mirrorless vs. DSLR technology in general!

Want to read more posts about travel photography gear?  Find them all here: Posts about Gear.

Focus on Asha Stanford Holi [Encore Publication] : Capturing the colors, joy, and exuberance of an iconic Indian celebration held close to home

I love all aspects of travel photography, but the moments I truly live for are when I have the opportunity to experience and to capture images of the world’s most exuberant celebrations.  The iconic Indian festival of Holi, celebrated annually throughout India in huge cities and small villages alike, is one of my absolute favorites.  This year I had the chance to shoot a large and vibrant Holi celebration without the need to fly for 30 hours to get to India.  As an official photographer for Asha Stanford’s Holi festival, I got to document all the color, joy, and revelry of a large, world-class Holi event, all within 20 minutes drive from my home.  In today’s post, I share some favorite images from the event along with some brief remarks about how each was made.  Note that all of these images and many more are available to view and purchase on my website–get there by clicking on any of the images here.

With colored powder and often sheets of water flying everywhere, Holi is by design a messy and mischievous celebration.  Protect yourself when “playing Holi” by wearing clothes you can part with after the event and by covering your camera body and lens with a rain sleeve.  Here’s the one I use, which is excellent–inexpensive, easy to use and very protective of the gear:

Note that even when using a high-quality rain cover like this one, the front end of the lens is still exposed, so be sure to protect your lens’ front element with a UV or Haze filter.  And to be extra safe, I brought only one camera body and only a single lens, which was an inexpensive but versatile “walk-around” travel zoom lens.

Crowded festivals, by their nature, have cluttered backgrounds.  When making portraits in such environments, I do try to reduce the clutter by choosing the background carefully, but capturing the moment is more important and in any case, it is futile trying to wait for completely uncluttered backgrounds.  In post-processing, some of the clutter can be minimized through careful cropping and the application of just a bit of post-crop vignetting.  Use too much vignetting, though, and the image begins to take on an artificial appearance.

To capture fast action, you obviously want to choose a fast shutter speed.  That’s no problem when shooting in bright sunshine such as we had during this Holi celebration.  Still, I choose a moderately high ISO (400) to ensure I could retain fast shutter speeds even when in the shade or when using a small aperture to maximize depth-of-field.

Get in close!  Portraits often are most effective when they emphasize a specific detail rather than show the entire environment.  To further emphasize that specific detail, try to select a wide aperture (low f-stop number) in order to obtain shallow depth-of-field.  I had only a relatively slow “walk-around” zoom lens with me, so for close-up portraits I shot wide open at f/4.5–not great for isolating the subject, but better than shooting at an even smaller aperture.  In typically less adverse environments, I would be shooting with a much faster portrait lens, most likely my favorite 85mm f/1.8 prime lens:


When your subject is backlit (the main light coming from behind), as is often the case when shooting outdoors in bright sunlight, be sure to choose exposure based on the main subject.  Here I used my camera’s spot metering mode to set the exposure based on the clothing of one of the people in the group, but it’s also fine to get your exposure by zooming in or walking up close to the group and then to set that exposure manually on your camera.  You can also use your camera’s exposure compensation control to dial up the automatic exposure by about 1.5 or 2 stops, but I recommend not trying to use automatic exposure modes in general.  If you use the exposure your camera’s auto mode chooses for you and your subject is strongly backlit, your image will be underexposed by typically 1.5-2 stops or even more.

I’m always on the lookout for great moments to capture.  When I saw this dad playing with his young daughter, I composed the frame around the two of them and started shooting continuously so as to get a shot at just the right instant.  During post-processing, I cropped the image to show only the portion that portrays the thrill and joy of the playful pair.

Careful composition is always important in photography, but it’s easy to forget this point during the heat of the moment when shooting in bustling and chaotic environments.  To compose this image, I framed it to get the splash of color from the two friends’ “high-five” moment right in front of the big sign boldly pronouncing, “COLOR”.  That’s a Holi moment.

One of the keys to successfully documenting huge festivals is finding the small, intimate moments.  Big, sweeping crowd shots showing chaotic motion are important to document, but it’s capturing those small interpersonal interactions that really make your portfolio shine.  I used as wide an aperture as I had available in order to cast the busy background in soft focus.

Performances are often a part of festivals, and these are wonderful fun to capture.  I’ve posted many times on the techniques required to make great images of performing arts, so I won’t repeat myself here.  Just be sure to compose appropriately, set the exposure correctly (challenging to do in direct sunlight), and shoot lots of images to be sure of capturing a few excellent ones.

The climactic moment of the Holi celebration comes near the end, when all the revelers simultaneous throw handfuls of colored powder high into the air.  Be ready for these big moments by preparing all your gear and composing all elements of the shot beforehand.  

To capture the sweeping scale of really big celebrations, sometimes it helps to make a panoramic image.  Some cameras can do this automatically in-the-camera, but I find those images don’t turn out very well, so I make panoramas manually by shooting a series of overlapping images that span the scene.  In theory this is quite simple.  Just take a series of photos starting from the far left side of the scene, then panning the camera a little bit to the right so the next photo just overlaps with the previous one, and so on until you reach the far right side of the scene.  You then use software such as Lightroom or Photoshop to stitch the separate, overlapping photos together into a single sweeping image.  In practice, this can be quite difficult.  I find the software often takes an extremely long time to process a panoramic image and sometimes even crashes while attempting to do so.  If you have a more powerful computer than I have, you may have an easier time with this process.  

Parting shot: When I see a great subject for a portrait, I will interact with him or her, get to know them a bit, then begin shooting with their permission.  Over time and in the heat of a celebration, they will forget I’m even there, but the resulting images will be better for the time spent interacting with the person first.

I hope you’ve enjoyed this photo essay and brief notes about how to shoot festivals and celebrations.  Whether we’re close to home or halfway around the world, such festive gatherings truly define the culture of the celebrants and make amazing photographic subjects.  If you’d like to read more posts about what to shoot while traveling or near home, find them all here: Posts about what to shoot.

What are your favorite celebrations to shoot, and how do you capture images there?  Please share your thoughts here!


“Boundless Theft in Limited Professions” ~Shakespeare [Encore Publication]: What to do if your images are being stolen

Disclaimer: I am not an attorney and cannot dispense legal advice.  In this post I am simply sharing as-is my own experiences of learning about unauthorized use of my images and taking steps to correct this situation.  You should consult with a qualified lawyer if you are facing theft of your intellectual property.

I recently traveled to London to receive an award and attend the opening of the Travel Photographer of the Year winners exhibition.  When I returned from the trip, I performed a Google image search on my winning photograph to see if it had garnered more international press coverage in the wake of the show’s opening.  The good news: there were dozens of new articles featuring my winning image, and hundreds of articles in total, spanning dozens of countries around the world.  The bad news: I learned that my image was being used without my permission on dozens of sites.  A winner of Travel Photographer of the Year and shortlisted for National Geographic’s Travel Photography Awards, this particular image is an important asset in my professional photography portfolio.  And while I don’t mind it being shared without authorization if it includes an attribution to me as the photographer, or at least includes my watermark, there were several quite egregious cases of my work literally being stolen.  In some of these cases, other people were trying to pass off my image as their own, one fellow even going to the point of claiming he had shot the photo “with a black-and-white camera.”  In a couple of other cases, my valuable intellectual property was being made available for download as a wallpaper image to the general public, without my permission.  Every one of these illegal downloads takes away the opportunity for me to sell the image on my own site or to earn a royalty through the image being sold by my authorized agents.

It has never been easier to steal intellectual property–in the form of photos, videos, or the written word–than in today’s interconnected digital world.  While it can be good for an artist’s reputation and business to have her or his work “go viral” on the web, the benefits only accrue when the work is attributed to the artist who created it.  If other people are passing the work off as their own or distributing it widely to others without authorization, then we have a problem.

After consulting with an intellectual property attorney (who also happens to be my brother), I realized that I need to act promptly to protect my rights.  I have started the process of identifying the worst cases of theft of my image and taking steps to stop the unauthorized use.  If you also have had your photographs used without your permission, here are some steps you may consider taking:

  1. Search the web for all uses of your image and identify the sites where it is being used without authorization: The remarkable technology to search the vast Internet for specific groupings of pixels that resemble your image is actually very easy to use.  Just right-click on your image and select “Search Google for image” from the drop-down menu.  You’ll see a listing of all likely matches to your image throughout the web.  From this listing, select the uses that are not authorized.  My image, for example, matched several hundred occurrences on the web, but most of these were valid press outlets reporting on the image’s success with Travel Photographer of the Year and National Geographic Travel Photography Awards.  I studied the list of sites to find the ones that were using my image without permission, and I further pared down this list to focus only on sites that were using my image without attribution to me and without my watermark.
  2. Identify the owners of the offending domains: Using a who-is directory search, you can often find contact information for the registered owner of the domain that is using your work illegally.  You can first try https://www.whois.net/, although other directory lookup services may provide better information.  Enter the domain (for example, reddit.com) from the URL of the site where your image is being misused, and who-is will provide some information on the domain owner.  You’re looking for the contact info about the owner so that you can complain about the abuse.  Look for a field like this one: “Registrar Abuse Contact Email: abusecomplaints@markmonitor.com”.
  3. Write and send DMCA Takedown Requests to the owners of the offending sites: The Digital Millennium Copyright Act, or DMCA, is a US copyright law that also provides some protection of intellectual property rights in certain other countries.  It provides for copyright owners (including photographers) to demand an unauthorized use of their property be taken down.  There is a standardized form called a DMCA Takedown Request that can be used to notify the owner of a site that they are using work you own without your permission, and to insist they remove promptly remove the infringement from their site.  There are numerous locations on the web where you can find sample Takedown Request forms.  Tailor one of these sample forms with your own info, the info about your property, and the location of the infringement of your copyright.  You will need to sign (electronically or physically) the form, including a statement that you swear under penalty of perjury that you own the copyright of the work in question.
  4. Follow up to ensure compliance with your DMCA Takedown Request: While the owner of the infringing site or domain is obligated to promptly remove the infringing post, frequently they may not do so in a timely manner, or they may ignore your request completely.  Two days after filing seven takedown requests, I have received only two responses, and both of them were from ISPs who claimed they were not responsible for the content their subscribers posted (I have since identified the actual owners of the infringing sites and directly sent them new takedown requests).  I plan to continue to follow up over the coming weeks to ensure compliance.
  5. Consider further legal action if required: So far, I have not asked for legal damages from the infringing site owners, but if they disregard my takedown requests and continue to either pass off my work as their own or propagate my photo in bulk to the general public, then I may choose to sue them for damages.  I will publish a followup to this post to share how this situation progresses, but I do want readers to be aware that there are further actions that can be taken beyond a DMCA Takedown Request.
  6. Consider registering your most valuable images: A photograph, like other forms of intellectual property, may be registered with the US Copyright Office at https://www.copyright.gov/.  Doing so it not required to initiate a DMCA Takedown Request, but having your copyright registered for your most valuable images may offer you more protection and give you standing for further legal action.

I hope that by sharing my own experiences with having my images stolen, readers may gain some context on the problem.  In this digital and interconnected era, most working photographers will likely see at least a few of their images used without permission.  We all need to be aware of the situation and how to deal with it.  Please consult with a qualified lawyer about the specifics of your own situation.  Nothing in this post should be interpreted as legal advice.

Have you had your images used without authorization?  Please share your experiences here.

What to read other posts about sharing your images?  Find them all here: Posts on Sharing Images.


Focus on Iceland [Encore Publication]: A world-class landscape photography destination

Iconic Icelandic scene: The lovely Gullfoss Waterfall can be viewed from three different levels to obtain different perspectives on these dramatic falls.  To capture this image, I climbed to the top level, secured the camera and wide-angle lens on a sturdy tripod, and attached a neutral-density filter to allow a long exposure even in the harsh midday lighting.  I shot a series of seven exposures, each one stop apart, and then combined them into a single image using image-processing software.  This technique, called High Dynamic Range (or HDR), allows a single image to show a wide range of tonal values from extremely dark to extremely bright. 

My two daughters, my wife, and I recently returned from an inspiring two-week adventure traveling through Iceland.  Our itinerary took us from the main city of Reykjavik to the scenic Snaefellsness Peninsula’s volcanic landscape, then up to Iceland’s far north just below the Arctic Circle, down to the southern coast dotted with geothermal fields and spectacular waterfalls, and ending with a visit to Iceland’s premier attraction, the Blue Lagoon.  Throughout this adventure we had the opportunity to meet and learn about Iceland’s Nordic culture and Viking roots from Icelanders of all backgrounds and trades.  Iceland is a photographer’s dream, filled with glorious landscapes, otherworldly natural features, and friendly people.

Our Icelandic adventure began in the largest city, Reykjavik.  While small relative to other major world capitals, Reykjavik is modern, well-functioning, and ambitious in its development.  Its harbor-side location lends the city a strong measure of natural beauty.

Reykjavik’s new Harpa Concert Hall is Iceland’s premier home for the arts.  The brightly colored glass façade of the building was inspired by Iceland’s volcanic landscape.  While it’s tempting in architectural photography to use a wide-angle lens in order to include the entire building, I find it’s often more interesting to use a moderate telephoto lens in order to emphasize just a part of the whole.  This abstract image takes the viewer’s eye along the multicolored façade with its varied patterns of texture and reflections.

A big part of the joy of travel photography is using our camera as a tool to get to know the people we meet.  While we shared a city bus ride with a group of schoolkids out on a field trip to visit the National Museum, this little boy and I were playing a game of virtual peekaboo, resulting in this unorthodox portrait.

Stunning view over Reykjavik and its harbor from the top of the tower at Hallgrimskirkja Church.  A polarizing filter can help darken skies and enhance the sense of drama in clouds and water. 

Departing Reykjavik for the Snaefellsnes Peninsula, we traversed a fabled landscape first discovered by the early Viking settlers.

A short hike took us to the summit of Mount Helgafell, a sacred hill about 250 feet high.  When composing landscape photos, keep in mind two useful tools, the Rule of Thirds, and the principle of Leading Lines.  Both are used in this image.  The Rule of Thirds suggests placing key elements of the image along the lines that cut 1/3 and 2/3 of the way through the frame in both the horizontal and vertical dimensions.  And Leading Lines draw the viewer’s eye across the frame to rest on the most important spots.

The coastal town of Stykkisholmur sits on the coast along the scenic Snaefellsnes Peninsula.  There we came across this curious house with windows at street level and a doorway at the second story level.  Often the most memorable photos are made of the strange places we happen upon during our wanderings.

During a visit to a horse farm, we saw a demonstration of all five gaits (one more than other breeds) that Icelandic horses are capable of.  So smooth is the Icelandic horse’s cantor that you could, if you like, enjoy a mug of beer while riding.

Even a dreadful rain storm couldn’t spoil images of Godafoss Waterfall.  Meaning “waterfall of the pagan gods,” the falls received their name when the leader of Iceland’s parliament decided that the country should adopt Christianity as the official religion in AD 1000.  Informally, Icelanders were still allowed to practice pagan rites in private, but the head of parliament made a symbolic gesture of throwing most of his pagan statues into the falls.  Waterfalls are wonderful subjects for landscape photography, but they should be treated with care and patience.  A sturdy tripod is essential for holding the camera steady during the long exposures required to lend a dramatic blur to the turbulent water.  Here I fitted the camera with a wide-angle lens and a neutral-density filter, which blocks out most of the light and allows a slow shutter speed even in broad daylight.  The camera was mounted on a tripod and I used a cable release to trigger the shutter in order to avoid shaking the camera.  During post-processing I decided to convert this image to black-and-white in order to remove the distraction of the color and really emphasize the dramatic effect of the roiling water.

Sometimes we get the best photos by turning our lens on small and easily overlooked features.  The volcanic soil at Lake Myvatn makes a fertile habitat for colorful lichens.  There were hundreds of other visitors present during our visit to Lake Myvatn, but nobody else noticed the vibrant natural display just below our feet.  The amazing palette of colors in this image is entirely natural. 

This abstract image shows the facade of the Lutheran church at the Laufas turf houses.  I was struck by the textures and patterns of the architecture, so I used a telephoto lens to crop the composition so as to show only a part of the building, then converted to black-and-white during post-processing to simplify the presentation.

The Laufas turf houses were built over a period of several hundred years for wealthy families, and included all the comforts of contemporary living.  When photographing architecture with a wide-angle lens, it’s important to keep the camera level so as to avoid excessive distortion of the vertical lines. 

Leaving behind the lovely Snaefellsnes Peninsula, we headed north to reach Akureyri, Iceland’s second-largest city located just a few miles below the Arctic Circle.

In Akureyri, just a few miles below the Arctic Circle, we enjoyed the warmth of a wonderful home-hosted dinner.  Our hosts were both professional musicians, and they performed an impromptu concert for us after dinner.

Suited up for the cold and wind, our group boarded a vessel for a whale watching excursion in Dalvik.  I made this portrait of our on-board naturalist, a true native Icelander, using a moderate telephoto lens.

There are so many wonderful subjects to capture during our travels that it’s important to remember to shoot a few of ourselves.  Because our daughters, in their early 20s, don’t get to travel with us very often, we cherish the few photos we have featuring all of us together as a family.  To grab this fun shot of our human family interacting with a family of trolls, I configured all of the camera’s settings before handing the camera to a fellow traveler in our group who triggered the shutter.

A short flight from Iceland’s far north back down to Reykjavik positions us to explore the famed Golden Circle, a road connecting Thingvellir National Park, Geysir geothermal region, and Gullfoss Waterfall.

At Thingvellir National Park, we hiked along the rift zone where two tectonic plates (the Eurasian and the North American) are drifting apart.  It’s hard to capture the majesty of dramatic and varied geological features, so I like to combine several layers of landforms in the image.  From top to bottom, this composition captures the sky, the rocky rift zone, and the ropey lava in the foreground.

Visiting the Geysir geothermal area, from which all geysers derive their name.  Along with Yellowstone’s Old Faithful and Calistoga’s geyser, Iceland’s Strokkur is one of just a few regularly erupting geysers in the world.  A hard truth in travel photography is that we can’t control the weather and often we can’t control the time of day when we visit certain locations, so we have to make do with what we’re given.  To make the best photo possible given the poor contrast between the geyser’s eruption and the cloudy sky, I stepped back several hundred yards to include the observers, the dramatic clouds, and the mountainous background in the composition.

An excursion via super truck (a large four-wheel drive vehicle with the tires partly deflated) afforded us the opportunity to explore the otherwise inaccessible glacial terrain, including hiking into this otherworldly ice cave.

My daughters, who only recently attained legal drinking age, enjoy a shot of local Icelandic vodka chilled with glacial ice during our hike into an ice cave.  In the dim lighting inside the cave, use of a flash is required to light a portrait, but to avoid firing the flash too close to the axis of the lens, I attached a flash unit to my camera via a remote flash cord.  This simple and inexpensive accessory makes a huge difference when using flash lighting.

Our ATV tour took us off-road across the volcanic landscape of the Reykjanes Peninsula.

On our last full day in Iceland before flying back home, we visited the legendary Blue Lagoon spa near Reykjavik.  Crowded, expensive, and touristy, it is nonetheless supremely relaxing and lots of fun.  This spa is also a very social place where it’s easy to meet—and photograph—visitors from all over the world.

The one site that nobody sets foot in Iceland without visiting is the Blue Lagoon.  During our time there, I made portraits of several visitors from different parts of the world.  It’s important to spend some time chatting with and getting to know your subject before making their portrait.  This practice is partly due to courtesy (it’s rude to shoot photos of people without their permission), but it also yields better images because your subject will relax and show you their true self after they get to know you.

All of the images appearing in this post and many more are available for viewing and purchase on my website here: Iceland photo gallery.

Have you traveled in Iceland?  Please share the most memorable aspects of your photographic journey in the comments box.

Want to read more posts about world-class travel photography destinations?  Find them all here: Posts about destinations.


Please Join Me for a Hands-on Portraiture Workshop: Learn to make beautiful portraits using natural light

Dear Readers,

If you’d like to learn how to make beautiful portraits using just natural light and a few simple techniques, then please join me for a 2-hour hands-on workshop/class that I’ll be teaching on Saturday, October 6. Held in a scenic location in Mountain View, CA, this class will cover the basics of techniques and tools, and then we’ll practice by shooting in the field with a wonderful model. Learn more or register for a session here: Kyle’s workshop on portraiture using natural light.

In today’s post I am sharing a few favorite images that we shot during a recent session of this workshop.  Working with our wonderful model Roxy, I walked students through the entire process of creating stunning headshots, full-body and action portraits, and environmental portraits, all using only natural light and with a minimum of gear, fuss, and bother.  Students learned how to configure their cameras, what lenses to choose for different portrait situations, where to shoot, how to pose and direct the model, how to use light modifiers (reflectors and diffusers), and much more.

Learning to capture flattering and eye-catching headshots is a basic requirement for portrait photography.

We will also learn to make full-body and action shots that bring out our subject’s true personality.

Always be on the lookout for special and playful moments.

I emphasize the artistic as well as the technical aspects of portrait photography.

Roxy really went the extra mile by climbing a tree wearing heels and a red dress!  In my hands-on portrait workshops, we will collaborate with fun and creative models.  Students will gain skills and a comfort level in directing models, even if they have never worked with a model previously.

You can see more details and book your place in the class here: Kyle’s workshop on portraiture using natural light.


Sneak Preview [Encore Publication]: Behind the scenes on my ongoing Human/Machine Dance Project

How does the human body move when interacting with artificial intelligence technologies? This is the question that my collaborator Carly Lave embarks on a year-long Fulbright grant to research. A talented dancer, choreographer, and scholar, Carly will present her research findings in visual form via a self-choreographed dance solo performance. I approached her to collaborate on a photography series informed by her research goals and artistry as a dancer. We explored several visual themes, each related to the timely question of how we humans will be transformed by increasing immersion into advanced technologies, including virtual reality, robotics, and interconnectivity. To complete this ongoing project, we will continue to collaborate across two continents during Carly’s research fellowship. Stay tuned!

In the meantime, I’d like to share a few early images from this work-in-process along with some words about how they were made.  It can be tricky to imagine a visual concept and realize it via photography, and all the more challenging when the concept is abstract like the ones Carly and I selected.  I’ll present four of our initial concepts, each illustrated with an image and a description of the techniques required to execute it.

  1. Virtual Reality Motion Study: Virtual meets reality as Carly’s body floats through the physical world while her motion is informed by her interactions with the virtual world playing inside her headset.This concept sounds simple but is quite difficult to execute photographically.  We wanted to capture Carly’s physical motion in the real world as she reacts to the experience of the VR world.  Images like these require a long time exposure (here about 15 seconds), which in turn necessitates shooting in a darkened photography studio.  I used a black backdrop and continuous LED lighting to illuminate Carly as she moved across the studio, with a single studio strobe light at the front right part of the set to capture her final pose at the end of the exposure.  The strobe was set to trigger as the camera’s shutter closed at the end of each shot (“rear curtain sync”).  Using this technique, Carly’s motion can be traced during the whole exposure but the vivid exposure is what we see last.  Considerable post-processing is then required to clean up the scene.
  2. Interconnectivity: Carly shared, “I found myself visualizing my body wrapped in cables coiled around my limbs and torso. I was thinking about the body in relation to embedded systems here, and how now all of our world is connected through cables either in the air or sea.”To shoot this visual concept, we used a dance studio with a mirrored wall.  Using different angles to obtain a variety of perspectives, I shot both Carly and her reflection as she improvised motion along the wall.  The technique conveys the impression of the interconnectedness between a human and a similar being across a network.  Post-processing was required to remove clutter and render the background as white.
  3. Human (de-)Evolution Series: A whimsical re-imagining of the classic ape-to-human evolution series, this montage asks us to consider whether technology contributes to or detracts from human evolution.This striking montage is actually quite straightforward to execute.  In a photography studio against a black backdrop, I shot images of Carly in each stage of the evolution series and then combined them using layers in Photoshop.
  4. Robotic Motion: Machines often perform the same tasks traditionally undertaken by humans, but the robot’s motion is constrained by its programming. How might the human dancer’s motion become similarly constrained if her movement is choreographed by programming instructions?For this concept, my job was fairly easy and Carly had to do the heavy lifting.  She choreographed movement indicative of robotic motion while I captured a series of images using a studio strobe light and a black fabric backdrop.

I hope this behind-the-scenes peek at my ongoing passion project will help inspire your own creative process.  It’s important to be personally and deeply invested in a project before you begin.  Select your partner(s) carefully and plan thoroughly.  Then the process becomes joyful and exhilarating as you begin to bring your concept to life!

Have you carried out a photography project?  Please share your key learnings–positive and otherwise–here!

Want to read more posts about what to photography while traveling or near home?  Find them all here: Posts about What to Shoot.